![- 1 cup graham cracker crumbs - 1/2 cup unsalted butter, melted - 1/3 cup packed brown sugar - 1/4 cup granulated sugar - 1 cup all-purpose flour - 1 teaspoon baking powder - 1/4 teaspoon salt - 1 cup mini marshmallows - 1 cup milk chocolate chips - 1/2 cup crushed graham crackers (for topping) To create these oven-baked s'mores bars, you need a few simple ingredients. The base starts with graham cracker crumbs. These give the bars that classic s'mores taste. Next, melted butter helps bind everything together and adds richness. Brown sugar and granulated sugar provide sweetness and a slight caramel flavor. The all-purpose flour gives structure to the bars. Baking powder helps them rise just a bit. A touch of salt balances the sweetness. Mini marshmallows melt beautifully and create that gooey texture we all love. Milk chocolate chips add a creamy, rich taste. Finally, crushed graham crackers on top give a little crunch. - Different types of chocolate - Nut butters for additional flavor - Add-ins like walnuts or peanuts For those who want to switch things up, consider using dark chocolate or white chocolate. Nut butters like peanut or almond can add a unique twist. You can also mix in nuts for some crunch. Each of these options can enhance the bars and make them your own. For the full recipe and instructions, check out the [Full Recipe]. First, gather your tools. You will need an 8x8-inch baking dish, mixing bowls, and a spatula. Grease the baking dish with cooking spray. You can also line it with parchment paper. Lining helps you remove the bars easily later. In a large bowl, mix the graham cracker crumbs and melted butter. Add brown and granulated sugar. Stir until it feels like coarse wet sand. Next, sift in flour, baking powder, and salt. Mix until you have a soft, slightly sticky dough. This texture is key for great bars. Take half of the dough and press it into the bottom of the dish. This forms a solid crust. Sprinkle mini marshmallows evenly over the crust. Then, add a layer of milk chocolate chips on top. Use the remaining dough to crumble over the chocolate and marshmallows. This adds texture and balance. Finally, sprinkle crushed graham crackers on top for crunch. Set your oven to 350°F (175°C). Place the dish inside and bake for 20-25 minutes. Keep an eye on it. The top should turn golden brown. Marshmallows will look puffy and bubbly. When done, take it out and let it cool for 15 minutes. This helps the bars set and makes cutting easier. For the full recipe, check the details above. To bake perfect s'mores bars, focus on even baking. Spread the dough evenly in the dish. This helps the bars cook uniformly. Keep an eye on the baking time. The bars should turn golden brown. You can check for doneness by looking for puffy marshmallows. They should be bubbly too. After baking, let the bars cool for about 15 minutes. This cooling time helps them set and makes cutting easier. If you have leftover s'mores bars, store them in an airtight container. This keeps them fresh for up to five days. You can also freeze them for later. Cut the bars into pieces first. Wrap each piece in plastic wrap, then place them in a freezer-safe bag. They will stay good for about two months. To enjoy them later, thaw them in the fridge or at room temperature. Serving s'mores bars can be fun. For special occasions, warm them up and drizzle with chocolate sauce. You can also add extra mini marshmallows on top for a tasty look. Pair the bars with vanilla ice cream for a great contrast. You can even sprinkle some crushed graham crackers on the plate for extra flair. Get creative and let your guests enjoy the deliciousness! {{image_4}} You can easily change the flavor of your s'mores bars. Try using flavored chocolate like mint or orange. You can also use colored marshmallows for a fun look. Adding spices can make a big difference too. A dash of cinnamon gives warmth and depth. You can also add a splash of vanilla for extra sweetness. If you're looking for gluten-free options, swap the graham crackers for gluten-free ones. You can use almond flour or gluten-free flour blends for the crust. For a vegan version, replace the butter with coconut oil or vegan butter. Use dairy-free chocolate and skip the eggs entirely. These swaps keep your s'mores bars just as tasty while meeting dietary needs. Add fruits like bananas or strawberries for a fresh twist. You can slice them thin and layer them with the chocolate and marshmallows. Another fun idea is to turn these into s'mores cookies. Just scoop the dough onto a baking sheet and bake as cookies instead. Both options give your s'mores bars a delightful new spin. To keep your s'mores bars fresh in the fridge, let them cool completely first. After cooling, cut them into squares. Place them in an airtight container. This helps keep them moist. You can enjoy them for up to five days. For freezing, wrap each bar in plastic wrap. Then, place them in a freezer bag. This method prevents freezer burn. You can store them for up to three months. When you are ready to eat, let them thaw in the fridge. Reheat them in the oven at 350°F for about 10 minutes. They will taste fresh and warm again. Check for any changes in color or texture. If the bars feel dry or hard, they may be bad. A weird smell is another sign of spoilage. If you notice any mold, throw them away immediately. Always trust your senses to guide you. Yes, you can make these s'mores bars ahead of time. To do this, bake them as the recipe states. Let them cool completely. Then, cover the dish tightly with plastic wrap. Store it in the fridge for up to three days. When you want to serve, you can warm them in the oven for a few minutes. This will bring back that warm, gooey texture. If you don’t have graham crackers, don’t worry! You can use digestive biscuits or vanilla wafers. Both options work well for the crust. You can also try crushed cookies like Oreos for a fun twist. Just make sure to adjust the sugar if your substitute is sweet. To make gluten-free s'mores bars, swap out the all-purpose flour for a gluten-free blend. Look for blends that include starches and flours like rice or almond. For the graham crackers, use gluten-free versions available at most stores. This way, you can enjoy the treat without gluten. To cut the bars cleanly, use a sharp knife. First, let the bars cool for about 15 minutes. This will help them set. Then, dip your knife in warm water before cutting. Wipe it dry between cuts to avoid crumbling. This method gives you neat slices. Yes, you can customize the chocolate! Use dark chocolate or even white chocolate for a different taste. If you want a richer flavor, try using chocolate bars instead of chips. Just keep in mind that different chocolates melt at different rates. Adjust your baking time if needed. For best results, use chocolate that is 60% cocoa or less for a smooth melt. For the full recipe, check the detailed instructions above. Enjoy your baking! These s'mores bars combine basic ingredients like graham crackers and chocolate. You learned step-by-step how to prep, mix, and bake them. I shared tips for the best results and ways to store them. Customizing the flavors can turn your bars into something really special. Try different chocolates or even fruits to explore new tastes. Enjoy making these easy treats for fun gatherings or cozy nights at home. Simple recipes like this bring joy to every kitchen. Happy baking!](https://mealinmoments.com/wp-content/uploads/2025/05/1ae6b7a4-abf5-47d2-9f8d-36117bbf603e-768x768.webp)
If you’re craving a sweet treat that’s both fun and easy, I have just the thing! My Oven-Baked S’mores Bars combine all the classic flavors of s’mores into a gooey, delicious dessert. With simple ingredients and straightforward steps, you can whip up this delight in no time. Trust me, your friends and family will love it! Let’s dive into this sweet adventure together!
Ingredients
List of Required Ingredients
– 1 cup graham cracker crumbs
– 1/2 cup unsalted butter, melted
– 1/3 cup packed brown sugar
– 1/4 cup granulated sugar
– 1 cup all-purpose flour
– 1 teaspoon baking powder
– 1/4 teaspoon salt
– 1 cup mini marshmallows
– 1 cup milk chocolate chips
– 1/2 cup crushed graham crackers (for topping)
To create these oven-baked s’mores bars, you need a few simple ingredients. The base starts with graham cracker crumbs. These give the bars that classic s’mores taste. Next, melted butter helps bind everything together and adds richness. Brown sugar and granulated sugar provide sweetness and a slight caramel flavor.
The all-purpose flour gives structure to the bars. Baking powder helps them rise just a bit. A touch of salt balances the sweetness. Mini marshmallows melt beautifully and create that gooey texture we all love. Milk chocolate chips add a creamy, rich taste. Finally, crushed graham crackers on top give a little crunch.
Optional Ingredients for Variation
– Different types of chocolate
– Nut butters for additional flavor
– Add-ins like walnuts or peanuts
For those who want to switch things up, consider using dark chocolate or white chocolate. Nut butters like peanut or almond can add a unique twist. You can also mix in nuts for some crunch. Each of these options can enhance the bars and make them your own.
For the full recipe and instructions, check out the [Full Recipe].
Step-by-Step Instructions
Prepping the Cooking Dish
First, gather your tools. You will need an 8×8-inch baking dish, mixing bowls, and a spatula. Grease the baking dish with cooking spray. You can also line it with parchment paper. Lining helps you remove the bars easily later.
Mixing and Preparing the Dough
In a large bowl, mix the graham cracker crumbs and melted butter. Add brown and granulated sugar. Stir until it feels like coarse wet sand. Next, sift in flour, baking powder, and salt. Mix until you have a soft, slightly sticky dough. This texture is key for great bars.
Assembling the S’mores Bars
Take half of the dough and press it into the bottom of the dish. This forms a solid crust. Sprinkle mini marshmallows evenly over the crust. Then, add a layer of milk chocolate chips on top. Use the remaining dough to crumble over the chocolate and marshmallows. This adds texture and balance. Finally, sprinkle crushed graham crackers on top for crunch.
Baking Process
Set your oven to 350°F (175°C). Place the dish inside and bake for 20-25 minutes. Keep an eye on it. The top should turn golden brown. Marshmallows will look puffy and bubbly. When done, take it out and let it cool for 15 minutes. This helps the bars set and makes cutting easier. For the full recipe, check the details above.
Tips & Tricks
Best Practices for Perfect Bars
To bake perfect s’mores bars, focus on even baking. Spread the dough evenly in the dish. This helps the bars cook uniformly. Keep an eye on the baking time. The bars should turn golden brown. You can check for doneness by looking for puffy marshmallows. They should be bubbly too. After baking, let the bars cool for about 15 minutes. This cooling time helps them set and makes cutting easier.
Storage Tips
If you have leftover s’mores bars, store them in an airtight container. This keeps them fresh for up to five days. You can also freeze them for later. Cut the bars into pieces first. Wrap each piece in plastic wrap, then place them in a freezer-safe bag. They will stay good for about two months. To enjoy them later, thaw them in the fridge or at room temperature.
Presentation Suggestions
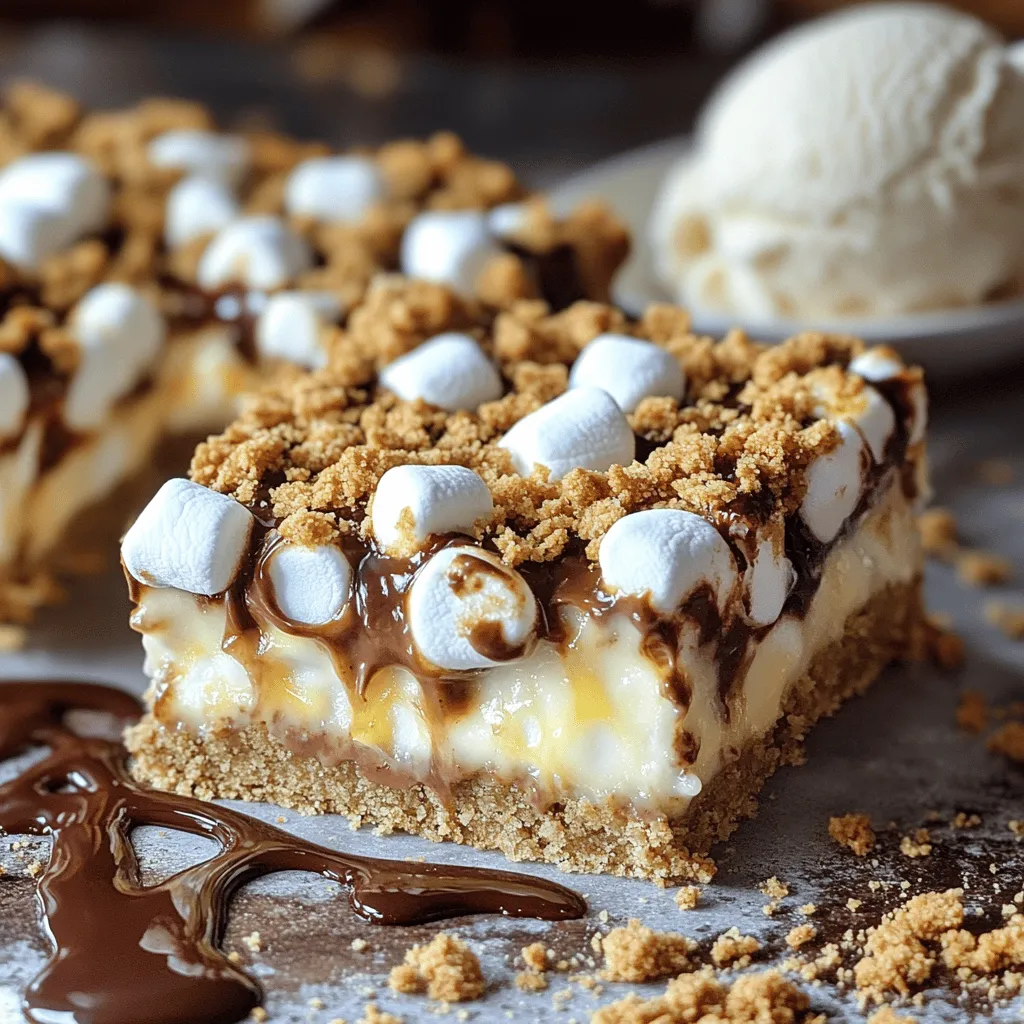
Serving s’mores bars can be fun. For special occasions, warm them up and drizzle with chocolate sauce. You can also add extra mini marshmallows on top for a tasty look. Pair the bars with vanilla ice cream for a great contrast. You can even sprinkle some crushed graham crackers on the plate for extra flair. Get creative and let your guests enjoy the deliciousness!
Variations
Flavor Enhancements
You can easily change the flavor of your s’mores bars. Try using flavored chocolate like mint or orange. You can also use colored marshmallows for a fun look. Adding spices can make a big difference too. A dash of cinnamon gives warmth and depth. You can also add a splash of vanilla for extra sweetness.
Dietary Adjustments
If you’re looking for gluten-free options, swap the graham crackers for gluten-free ones. You can use almond flour or gluten-free flour blends for the crust. For a vegan version, replace the butter with coconut oil or vegan butter. Use dairy-free chocolate and skip the eggs entirely. These swaps keep your s’mores bars just as tasty while meeting dietary needs.
Fun Twists
Add fruits like bananas or strawberries for a fresh twist. You can slice them thin and layer them with the chocolate and marshmallows. Another fun idea is to turn these into s’mores cookies. Just scoop the dough onto a baking sheet and bake as cookies instead. Both options give your s’mores bars a delightful new spin.
Storage Info
Short-Term Storage
To keep your s’mores bars fresh in the fridge, let them cool completely first. After cooling, cut them into squares. Place them in an airtight container. This helps keep them moist. You can enjoy them for up to five days.
Long-Term Freezing
For freezing, wrap each bar in plastic wrap. Then, place them in a freezer bag. This method prevents freezer burn. You can store them for up to three months. When you are ready to eat, let them thaw in the fridge. Reheat them in the oven at 350°F for about 10 minutes. They will taste fresh and warm again.
Signs of Spoilage
Check for any changes in color or texture. If the bars feel dry or hard, they may be bad. A weird smell is another sign of spoilage. If you notice any mold, throw them away immediately. Always trust your senses to guide you.
FAQs
Can I make these s’mores bars ahead of time?
Yes, you can make these s’mores bars ahead of time. To do this, bake them as the recipe states. Let them cool completely. Then, cover the dish tightly with plastic wrap. Store it in the fridge for up to three days. When you want to serve, you can warm them in the oven for a few minutes. This will bring back that warm, gooey texture.
What if I don’t have graham crackers?
If you don’t have graham crackers, don’t worry! You can use digestive biscuits or vanilla wafers. Both options work well for the crust. You can also try crushed cookies like Oreos for a fun twist. Just make sure to adjust the sugar if your substitute is sweet.
How can I make these s’mores bars gluten-free?
To make gluten-free s’mores bars, swap out the all-purpose flour for a gluten-free blend. Look for blends that include starches and flours like rice or almond. For the graham crackers, use gluten-free versions available at most stores. This way, you can enjoy the treat without gluten.
What are the best techniques for cutting the bars?
To cut the bars cleanly, use a sharp knife. First, let the bars cool for about 15 minutes. This will help them set. Then, dip your knife in warm water before cutting. Wipe it dry between cuts to avoid crumbling. This method gives you neat slices.
Can I customize the chocolate used in this recipe?
Yes, you can customize the chocolate! Use dark chocolate or even white chocolate for a different taste. If you want a richer flavor, try using chocolate bars instead of chips. Just keep in mind that different chocolates melt at different rates. Adjust your baking time if needed. For best results, use chocolate that is 60% cocoa or less for a smooth melt.
For the full recipe, check the detailed instructions above. Enjoy your baking!
These s’mores bars combine basic ingredients like graham crackers and chocolate. You learned step-by-step how to prep, mix, and bake them. I shared tips for the best results and ways to store them. Customizing the flavors can turn your bars into something really special.
Try different chocolates or even fruits to explore new tastes. Enjoy making these easy treats for fun gatherings or cozy nights at home. Simple recipes like this bring joy to every kitchen. Happy baking!
![- 1 cup graham cracker crumbs - 1/2 cup unsalted butter, melted - 1/3 cup packed brown sugar - 1/4 cup granulated sugar - 1 cup all-purpose flour - 1 teaspoon baking powder - 1/4 teaspoon salt - 1 cup mini marshmallows - 1 cup milk chocolate chips - 1/2 cup crushed graham crackers (for topping) To create these oven-baked s'mores bars, you need a few simple ingredients. The base starts with graham cracker crumbs. These give the bars that classic s'mores taste. Next, melted butter helps bind everything together and adds richness. Brown sugar and granulated sugar provide sweetness and a slight caramel flavor. The all-purpose flour gives structure to the bars. Baking powder helps them rise just a bit. A touch of salt balances the sweetness. Mini marshmallows melt beautifully and create that gooey texture we all love. Milk chocolate chips add a creamy, rich taste. Finally, crushed graham crackers on top give a little crunch. - Different types of chocolate - Nut butters for additional flavor - Add-ins like walnuts or peanuts For those who want to switch things up, consider using dark chocolate or white chocolate. Nut butters like peanut or almond can add a unique twist. You can also mix in nuts for some crunch. Each of these options can enhance the bars and make them your own. For the full recipe and instructions, check out the [Full Recipe]. First, gather your tools. You will need an 8x8-inch baking dish, mixing bowls, and a spatula. Grease the baking dish with cooking spray. You can also line it with parchment paper. Lining helps you remove the bars easily later. In a large bowl, mix the graham cracker crumbs and melted butter. Add brown and granulated sugar. Stir until it feels like coarse wet sand. Next, sift in flour, baking powder, and salt. Mix until you have a soft, slightly sticky dough. This texture is key for great bars. Take half of the dough and press it into the bottom of the dish. This forms a solid crust. Sprinkle mini marshmallows evenly over the crust. Then, add a layer of milk chocolate chips on top. Use the remaining dough to crumble over the chocolate and marshmallows. This adds texture and balance. Finally, sprinkle crushed graham crackers on top for crunch. Set your oven to 350°F (175°C). Place the dish inside and bake for 20-25 minutes. Keep an eye on it. The top should turn golden brown. Marshmallows will look puffy and bubbly. When done, take it out and let it cool for 15 minutes. This helps the bars set and makes cutting easier. For the full recipe, check the details above. To bake perfect s'mores bars, focus on even baking. Spread the dough evenly in the dish. This helps the bars cook uniformly. Keep an eye on the baking time. The bars should turn golden brown. You can check for doneness by looking for puffy marshmallows. They should be bubbly too. After baking, let the bars cool for about 15 minutes. This cooling time helps them set and makes cutting easier. If you have leftover s'mores bars, store them in an airtight container. This keeps them fresh for up to five days. You can also freeze them for later. Cut the bars into pieces first. Wrap each piece in plastic wrap, then place them in a freezer-safe bag. They will stay good for about two months. To enjoy them later, thaw them in the fridge or at room temperature. Serving s'mores bars can be fun. For special occasions, warm them up and drizzle with chocolate sauce. You can also add extra mini marshmallows on top for a tasty look. Pair the bars with vanilla ice cream for a great contrast. You can even sprinkle some crushed graham crackers on the plate for extra flair. Get creative and let your guests enjoy the deliciousness! {{image_4}} You can easily change the flavor of your s'mores bars. Try using flavored chocolate like mint or orange. You can also use colored marshmallows for a fun look. Adding spices can make a big difference too. A dash of cinnamon gives warmth and depth. You can also add a splash of vanilla for extra sweetness. If you're looking for gluten-free options, swap the graham crackers for gluten-free ones. You can use almond flour or gluten-free flour blends for the crust. For a vegan version, replace the butter with coconut oil or vegan butter. Use dairy-free chocolate and skip the eggs entirely. These swaps keep your s'mores bars just as tasty while meeting dietary needs. Add fruits like bananas or strawberries for a fresh twist. You can slice them thin and layer them with the chocolate and marshmallows. Another fun idea is to turn these into s'mores cookies. Just scoop the dough onto a baking sheet and bake as cookies instead. Both options give your s'mores bars a delightful new spin. To keep your s'mores bars fresh in the fridge, let them cool completely first. After cooling, cut them into squares. Place them in an airtight container. This helps keep them moist. You can enjoy them for up to five days. For freezing, wrap each bar in plastic wrap. Then, place them in a freezer bag. This method prevents freezer burn. You can store them for up to three months. When you are ready to eat, let them thaw in the fridge. Reheat them in the oven at 350°F for about 10 minutes. They will taste fresh and warm again. Check for any changes in color or texture. If the bars feel dry or hard, they may be bad. A weird smell is another sign of spoilage. If you notice any mold, throw them away immediately. Always trust your senses to guide you. Yes, you can make these s'mores bars ahead of time. To do this, bake them as the recipe states. Let them cool completely. Then, cover the dish tightly with plastic wrap. Store it in the fridge for up to three days. When you want to serve, you can warm them in the oven for a few minutes. This will bring back that warm, gooey texture. If you don’t have graham crackers, don’t worry! You can use digestive biscuits or vanilla wafers. Both options work well for the crust. You can also try crushed cookies like Oreos for a fun twist. Just make sure to adjust the sugar if your substitute is sweet. To make gluten-free s'mores bars, swap out the all-purpose flour for a gluten-free blend. Look for blends that include starches and flours like rice or almond. For the graham crackers, use gluten-free versions available at most stores. This way, you can enjoy the treat without gluten. To cut the bars cleanly, use a sharp knife. First, let the bars cool for about 15 minutes. This will help them set. Then, dip your knife in warm water before cutting. Wipe it dry between cuts to avoid crumbling. This method gives you neat slices. Yes, you can customize the chocolate! Use dark chocolate or even white chocolate for a different taste. If you want a richer flavor, try using chocolate bars instead of chips. Just keep in mind that different chocolates melt at different rates. Adjust your baking time if needed. For best results, use chocolate that is 60% cocoa or less for a smooth melt. For the full recipe, check the detailed instructions above. Enjoy your baking! These s'mores bars combine basic ingredients like graham crackers and chocolate. You learned step-by-step how to prep, mix, and bake them. I shared tips for the best results and ways to store them. Customizing the flavors can turn your bars into something really special. Try different chocolates or even fruits to explore new tastes. Enjoy making these easy treats for fun gatherings or cozy nights at home. Simple recipes like this bring joy to every kitchen. Happy baking!](https://mealinmoments.com/wp-content/uploads/2025/05/1ae6b7a4-abf5-47d2-9f8d-36117bbf603e-250x250.webp)
