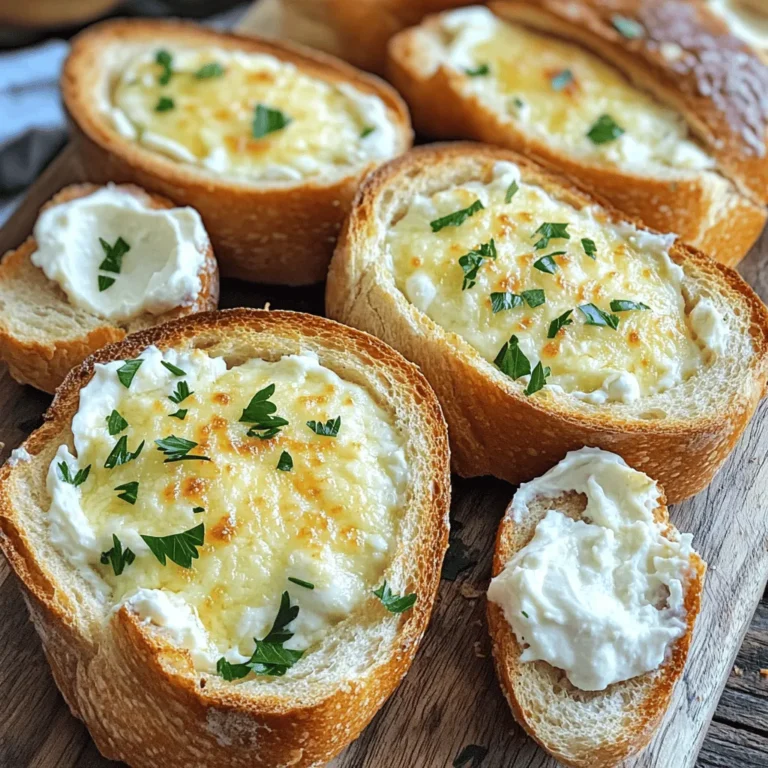
Looking for a warm, tasty dip that brings comfort to any gathering? Try my Baked Garlic Bread Dip! This creamy delight, baked in crusty Italian bread, is perfect for sharing with friends and family. You’ll love how simple it is to make and how customizable it can be. In this post, I’ll share tips, tricks, and delicious variations. Get ready for a cozy treat that everyone will adore!
Ingredients
List of Required Ingredients
– Crusty Italian bread
– 1 cup cream cheese, softened
– 1 cup sour cream
– 1 cup shredded mozzarella cheese
– 1/2 cup grated Parmesan cheese
– 4 cloves garlic, finely minced
– 1 teaspoon dried oregano
– 1 teaspoon dried basil
– Salt and pepper, to taste
– 2 tablespoons fresh parsley, finely chopped (for garnish)
To make Baked Garlic Bread Dip, you need a few key ingredients. The crusty Italian bread serves as your base, creating a warm, inviting vessel for the dip. Cream cheese and sour cream form a creamy blend that holds the flavors together. Mozzarella and Parmesan add richness and a cheesy texture. Garlic, oregano, and basil bring in that classic Italian taste. Lastly, a sprinkle of parsley adds color and freshness.
Ingredient Substitutions
– Instead of cream cheese, you can use Greek yogurt for tang.
– If you want a dairy-free option, try using cashew cream or tofu.
– For gluten-free choices, look for gluten-free Italian bread or use vegetable slices.
If you don’t have cream cheese, Greek yogurt works well. It gives a tangy taste and creamy texture. For a dairy-free dip, cashew cream is a great option. You can easily make cashew cream by blending soaked cashews with a bit of water. If you’re gluten-free, you can use gluten-free bread or even veggie slices, like zucchini or eggplant, as a fun twist.
When you use these substitutions, you can still enjoy this delicious dip without missing out on flavor. Each option allows you to cater to different diets while keeping the essence of the recipe. Feel free to mix and match based on your needs!
Step-by-Step Instructions
Preparation Steps
1. Preheat the oven: Set your oven to 375°F (190°C). This gives the dip a nice golden color while baking.
2. Prepare the bread: Slice the crusty Italian bread in half lengthwise. Carefully scoop out some of the inside, making shallow wells. Place the bread halves on a baking sheet, cut side up.
3. Mix the dip ingredients: In a large bowl, combine 1 cup of softened cream cheese, 1 cup of sour cream, 1 cup of shredded mozzarella, and 1/2 cup of grated Parmesan cheese. Add 4 minced garlic cloves, 1 teaspoon of dried oregano, and 1 teaspoon of dried basil. Season with salt and pepper to your taste. Mix until creamy.
Baking Instructions
1. Fill the bread wells: Use a spoon to fill each bread well with the creamy dip mixture. Be generous so every bite is flavorful.
2. Baking time and temperature: Place the baking sheet in your preheated oven. Bake for 20-25 minutes, or until the dip is bubbly and golden brown on top.
Serving Recommendations
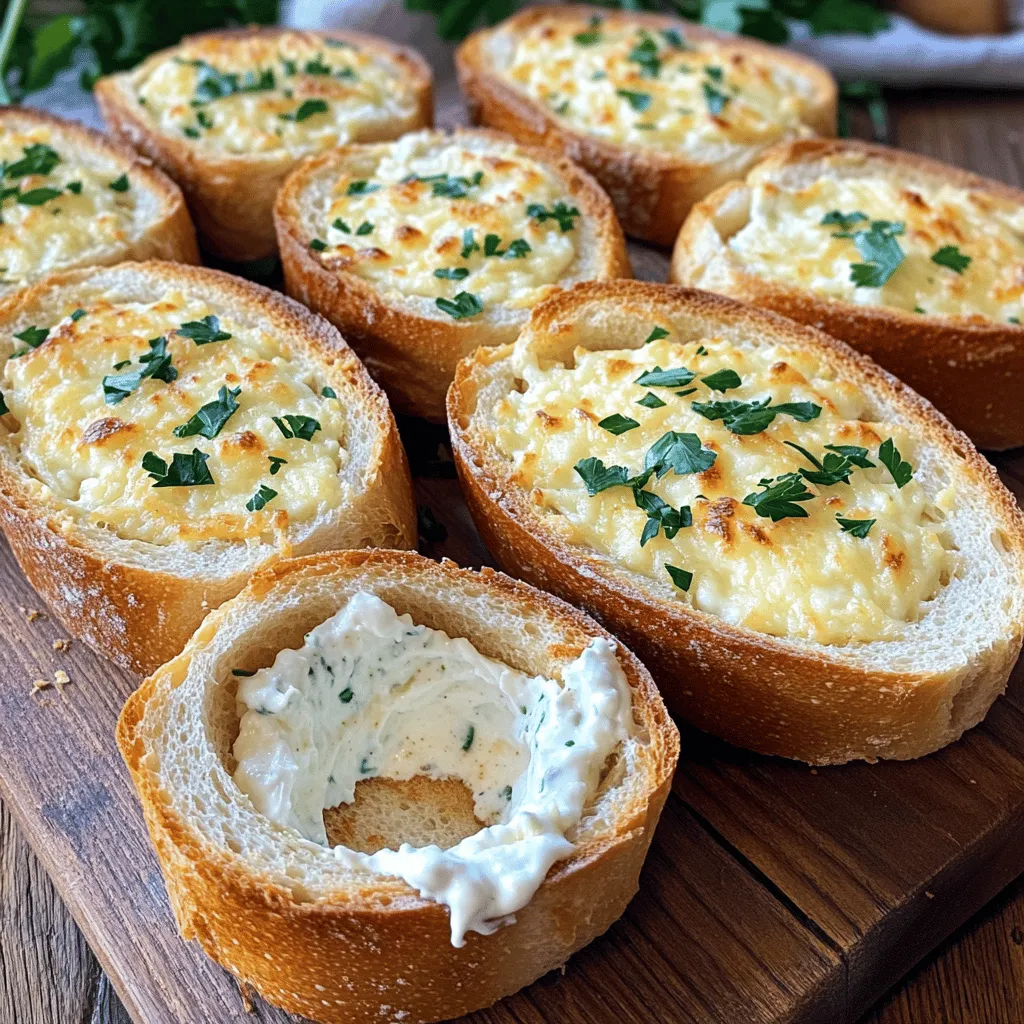
1. How to serve the baked dip: Serve the dip right in the bread halves. This adds a rustic touch and makes it easy for guests to dip.
2. Tips for presentation and dipping accompaniments: Display the dip on a wooden board. Serve with the scooped-out bread pieces, cut into small chunks for easy dipping. For a special touch, add a small bowl of herb-infused olive oil on the side.
For the full recipe, check out the details above. Enjoy this savory and comforting treat!
Tips & Tricks
Ways to Enhance Flavor
To make your baked garlic bread dip even better, try adding spices. A pinch of red pepper flakes gives it a nice kick. You can also use smoked paprika for a smoky taste. For a touch of sweetness, consider adding a dash of garlic powder.
Adding different cheeses can boost flavor too. Cream cheese makes it rich, while mozzarella adds stretch. Try using gouda or cheddar for a stronger flavor. Mixing cheeses creates a unique taste. Experiment and find what you love.
Avoiding Common Mistakes
One common mistake is burning the dip. To avoid this, keep an eye on it while baking. If the top browns too fast, cover it with foil. This protects it while it cooks through.
Another tip is to ensure a creamy texture. If your dip is too thick, add a bit of milk. This helps it stay smooth. Mix well to combine all ingredients fully before baking.
Equipment Recommendations
For baking, use a sturdy baking sheet. A shallow pan keeps the dip from spilling. You can also use an oven-safe dish for easier serving.
When mixing, a sturdy spatula works well. If you want a smoother dip, an electric mixer can help. Make sure all ingredients blend together nicely. This makes the dip creamy and delicious.
Variations
Different Flavor Profiles
You can easily switch up the flavors in your baked garlic bread dip. One tasty option is to add spinach or artichoke. These greens not only boost nutrition but also give a fresh taste. Simply chop a cup of fresh spinach or one can of artichokes and mix them into the creamy dip. You can even use both for extra flavor!
Another fun way to change the dip is by adding different herbs. Fresh herbs like rosemary or thyme can bring a nice twist. You can also try using herbs like dill or chives for a unique taste. Just chop about one tablespoon and stir them into your mix for a hint of brightness.
Dietary Variations
If you want a vegan baked garlic bread dip, you can make simple swaps. Use vegan cream cheese and dairy-free sour cream. These options still provide that creamy texture. For the cheese, try using a blend of nutritional yeast and vegan mozzarella. This keeps the taste rich and satisfying.
For those following a low-carb or keto diet, you can also adapt this recipe. Instead of bread, use bell peppers or zucchini slices for dipping. You can also replace the cream cheese with a nut-based cream. This makes a delightful, keto-friendly option full of flavor without the carbs.
Storage Info
How to Store Leftovers
To keep your baked garlic bread dip fresh, refrigeration is key. Allow the dip to cool before storing. Place any leftovers in an airtight container. This helps prevent moisture loss and keeps the dip tasty. Make sure to cover it well to avoid odors from the fridge. You can store it for up to three days.
Reheating Instructions
When it’s time to enjoy leftovers, reheating is simple. The best method is using the oven. Preheat it to 350°F (175°C). Transfer the dip to an oven-safe dish. Cover it with foil to keep it moist. Bake for about 15 minutes or until warmed through. This method keeps the flavors and texture intact. You can also use the microwave, but be careful not to overheat it. Heat in short bursts and stir in between for even warming. Enjoy your creamy dip just like the first time!
FAQs
Can I make this dish ahead of time?
Yes, you can prepare this dip ahead. Mix all the ingredients and place them into the bread. Cover it well with plastic wrap and store it in the fridge. You can keep it for about 24 hours. When you are ready to bake, take it out and let it sit at room temperature for 15 minutes. This helps it bake evenly.
How do I serve it for a party?
For a party, serve this dip in the bread halves. Cut the bread into pieces for easy dipping. Aim for about 4 to 6 servings. You can also add a few small bowls of extra toppings, like olive oil or fresh herbs. These add a nice touch for your guests.
Is it possible to freeze baked garlic bread dip?
Yes, you can freeze baked garlic bread dip. After baking, let it cool completely. Wrap the bread tightly in foil or plastic wrap. Store it in the freezer for up to three months. To thaw, move it to the fridge overnight. Reheat it in the oven at 350°F (175°C) until warm.
What’s the best bread for this recipe?
The best bread for this recipe is a crusty Italian loaf. It holds the dip well. You can also use French bread or sourdough. These breads have a nice texture and flavor. Avoid soft breads, as they may not hold up. If you want a twist, try a garlic bread loaf for extra flavor.
This blog post covered a great baked garlic bread dip recipe. You learned about the ingredients, including essential cheese and bread types. We explored substitutions for dietary needs and shared easy preparation and baking steps. I included helpful tips to enhance flavor while avoiding common mistakes. Lastly, we discussed storage and reheating methods.
This dip can fit into any gathering with its delicious flavors. Feel free to get creative with variations and enjoy every bite!

