Skip to content
DisclaimerTerms Of UseGDPR PolicyCookie Policy

mealinmoments

  • Home
  • Drinks
  • Appetizers
  • Dinner
  • Dessert
  • About
  • Contact
  • Privacy Policy
DisclaimerTerms Of UseGDPR PolicyCookie Policy

Megan

When making Honey-Lime Garlic Butter Baked Salmon, you need fresh and simple ingredients. Each one plays a key role in creating the dish's rich flavor. Here’s what you will need: - Fresh salmon fillets - Unsalted butter - Pure honey - Fresh lime juice - Garlic - Lime zest - Sea salt and black pepper - Garnishes: parsley or cilantro and lime slices These ingredients not only enhance the salmon but also make cooking fun. The salmon gives you healthy protein. The honey adds sweetness, while lime brings a fresh zing. Garlic and butter create a rich, savory sauce that makes each bite special. Using fresh ingredients is vital. They can greatly improve the taste of your meal. I always choose high-quality salmon. It should have a bright color and a fresh smell. The butter should be unsalted, so you can control the salt level better. Pure honey gives you the best flavor. Avoid blends, as they may contain additives. When it comes to lime, fresh juice and zest work best. The zest adds an intense lime flavor. Don’t skip the seasonings! Sea salt and black pepper bring out the natural taste of the fish. Finally, garnishing with parsley or cilantro adds a pop of color and freshness. For the full recipe, check out the detailed instructions to guide you in making this delicious dish. First, you need to set your oven to 375°F (190°C). This temperature will help the salmon cook evenly. Next, line a baking sheet with parchment paper. This step is key. It keeps the salmon from sticking and makes clean-up hassle-free. Now, it's time to make the sauce. Grab a medium bowl. Mix together 1/4 cup of melted unsalted butter, 1/4 cup of pure honey, 2 tablespoons of freshly squeezed lime juice, 4 cloves of minced garlic, and the zest of 1 lime. Whisk these ingredients until you get a smooth blend. The sweet and tangy mix will bring great flavor to your dish. Take your fresh salmon fillets and place them skin-side down on the lined baking sheet. Use sea salt and freshly cracked black pepper to season each piece. Don’t be shy; this will enhance the natural taste of the fish and make it even more delicious. Drizzle the honey-lime garlic butter sauce evenly over the salmon. Make sure each fillet is well coated. This step is crucial for infusing flavor. Now, place the baking sheet in your preheated oven. Bake for 15-20 minutes. The salmon is ready when it flakes easily with a fork and looks opaque. Once the salmon is done, take it out of the oven. Let it rest for about 2-3 minutes. This resting period helps keep the fish moist. Before serving, garnish the salmon with freshly chopped parsley or cilantro. You can also add lime slices on the side. This adds a nice touch and lets your guests squeeze extra lime over their fish. For more details, check the Full Recipe. To check for flakiness, use a fork. Gently press on the salmon. If it flakes easily, it is done. The fish should look opaque and moist. Overcooking can dry it out, so keep an eye on the time. You can add extra seasonings to make it your own. Try fresh herbs like dill or basil. A pinch of cayenne pepper can add a kick. If you love citrus, consider orange juice or zest instead of lime. These changes can create new flavor profiles. For serving, place the salmon on a colorful plate. Use a sprig of parsley on each piece for a pop of green. Arrange lime slices around the salmon for a bright touch. A sprinkle of sesame seeds can add a nice crunch. This makes the dish look as good as it tastes. For more details, check the Full Recipe. {{image_4}} You can swap salmon for other fish like trout or tilapia. Both have a mild taste and cook well. If you prefer a meat option, try chicken breast. It will soak up the honey-lime garlic butter nicely. For a healthier butter choice, use olive oil or coconut oil. These options add good fats and can enhance the flavor. You may also consider vegan butter for a plant-based version. To change up the taste, add fresh herbs like dill or basil. These herbs can bring a new twist to your dish. A pinch of red pepper flakes adds spice if you like heat. You can also try different citrus fruits. Swap lime for lemon or orange for a unique flavor. Each fruit gives a fresh taste and pairs well with fish. You can grill or bake your salmon. Grilling gives a smoky flavor and crispy texture. If you grill, watch your time as it may cook faster. In the oven, adjust the cooking time based on the thickness of your fish. Thinner fillets need less time, while thicker ones may need a few extra minutes. Always check for flakiness to ensure it's done. Check out the [Full Recipe] for detailed instructions on preparing this dish! After enjoying your honey-lime garlic butter baked salmon, you may have some leftovers. To store them, follow these simple steps: - Let the salmon cool to room temperature. - Place it in an airtight container. - Store it in the fridge for up to 3 days. Keeping it sealed helps maintain flavor and moisture. Avoid leaving it out for too long, as this can lead to spoilage. When you are ready to enjoy your leftover salmon, reheating it properly is key. Here are two effective methods: - Oven: Preheat your oven to 350°F (175°C). Place the salmon on a baking sheet and cover it with foil. Heat for about 10-15 minutes, or until warmed through. - Microwave: Place the salmon on a microwave-safe plate. Cover it with a damp paper towel to keep moisture. Heat in short bursts of 30 seconds until warm. Both methods will help preserve the fish's texture and flavor. If you want to keep salmon for a longer time, freezing is a great option. Here’s how to do it right: - Wrap each salmon fillet tightly in plastic wrap or aluminum foil. - Place wrapped fillets in a freezer-safe bag or container. - Label with the date and freeze for up to 3 months. To thaw, move the salmon to the fridge overnight. This keeps the fish safe and tasty. Enjoy your leftovers any time! For the full recipe, check the section above. Baking salmon at 375°F takes about 15 to 20 minutes. The time depends on the thickness of the fillets. A thicker piece may need closer to 20 minutes, while a thinner one may cook faster. You want to check the salmon after 15 minutes. When it flakes easily with a fork, it's done. Always remember that overcooking can make the fish dry. Yes, you can use frozen salmon! Just make sure to thaw it first. Place the frozen fillets in the fridge overnight or submerge them in cold water for about an hour. Pat them dry before cooking. This helps the sauce stick better and improves flavor. Adjust your baking time slightly if the salmon stays colder. This recipe is quite healthy! Salmon is rich in omega-3 fatty acids, which are good for your heart. Each serving offers protein and important vitamins. The honey adds natural sweetness without refined sugar. Using fresh lime juice boosts your vitamin C intake too. Overall, this dish supports a balanced diet. Absolutely! You can prepare the honey-lime garlic butter in advance. Just mix the butter, honey, lime juice, garlic, and zest as outlined in the recipe. Store it in the fridge for up to three days. When you're ready to bake the salmon, simply rewarm the sauce until it’s melted. This saves time and still gives you great flavor. For the full recipe, refer to the Honey-Lime Garlic Butter Baked Salmon section above. You now have a complete guide to baking flavorful salmon. We covered fresh ingredients, step-by-step instructions, and helpful tips. Remember, the key is to mix your ingredients well and watch the baking time. This dish shines with its sweet and tangy sauce. Feel free to explore variations based on your tastes. You can store leftovers and reheat them for a quick meal. Enjoy serving this dish with friends or family. I hope you feel inspired to make it tonight!

Honey-Lime Garlic Butter Baked Salmon Flavorful Dish

Are you ready to impress your taste buds? In this blog post, I will guide you through making Honey-Lime Garlic

- 1 cup cooked and drained lentils - 1 cup shredded vegan mozzarella cheese - 1 package puff pastry sheets (thawed) - 1 tablespoon Italian seasoning - 1/4 cup nutritional yeast - 1/4 cup finely chopped onion - 2 cloves garlic, minced - Salt and pepper, to taste - 1/2 cup gluten-free breadcrumbs - Marinara sauce for dipping - 1 egg replacement (1 tablespoon ground flaxseed mixed with 3 tablespoons water) In this recipe, the cooked lentils serve as the base. They give the filling a hearty texture. The vegan mozzarella cheese melts beautifully and adds creaminess. Puff pastry sheets create a crispy outer layer. For the seasonings, Italian seasoning gives the filling its classic flavor. Nutritional yeast adds a cheesy, savory taste. Garlic and onion bring depth to the dish. Salt and pepper enhance all these flavors. If you want to make it gluten-free, swap regular breadcrumbs for gluten-free breadcrumbs. Marinara sauce is perfect for dipping. Plus, using an egg replacement helps to bind the filling together. If you want the full recipe with easy-to-follow steps, check out the [Full Recipe]. - Preheat oven to 400°F (200°C). - Prepare the baking sheet with parchment paper. - In a large bowl, combine cooked lentils, breadcrumbs, and spices. - Fold in the vegan cheese gently. - Roll out the puff pastry on a floured surface. Cut into 6x6 inch squares. - Spoon a tablespoon of the lentil mixture onto each square. - Fold the pastry over and crimp the edges with a fork. - Brush the tops with egg replacement glaze. - Bake in the oven for 20-25 minutes. Watch for a golden brown finish. These vegan meatball mozzarella hot pockets are quick to make and so tasty. Enjoy them warm with marinara sauce. For the full recipe, check the details above! To roll out puff pastry, keep it cold. This prevents it from sticking. Aim for a thickness of about 1/8 inch. Use a rolling pin and flour your surface lightly. If the dough tears, patch it with extra pastry. Add a pinch of crushed red pepper for heat. A splash of soy sauce can boost umami too. Adjust the filling’s moisture by adding more breadcrumbs if it feels wet. You want a thick mixture that holds together. Serve the hot pockets on a bright platter. Place a small bowl of marinara sauce in the center for dipping. Garnish with fresh basil leaves for added color. This makes the dish pop and look inviting. {{image_4}} You can spice things up with different flavors. - Spicy jalapeño vegan meatball pockets: Add chopped jalapeños to the lentil mix. This gives a kick! - Mediterranean-inspired pockets with sun-dried tomatoes: Mix in chopped sun-dried tomatoes and olives for a tangy twist. Some people need special diets. You can easily adjust this recipe. - Making it gluten-free: Use gluten-free puff pastry and breadcrumbs. This way, everyone can enjoy! - Low-carb versions: Swap puff pastry for zucchini slices or cauliflower dough. This cuts carbs but keeps flavor. Experiment with different ingredients to suit your taste. - Alternative protein sources: Try using chickpeas or quinoa instead of lentils. Both pack a tasty punch! - Using store-bought filling options: If you're short on time, grab a vegan meatball or cheese substitute from the store. It saves time and effort. For the complete recipe, check the Full Recipe section. To keep your vegan meatball mozzarella hot pockets fresh, store them in airtight containers. Make sure they are fully cooled before sealing. This helps prevent moisture build-up. Refrigerate them for up to three days. If you want to save them longer, you can freeze them. Place the hot pockets in a freezer-safe bag or container. This way, they stay fresh for up to three months. When you want to enjoy these hot pockets again, you can reheat them in different ways. For a crispy texture, use the oven. Preheat it to 350°F (175°C) and bake for 10-15 minutes. If you’re short on time, use the microwave. Heat on high for 1-2 minutes. But be careful; microwaving may make them a bit soft. For the best results, the oven is the way to go. Vegan meatball mozzarella hot pockets last about three days in the fridge. After that, they may lose their taste and texture. Always check for signs of spoilage. Look for changes in color or a sour smell. If you notice any of these, it’s best to throw them away. Keeping an eye on your food helps you stay safe and enjoy delicious meals. Yes, you can make these hot pockets ahead of time. This is great for busy days. To meal prep, follow these steps: - Prepare the filling and let it cool. - Assemble the hot pockets as directed. - Place them on a baking sheet and freeze for about an hour. - Once frozen, transfer them to an airtight container or freezer bag. - When ready to eat, bake them straight from the freezer. This way, you have a quick meal ready when you need it. These hot pockets pair well with various sides and drinks. Here are some ideas: - Fresh salad with a light vinaigrette. - Crispy sweet potato fries for a fun crunch. - A bowl of marinara sauce for dipping. - Sparkling water or iced tea to sip alongside. These sides add flavor and balance to your meal. If you need alternatives to puff pastry, you have options. Here are some ideas: - Use whole wheat dough for a healthier twist. - Try phyllo dough for a flaky texture. - Homemade biscuit dough works well too. - For gluten-free, look for pre-made gluten-free dough. These substitutes keep the recipe delicious while meeting dietary needs. You learned how to make Vegan Meatball Mozzarella Hot Pockets from this guide. You now know the key ingredients, the step-by-step process, and tips to enhance flavor. Don’t forget about the fun variations and storage methods to keep your pockets fresh. These easy hot pockets fit any meal or snack time. Enjoy exploring different flavors and sharing them with friends. Dive into this tasty vegan treat today!

Vegan Meatball Mozzarella Hot Pockets Delight

What if I told you that you could enjoy cheesy, savory goodness while eating vegan? In this post, I’ll share

- 1 can refrigerated crescent roll dough - 8 oz cream cheese, softened - 1/2 cup powdered sugar - 1 teaspoon vanilla extract - 1 tablespoon fresh lemon juice - 1/4 cup fruit preserves (suggestions: raspberry or apricot) - 1 egg, beaten (for egg wash) - Optional toppings: sliced almonds or ground cinnamon When I make Crescent Cheese Danishes, I love using fresh ingredients. For the dough, I reach for a can of refrigerated crescent roll dough. It puffs up beautifully, making each Danish light and flaky. The cream cheese filling is the star. I use 8 oz of softened cream cheese. Mixing in 1/2 cup of powdered sugar gives it sweetness. A teaspoon of vanilla extract adds a lovely aroma. I squeeze in a tablespoon of fresh lemon juice for a bright note. For a fruity twist, I like to include 1/4 cup of fruit preserves. Raspberry or apricot works great. They add color and flavor. Don't forget the egg wash! One beaten egg brushed on top makes the Danishes golden brown. If you want to get fancy, sprinkle some sliced almonds or ground cinnamon on top. These small touches make all the difference. For the full recipe, check out Full Recipe. It guides you through every step to make these tasty treats. - Preheat the oven to 375°F (190°C). - Prepare the baking sheet with parchment paper. To make the filling, blend cream cheese, powdered sugar, vanilla, and lemon juice together. Start with softened cream cheese for the best results. Use a hand mixer or spatula to get a smooth and creamy texture. The mixture should blend well, with no lumps. Now it is time to assemble. Unroll the crescent roll dough on a clean surface. Carefully separate it into individual triangles. At the wide end of each triangle, place a generous tablespoon of the cream cheese mixture. Starting from the wide end, roll the dough towards the pointed end. Make sure to encase the filling fully. Pinch the ends to seal each Danish securely. Place them on the prepared baking sheet, leaving space for each pastry to expand. Next, use a pastry brush to coat the tops with beaten egg. This will give them a lovely golden-brown finish when baked. Add a small dollop of fruit preserves in the center of each rolled Danish. If you like, sprinkle some sliced almonds or ground cinnamon on top for extra flavor. Finally, bake the Danishes in the preheated oven for 12-15 minutes. They should puff up and turn a beautiful golden brown. Once baked, let them cool slightly before serving warm. This simple process leads to a tasty treat that is sure to impress. For the complete method, check the Full Recipe. For the best cheese filling, use softened cream cheese. This makes it easier to mix. The filling should be creamy but not runny. Keep your crescent dough cold before you roll it. Cold dough helps it keep shape while baking. Add a splash of almond or lemon extract for a twist. For fruit preserves, try different flavors like cherry or blueberry. They add great taste and color to your Danishes. You can also use fresh fruit like berries or apple slices for a fun alternative. Apply the egg wash with a pastry brush for a shiny finish. It makes your Danishes look golden and appetizing. If you want to add toppings, sprinkle sliced almonds or cinnamon on top after the egg wash. This adds a nice crunch and extra flavor. {{image_4}} You can change the filling of your Crescent Cheese Danishes for fun and taste. Here are some tasty ideas: - Ricotta: This cheese gives a creamy texture. Mix it with a bit of sugar and vanilla for a sweet treat. - Mascarpone: Use this Italian cheese for a rich and smooth filling. It pairs well with fruit preserves. - Spinach: For a savory option, mix cooked spinach with feta cheese. This creates a nice balance of flavors. - Feta: Crumbled feta adds a salty kick. Pair it with herbs like dill for a fresh taste. If you want to switch up the dough, consider these options: - Puff Pastry: Using puff pastry makes your Danishes flakier. It puffs up beautifully and adds a lovely texture. - Gluten-Free Crescent Rolls: If you need a gluten-free option, look for gluten-free crescent roll dough. These work well and still taste great. Try these variations to make your Crescent Cheese Danishes unique and exciting. Check the Full Recipe for detailed steps! To keep your crescent cheese Danishes fresh, store them in the fridge. Place them in an airtight container. They stay good for about three days. When ready to eat, reheat them in the oven. Set the oven to 350°F (175°C) and heat for about 10 minutes. This warms them through and keeps them crisp. You can freeze these Danishes to enjoy later. If you want to freeze before baking, prepare them up to the egg wash step. Wrap each Danish individually in plastic wrap. Then, place them in a freezer bag. To bake, just remove them and add a bit of time to the baking. If freezing after baking, let them cool first. Then, store them in a freezer-safe container. They can last up to two months. To reheat, bake at 350°F (175°C) for about 15-20 minutes. This helps keep the texture and flavor just right. To make a simple cream cheese filling, start with these ingredients: - 8 oz cream cheese, softened - 1/2 cup powdered sugar - 1 teaspoon vanilla extract - 1 tablespoon fresh lemon juice Mix these ingredients together until smooth and creamy. You can play with flavors by adding a bit of orange zest or almond extract. For a fun twist, try adding a splash of maple syrup. This filling is versatile and pairs well with many toppings. Yes, you can use store-bought fillings for your danishes. Look for cream cheese filling in the dairy section. Brands often sell sweetened cream cheese that is ready to use. You can also find fruit fillings like cherry or blueberry. These options save time and still taste great. Crescent cheese danishes last about 2-3 days when stored in the fridge. Keep them in an airtight container to maintain freshness. If you want to keep them longer, consider freezing them. They can last up to 2 months in the freezer. To reheat, bake them at 350°F (175°C) until warm. You now have a simple way to make delightful cheese danishes. We covered the ingredients, preparation steps, and tips for the best results. Remember, you can mix up the flavors with various fillings or doughs. Store leftovers properly to keep them fresh. Enjoy your baking, and share your tasty creations with family and friends. Making these danishes is not just about food; it’s about fun and connection. Try it out and see how easy it can be!

Crescent Cheese Danishes Simple and Tasty Recipe

Are you ready to impress your friends and family with a delicious treat? These Crescent Cheese Danishes are simple to

To make your Maple Pecan Granola Bars, you will need the following ingredients: - 2 cups rolled oats - 1 cup pecans, chopped - 1/2 cup almond butter - 1/2 cup pure maple syrup - 1/4 cup honey - 1/2 teaspoon vanilla extract - 1/2 teaspoon ground cinnamon - 1/4 teaspoon sea salt - 1/2 cup dried cranberries or raisins (optional) These ingredients work together to create a tasty and chewy snack. The oats provide a hearty base, while the pecans add crunch. Almond butter offers healthy fats, and maple syrup gives a natural sweetness. Honey enhances the flavor, making each bite delightful. Vanilla, cinnamon, and salt round out the taste. If you like, toss in some dried cranberries or raisins for extra sweetness and texture. You can find the Full Recipe for a step-by-step guide on how to bring these delicious bars to life! First, preheat your oven to 350°F (175°C). This step warms up your oven for baking. Next, prepare your baking dish. Use an 8x8-inch dish and line it with parchment paper. Leave some paper hanging over the edges. This makes it easy to lift your bars out later. In a large bowl, combine 2 cups of rolled oats with 1 cup of chopped pecans. Stir well to mix them. This helps ensure that the pecans are spread evenly throughout the oats. In a small saucepan, heat 1/2 cup of almond butter, 1/2 cup of pure maple syrup, and 1/4 cup of honey. Add 1/2 teaspoon of vanilla extract, 1/2 teaspoon of ground cinnamon, and 1/4 teaspoon of sea salt. Stir this mixture over low heat until it becomes smooth. This process takes about 3 to 5 minutes. Once your wet mixture is ready, pour it over the dry oat and pecan mix. If you want, add 1/2 cup of dried cranberries or raisins now. Mix everything together well. Make sure the oats and nuts are evenly coated with the sticky mixture. Next, transfer the combined mixture into your prepared baking dish. Use clean hands or a spatula to press the mixture down firmly. This step helps your bars hold their shape when baked. Bake for 20 to 25 minutes. Keep an eye on them, and look for golden brown edges. After baking, take them out and let them cool in the pan for about 10 minutes. Use the parchment paper to lift the bars out onto a wire rack. Let them cool completely. Once cool, cut them into your desired shapes, either bars or squares. Store your maple pecan granola bars in an airtight container. They stay fresh at room temperature for up to a week. For longer freshness, refrigerate them. For the Full Recipe, check the details above. To keep your granola bars fresh, store them in an airtight container. This helps keep moisture out. I recommend using a glass container or a plastic one with a secure lid. If you stack the bars, place parchment paper between them. This prevents sticking. For longer freshness, you can refrigerate them. Just remember to let them reach room temperature before serving. These granola bars look lovely when served in a decorative basket. Line the basket with a cloth napkin for a nice touch. You can also cut them into fun shapes for kids. Pair them with yogurt for breakfast or a snack. They go well with fresh fruit too, like sliced bananas or berries. You can also enjoy them with a warm cup of tea or coffee. One common mistake is not pressing the mixture firmly enough into the dish. This step is key to keeping the bars together. Use clean hands or a spatula to press it down well. Another mistake is not watching the baking time. The edges should turn golden brown. If they look too dark, they may taste burnt. Check them a few minutes before the timer goes off. {{image_4}} You can change the nuts in your granola bars. Try using walnuts or almonds instead of pecans. Each nut brings a different taste and crunch. You can also use flavored nut butters. For example, a peanut butter or cashew butter can add a new twist. Consider adding dried fruits for extra flavor. Chopped apricots or figs can change the taste of your bars. You can also mix in seeds like chia or flaxseeds. These seeds add nutrition and a nice crunch. If you need gluten-free bars, choose certified gluten-free oats. This way, you can enjoy them without worry. For vegan options, replace honey with more maple syrup or agave nectar. Both work well and keep the bars sweet. Each Maple Pecan Granola Bar has about 200 calories. This makes them a great snack choice. The bars have a balanced mix of macronutrients. Here’s how they break down: - Carbohydrates: 24 grams - Protein: 5 grams - Fat: 10 grams These numbers can change slightly based on any add-ins or substitutions. Oats and pecans bring many health benefits to the table. Oats are high in fiber. This helps keep your digestion smooth. Fiber also keeps you feeling full longer. Pecans are packed with healthy fats. They support heart health and provide energy. The fiber in these bars aids in digestion. Healthy fats from pecans help reduce bad cholesterol. Together, they make these bars a smart snack. Enjoying them can support your overall health. Maple Pecan Granola Bars stay fresh for about a week. Keep them in an airtight container. This helps them avoid getting soft or stale. For best results, store them at room temperature. If you want them to last longer, put them in the fridge. This can keep them fresh for up to two weeks. Yes, you can freeze these bars! First, cut them into pieces. Wrap each piece tightly in plastic wrap. Then, put them in a freezer bag. This helps prevent freezer burn. You can freeze them for up to three months. When you want to eat one, just take it out and let it thaw. If you need a substitute for almond butter, try peanut butter or cashew butter. You can also use sunflower seed butter for a nut-free option. Each will give a different flavor but still taste great. Just make sure the texture is similar so your bars hold together. Definitely! These bars make a great snack for kids. They are packed with oats and nuts, providing good energy. The maple syrup adds a touch of sweetness that kids love. They are healthier than many store-bought snacks. Just keep an eye on portion sizes for younger children. To cut down on sugar, use less maple syrup or honey. You can also swap in mashed bananas or unsweetened applesauce. Both give sweetness without added sugar. Another option is to use sugar-free syrup. This way, you keep the flavor while reducing the sugar content. You can find the Full Recipe for these crunchy maple pecan granola bars [here](#). In this post, we covered how to make Maple Pecan Granola Bars. We listed the key ingredients and gave easy steps. You learned what to do from mixing to baking and cooling. I shared tips for storage and serving. I also discussed possible variations and nutrition facts. These bars are tasty, healthy, and great for snacks. You can adapt the recipe to fit your needs. Enjoy making them your own!

Maple Pecan Granola Bars Easy and Tasty Snack

Looking for a quick snack that’s both tasty and healthy? Let me introduce you to my Maple Pecan Granola Bars!

- 2 cans (15 oz each) chickpeas, thoroughly drained and rinsed - 1 tablespoon olive oil - 2 teaspoons smoked paprika - 1 teaspoon ground cumin - 1 teaspoon chili powder - 1/2 teaspoon cayenne pepper - Salt and freshly ground black pepper to taste - 8 small corn or flour tortillas - 1 ripe avocado, sliced into wedges - 1 cup red cabbage, finely shredded - 1/2 cup fresh cilantro, chopped - 1 lime, cut into wedges for serving - Optional: your favorite hot sauce Gathering these ingredients sets you up for taco success. Chickpeas bring protein and texture, while spices like paprika and cumin add warmth. The cayenne pepper heat can be adjusted to your taste. Fresh toppings like avocado and cilantro enhance the flavor and color. Using small corn or flour tortillas makes each taco easy to hold. The lime adds a refreshing zing, perfect for balancing the spices. For those who love heat, a drizzle of hot sauce makes these tacos pop. For the complete recipe, check out the Full Recipe. 1. Heat olive oil in a skillet and add chickpeas. Start by pouring olive oil into a large skillet. Place it over medium heat. Wait until the oil shimmers. Then, add the drained chickpeas. 2. Season chickpeas with spices and sauté. Sprinkle the chickpeas with smoked paprika, cumin, chili powder, cayenne, salt, and pepper. Stir well to coat the chickpeas evenly. Sauté them for about 5 to 7 minutes. You want them heated through and slightly crispy. 3. Warm tortillas in a separate skillet. While the chickpeas cook, grab another skillet. Heat it over medium heat, then warm each tortilla for about 30 seconds. Flip them to make both sides soft and pliable. 4. Assemble the tacos with fillings. Take a warm tortilla and place a good spoonful of the chickpea mixture in the center. Add some avocado slices, shredded red cabbage, and chopped cilantro on top. - Prep Time: 10 minutes - Total Cook Time: 10 minutes Present your tacos with lime wedges and a side of hot sauce. This adds a zesty kick and enhances the flavor. For a fun touch, arrange the tacos on a platter with lime wedges and small bowls of hot sauce. It makes serving easy and inviting. You can find the full recipe in the earlier sections of this article. To make the perfect crispy chickpeas, start by draining and rinsing them well. Then, heat olive oil in a skillet. Once the oil is hot, add the chickpeas. Sprinkle them with smoked paprika, cumin, chili powder, and cayenne. Cook them for about 5-7 minutes. Stir often to ensure they crisp up nicely. This method gives you that crunchy texture everyone loves. For warming tortillas effectively, use a dry skillet over medium heat. Place each tortilla in the skillet for about 30 seconds per side. This method keeps them soft and pliable. Warm tortillas make a big difference in your taco experience. The best accompaniments for spicy chickpea tacos include fresh avocado, shredded red cabbage, and chopped cilantro. These toppings add color and taste. Lime wedges add a zesty touch that brightens the dish. For garnishing, arrange the tacos on a platter. Use lime wedges and small bowls of hot sauce to enhance the look. You can also sprinkle extra cilantro on top for a pop of green. One common mistake is overcooking the chickpeas. Keep an eye on them while cooking. They should be crispy but not burnt. Another mistake is using cold tortillas. Cold tortillas can break and spoil your tacos. Always warm them up for the best texture. For the full recipe, check out the [Full Recipe]. {{image_4}} For a vegan twist, you have many choices. Use corn tortillas instead of flour. Always check labels to ensure they're gluten-free. You can switch out the olive oil with avocado oil. This will give a nice flavor. If you want a different taste, try adding smoked chipotle peppers. They add a great smoky heat. You can also swap chickpeas for black beans. This changes the flavor but keeps it hearty. Toppings make your tacos fun and tasty. Consider adding pickled red onions for a tangy kick. You can also try crumbled feta or vegan cheese for creaminess. For sauces, think about a zesty lime crema. Just mix yogurt, lime juice, and a bit of garlic. Another great option is a spicy salsa. It adds a fresh kick that pairs well with the chickpeas. Explore these ideas to customize your Spicy Chickpea Tacos. Enjoy the full recipe that brings all these flavors together! To keep your spicy chickpea tacos fresh, store them properly. Place the cooked chickpeas in an airtight container. Keep the tortillas in a separate bag to avoid sogginess. You can store both in the fridge for up to three days. If you want to keep them longer, consider freezing the chickpeas. They can last up to three months in the freezer. When it's time to enjoy your leftovers, reheat with care. Use a skillet over medium heat for the chickpeas. Stir them occasionally until they are hot. For tortillas, warm them in a dry skillet too. This helps keep them soft and pliable. Avoid using the microwave, as it can make them chewy. For the best taste, enjoy your tacos fresh with the toppings added just before serving. To boost the heat, you can add more cayenne pepper. Increase it to one teaspoon or more, depending on your taste. You can also use a hotter chili powder. Consider adding fresh jalapeños or serrano peppers for a fresh kick. If you love sauces, try a spicy salsa or hot sauce on top. Yes, canned chickpeas are great for this recipe. They are quick and easy to use. Canned chickpeas save time since they are already cooked. They have a soft texture, which works well for tacos. Drain and rinse them to remove salt and canning liquid. You can also use dried chickpeas, but they take longer to cook. Some popular sides include Mexican rice and refried beans. You can also serve a fresh salad with lime dressing. Guacamole is a tasty option, too. Chips and salsa add a nice crunch. For a refreshing touch, consider sweet corn salad or grilled veggies. You can find great Spicy Chickpea Tacos at local vegan or vegetarian spots. Some food trucks specialize in creative tacos. Many restaurants that focus on Mexican food may have their unique twist on this dish. Ask friends for recommendations, or check online reviews for the best places in your area. Spicy Chickpea Tacos are quick and tasty. You learned how to make them using simple ingredients like chickpeas and spices. We covered tips to avoid mistakes and enhance your dish. You can also create variations to meet dietary needs. Remember to store and reheat leftovers properly. These tacos are a satisfying meal for anyone. Enjoy making them your own with new flavors!

Spicy Chickpea Tacos Flavorful and Simple Delight

Are you craving a tasty, plant-based meal that’s quick to make? Look no further! My Spicy Chickpea Tacos are both

Here are the ingredients you need for a tasty creamy spinach artichoke dip: - 1 cup fresh spinach, finely chopped - 1 cup artichoke hearts, drained and coarsely chopped - 1/2 cup cream cheese, softened to room temperature - 1/2 cup sour cream - 1/2 cup mayonnaise - 1 cup shredded mozzarella cheese - 1/2 cup grated parmesan cheese - 2 cloves garlic, minced - 1 teaspoon garlic powder - 1 teaspoon onion powder - Salt and freshly ground black pepper to taste - 1/2 teaspoon crushed red pepper flakes (optional, for a kick) - Fresh herbs (such as chopped parsley or basil) for a vibrant garnish You can swap some ingredients to fit your taste or diet: - Use Greek yogurt instead of sour cream for a lighter option. - Swap cream cheese for a dairy-free cream cheese if needed. - Try vegan mayonnaise for a plant-based dip. - Substitute spinach with kale for a different green flavor. - Add cooked chicken for a heartier dip. Fresh ingredients make a big difference in flavor. Here are tips to keep them fresh: - Buy spinach that is bright green and crisp. Avoid yellow or wilted leaves. - Choose artichoke hearts packed in water or oil for better taste. - Look for cream cheese that is smooth, with no lumps. - Use freshly minced garlic for a stronger flavor. - Always check expiration dates on dairy products to ensure freshness. This creamy spinach artichoke dip is a crowd-pleaser. You can find the full recipe for it [here](#). Enjoy making this dish! To make creamy spinach artichoke dip, start by gathering your ingredients. You need fresh spinach, artichoke hearts, cream cheese, sour cream, and mozzarella cheese. Make sure your cream cheese is soft. This helps it mix well. A hand mixer or a sturdy spoon will work fine to blend everything. 1. Preheat your oven to 350°F (175°C). 2. In a bowl, mix cream cheese, sour cream, and mayonnaise until smooth. 3. Add spinach, artichokes, garlic, mozzarella, and parmesan. Don’t forget the garlic and onion powders! 4. Season with salt and pepper to taste. If you like heat, add crushed red pepper flakes. 5. Fold everything gently to keep it creamy. 6. Transfer the mix to a greased baking dish, spreading it evenly. Baking the dip at the right temperature is key. Set your oven to 350°F (175°C). This heat allows the dip to bubble and blend flavors without burning. - Bake for 25-30 minutes. This gives the cheeses time to melt and the top to turn golden brown. - If you want a crispier top, broil it for the last few minutes. Watch it closely to avoid burning. To check if your dip is ready, look for a bubbly surface and a light golden color. You can use a fork to poke the dip in the center. If it feels hot and soft, it's done! Let it cool for about 5 minutes. This way, it will be easier to scoop. For a lovely touch, sprinkle fresh herbs on top before serving. Enjoy this creamy spinach artichoke dip warm with tortilla chips or veggie sticks for the best experience! For the full recipe, see above. To boost flavor, add a squeeze of lemon juice. This brightens the dip and adds freshness. You can also mix in a pinch of smoked paprika for a nice smoky note. If you love garlic, increase the minced garlic to three cloves. For a cheesy kick, try adding a bit of feta cheese. It adds a nice tangy flavor that pairs well with spinach and artichokes. One mistake is overmixing the dip. This can make it too dense. Mix just until combined for a creamy texture. Another pitfall is using canned artichokes without draining them well. Excess liquid can make your dip watery. Always drain and chop artichokes carefully. Lastly, don’t skip the fresh herbs. They add color and flavor that elevate your dish. Serve the dip warm for the best taste. Pair it with crispy tortilla chips or toasted baguette slices. Fresh veggie sticks like carrots and celery also work well. For a fun twist, try using pita chips. You can make a platter with assorted dippers for a lovely presentation. For a unique touch, serve it in small ramekins with a sprinkle of fresh herbs on top. Enjoy this creamy spinach artichoke dip with friends and family! For the full recipe, check out the section above. {{image_4}} You can easily tweak this recipe for different diets. If you're vegan, swap cream cheese for cashew cream. Use a plant-based sour cream and mayonnaise too. For a gluten-free option, make sure your ingredients are labeled gluten-free. You can still enjoy the rich taste without the gluten! Want a kick? Add jalapeños to your dip! Chop 1-2 fresh jalapeños and mix them in with the other ingredients. This gives the dip a nice heat. For extra spice, add crushed red pepper flakes. The heat balances well with the creamy flavors. For a refreshing twist, try a cold version. Use the same ingredients but skip the baking. Mix everything in a bowl and chill for at least one hour. This is great for summer parties. Serve it with fresh veggies or pita chips for a light snack. You can find more ideas in the Full Recipe. After enjoying your creamy spinach artichoke dip, store leftovers in an airtight container. Make sure to let the dip cool first. This helps keep its texture and flavor. Place it in the fridge, where it will last for up to three days. When you’re ready to eat, just take it out and enjoy. If you want to save some dip for later, freezing is a great option. Transfer the cooled dip into a freezer-safe container. Leave some space at the top, as the dip may expand when frozen. It can stay fresh in the freezer for up to two months. Just remember to label the container with the date. To reheat your creamy spinach artichoke dip, remove it from the fridge or freezer. If frozen, let it thaw in the fridge overnight. For reheating, use an oven or microwave. If using an oven, preheat it to 350°F (175°C) and heat the dip in a baking dish for about 15-20 minutes. Stir it halfway through to keep it creamy. If using a microwave, heat in short bursts, stirring in between, until hot. Avoid overheating, as it can make the dip grainy. Enjoy your dip warm and delicious! Yes, you can make this dip ahead of time. Prepare the dip as directed and place it in a baking dish. Cover it with plastic wrap and keep it in the fridge. You can store it like this for up to two days. When you’re ready to bake, simply remove the wrap and pop it in the oven. Baking time may need a little adjustment if it’s cold from the fridge. If you need an alternative to sour cream, try Greek yogurt. It gives a similar tang and creaminess. You can also use cottage cheese or even a non-dairy yogurt for a vegan option. These substitutes maintain the dip's rich flavor and texture. Each option adds its unique twist, so feel free to explore! Serve this dip warm right from the oven for the best taste. Pair it with crispy tortilla chips, fresh veggie sticks, or toasted bread slices. You could also use pita chips for a fun crunch. Arrange your dippers on a platter for a beautiful spread. This makes your snack time feel special! For more recipes like this, check out the Full Recipe. In this blog post, we covered all aspects of making a great spinach artichoke dip. You learned about key ingredients, tips for fresh tastes, and step-by-step baking methods. I shared common mistakes to avoid and pro tips for flavors. You also found variations for dietary needs and storage tips for leftovers. Remember, this dip is not just a dish; it’s a crowd-pleaser. With these tips, you can create a dip that everyone will love. Enjoy your cooking and share your delicious results!

Creamy Spinach Artichoke Dip Irresistible Flavor Boost

Are you ready to elevate your snack game? My Creamy Spinach Artichoke Dip packs a punch of flavor that’s hard

- 200g kataifi pastry - 100g unsalted butter, melted - 200g dark chocolate, finely chopped - 150g sweetened condensed milk - 50g chopped nuts (walnuts or pistachios) - 1 teaspoon pure vanilla extract - A pinch of sea salt - 1 tablespoon granulated sugar (optional) You can change nuts easily. Use almonds or hazelnuts if you prefer. For a vegan version, swap the butter with coconut oil and use dairy-free chocolate. These changes keep the bars tasty and fun. Using high-quality chocolate is key. It makes the filling rich and smooth. Look for chocolate with at least 70% cocoa for the best flavor. The kataifi pastry also matters. Choose fresh kataifi for a great texture. It should be soft and easy to work with. This makes your Chocolate Kataifi Bars even more delightful. 1. Preheat the Oven: First, preheat your oven to 180°C (350°F). This ensures even cooking. 2. Prepare the Baking Pan: Line an 8x8 inch (20x20 cm) square baking pan with parchment paper. Leave some paper hanging over the sides. This makes it easy to lift out later. 3. Shred Kataifi Pastry: In a bowl, take the kataifi pastry. Carefully shred it into fine strands. This helps it bake evenly. 4. Mix with Butter: Drizzle the melted butter over the shredded kataifi. Toss it well to coat all the strands. This adds flavor and keeps them crispy. 1. Initial Baking: Spread half of the buttered kataifi mixture in the pan. Press it down firmly with a spatula or your hands. Bake in the preheated oven for about 15 minutes. It should turn a lovely golden brown. 2. Create the Chocolate Filling: While the kataifi bakes, prepare the chocolate filling. In a saucepan over low heat, combine finely chopped dark chocolate, sweetened condensed milk, vanilla extract, and a pinch of sea salt. Stir until smooth and glossy. Remove from heat and fold in the chopped nuts. 1. Pour the Chocolate Mixture: After the kataifi base bakes, carefully pour the chocolate filling over it. Spread it evenly with a spatula. 2. Top with Remaining Kataifi: Take the rest of the kataifi and spread it over the chocolate layer. Press this down gently to make it compact. If you want more sweetness, sprinkle some granulated sugar on top. 3. Final Baking Steps: Return the pan to the oven. Bake for another 20-25 minutes. The top should be golden and crispy. 4. Cooling Instructions: Once baked, let the bars cool in the pan for 30 minutes. Use the parchment overhang to lift the dessert out of the pan. Transfer it to a cutting board and cut into squares or rectangles. For more details, check the Full Recipe. To achieve a crispy top layer, focus on the baking time. Bake until golden brown, about 20-25 minutes. Keep an eye on it. You want that crunchy texture. For even baking, ensure your kataifi is spread evenly in the pan. Press it down well to form a solid base. This helps the heat circulate better, giving you the perfect bake. Presentation matters! Serve your kataifi bars on a nice plate. Dust them with cocoa powder or powdered sugar for that fancy touch. Adding whole nuts on top makes them look even better. Pair these bars with a glass of milk or a cup of coffee. They also go well with a sweet dessert wine. Enjoy them with a side of fresh fruit for a fresh taste. If your kataifi layer is soggy, check your baking time. It should be golden brown before adding the chocolate. You can also try baking it a bit longer next time. To ensure your chocolate mixture is smooth, melt the chocolate on low heat. Stir constantly until it is well combined. If it gets too thick, add a little more sweetened condensed milk to loosen it. {{image_4}} You can change the taste of your Chocolate Kataifi Bars easily. Adding spices like cinnamon or cardamom can bring warmth. A few drops of almond or orange extract will give a nice twist. You can also mix in fruit. Diced strawberries or bananas can add a fresh touch. If you need a gluten-free version, look for gluten-free kataifi. Some brands offer this option, making it easy to enjoy. For a nut-free treat, just skip the nuts or use seeds. You can also make these bars dairy-free. Use coconut milk instead of sweetened condensed milk. This makes it creamy without dairy. You can make larger or smaller batches based on your needs. If you want mini bars, use a smaller pan. Just adjust the baking time to ensure they cook evenly. For fun shapes, use cookie cutters after baking. This adds a playful twist to your dessert. To keep your Chocolate Kataifi Bars fresh, store them properly. First, let the bars cool completely. Once cooled, cut them into squares. Place them in an airtight container. If you want to refrigerate them, use a glass or plastic container with a tight seal. This helps keep moisture out. You can also wrap the bars in plastic wrap before placing them in the container. For long-term storage, freeze the bars. Use freezer-safe bags or containers. Make sure to label them with the date for easy tracking. Chocolate Kataifi Bars can last for about a week at room temperature. Store them in a cool, dry place. If kept in the fridge, they can last up to two weeks. Signs that the bars have gone bad include a change in smell or texture. If they look dry or have an off smell, it’s best to toss them. Trust your senses to determine if they are still good. To enjoy leftover Chocolate Kataifi Bars, you can reheat them gently. The best method is to use a microwave. Place a bar on a microwave-safe plate. Heat it for about 10-15 seconds. Check to see if it's warm enough. You can also use an oven for reheating. Set it to a low temperature, around 150°C (300°F). Place the bars on a baking sheet for about 5-10 minutes. Avoid high heat, as it can make them soggy. Enjoy them warm for a delightful treat! Kataifi pastry is a thin, shredded dough. It looks like fine noodles. This pastry is crispy, light, and very flaky. It absorbs flavors well. You can find it in Middle Eastern or Mediterranean recipes. When baked, it turns golden and crunchy. It adds a fun texture to desserts and is perfect for our bars. Yes, you can easily make these bars ahead of time. Prepare the bars and let them cool. You can store them in an airtight container. Keep them in the fridge for up to a week. If you want to save them longer, freeze them for up to three months. Just remember to wrap them well. This keeps them fresh and tasty. You can adjust the sweetness easily. If you want them sweeter, add more sugar. You can also use a sweeter chocolate. Dark chocolate is rich, but milk chocolate is sweeter. You can also mix them to get the flavor you like. Taste as you go, and find your perfect level of sweetness! Yes, you can use different types of chocolate. Milk chocolate makes the bars sweeter. White chocolate is also an option, but it lacks the deep flavor of dark chocolate. You can mix chocolates too! This way, you can create a unique taste that suits your preference. You’ve learned how to make delicious chocolate kataifi bars. We covered the key ingredients, like kataifi pastry and quality chocolate. You now know how to customize the recipe with different nuts or vegan options. I shared tips for perfecting your bars and how to store them properly. Remember, using fresh, high-quality ingredients makes a big difference. Enjoy being creative as you try different flavors and shapes. Make this recipe your own and impress your family and friends!

Chocolate Kataifi Bars Delightful and Easy Recipe

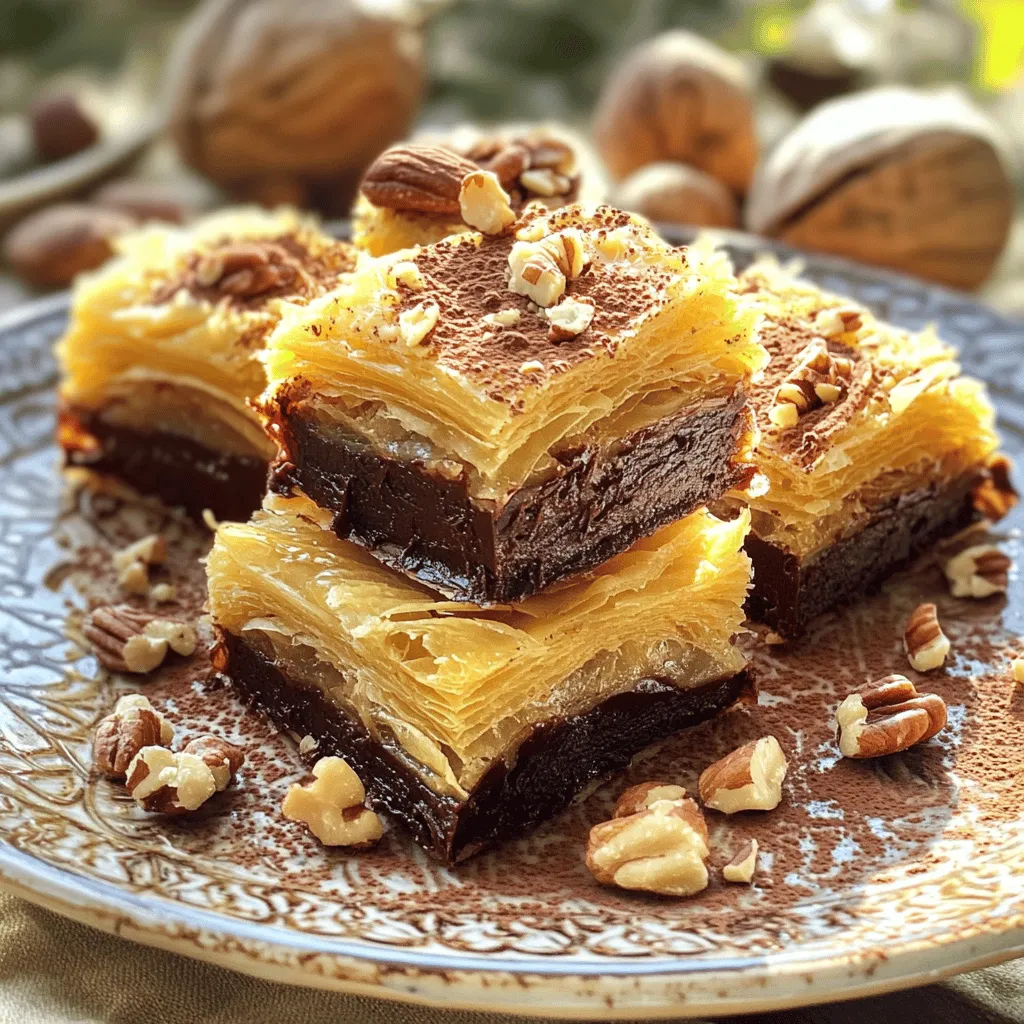
Get ready to indulge in a dessert that’s both delightful and easy to make: Chocolate Kataifi Bars! In this post,

- 300g honey - 200g granulated sugar - 2 large egg whites These ingredients are key to making your torrone smooth and sweet. Honey gives a rich flavor. Sugar adds sweetness and helps with texture. Egg whites provide the lightness that makes torrone so delightful. - 300g roasted almonds (or hazelnuts) - 150g candied orange peel, finely chopped - 1 teaspoon vanilla extract - A pinch of salt - Wafer sheets (for layering) The nuts add crunch, while the orange peel brings a fresh taste. Vanilla enhances the flavor, making it more aromatic. Salt balances the sweetness. Wafer sheets form layers, creating a lovely bite. You can find the full recipe to see how to combine these elements perfectly. 1. Start by combining honey and sugar in a medium saucepan. 2. Place the saucepan over medium heat. Stir constantly to help dissolve the sugar. 3. Once the mixture bubbles gently, let it simmer for 5-7 minutes. 4. Look for a thicker consistency, which means it's ready. 1. While the honey-sugar mix simmers, prepare your egg whites. 2. Use a clean, dry mixing bowl and an electric mixer on high speed. 3. Add a pinch of salt to the egg whites. 4. Whip until stiff peaks form. This means they are ready to use. 5. Be careful when handling hot mixtures; avoid burns by keeping a safe distance. 1. Set your mixer to low speed. Slowly drizzle the hot honey-sugar mixture into the whipped egg whites. 2. Keep mixing until everything is well combined and feels slightly cooler to touch. 3. Gently fold in roasted almonds, chopped candied orange peel, and vanilla extract. 4. Ensure these ingredients are evenly distributed for great flavor in every bite. 5. Line a baking dish with parchment paper. Place a layer of wafer sheets at the bottom. 6. Pour the torrone mixture over the wafer sheets, smoothing the top with a spatula. 7. Add another wafer sheet on top and press gently for an even layer. 8. Let the torrone cool at room temperature for at least 4 hours. 9. You can also refrigerate it for about 2 hours if you are in a hurry. 10. When set, lift it out using the parchment paper edges and place it on a cutting board. 11. Cut into squares or rectangles based on your serving size. 12. To store, wrap each piece in wax paper or put them in an airtight container. Keep them at room temperature for the best texture. This simple yet delightful recipe makes about 24 pieces. Enjoy your homemade soft Italian torrone! For the full recipe, refer to the beginning of this article. To make soft Italian torrone, you need to watch the temperature closely. - Heat the honey and sugar mixture on medium. - Stir it constantly until it bubbles gently. - Let it simmer for about 5-7 minutes. - You want it to thicken slightly before mixing it with the egg whites. Next, focus on the egg whites. - Use a clean bowl and beaters. - Whip the egg whites until stiff peaks form. - This step is key for a light, airy torrone. Serving torrone can be fun and creative. Here are some ideas: - Cut the torrone into squares or rectangles. - Place them on a decorative plate. - Add some roasted almonds on top for a nice touch. - A sprinkle of powdered sugar can add elegance. You can also serve it with coffee or tea. It makes a delightful treat. Avoid these common mistakes when making torrone: - Don’t overcook the honey-sugar mixture. It can turn too hard. - Be careful not to under-whip the egg whites. This will make the texture dense. Following these tips will help you create perfect soft Italian torrone. For the complete guide, check the Full Recipe. {{image_4}} You can switch up the nuts in your torrone. Hazelnuts work great instead of almonds. They add a rich, nutty flavor that pairs nicely with the sweet base. You can also mix nuts. Try a blend of almonds, hazelnuts, and pistachios. This gives your torrone a unique taste and texture. Adding spices or extracts can make your torrone special. Consider using a pinch of cinnamon or nutmeg for warmth. You can also try almond or orange extracts to enhance the flavor. Candied fruits are another fun twist. Mix in diced cherries or lemon peel for a fruity burst in every bite. Want to make your torrone even more indulgent? Try dipping it in chocolate! After cutting your set torrone into pieces, melt your favorite chocolate. You can use dark, milk, or white chocolate. Dip each piece halfway into the melted chocolate. Let them cool on parchment paper until the chocolate hardens. This adds a delicious layer that makes your treat even more special. To keep your soft Italian torrone fresh, wrap each piece in wax paper. This method protects each piece from air and moisture. You can also use an airtight container. Make sure the container is clean and dry before placing the torrone inside. Store the container in a cool, dry place. Avoid areas with heat or direct sunlight. This will help maintain the delightful texture of the torrone. Soft Italian torrone lasts about two weeks at room temperature. After that, it may lose its texture and flavor. You can tell if torrone has gone bad by checking for a hard, dry texture. It should feel soft and chewy. If it becomes sticky or develops an off smell, it is best to throw it away. By following these simple tips, you can enjoy the sweet, nutty flavors of your homemade torrone for as long as possible. For the complete recipe, check out the Full Recipe to get started! Soft Italian Torrone is a chewy candy made from sugar, honey, and nuts. This sweet treat has roots in Italy, where it dates back to the 14th century. Each bite brings a taste of history and culture. Traditionally, families share torrone during holidays and special occasions. It symbolizes joy and togetherness, making it a beloved dessert. If your torrone has become hard, don’t worry! You can soften it easily. Wrap the torrone in a damp paper towel. Place it in a sealed container with a slice of bread or an apple. Let it sit for 24 hours. The moisture from the bread or apple will help revive the chewiness. Enjoy your fresh, soft torrone again! Yes, you can make torrone without egg whites! Use aquafaba, the liquid from canned chickpeas. Whip it until it forms stiff peaks, just like egg whites. This will give your torrone a nice texture. Other alternatives include flaxseed gel or chia seed gel. Both can mimic the properties of egg whites. You can find authentic Soft Italian Torrone in many places. Look for local Italian markets or specialty candy shops. Many stores offer online shopping for ease. Websites like Amazon and Italian food retailers often stock it. Check labels to ensure you are getting the real deal. Enjoy exploring these tasty options! Soft Italian torrone is a delightful treat made with simple, fresh ingredients. We began by exploring the key components: honey, sugar, and egg whites. Next, I walked you through the steps to create the perfect mixture, whip the egg whites, and combine everything seamlessly. I also shared tips to avoid common mistakes and highlighted different variations to try. Finally, I covered how to store your torrone properly to keep it fresh. Now, you’re ready to make and enjoy this classic candy, sharing it with family and friends. Embrace this sweet tradition!

Soft Italian Torrone Delightful and Easy Recipe

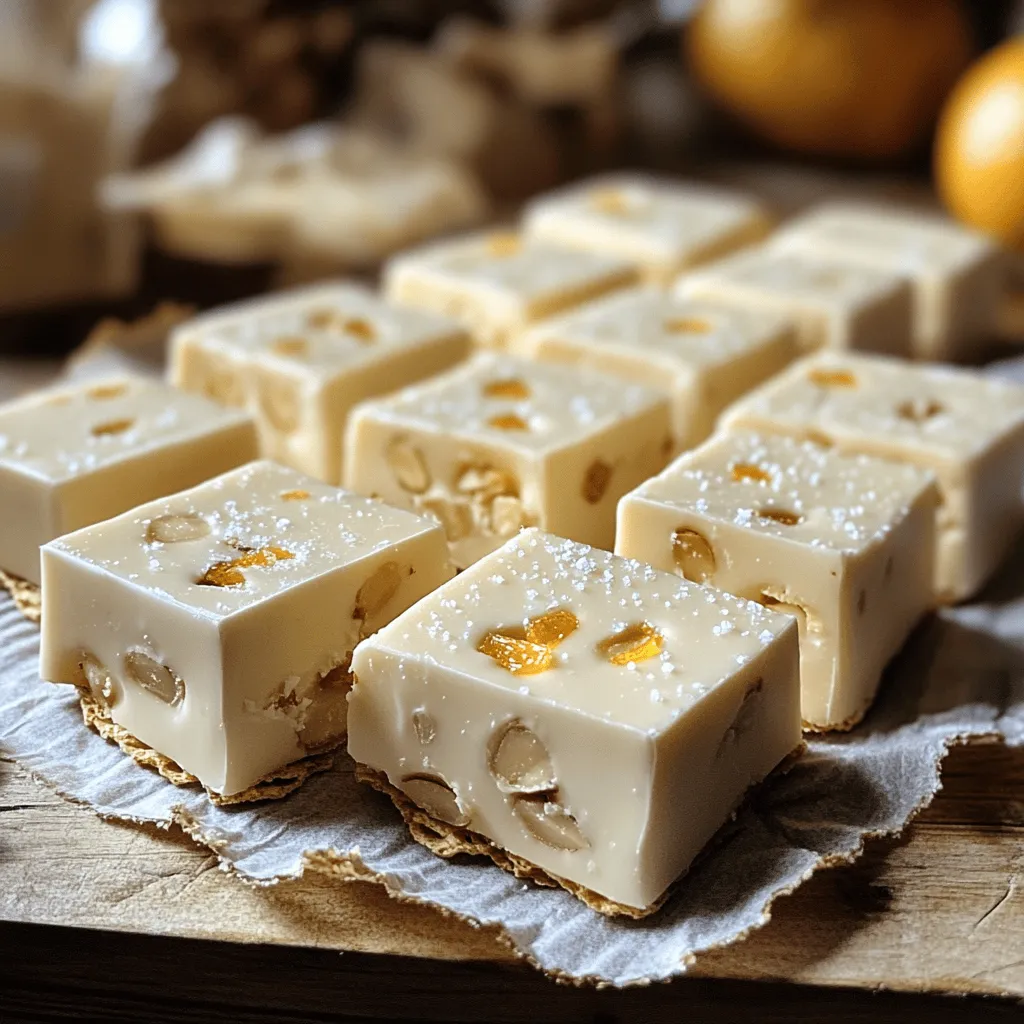
If you’re craving a sweet treat that’s both delightful and easy to make, you’re in for a treat! Soft Italian

- 1 ½ cups crushed graham crackers - ½ cup unsalted butter, melted - 2 tablespoons granulated sugar - 16 oz cream cheese, softened - ½ cup granulated sugar - 3 large eggs - Zest and juice of 2 lemons - 1 teaspoon vanilla extract - 3 large eggs - ¾ cup granulated sugar - ⅓ cup lemon juice - Zest of 1 lemon - 4 tablespoons unsalted butter - 3 large egg whites - ¾ cup granulated sugar - ¼ teaspoon cream of tartar - 1 teaspoon vanilla extract The ingredients are key to making this dish shine. For the crust, I use crushed graham crackers. They bring a sweet, crumbly base. Melted butter and sugar add richness. This mix makes a nice layer that holds everything together. The cheesecake filling is where the magic starts. Cream cheese makes it smooth and rich. Sugar sweetens it just right. The eggs help bind everything. Lemon zest and juice add that bright, tart flavor we love. A hint of vanilla rounds it out nicely. Next, we need lemon curd. This is a luscious layer on top. Eggs, sugar, and lemon juice combine over heat. Stir it until it thickens. The zest gives it an extra pop of lemon flavor. Butter makes it creamy and smooth. Finally, the meringue topping is a showstopper. Egg whites whip up light and fluffy. Adding sugar slowly helps it become stable. Cream of tartar keeps it from falling. A touch of vanilla adds flavor. This topping will be golden and fluffy once baked. For the full recipe, check out the detailed instructions. Each layer is special. Together, they create a delightful treat. - Preheat to 325°F (165°C) - Lightly grease a 9-inch springform pan First, preheat your oven to 325°F (165°C). This helps the cheesecake cook evenly. Next, lightly grease a 9-inch springform pan with butter or non-stick spray. This step ensures easy removal later. - Combine crust ingredients and press into the pan - Bake for 10 minutes and set aside For the crust, combine 1 ½ cups of crushed graham crackers, ½ cup melted unsalted butter, and 2 tablespoons of sugar in a bowl. Mix until the crumbs look wet. Press this mixture firmly into the bottom of the springform pan. Bake the crust for 10 minutes, then take it out and let it cool. - Blend cream cheese and sugar until smooth - Add eggs, lemon zest, juice, and vanilla; mix until combined Now, in a large bowl, blend 16 ounces of softened cream cheese with ½ cup of sugar. Mix until smooth. Add 3 large eggs, lemon zest from 2 lemons, ⅓ cup of lemon juice, and 1 teaspoon of vanilla extract. Mix everything until it’s all combined and creamy. - Pour filling over crust and bake for 50-60 minutes - Cool in the oven for 1 hour and refrigerate for 4 hours Pour this filling over the cooled crust, smoothing it with a spatula. Bake for 50 to 60 minutes. The center should jiggle a bit. Once baked, turn off the oven, crack the door open, and let it cool for 1 hour. After that, refrigerate the cheesecake for at least 4 hours or overnight. - Whisk together lemon curd ingredients over medium heat - Cook until thickened and stir in butter; cool completely To make the lemon curd, whisk together 3 eggs, ¾ cup sugar, ⅓ cup lemon juice, and zest of 1 lemon in a small saucepan over medium heat. Keep whisking until it thickens, about 8-10 minutes. Once thick, stir in 4 tablespoons of butter until melted. Let it cool completely. - Spread lemon curd over cheesecake - Prepare meringue topping and spread over the curd - Broil until golden brown Spread the cooled lemon curd over the cheesecake evenly. Next, for the meringue topping, beat 3 large egg whites until frothy. Add ¼ teaspoon of cream of tartar and whip until soft peaks form. Gradually add ¾ cup of sugar while beating until stiff peaks form. Fold in 1 teaspoon of vanilla. Spread the meringue on top of the lemon curd, creating peaks. Broil for 1-2 minutes until golden brown, watching closely to prevent burning. For the full recipe, be sure to check the details above! To make a creamy cheesecake, use room temperature ingredients. Cold cream cheese does not blend well. It can cause lumps and a tough texture. Let your eggs sit out for about 30 minutes before mixing. This also helps create a smooth batter. Be careful not to overmix. Mix just until combined. Overmixing adds air to the batter. This can lead to cracks during baking. A gentle touch helps keep your cheesecake smooth and perfect. Broiling meringue can be tricky. Keep a close eye on it while it cooks. Even a moment can turn it from perfect to burnt. Set your broiler to a low setting. This helps the meringue brown slowly without burning. Broil for about 1-2 minutes. Watch for a nice golden color on top. Once you see it turning golden, pull it out. Let it cool completely before slicing. To cut clean slices, use a sharp knife. Dip the knife in hot water before each cut. This helps to keep the slices neat. Garnish your cheesecake with fresh lemon slices or berries. A sprig of mint adds a nice touch too. These details make your dessert even more inviting. For the full recipe, be sure to check out the steps in detail! {{image_4}} You can change up the flavor of your cheesecake. Adding berries is a fun twist. Blueberries or raspberries add bright flavors and color. They make each bite exciting! You can also use other citrus fruits. Lime or orange zest gives a fresh taste. This adds depth to the lemon flavor. You can mix and match to find your favorite combo. If you're gluten-free, try almond flour for the crust. Mix it with melted butter for a tasty base. You can also use gluten-free graham crackers for a classic taste. For a vegan take, swap cream cheese for cashew cream. You can make meringue with aquafaba instead of egg whites. This keeps the light and fluffy texture. Both options are delicious and friendly to different diets. You can adapt this cheesecake for seasons too. In spring, add fresh strawberries or peaches on top. In fall, try slices of apples with a sprinkle of cinnamon. For holidays, include festive toppings. Use pomegranate seeds for a holiday touch. You can also use crushed candy canes for a minty flavor. Each season brings new ideas to make this cheesecake special. For more detailed instructions and ideas, check the Full Recipe. Store your cheesecake in the fridge. Use an airtight container to keep it fresh. If you do not have one, cover it tightly with plastic wrap. This will help keep the flavors intact. You can freeze leftover cheesecake for later. First, cut it into slices. Wrap each slice in plastic wrap, then place them in a freezer bag. This keeps them safe from freezer burn. To serve later, thaw the slices in the fridge for several hours. This keeps the texture nice. The cheesecake lasts up to five days in the fridge. However, I recommend eating it within three days for the best taste. Look for signs of spoilage, like an off smell or a change in color. If you see any mold, it's best to toss it. Enjoy your delicious Triple Lemon Meringue Cheesecake! For the complete recipe, check out the Full Recipe. Yes, you can make this cheesecake a day ahead. It tastes even better after chilling. To store, wrap it tightly in plastic wrap. Keep it in the fridge until you are ready to serve. This helps the flavors blend and makes it creamy. If your cheesecake cracks, don't worry! This can happen. To prevent this, make sure your oven is not too hot. Use room temperature eggs and cream cheese. Also, avoid overmixing the batter. If it cracks, you can cover it with meringue. The meringue will hide the cracks well. Look for a slight jiggle in the center of your cheesecake. It should be set around the edges. The center will firm up as it cools. This way, you avoid overbaking. You can also insert a toothpick. If it comes out clean, your cheesecake is ready! Yes, store-bought lemon curd is fine to use. It saves time and effort. However, homemade curd can taste fresher and brighter. If you want a rich lemon flavor, go for homemade. Store-bought is great for convenience. Just choose one with good ingredients for the best taste. For the complete cooking process, check out the Full Recipe. This blog post walks you through making a delicious Triple Lemon Meringue Cheesecake. You learned about the right ingredients, step-by-step baking tips, and storage advice. Achieving a smooth texture and perfect meringue is key. Don’t forget the endless flavor variations you can try. Now, it's time for you to create your cheesecake masterpiece. Enjoy every slice and impress your friends and family with your skills! Your kitchen has never been this exciting.

Triple Lemon Meringue Cheesecake Delightfully Fresh Treat

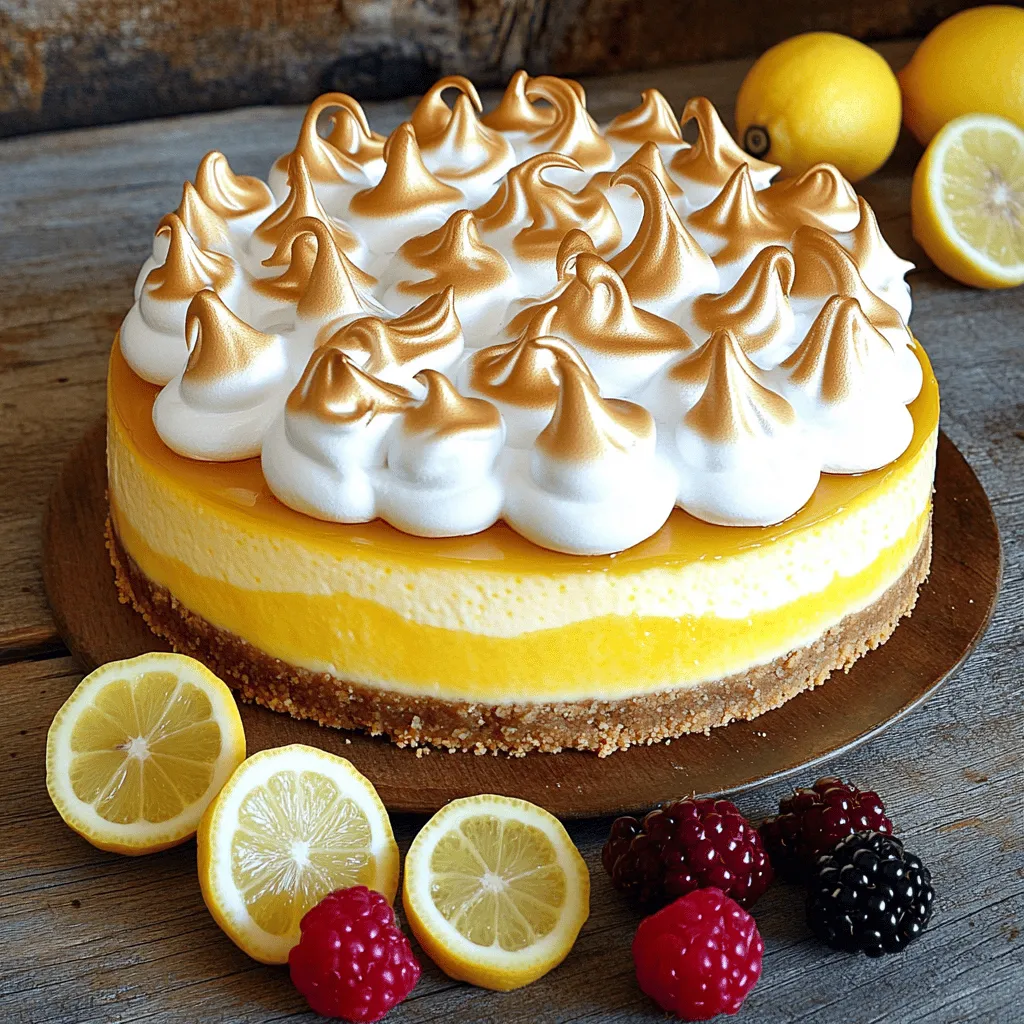
Get ready to awaken your taste buds with my Triple Lemon Meringue Cheesecake! This delightful fresh treat combines creamy cheesecake,

- 1 (15 oz) can pumpkin puree - 1 (12 oz) can evaporated milk - 3 large eggs - 1 cup granulated sugar - 1 box (15.25 oz) yellow cake mix - 1/2 cup unsalted butter, melted - 1 teaspoon pure vanilla extract - 1 teaspoon ground cinnamon - 1/2 teaspoon ground nutmeg - 1/2 teaspoon ground ginger - 1/4 teaspoon salt - 1 cup chopped pecans - Whipped cream for serving The main ingredients create a rich and creamy base. Pumpkin puree gives it that classic flavor. Evaporated milk adds creaminess, while eggs bind everything together. The sugar sweetens the mix. The yellow cake mix forms a lovely topping. The melted butter helps it brown nicely. Spices bring warmth to the dish. Vanilla extract adds depth. Ground cinnamon gives it that cozy taste. Nutmeg and ginger add a warm kick. Salt balances the sweetness. Optional ingredients can elevate your dump cake. Chopped pecans add crunch and flavor. Whipped cream is a perfect topping for serving. You can find the full recipe [here]. This Pumpkin Pie Dump Cake is simple yet full of flavor. - Preheat the oven to 350°F (175°C). - Lightly grease a 9x13 inch baking dish with cooking spray or butter. - In a large bowl, combine pumpkin puree, evaporated milk, eggs, sugar, vanilla, cinnamon, nutmeg, ginger, and salt. - Blend until smooth and creamy. - Pour the pumpkin mixture evenly into the prepared baking dish. - Sprinkle the dry cake mix over the pumpkin layer without stirring. - Drizzle the melted butter on top and add chopped pecans if you like. - Place the baking dish in the oven and bake for 50-60 minutes. - Check for doneness by inserting a toothpick in the center; it should come out clean. - Allow the cake to cool for 10-15 minutes before serving. - For a special touch, top with whipped cream and a sprinkle of cinnamon. For the full recipe, check out the detailed instructions above. Enjoy your delicious Pumpkin Pie Dump Cake! To make the best pumpkin pie dump cake, start with pure pumpkin puree. This is key. Avoid using pumpkin pie filling, as it has added sugars and spices. Pure pumpkin gives you full control over flavor. When you layer the cake mix, do not stir. This is very important! If you stir, the mix will not form a nice topping. Let the cake mix sit on top. It will create a lovely texture while baking. This cake is best served warm. A generous dollop of whipped cream takes it to the next level. The cream adds richness and a nice contrast to the pumpkin flavor. For a festive touch, add a sprinkle of cinnamon on top. It’s simple, but it makes your dessert look special. You can also add some chopped pecans for a crunchy twist. Enjoy your delicious treat! {{image_4}} You can easily make a gluten-free version of this cake. Start with a gluten-free cake mix. There are many brands available in stores. Check labels for safe options. You may need to adjust your other ingredients. Use gluten-free flour in place of regular flour if needed. This keeps your cake tasty and safe for all. Want to add some chocolate flavor? You can mix cocoa powder into the pumpkin layer. Or, use chocolate cake mix instead of yellow cake mix. This gives a rich, sweet twist. Pair it with chocolate chips or a hint of espresso. These flavors work great together and add depth. If you want a nut-free cake, skip the pecans. Instead, add a sprinkle of sunflower seeds or pumpkin seeds for crunch. You can also enhance flavors with a bit of toasted coconut. This keeps your cake tasty and safe for those with nut allergies. Enjoy all the flavors without worry. For the full recipe, check back to the main section. To keep your Pumpkin Pie Dump Cake fresh, store it in the fridge. Place the cake in an airtight container or cover it tightly with plastic wrap. The cake stays good for about 3 to 4 days. After that, it may dry out or lose its flavor. You can freeze Pumpkin Pie Dump Cake for longer storage. First, let the cake cool completely. Then, cut it into pieces and wrap each slice in plastic wrap. Place the wrapped slices in a freezer bag or container. This way, the cake can last up to 3 months in the freezer. When you want to enjoy it again, take out a slice and let it thaw in the fridge overnight. To reheat, place the slice in the microwave for about 30 seconds or until warm. This will bring back its yummy taste, making it just as delightful as when you first baked it. Pumpkin Pie Dump Cake lasts about 4 to 5 days in the fridge. Keep it in an airtight container to keep it fresh. If you want to enjoy it longer, consider freezing it. It can last up to 2 months in the freezer. Just make sure to wrap it well to avoid freezer burn. Yes, you can make this recipe ahead of time. Prepare the pumpkin mixture and layer it in the baking dish. Cover it and store it in the fridge for up to 24 hours before baking. When ready, add the cake mix and butter, then bake. This makes it easy to serve at gatherings or special occasions. Dump cakes are easier and quicker to make than traditional cakes. You simply "dump" the ingredients into a dish. There’s no mixing, which saves time and effort. Traditional cakes require more steps, like creaming butter and sugar. Dump cakes also have a unique texture, with a soft base and a crumbly topping. This makes them a comforting dessert that many love. This blog post detailed how to make a tasty Pumpkin Pie Dump Cake. We covered the ingredients needed, like pumpkin puree and yellow cake mix, and shared step-by-step instructions. I also included helpful tips for the best results and tasty variations, like a gluten-free option. In closing, this dessert is simple and fun to make. It’s perfect for any gathering. I hope you enjoy baking and sharing it with friends and family. Happy baking!

Pumpkin Pie Dump Cake Simple and Delicious Treat

If you’re craving a simple and tasty dessert, you’ll love this Pumpkin Pie Dump Cake. It combines warm pumpkin spice

Older posts
Newer posts
← Previous Page1 … Page8 Page9 Page10 … Page27 Next →

dsad

© 2025 mealinmoments • Built with GeneratePress

Our Policies

  • Copyright Policy
  • Cookie Policy
  • GDPR Policy
  • Privacy Policy
  • Disclaimer
  • Terms Of Use

More Information

  • Home
  • About
  • Contact
  • Appetizers
  • Dessert
  • Dinner
  • Drinks
©2025, mealinmoments About Back To Top