Skip to content
DisclaimerTerms Of UseGDPR PolicyCookie Policy

mealinmoments

  • Home
  • Drinks
  • Appetizers
  • Dinner
  • Dessert
  • About
  • Contact
  • Privacy Policy
DisclaimerTerms Of UseGDPR PolicyCookie Policy

Megan

To make these fluffy pancakes, you need some simple ingredients. Gather the following: - 1 cup all-purpose flour - 2 tablespoons granulated sugar - 1 tablespoon baking powder - 1/2 teaspoon salt - 1 cup whole milk - 1 large egg - 2 tablespoons melted butter (plus additional for cooking) - 1 teaspoon vanilla extract - Maple syrup, for serving - Fresh berries, for garnish (optional) Each ingredient plays an important role. The flour gives structure, while sugar adds sweetness. Baking powder helps the pancakes rise and become fluffy. The milk and egg add moisture. Vanilla gives a lovely flavor, and butter adds richness. Finally, maple syrup and berries make the dish special. For more details, you can check the Full Recipe. Start by sifting together the following ingredients in a large bowl: - 1 cup all-purpose flour - 2 tablespoons granulated sugar - 1 tablespoon baking powder - 1/2 teaspoon salt Sifting helps mix these dry ingredients well. Next, create a well in the center of the dry mix. This well will hold the wet ingredients later. In another bowl, whisk together these ingredients: - 1 cup whole milk - 1 large egg - 2 tablespoons melted butter - 1 teaspoon vanilla extract Make sure to whisk until the mixture is smooth and fully blended. This step is key for a soft pancake texture. Now, gently fold the wet mixture into the dry ingredients. Be careful not to overmix; a few lumps are okay. This will help keep your pancakes fluffy. Let the batter rest for about 10 minutes. This resting time lets the baking powder work, which makes your pancakes light and airy. While the batter rests, preheat a non-stick skillet over medium heat. Lightly grease it with more melted butter. For each pancake, pour 1/4 cup of batter onto the skillet. Cook until bubbles form and the edges look set, about 2-3 minutes. Carefully flip each pancake using a spatula. Cook for another 2-3 minutes until golden brown. Adjust the heat if needed to avoid burning. Keep the cooked pancakes warm in a low oven while you finish the batter. Serve them stacked high on a plate, drizzle with warm maple syrup, and add fresh berries if you like. Enjoy! For the complete recipe, refer to the [Full Recipe]. To make your pancakes super fluffy, let the batter rest for about 10 minutes. This step helps the baking powder activate. The bubbles in the batter will rise while it sits, helping each pancake become light and airy. Avoid overmixing your batter. Mix it just enough to combine the wet and dry ingredients. A few lumps are okay. If you mix too much, the pancakes may turn out dense. Get your skillet to the right temperature. Preheat it over medium heat. A hot skillet ensures that the pancakes cook evenly. If it is too hot, the pancakes may burn on the outside and stay raw inside. When flipping the pancakes, wait for bubbles to form on the surface. This shows they are ready to flip. Use a wide spatula to turn them over gently. This method helps keep the pancakes intact and golden brown. For a beautiful stack, place the pancakes on top of each other. Drizzle warm maple syrup over the top for sweetness. You can add fresh berries to make the dish pop with color. This makes your breakfast look and taste amazing. For extra flair, dust the pancakes with powdered sugar before serving. This small touch adds a nice finish and makes them feel more special. You can find the full recipe to create these fluffy delights in the earlier section! {{image_4}} You can make pancakes even better by adding fun flavors. Chocolate chips are a sweet treat. Just fold in a half cup into the batter. Nuts like walnuts or pecans add a nice crunch. They give a tasty twist that everyone loves. Spices can also change the flavor a lot. Cinnamon gives a warm taste. Nutmeg adds a hint of sweetness. Just sprinkle in about half a teaspoon of either spice to really make your pancakes pop. If you need gluten-free pancakes, you can swap out the flour. Use almond flour or a gluten-free mix instead. This change keeps them fluffy and delicious. For a dairy-free option, pick almond milk or oat milk. You can also use coconut oil instead of butter. Both options keep the pancakes rich without dairy. Seasonal flavors can make your pancakes special. In fall, try a pumpkin spice version. Just add half a cup of pumpkin puree and a teaspoon of pumpkin pie spice. In summer, fresh fruit is a great choice. Blueberries, strawberries, or sliced bananas can brighten up each bite. You can fold them into the batter or pile them on top. Explore these variations to keep your fluffy pancakes exciting! For a detailed guide on making these delightful pancakes, check out the Full Recipe. To store leftover pancakes, let them cool first. Place them in an airtight container. You can keep them in the fridge for up to three days. When you want to enjoy them again, reheat in the microwave. Heat for about 20 seconds or until warm. This method helps keep them fluffy. If you want to freeze pancakes, stack them with parchment paper between each one. This prevents sticking. Place the stack in a freezer bag or container. They can last up to two months in the freezer. To enjoy, take the pancakes out and let them thaw. You can reheat them in the microwave or toaster. Heat until warm and fluffy again. Pancakes last about three days in the fridge. In the freezer, they can stay fresh for up to two months. Always check for signs of spoilage before eating. If they smell off or look weird, it’s best to toss them. This way, you keep your meals safe and tasty. To make your pancakes fluffier, use fresh baking powder. This helps them rise better. You can also separate the egg. Whip the egg white until it’s stiff. Then fold it into the batter gently. Another tip is to avoid overmixing. Mix just until the dry and wet ingredients combine. A few lumps are okay! Yes, you can make pancakes without eggs! Use mashed banana or applesauce as a substitute. A quarter cup of either will work well. You can also mix one tablespoon of flaxseed meal with three tablespoons of water. Let it sit for a few minutes until it thickens. This will help bind your batter. Yes, letting the batter rest is important. It allows the baking powder to activate and makes your pancakes fluffier. The rest time should be about 10 minutes. This gives the flour time to absorb the liquid too. You’ll notice a difference in texture when you let it rest. Serve your fluffy pancakes stacked high on a plate. Drizzle warm maple syrup over them for sweetness. Fresh berries like strawberries or blueberries make great toppings too. You can add whipped cream for extra indulgence. Dusting with powdered sugar adds a nice touch. Leftover pancakes can be stored in the fridge for up to three days. Place them in an airtight container. You can also freeze pancakes for up to two months. Just make sure to separate them with parchment paper. This prevents them from sticking together. To reheat, use a toaster or microwave until warm. For the best taste, add some maple syrup! You learned how to make fluffy pancakes from scratch. We looked at the right ingredients and step-by-step instructions. I shared tips to make them light and fluffy. You can try fun flavor twists and learn how to store leftovers. Delicious pancakes can be easy and quick. Now, grab your ingredients and start cooking. Enjoy your tasty pancakes!

Fluffy Pancakes with Maple Syrup Easy Breakfast Recipe

Get ready for a sweet breakfast treat with my easy recipe for fluffy pancakes drizzled with maple syrup! These soft,

To make this tasty soup, here is what you need: - 1 cup red lentils, thoroughly rinsed - 1 can (13.5 oz) full-fat coconut milk - 4 cups vegetable broth - 1 medium onion, finely diced - 2 cloves garlic, minced - 1-inch piece of fresh ginger, grated - 1 medium carrot, diced into small cubes - 1 bell pepper (any color), diced - 2 tablespoons curry powder - 1 tablespoon ground turmeric - 1 teaspoon ground cumin - 1/2 teaspoon red pepper flakes (optional, for added heat) - Salt and freshly ground black pepper, to taste - 2 tablespoons olive oil - Fresh cilantro leaves, for garnish - Lime wedges, for serving You can make this soup your own by changing some ingredients: - Red lentils: Use green lentils, but cook longer. - Coconut milk: Almond or cashew milk for a lighter taste. - Vegetable broth: Chicken broth adds more flavor. - Garlic: Garlic powder works if you lack fresh. - Bell pepper: Zucchini or celery gives a different crunch. - Curry powder: Use garam masala for a unique twist. Each serving of this soup is full of good stuff: - Calories: 350 - Protein: 12g - Fat: 18g - Carbs: 39g - Fiber: 12g - Sugar: 3g This soup is not only tasty but also rich in nutrients. You get protein and fiber from the lentils, while the coconut milk brings healthy fats. This balance makes it a satisfying dish! You can find the full recipe for more details on how to prepare this delightful meal. To make this soup, gather your ingredients first. Use a large pot to start cooking. Heat two tablespoons of olive oil over medium heat. Once the oil is hot, add one diced onion, one diced carrot, and one diced bell pepper. Stir these veggies for 5-7 minutes. You want them soft and golden. Next, add two minced garlic cloves and one inch of grated ginger. Stir for 1-2 minutes. The smell will be amazing! Then, mix in two tablespoons of curry powder, one tablespoon of turmeric, and one teaspoon of cumin. If you like heat, add half a teaspoon of red pepper flakes. Stir well for one minute to wake up the spices. Now, add one cup of rinsed red lentils, four cups of vegetable broth, and one can of coconut milk. Mix everything well. Bring the soup to a boil. After it boils, lower the heat and let it simmer. Cook it uncovered for 25-30 minutes. Stir it every so often. The lentils should be soft, and the soup should thicken. Taste the soup. You can add salt and black pepper to make it just right. For a creamier texture, blend part of the soup with an immersion blender. Leave some lentils whole for texture. Finally, ladle the soup into bowls, top with cilantro, and serve with lime wedges. To get the perfect texture, focus on the lentils. Red lentils cook quickly and break down well. This helps thicken the soup naturally. If you want a chunkier soup, keep some lentils whole. Use an immersion blender lightly for blending. Watch your heat level while simmering. If it cooks too fast, the lentils may break down too much. Stir often to avoid sticking. If your soup is too thick, just add a bit of broth or water. Adjusting the liquid helps reach your desired thickness. You will need a large pot for cooking the soup. A wooden spoon works great for stirring. An immersion blender helps with texture, but a regular blender works too. Use measuring cups for accuracy. A cutting board and knife will help you prep your veggies. For serving, have bowls ready. A ladle makes it easy to serve. Don't forget lime wedges for a fresh finish! For the full recipe, check the section above. To boost flavor, focus on fresh herbs and spices. Fresh cilantro adds brightness. Use quality curry powder for depth. Toast spices in oil before adding other ingredients. This makes their flavors pop. A squeeze of lime juice right before serving brightens the dish. It gives a fresh taste that wakes up the soup. You can adjust the spice in this soup easily. If you like it mild, skip the red pepper flakes. For more heat, add more flakes or a chopped chili. You can also add fresh ginger for a warm spice. Remember, you can always add more spice, but you can’t take it out! If you are short on time, use pre-chopped veggies. Many stores offer fresh diced onions and peppers. You can also use canned lentils instead of dried ones. They cook faster and save time. Prep everything ahead of time for a quick meal. Just follow the Full Recipe, and you'll have a delicious dish in no time! {{image_4}} Coconut Curry Lentil Soup is a great dish for all kinds of eaters. If you want it vegetarian, just stick with the recipe. The coconut milk adds richness and creaminess. For a vegan option, we keep the same ingredients. Just ensure all your vegetable broth is vegan-friendly. This soup is naturally plant-based, making it a perfect choice for both diets. You can easily boost the protein in this soup. If you eat meat, add cooked chicken. Cube it and mix it in during the last 10 minutes of cooking. If you want a vegetarian protein, consider adding tofu. Use firm tofu, drain it, and cube it. Sauté it with the vegetables for added flavor before adding the lentils. Both options will make your soup more filling. Feel free to make this soup your own by adding seasonal veggies. In the summer, try zucchini or corn. In the fall, diced sweet potatoes or squash work well. Just remember to adjust the cooking time. Some veggies need more time to soften. You can also add leafy greens like spinach or kale at the end. They just need a few minutes to wilt. This keeps your soup fresh and exciting. For the full recipe, check the section above. To keep Coconut Curry Lentil Soup fresh, store it in airtight containers. Let the soup cool first. This way, it won’t steam and create extra moisture. Make sure to store leftovers in the fridge if you plan to eat them within three days. Always label your containers with the date. You can freeze Coconut Curry Lentil Soup for later use. Pour the cooled soup into freezer-safe containers or bags. Leave some space at the top for the soup to expand when frozen. It can last up to three months in the freezer. When ready to enjoy, just thaw it in the fridge overnight. Reheating is easy! If you stored it in the fridge, pour the soup into a pot. Heat it over medium heat, stirring often. If frozen, thaw it overnight first. You can also heat it in the microwave. If it seems too thick, add a splash of vegetable broth or water while reheating. Enjoy your warm soup with fresh cilantro and lime! For the full recipe, check the earlier section. Coconut Curry Lentil Soup lasts about 4 to 5 days in the fridge. Store it in an airtight container. This keeps the flavors fresh. Always let the soup cool before sealing it. When you are ready to eat, just reheat it on the stove. Yes, you can use dried lentils. Just remember to rinse them well before cooking. Dried lentils need more time to cook than canned ones. They usually take about 25 to 30 minutes to become tender. You might need to add a little extra broth or water while cooking. Coconut Curry Lentil Soup pairs well with many dishes. Here are some ideas: - Crusty bread or naan - A fresh green salad - Rice or quinoa for extra filling - Grilled vegetables for a hearty side Enjoy experimenting with different sides to find your perfect match! For the complete recipe, check out the Full Recipe section. Coconut Curry Lentil Soup offers a warm, tasty meal that's easy to make. We covered the full ingredient list, helpful cooking steps, and clever tips for busy cooks. You can tweak the recipe to fit your tastes, making it both fun and flexible. Proper storage ensures your soup stays fresh and delicious. Remember, this recipe can fit any diet, whether you're vegan or love meat. Enjoy the comforting flavors, and don't hesitate to experiment! Your kitchen is the best place for creativity.

Coconut Curry Lentil Soup Flavorful and Satisfying Dish

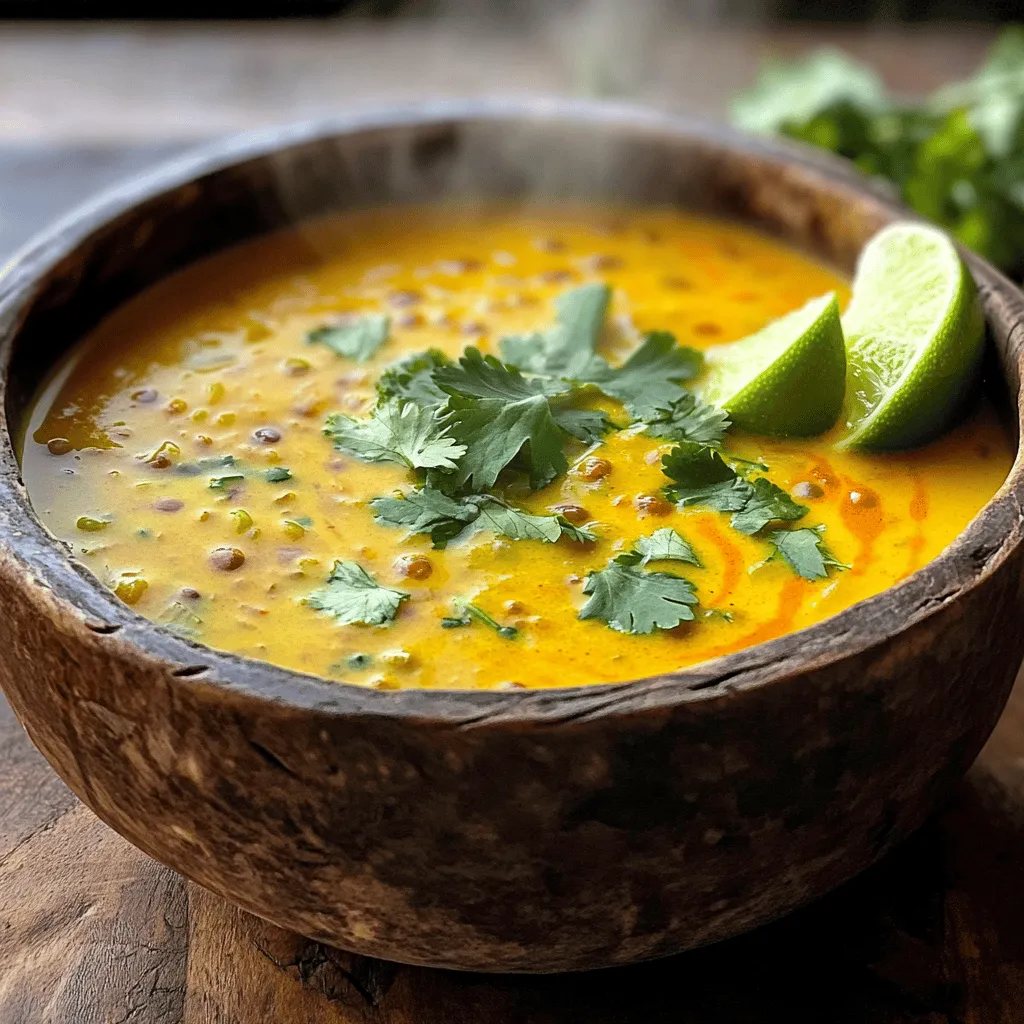
Looking for a dish that warms you up and fills you up? Coconut Curry Lentil Soup is a perfect choice!

- 1 lb shrimp, peeled and deveined - 2 tablespoons honey - 3 cloves garlic, minced - 1 tablespoon soy sauce - 1 tablespoon fresh lime juice - 1 tablespoon vegetable oil - 1 teaspoon chili powder - Salt and pepper to taste - 8 small corn tortillas - 1 cup cabbage, shredded - ½ ripe avocado, sliced - Fresh cilantro leaves - Lime wedges for serving In this recipe, the shrimp is the star. You want fresh shrimp that shines in flavor. The honey gives a sweet touch, while garlic adds depth. For the marinade, soy sauce brings umami to the dish. Fresh lime juice adds a zesty kick that brightens each bite. Next, the extra ingredients help enhance the dish. The vegetable oil helps cook the shrimp nicely. Chili powder adds a hint of spice, while salt and pepper balance the flavors. The corn tortillas serve as the perfect wrap for all this goodness. For a great finish, toppings are key. Shredded cabbage adds crunch and freshness. Slices of creamy avocado give richness. Fresh cilantro adds a pop of color and flavor. Lastly, lime wedges offer a refreshing squeeze on top. This dish is not just tasty; it is easy to make. You can find the full recipe in the earlier section. Enjoy creating these delicious honey garlic shrimp tacos! - Combine honey, garlic, soy sauce, lime juice, and chili powder. - Stir until well blended. Start by mixing the honey, minced garlic, soy sauce, fresh lime juice, and chili powder in a bowl. This marinade gives the shrimp a sweet and savory flavor. It’s simple, yet it makes a big impact on taste. - Add shrimp to the marinade. - Cover and let sit for 15-20 minutes. Next, add the shrimp to the bowl. Make sure every piece is coated well. Then, cover the bowl and set it aside. Letting the shrimp sit in the marinade for 15 to 20 minutes helps them soak up all those delicious flavors. - Heat vegetable oil in a skillet. - Cook shrimp for 2-3 minutes on each side. While the shrimp marinates, heat vegetable oil in a skillet over medium-high heat. When the oil is hot, add the shrimp. Cook them for about 2 to 3 minutes on each side. Look for them to turn pink and opaque. This means they are cooked just right. - Warm corn tortillas in a separate skillet. While the shrimp cooks, warm the corn tortillas in a different skillet. Heat them for about 30 seconds on each side. This step makes the tortillas soft and tasty, perfect for holding all that shrimp goodness. - Layer cabbage, shrimp, and avocado on tortillas. - Garnish with cilantro. To build your tacos, lay a handful of shredded cabbage on each tortilla. Then, add the cooked shrimp on top. Finish with slices of creamy avocado. Sprinkle fresh cilantro on top, and your tacos are ready to enjoy! For the full recipe, check the earlier section. To cook shrimp just right, keep an eye on the time. Cook shrimp for only 2 to 3 minutes per side. They cook quickly. If you notice them turning pink and opaque, they are ready. The shrimp should have a slight caramel color. This means you’ve cooked them well. Want to boost flavor? Try adding spices like cumin or paprika. These spices work well with shrimp. You can also marinate shrimp longer, up to an hour, for deeper taste. Pair shrimp with fresh ingredients like mango or pineapple. They add sweetness and brightness. Plating matters! Use a colorful platter to serve your tacos. Arrange lime wedges around the tacos to catch the eye. Consider stacking the tacos for height. Add more fresh cilantro on top for a pop of green. This makes your dish look fancy and fun. For a final touch, sprinkle some chili flakes for color. {{image_4}} You can swap shrimp for chicken or tofu. Both options work well in this dish. For chicken, use boneless thighs or breasts. Cut the chicken into small pieces for even cooking. Cook chicken until it reaches a safe internal temperature of 165°F. For tofu, choose firm or extra-firm varieties. Press the tofu to remove excess water, then cut it into cubes. Sauté the tofu until it gets golden brown on all sides. This adds great texture and flavor. Want to kick up the heat? Add diced jalapeños or a splash of hot sauce. You can also try smoked paprika for a smoky taste. For sauces, use chipotle mayo or avocado crema for creaminess. These will create a tasty twist on your tacos. If you love citrus, consider adding orange juice to the marinade. This gives a fresh and bright flavor to the shrimp. If you need gluten-free options, use tamari instead of soy sauce. It tastes great and keeps the dish safe for those with gluten issues. For a vegan version, replace shrimp with chickpeas or more tofu. Marinate as usual to infuse great flavors. You can also use corn tortillas that are naturally gluten-free. This way, everyone can enjoy these tasty tacos! For the full recipe, check out the detailed instructions above. To keep your honey garlic shrimp tacos fresh, store leftovers in the fridge. Place them in an airtight container. Make sure they cool down before sealing. This helps prevent moisture buildup. Keep the tacos at a temperature below 40°F. Consume them within two days for the best taste. When you reheat shrimp, avoid drying them out. Use a skillet over low heat. Add a splash of water or broth to keep them moist. Stir gently until warm. For the tortillas, warm them in a dry skillet for about 20 seconds each side. This will make them soft again and ready to use. You can freeze shrimp tacos, but it's best to store components separately. Freeze cooked shrimp in a sealed bag. They can last about three months in the freezer. Store tortillas in another bag, and they can stay fresh for up to six months. When ready to eat, thaw shrimp in the fridge overnight before reheating. This keeps the flavors intact. For the full recipe, check out the earlier sections. You can enjoy several tasty sides with these tacos. Here are my top picks: - Mexican rice: It adds a nice, savory touch. - Black beans: Rich in protein and flavor. - Corn salad: Fresh and vibrant, it brightens the plate. - Guacamole: Creamy and rich, it pairs perfectly. - Pico de gallo: This fresh salsa adds a zesty crunch. These sides will round out your meal and make it more satisfying. Yes, you can prepare the marinade ahead of time. Store it in an airtight container in the fridge for up to three days. This gives the flavors time to meld. When you’re ready, just add the shrimp and marinate as usual. Cooked shrimp turn pink and opaque. They should curl slightly and feel firm to the touch. If they look shiny, they need more time. Perfectly cooked shrimp have a slight caramelization on the outside, which adds flavor. Toppings can elevate your shrimp tacos. Here are some popular choices: - Sour cream: Adds creaminess and tang. - Pico de gallo: Offers freshness and crunch. - Shredded cheese: A sprinkle of cheese adds richness. - Hot sauce: For those who like a kick. - Radishes: Thinly sliced for extra crunch. Feel free to mix and match your favorites! You can definitely use frozen shrimp. Thaw them in the fridge overnight or run them under cold water. Pat them dry before marinating. Frozen shrimp may need a minute more to cook. Just ensure they’re fully cooked before serving. For the full recipe, check out the details! Honey garlic shrimp tacos are simple and fun to make. We covered the key ingredients, such as shrimp, honey, and tortillas. I shared steps for marinating, cooking, and assembling. Tips helped you achieve perfectly cooked shrimp and enhance flavor. Variations offered ideas for different proteins and dietary needs. Enjoy your tacos with fresh toppings and sides. These tacos please everyone and keep meal prep easy. Dive in, taste success, and make each bite count!

Honey Garlic Shrimp Tacos Flavorful and Easy Dish

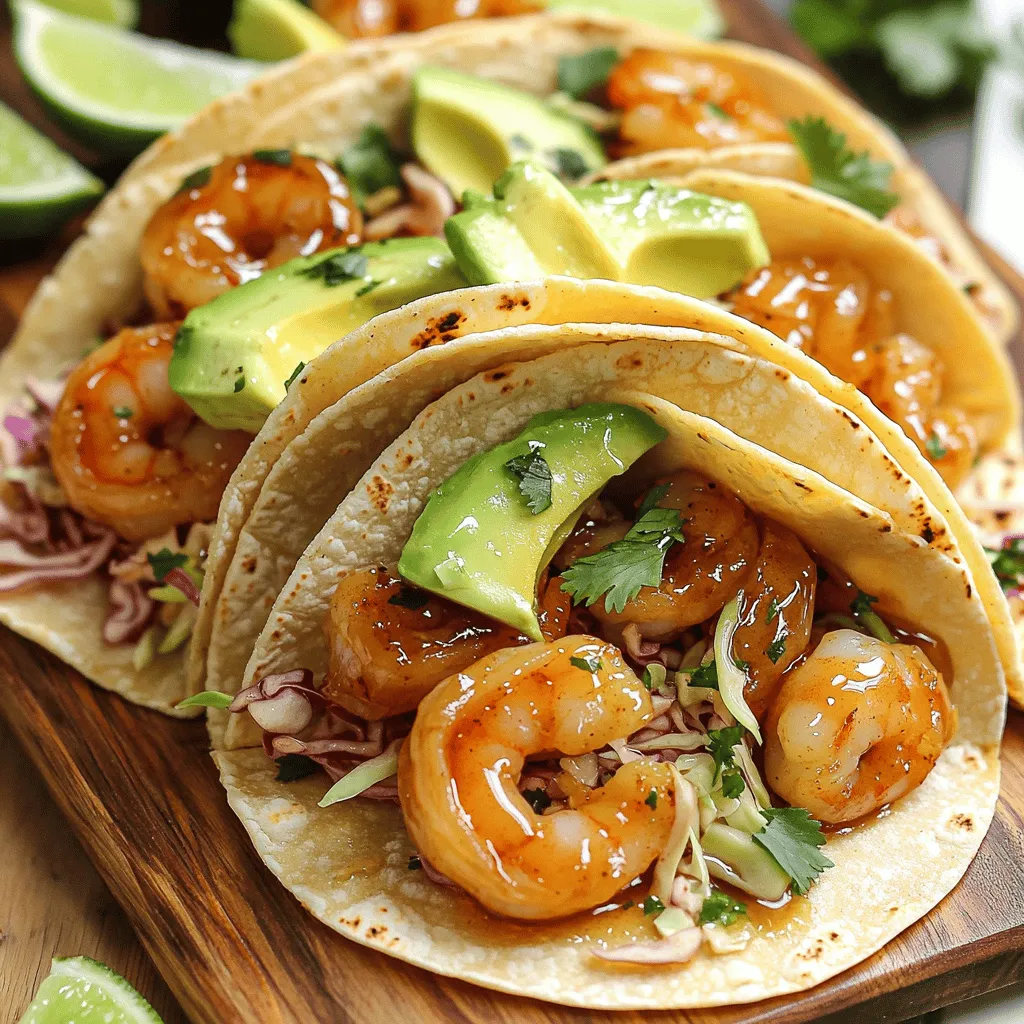
Get ready to wow your taste buds with Honey Garlic Shrimp Tacos! This dish combines sweet honey and rich garlic

- 1 cup jasmine rice - 2 cups water - 1 tablespoon olive oil - 1 teaspoon salt - Zest of 1 lime - Juice of 1 lime - 1/4 cup fresh cilantro, finely chopped - 1/2 teaspoon garlic powder - 1/4 teaspoon black pepper - Optional: 1/4 teaspoon red pepper flakes Using fresh cilantro is key for great flavor. Fresh cilantro adds a bright, green taste that dried herbs just can't match. When you chop the cilantro, use a sharp knife to keep it fresh and vibrant. Choosing high-quality jasmine rice makes a difference too. Look for rice that has a nice aroma and a clean appearance. This type of rice cooks up fluffy and pairs well with zesty flavors. Fresh lime juice is another must-have. It packs a punch that bottled juice can't beat. The zest from the lime adds extra flavor and aroma, giving your rice a fresh kick. Using real ingredients makes your dish stand out. For the full recipe, check out the details earlier. First, rinse the jasmine rice. Place the rice in a fine-mesh strainer. Rinse it under cold running water. Keep rinsing until the water runs clear. This step removes excess starch. It helps make the rice fluffy, not gummy. Next, combine the ingredients in a saucepan. In a medium-sized saucepan, add the rinsed rice, 2 cups of water, and 1 teaspoon of salt. Stir briefly to mix. Bring this mixture to a rolling boil over medium-high heat. Once the water boils, reduce the heat to low. Cover the saucepan with a tight lid. Let it simmer undisturbed for 15 minutes. This allows the rice to absorb all the water and become tender. After 15 minutes, remove the saucepan from the heat. Keep it covered for another 5 minutes. This steaming step is crucial. It helps the rice finish cooking and settle nicely. Now, it’s time to fluff the rice and add flavor. Use a fork to gently fluff the rice. This helps separate the grains. Then, add the olive oil, lime zest, lime juice, chopped cilantro, garlic powder, and black pepper. If you want some heat, add the red pepper flakes. Stir gently until everything is well mixed. Finally, taste the rice. Adjust the seasoning if needed. You can add more lime juice for brightness or salt for flavor. For the full recipe, check out the complete instructions above. - Overcooking or undercooking the rice: This can lead to mushy or hard rice. To avoid this, follow the cooking time and check the rice for doneness. - Not letting the rice steam adequately: Skipping the steaming step can make the rice sticky. Always let it sit covered after cooking for better texture. - Suggestions for additional spices: You can try adding cumin or coriander for extra depth. These spices blend well with the lime and cilantro. - How to brighten flavors with extra lime: A little more lime juice can lift the dish. Add it to taste after cooking for a zesty kick. - Serving suggestions or plating ideas: Use a colorful bowl to make the rice pop. Pair it with grilled veggies or proteins for a complete meal. - Garnishing for visual appeal: Top with fresh cilantro leaves and a lime wedge. This adds color and makes the dish look fresh and inviting. For the full recipe, follow the steps outlined above to create this tasty dish! {{image_4}} You can change up the flavor of your zesty cilantro lime rice easily. - Adding spices: Try adding spices like cumin or coriander. These spices give a warm, earthy taste. You can add about 1/2 teaspoon of either spice when you mix in the lime juice and cilantro. - Incorporating vegetables: You can also add vegetables. Sweet corn or colorful bell peppers work great. Simply sauté the veggies before mixing them with the rice. This adds color and crunch to your dish. Not everyone eats the same way, and that's okay! You can adjust the recipe to fit different diets. - Gluten-free options: This recipe is naturally gluten-free. Just make sure to check your rice brand. Most jasmine rice is gluten-free, but it's good to confirm. - Vegan-friendly swaps: Want it vegan? Swap olive oil for coconut oil or vegetable broth. This keeps the flavors bright and fresh. Pairing the rice with the right foods makes it even better. - Suggested proteins: This rice goes well with grilled chicken, shrimp, or tofu. These proteins bring in extra flavor and make the meal filling. - Complete meal ideas: You could serve the rice with black beans and a fresh salad. This makes a colorful and healthy meal. Just add some avocado slices for creaminess. For a full recipe, check out the [Full Recipe]. To keep your zesty cilantro lime rice fresh, follow these steps: - Cool the rice: Let it cool to room temperature before storing. - Use airtight containers: Store in a glass or plastic container with a tight lid. - Refrigerate: Place the container in the fridge within two hours of cooking. Storing rice correctly prevents spoilage and keeps it tasty for later meals. When it’s time to enjoy your leftover rice, try these methods: - Microwave: Place rice in a bowl with a splash of water. Cover with a damp paper towel. Heat in short bursts, stirring between each to avoid hot spots. - Stovetop: Add rice to a saucepan with a little water. Heat on low, stirring gently until warm. These methods help keep your rice fluffy and avoid a dry texture. If you want to store rice for a longer time, freezing works well. Here’s how to do it: - Cool and portion: Cool the rice and divide it into portions. - Use freezer bags: Place portions in freezer-safe bags. Squeeze out the air and seal. - Label and freeze: Write the date on the bags and store in the freezer. When you’re ready to eat, thaw the rice overnight in the fridge before reheating. To make Zesty Cilantro Lime Rice, start by rinsing 1 cup of jasmine rice under cold water until clear. This helps keep the rice fluffy. Next, add the rinsed rice, 2 cups of water, and 1 teaspoon of salt to a medium saucepan. Bring this mix to a boil over medium-high heat. Once boiling, lower the heat and cover the pan. Let it simmer for 15 minutes or until all the water is absorbed. After that, remove the pan from heat but keep it covered for another 5 minutes. This steaming step is key for perfect texture. Finally, fluff the rice with a fork and mix in olive oil, lime zest, lime juice, chopped cilantro, garlic powder, and black pepper. You can find the Full Recipe for more detailed steps. Jasmine rice is the best choice for cilantro lime rice. It has a lovely aroma and a soft, sticky texture that absorbs flavors well. Long-grain white rice can work too, but it won’t provide the same fragrant taste. Avoid using brown rice, as it takes longer to cook and may not pair well with the zesty flavors. Yes, you can make Zesty Cilantro Lime Rice ahead of time. It stores well in the fridge for about 3 to 4 days. Just place it in an airtight container once cooled. When you're ready to eat, reheat it in the microwave or on the stove with a splash of water to keep it moist. This makes it a great option for meal prep! Zesty Cilantro Lime Rice is easy to make and full of fresh flavor. You learned about key ingredients like jasmine rice, lime juice, and fresh cilantro. Cooking tips helped you avoid common mistakes and suggested ways to enhance flavor. We explored fun variations and how to store leftovers properly. This dish can brighten any meal, so enjoy making it your own. Keep experimenting, and you’ll find the perfect taste for your plate.

Zesty Cilantro Lime Rice Flavorful and Fresh Delight

Are you ready to elevate your meal with a burst of flavor? My Zesty Cilantro Lime Rice combines fresh ingredients

To make the best creamy spinach and artichoke dip, gather these items: - 1 cup fresh spinach, finely chopped - 1 cup canned artichoke hearts, drained and roughly chopped - 1 cup cream cheese, softened to room temperature - 1/2 cup sour cream - 1/2 cup mayonnaise - 1 cup shredded mozzarella cheese - 1/4 cup grated Parmesan cheese - 2 cloves garlic, minced - 1 teaspoon fresh lemon juice - 1/2 teaspoon red pepper flakes (optional, for added heat) - Salt and freshly cracked black pepper to taste For those who want to take their dip to the next level, consider these options: - Fresh herbs like basil or parsley for a burst of freshness - A splash of Worcestershire sauce for depth of flavor - A pinch of smoked paprika for a hint of smokiness Use high-quality ingredients for the best taste. Fresh spinach adds a vibrant flavor. Canned artichokes should be tender, not tough. Choose full-fat cream cheese for richness. If you can, opt for fresh mozzarella. It melts better and gives a creamier texture. Lastly, fresh lemon juice brightens the dip, while freshly cracked pepper enhances the flavors. By selecting premium ingredients, your creamy spinach and artichoke dip will shine. For the full recipe, check the details above. 1. Preheat your oven to 350°F (175°C). This helps the dip get bubbly and brown. 2. In a large bowl, mix cream cheese, sour cream, and mayonnaise. Beat until smooth. 3. Fold in the chopped spinach, artichoke hearts, minced garlic, mozzarella, and Parmesan cheese. Stir gently to mix well. 4. Add fresh lemon juice and red pepper flakes if you want heat. Season with salt and black pepper to taste. 5. Transfer the mixture to a greased baking dish, spreading it evenly. 6. Place the baking dish in the preheated oven. Bake for 20-25 minutes. Watch for a golden top. 7. Once golden and bubbly, take it out and let it cool for about 5 minutes. Serve the dip warm in a nice bowl. Pair it with toasted baguette slices, crispy tortilla chips, or crunchy veggies like carrots and celery. For a pop of color, add freshly chopped parsley or a sprinkle of red pepper flakes on top. Enjoy this creamy treat! You can find the Full Recipe for more details. To get that smooth, creamy texture, start with softened cream cheese. This helps it blend well. Mix the cream cheese, sour cream, and mayonnaise until it is smooth. Use a hand mixer for the best results. When you add the spinach and artichokes, fold them in gently. This keeps the dip fluffy and light. One common mistake is overbaking the dip. Keep a close eye on it in the oven. You want a bubbly top, not burnt edges. Also, avoid using frozen spinach without draining it well. Too much water can make the dip runny. Lastly, taste your mixture before baking. Adjust the seasoning for the best flavor. I love serving this dip with various dippers. Toasted baguette slices add a nice crunch. Crispy tortilla chips are a classic choice too. For a healthier option, use crunchy veggies like carrots, celery, or bell peppers. They bring a fresh taste that pairs well with the dip. For more ideas, check the Full Recipe for details on dippers. {{image_4}} Want to add some heat? A spicy spinach and artichoke dip is perfect! To make it spicy, add 1 teaspoon of cayenne pepper. You can also use 1/2 teaspoon of hot sauce. These small changes bring big flavor. The heat pairs nicely with the creamy texture. Serve this dip with crunchy tortilla chips for a fun kick! Looking for vegetarian or vegan options? You can make this dip without animal products! For a vegan version, swap cream cheese with cashew cream or vegan cream cheese. Use plant-based sour cream and mayonnaise. Nutritional yeast can give you that cheesy flavor without dairy. Your dip will still taste creamy and rich! Not a fan of certain cheeses? You can easily switch them out. Instead of mozzarella, try gouda or cheddar for a unique taste. For a sharper flavor, use aged provolone or feta. You can mix and match to find what you love. Each cheese brings a new twist to this classic dip. Check out the full recipe for more ideas! After enjoying your creamy spinach and artichoke dip, let any leftovers cool. Once cooled, transfer the dip into an airtight container. This helps keep the flavors fresh. Store it in the fridge for up to three days. Always remember to cover it tightly to avoid drying out. If you want to save some for later, freezing works well. First, let the dip cool completely. Then, place it in a freezer-safe container. Seal it tightly to prevent freezer burn. You can freeze it for up to two months. When you’re ready to enjoy it, just thaw it overnight in the fridge. To reheat your dip, preheat the oven to 350°F (175°C). Place the dip in an oven-safe dish. Cover it with foil to keep it moist. Heat for about 20 minutes or until it’s warm throughout. You can also use the microwave. Heat in short bursts, stirring in between until hot. Enjoy your dip warm for the best taste. For the full recipe, visit the main article. Yes, you can make this dip ahead of time. Prepare it and store it in the fridge. Just cover it tightly to keep it fresh. You can bake it right before serving. This way, it stays warm and bubbly for your guests. If you want to substitute cream cheese, try using Greek yogurt. It gives a nice tang and creamy texture. You can also use ricotta cheese for a lighter option. These choices will keep your dip smooth and tasty. You can keep the dip in the fridge for about three to five days. Make sure to store it in an airtight container. If it starts to smell or look off, it's best to toss it. Always trust your senses when it comes to food safety. For the full recipe, check the section above. This blog post covered everything you need to make a great dip. We talked about essential ingredients, preparation steps, and baking tips. You learned how to achieve a creamy texture and avoid common mistakes. We even explored fun variations and storage methods. Now you’re ready to impress your friends and family with your dip skills. Remember, the right ingredients and simple steps lead to delicious results! Enjoy your tasty creation and share it with others.

Creamy Spinach and Artichoke Dip Hearty Flavorful Treat

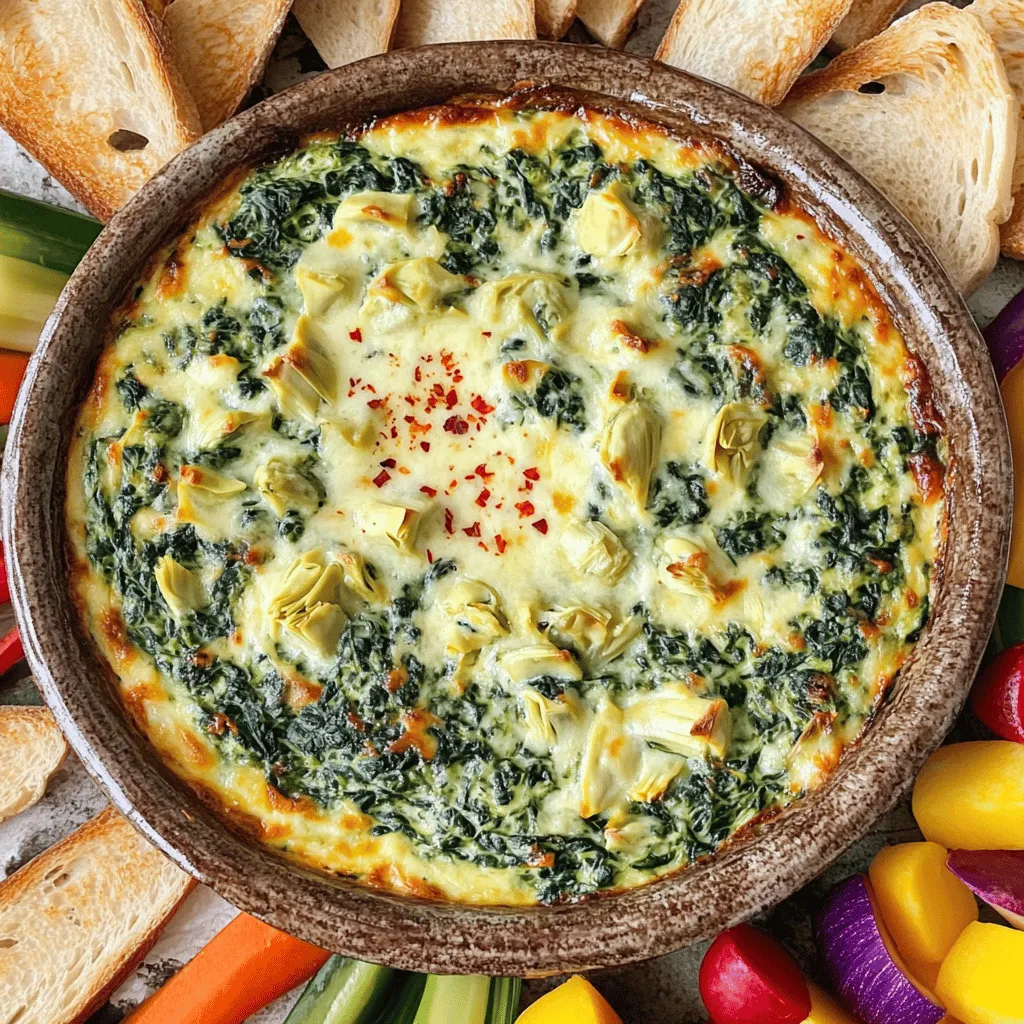
Are you ready to dig into a creamy spinach and artichoke dip that’s bursting with flavor? This dish is perfect

- 400g spaghetti - 6 cloves garlic, thinly sliced - 1/2 cup extra-virgin olive oil - 1 teaspoon red pepper flakes - 1/2 cup fresh parsley, finely chopped - Salt, to taste - Zest of 1 lemon (about 1 tablespoon) - Freshly grated Parmesan cheese (optional) To create a simple yet delicious Spaghetti Aglio e Olio, gather these key ingredients. The spaghetti forms the base of this dish. I love the way it absorbs the garlic oil. Garlic is vital too, as it adds a rich flavor. Slice it thinly for even cooking. Extra-virgin olive oil gives the dish a silky texture. Red pepper flakes bring a spicy kick, but you can adjust the amount to your taste. Fresh parsley adds a pop of color and brightness. The zest of lemon enhances the flavor further, while Parmesan cheese can be a nice touch, if you like. Follow the Full Recipe to enjoy a meal that highlights these simple, fresh ingredients. To start, you need a large pot. Fill it with water and add a generous amount of salt. Bring the water to a rolling boil. Now, add your spaghetti. Cook it according to the package instructions, usually 8 to 10 minutes. You want it to be al dente, which means it should be firm but not hard. Before you drain the spaghetti, reserve 1 cup of the cooking water. This water is starchy and will help your sauce stick later. After that, drain the spaghetti in a colander. Next, grab a large skillet. Pour in half a cup of extra-virgin olive oil. Heat it over medium heat. Once the oil is hot, add your thinly sliced garlic. Stir the garlic often to prevent it from burning. You want it to turn a lovely golden brown. This should take about 2 to 3 minutes. Keep a close eye, as burnt garlic can ruin your dish. Once the garlic is golden, it’s time to add some heat. Sprinkle in 1 teaspoon of red pepper flakes. Sauté for another 30 seconds. This will give the oil a spicy kick. Now, add the drained spaghetti to the skillet with the garlic oil. Pour in a splash of the reserved pasta water. Toss everything well to coat the spaghetti in the oil. If it seems too dry, add more reserved water until it reaches the desired consistency. Finish by folding in fresh parsley and lemon zest for added flavor. You can also add salt to taste. If you like, top your dish with freshly grated Parmesan cheese. Enjoy your Spaghetti Aglio e Olio! For the full recipe, check out the detailed instructions above. To avoid burning garlic, keep the heat at medium. Stir the garlic often and watch it closely. If it starts to brown too fast, lower the heat. Golden garlic adds flavor, while burnt garlic ruins the dish. For the right pasta consistency, cook spaghetti until it is al dente. This means it should be firm to the bite. Reserve some pasta water before draining. You can add this water later to adjust the sauce's texture. If you want to adjust the spice level, start with less red pepper flakes. You can always add more later. For a milder dish, use just a pinch or omit the flakes. Using fresh herbs, like parsley, gives a bright taste. Dried herbs work too, but they lack the same freshness. If you use dried herbs, add them early in the cooking process so they can release their flavor. {{image_4}} You can easily add protein to your Spaghetti Aglio e Olio. Shrimp is a great choice. Just sauté it in the garlic oil until pink. Chicken works well too. Cut it into small pieces and cook in the oil. For a vegetarian option, use tofu. Press and cube it, then fry until golden. If you want a vegan meal, use firm tofu and skip the cheese. It adds texture and protein without animal products. Each protein option gives a different taste, making your dish more exciting. Spaghetti Aglio e Olio is a blank canvas. You can play with flavors. Try adding fresh herbs like basil or oregano. They brighten up the dish. You can also add spices like smoked paprika for depth. Sun-dried tomatoes or olives can add a rich, tangy flavor. Chop them up and mix them in with the spaghetti. This gives the dish a Mediterranean twist. Don't be afraid to experiment! Your taste buds will thank you. For the full recipe, check out the Spaghetti Aglio e Olio with a Kick. To store Spaghetti Aglio e Olio, let it cool first. Place it in an airtight container. This keeps the dish fresh. It will last up to three days in the fridge. To enjoy it later, you could freeze it. However, freezing can change the texture of the dish. I recommend enjoying it fresh for the best taste. When reheating, use low heat on the stove. Add a splash of reserved pasta water to help revive the sauce. This keeps the flavors strong. You can also use a microwave. Heat in short bursts, stirring in between. This way, the dish stays moist and tasty. If it feels dry, add a bit more olive oil or water. Aglio e Olio means "garlic and oil" in Italian. This dish highlights these two simple flavors. You can taste the garlic's warmth paired with the rich olive oil. It is a classic dish from Naples, Italy. Yes, you can use gluten-free pasta for Spaghetti Aglio e Olio. Many brands make great gluten-free options. Just follow the cooking time on the package. The rest of the recipe remains the same. To make this dish less spicy, reduce the red pepper flakes. Start with half a teaspoon instead of one. You can also leave them out entirely. The garlic and oil will still taste great without the heat. Good side dishes include a fresh green salad, garlic bread, or roasted vegetables. A simple arugula salad adds a nice peppery contrast. Garlic bread makes the meal feel cozy and warming. To make this a complete meal, add protein. Grilled chicken, shrimp, or chickpeas work well. You can also toss in some veggies like spinach or cherry tomatoes. This not only adds nutrition but also flavor. You can find the full recipe in the earlier section. Spaghetti Aglio e Olio is a simple yet tasty dish. We explored key ingredients like garlic, olive oil, and more. I shared how to cook pasta perfectly and make the garlic oil. We also looked at tips to enhance flavor and fun variations. Remember, cooking is about experimenting. Don’t be afraid to make this dish your own. Enjoy your delicious Spaghetti Aglio e Olio!

Spaghetti Aglio e Olio Simple and Flavorful Recipe

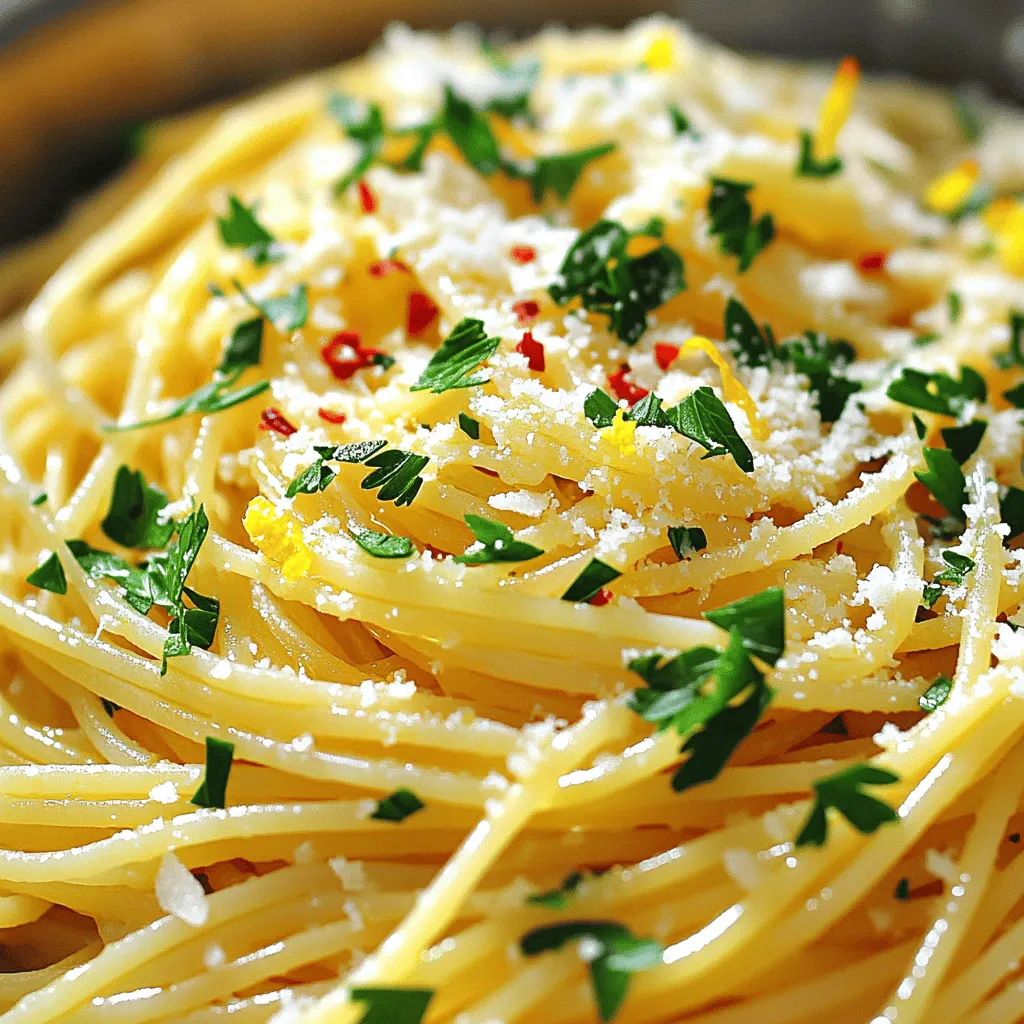
Craving a simple yet delicious Italian dish? You’re in the right place! Spaghetti Aglio e Olio combines just a few

To make garlic herb roasted chicken, you need a few key items: - 1 whole chicken (approximately 4-5 lbs) - 1 tablespoon olive oil - 1 tablespoon unsalted butter, softened to room temperature - 6 cloves garlic, minced finely - Zest of 1 large lemon - Juice of 1 large lemon - Salt and freshly ground black pepper, to taste The herbs and spices add flavor and aroma to the dish: - 2 teaspoons fresh thyme, finely chopped (or 1 teaspoon dried thyme) - 2 teaspoons fresh rosemary, finely chopped (or 1 teaspoon dried rosemary) - 2 teaspoons fresh parsley, finely chopped You can enhance the meal with some tasty veggies: - Mixed fresh vegetables, such as carrots, potatoes, and onions, cut into uniform pieces for roasting - Drizzle with olive oil and season with salt and pepper before roasting The garlic herb roasted chicken is simple yet full of flavor. Each ingredient plays a role in making this dish delicious. For the complete recipe, check out the Full Recipe. Start by preheating your oven to 425°F (220°C). This gives the chicken a great roast. Next, prepare a roasting pan. You can grease it lightly or use parchment paper for easy cleanup. Now, let's make the herb paste. In a small bowl, mix together: - 6 cloves garlic, minced - 1 tablespoon olive oil - 1 tablespoon unsalted butter, softened - 2 teaspoons fresh thyme, finely chopped - 2 teaspoons fresh rosemary, finely chopped - 2 teaspoons fresh parsley, finely chopped - Zest of 1 large lemon - Salt and freshly ground black pepper, to taste Stir until smooth and fragrant. This herb paste is key to adding flavor. Now, let's ready the chicken. First, pat it dry with paper towels. This helps keep the skin crispy. Next, gently loosen the skin at the neck end. Be careful not to tear it. Rub half of the herb paste under the skin. This gets flavor deep into the meat. Use the rest of the paste to coat the outside of the chicken. Stuff the cavity with a halved lemon and any leftover herb mix. If you want to add vegetables, cut them into uniform pieces and place them around the chicken. Drizzle them with olive oil and sprinkle with salt and pepper. Place the chicken in the oven. Roast for about 1 hour and 20 minutes. The chicken is done when its internal temperature reaches 165°F (74°C). Baste it with its own juices halfway through for extra flavor. To get that perfect crispy skin, remember to dry the chicken well. The loose skin helps, too. Basting with juices keeps the chicken moist but also helps the skin get crispy. After roasting, let the chicken rest for 10-15 minutes before carving. This allows the juices to redistribute. Trust me, it makes a big difference in taste and texture. You can check out the Full Recipe for all the steps and tips. Enjoy your flavorful Garlic Herb Roasted Chicken! Marinating your chicken is a key step. I recommend marinating for at least two hours. This gives the herbs time to seep into the meat. Use a mix of olive oil, lemon juice, and garlic to create a tasty marinade. You can also add salt and pepper to enhance the flavor. If you have time, try marinating overnight. This makes the chicken even more delicious! Basting adds moisture and flavor to your chicken. Halfway through cooking, use a spoon to pour the chicken's juices over the top. This keeps the skin crispy and flavorful. If you want extra flavor, baste with melted butter mixed with herbs. It adds richness and keeps the meat juicy. Don’t forget to baste every 20 minutes for best results! A meat thermometer is your best friend. Insert it into the thickest part of the chicken, avoiding bones. Aim for an internal temperature of 165°F (74°C). This ensures your chicken is safe to eat and perfectly cooked. If you don’t have a thermometer, check if the juices run clear when you cut into it. Using a thermometer gives you peace of mind with every bite. For the full recipe, check out the Garlic Herb Roasted Chicken instructions. {{image_4}} You can change the herbs in your garlic herb roasted chicken to suit your taste. Instead of thyme, try using sage for a warm flavor. Oregano gives it a nice twist, too. You could also add a pinch of red pepper flakes for some heat. If you have fresh herbs, use them! They provide a brighter taste. Both the Instant Pot and oven work well for this recipe, but they give different results. The oven method offers a golden, crispy skin that is hard to beat. It also fills your kitchen with a great smell. The Instant Pot cooks the chicken faster and keeps it juicy. If you choose the Instant Pot, set it for about 6-8 minutes per pound. Always check that the internal temperature reaches 165°F (74°C). Adding a sauce can elevate your meal. A creamy garlic sauce pairs well with the roasted chicken. Simply mix heavy cream, garlic, and herbs for a rich topping. Alternatively, a tangy lemon sauce adds brightness. To make it, combine lemon juice, butter, and a bit of broth. This adds a fresh flavor that complements the herbs. You can also serve the chicken with a side of chimichurri for a zesty kick. For more ideas, check out the Full Recipe. After enjoying your garlic herb roasted chicken, store any leftovers right away. Place the chicken in an airtight container. This keeps the chicken fresh and tasty. Make sure to add any leftover vegetables too. Store it in the fridge for up to four days. If you want to keep it longer, freezing is a great option. When you’re ready to eat your leftovers, reheating is key. Preheat your oven to 350°F (175°C). Place the chicken in an oven-safe dish and cover it with foil. This keeps moisture in. Heat for about 20-30 minutes, or until warm. You can also use the microwave. Just heat it on medium power for a few minutes. Check often to avoid drying it out. To freeze your garlic herb roasted chicken, ensure it’s completely cool. Wrap it tightly in plastic wrap and then in aluminum foil. This prevents freezer burn. Label the package with the date. You can freeze it for up to three months. When you’re ready to eat, thaw it in the fridge overnight. Then, reheat as mentioned above for a tasty meal. For the full recipe, check out the [Full Recipe]. Roast chicken for about 20 minutes per pound. So, a 4-pound chicken takes about 1 hour and 20 minutes. Always check the temperature with a meat thermometer. It should reach 165°F (74°C) in the thickest part. Using frozen chicken is not ideal for this recipe. It is best to thaw the chicken fully before roasting. Cooking frozen chicken may lead to uneven cooking and tough meat. Garlic roasted chicken works well with several herbs. Here are some great choices: - Thyme - Rosemary - Parsley - Sage - Oregano These herbs add depth and flavor to your dish. Check for doneness by using a meat thermometer. Insert it into the thickest part of the thigh. The chicken is done when it reads 165°F (74°C). You can also check if the juices run clear when you cut into it. Yes, you can cook this chicken on a grill! Set the grill to medium heat. Cook the chicken until it reaches the right temperature. Grilling adds a nice smoky flavor and crispy skin. For full details, check out the Full Recipe. You learned how to make Garlic Herb Roasted Chicken. We covered the key ingredients, herbs, and spices. I shared the steps for a crispy skin and juicy meat. Tips like marinating and basting will enhance flavor. You can mix it up with substitutions and different cooking methods. Proper storage keeps your leftovers tasty, and I answered common questions. Cook confidently and enjoy your meal!

Garlic Herb Roasted Chicken Flavorful and Simple Meal

If you’re craving a meal that’s both tasty and easy, you’ve found it! Garlic Herb Roasted Chicken is a simple

- 4 large sweet potatoes - 1/2 cup packed brown sugar - 1/4 cup unsalted butter - 2 cups mini marshmallows - Ground cinnamon - Ground nutmeg - Pure vanilla extract - Large pot - Mixing bowls - Potato masher - Baking dish For this sweet potato casserole, I love using four large sweet potatoes. They give a rich flavor. You will also need brown sugar to sweeten the dish. Unsalted butter adds creaminess. Mini marshmallows on top melt beautifully, making it a treat. You can add optional spices like ground cinnamon and nutmeg for warmth. A splash of pure vanilla extract can enhance the taste too. Gather a large pot for boiling, mixing bowls for combining, and a potato masher for smoothness. Finally, a baking dish helps to bake it all together. This recipe is easy and fun. Check out the Full Recipe for more details! - Boiling the sweet potatoes: Start by peeling and cutting 4 large sweet potatoes into 1-inch cubes. Place them in a large pot and cover them with water. Bring the water to a boil, and cook the sweet potatoes for about 15-20 minutes. They should be tender enough to pierce with a fork. Once cooked, drain the water and let the sweet potatoes cool slightly. - Mashing the sweet potatoes: Transfer the sweet potatoes to a large mixing bowl. Use a potato masher or fork to mash them until smooth. Make sure there are no lumps. A creamy texture is key to a great casserole. - Combining the sweet potatoes with other ingredients: In the bowl with your mashed sweet potatoes, add 1/2 cup packed brown sugar, 1/4 cup melted unsalted butter, 1/2 teaspoon ground cinnamon, 1/4 teaspoon ground nutmeg, and 1/4 teaspoon salt. Pour in 1/2 cup whole milk, 2 large lightly beaten eggs, and 1 teaspoon pure vanilla extract. - Ensuring a smooth texture: Stir all the ingredients together vigorously. Mix until the mixture is creamy and uniform. This step helps to blend the flavors well. - Initial baking for base flavors: Preheat your oven to 350°F (175°C). Carefully pour the sweet potato mixture into a greased 9x13 inch baking dish. Spread it evenly across the dish. Bake for 25 minutes. This allows the flavors to meld beautifully. - Final baking with marshmallows for topping: After 25 minutes, remove the dish from the oven. Evenly sprinkle 2 cups of mini marshmallows over the top. Return the dish to the oven for another 10-15 minutes. Bake until the marshmallows are golden brown and bubbly. This adds a sweet, gooey topping to your casserole. Follow these steps closely for a delightful sweet potato casserole. For the full recipe, refer to the provided link. Enjoy the sweet flavors and cozy textures! To avoid lumps in your mashed sweet potatoes, I recommend cooking them until they are very soft. This usually takes around 15-20 minutes of boiling. Drain them well so there’s no water left. When you mash, use a potato masher or a fork for a smooth finish. If you want a creamy consistency, add whole milk and melted butter while mashing. This step makes your casserole velvety. To bring out the best flavor, consider adding spices like ground cinnamon and nutmeg. These spices pair well with sweet potatoes. For fresh taste, use fresh sweet potatoes rather than canned ones. Fresh sweet potatoes have more flavor and nutrients. If you must use canned, choose ones with no added sugar for a healthier option. For serving, try using individual bowls. This adds a nice touch to your meal. Garnish each bowl with a sprinkle of cinnamon. You can also add a dollop of whipped cream on the side. Both choices make the dish look inviting and delicious. For a festive touch, consider adding a few whole marshmallows on top before baking for a beautiful finish. Enjoy making your sweet potato casserole look as good as it tastes! {{image_4}} To make a vegan sweet potato casserole, replace the dairy ingredients. Use almond milk or coconut milk in place of whole milk. For a buttery flavor, substitute unsalted butter with coconut oil or vegan butter. Eggs can also be swapped out. Use flax eggs by mixing one tablespoon of ground flaxseed with three tablespoons of water. Let this sit for a few minutes to thicken. It works well as a binding agent in your casserole. Adding nuts can bring a crunchy texture to your casserole. Pecans or walnuts are great choices. Chop them roughly to mix in or sprinkle on top. Toasting the nuts first enhances their flavor. Just spread them on a baking sheet and roast at 350°F (175°C) for about 5-7 minutes. Keep an eye on them to avoid burning. Instead of brown sugar, try maple syrup or honey. Maple syrup gives a unique flavor and is less processed. Honey is sweeter and adds depth. However, each sweetener has its pros and cons. Maple syrup can make your casserole a bit more liquidy. Honey may not work for strict vegans. Adjust the amount based on your taste preference. For a full list of ingredients, check the Full Recipe. To keep your sweet potato casserole fresh, store leftovers in the fridge. Use an airtight container for best results. This keeps the flavors vibrant and prevents odors from mixing. If you want to save some for later, freezing is a great option. First, let it cool completely. Then, place it in a freezer-safe container. Be sure to leave some space at the top for expansion. Label it with the date so you can track how long it's been frozen. When reheating in the oven, preheat to 350°F (175°C). Place the casserole in a baking dish and cover it with foil. This helps retain moisture. Heat for about 20-25 minutes, or until it's warmed through. For the microwave, use a microwave-safe dish. Heat in short intervals, about 1-2 minutes at a time. Stir between intervals to keep the texture smooth. In the fridge, your sweet potato casserole lasts about 3-5 days. Look for signs of spoilage, like an off smell or mold. If you see any of these, it’s best to toss it. In the freezer, it can stay good for up to 3 months. Always check before using. Enjoy your Heavenly Sweet Potato Delight with confidence! Yes, you can make sweet potato casserole ahead of time. Here’s how: - Prepare the sweet potato mix as per the recipe. - Spoon it into your baking dish. - Cover it tightly with plastic wrap. - Store it in the fridge for up to two days. When you're ready to bake, remove the wrap. Bake it for about 25 minutes at 350°F (175°C). This method helps the flavors develop well. If you don’t like marshmallows, you have many options: - Use crushed graham crackers for a crunchy top. - Try pecans for a nutty flavor and texture. - Coconut flakes can add a nice sweetness. - For a savory twist, sprinkle some cheese on top. These alternatives can bring a new taste to your casserole. To lower the sweetness, here are some tips: - Cut back on the brown sugar. Start with 1/4 cup. - You may use unsweetened applesauce instead of sugar. - Add a bit more salt to balance flavors. - Consider using spices like nutmeg or cinnamon to enhance taste without sugar. Adjusting these ingredients helps create a balanced dish you will enjoy. We covered how to make a delicious sweet potato casserole. We began with the essential ingredients and tools you'll need. Then, I detailed the step-by-step process, from boiling to baking. I shared tips for perfect texture and ways to add flavor. You also learned about variations like vegan options and nutty additions. Lastly, we discussed storage and reheating tips to keep your dish fresh. Enjoy making this tasty casserole for your next meal!

Sweet Potato Casserole with Marshmallows Simple Recipe

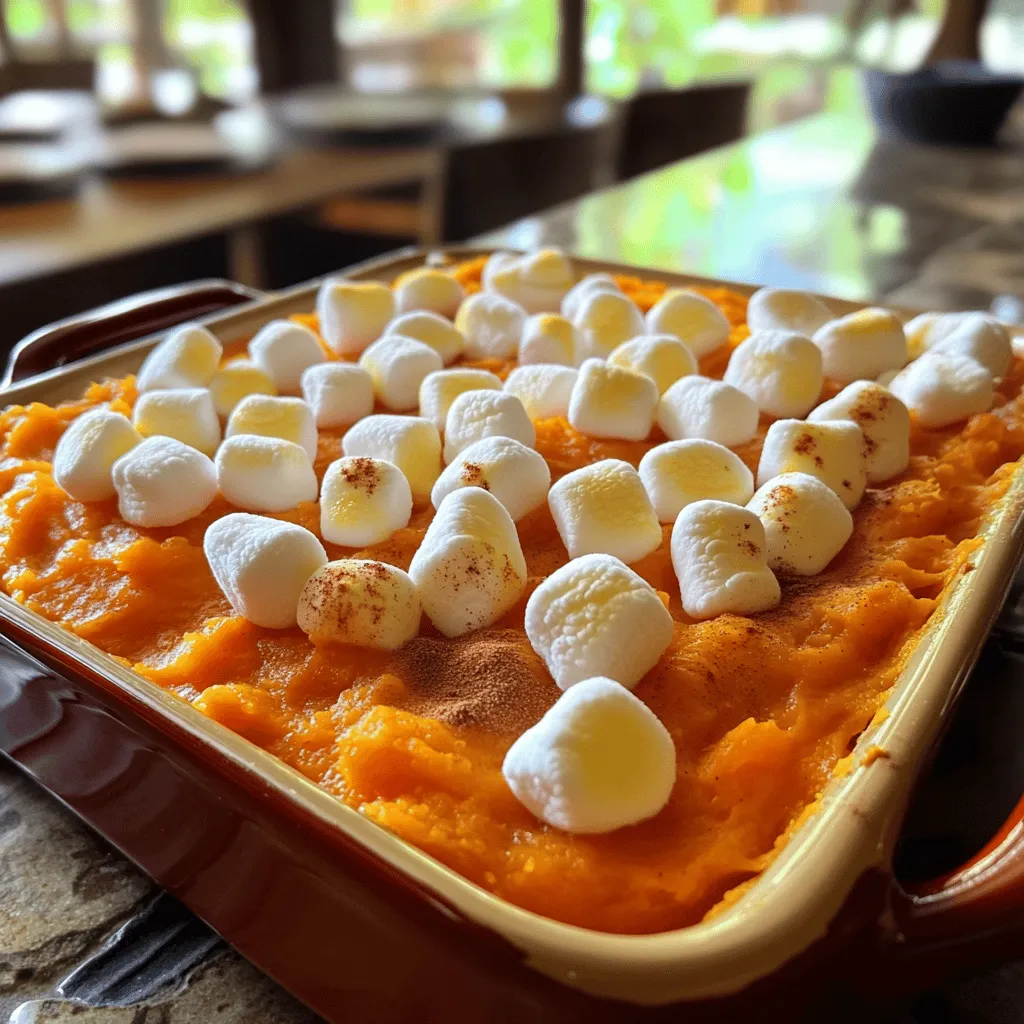
Are you ready to impress your family with a delicious Sweet Potato Casserole with Marshmallows? This simple recipe lets you

To make this creamy dessert, you will need the following ingredients: - 1 ½ cups chocolate cookie crumbs - ½ cup unsalted butter, melted - 2 cups cream cheese, softened to room temperature - 1 cup powdered sugar - 1 teaspoon pure vanilla extract - 1 cup heavy whipping cream, chilled - ½ cup unsweetened cocoa powder - ½ cup semi-sweet chocolate chips, melted (for drizzling) - Fresh raspberries or strawberries, for garnish These ingredients create a smooth and rich cheesecake that is easy to make. The chocolate cookie crumbs form a tasty crust. The cream cheese gives it a creamy texture, while the cocoa adds a deep chocolate flavor. You do not need many tools to make this cheesecake. Here’s what you will need: - Medium mixing bowl - Large mixing bowl - Electric mixer - 9-inch springform pan - Spatula - Measuring cups and spoons - Plastic wrap or a lid Having the right tools helps you work faster and makes the process fun. To make your cheesecake even prettier, consider these garnishes: - Extra melted chocolate for drizzling - Fresh berries like raspberries or strawberries - Whipped cream for a fluffy touch These garnishes add color and flavor, making your dessert look stunning. You can also mix and match to find your favorite combination. For the full recipe, check out the Choco Delight No-Bake Cheesecake. To start, gather your ingredients for the crust. You need chocolate cookie crumbs and melted butter. In a medium bowl, mix the cookie crumbs and butter. Stir until it looks like damp sand. Press this mixture into the bottom of a 9-inch springform pan. Use your fingers or the back of a cup to pack it down. Make sure it's even and firm. This step creates a solid base for your cheesecake. Once done, put the pan in the fridge to chill while you work on the filling. Now, let’s make the filling. First, grab a large bowl and add softened cream cheese. Beat it with an electric mixer until smooth. This takes a minute or two. Next, slowly add powdered sugar and vanilla extract. Mix until everything is well blended. In a separate bowl, whip the chilled heavy cream. You want soft peaks, so be careful not to whip it too much. After that, sift cocoa powder over the cream cheese mix. Fold it in gently with a spatula. Make sure there are no lumps. Now you can pour this rich filling over the prepared crust, smoothing the top nicely. Once your filling is smooth, it’s time to chill. Cover the cheesecake with plastic wrap or a lid. Place it in the fridge for at least 4 hours. For the best taste, leave it overnight. When it's set, melt semi-sweet chocolate chips in a microwave-safe bowl. Heat in 20-second intervals until smooth. Drizzle the melted chocolate over the cheesecake. For a fancy touch, add fresh raspberries or strawberries on top. Enjoy your no-bake chocolate cheesecake! For a detailed guide, check the Full Recipe. When making no-bake chocolate cheesecake, some simple mistakes can ruin your dessert. Here are a few to watch for: - Over-mixing the cream cheese: This can make it too soft. Mix just until smooth. - Not chilling long enough: If you don’t chill it for at least 4 hours, it may not set well. - Skipping the crust: A good crust adds flavor and texture. Don’t skip it! The right texture is key to a great cheesecake. Here’s how to get it just right: - Use softened cream cheese: This helps you mix it smoothly. Take it out of the fridge early. - Whip the heavy cream properly: Aim for soft peaks. This keeps your cheesecake light. - Fold gently: When adding cocoa, fold it in slowly. This helps keep the airy texture. Serving this cheesecake can be fun and creative. Try these ideas: - Garnish with fresh berries: Raspberries or strawberries add color and taste. - Drizzle with chocolate: Melted chocolate on top makes it extra special. - Pair with coffee or tea: A warm drink balances the rich cheesecake. These tips will make your no-bake chocolate cheesecake a hit at any gathering! You can find the Full Recipe to guide you through the steps. {{image_4}} You can easily add fun flavors to your chocolate cheesecake. For a mint twist, mix in 1 teaspoon of mint extract. This adds a refreshing taste. If you prefer a fruity touch, add the zest of one orange or lemon. This brightens the dessert and pairs well with chocolate. Experimenting with flavors makes your cheesecake unique! You can change up the crust to suit your taste. Instead of chocolate cookies, try crushed graham crackers for a classic taste. If you like nuts, use ground almonds or walnuts. Combine them with melted butter for a crunchy base. This gives your cheesecake a different texture and flavor that you might love. You can make this cheesecake dairy-free or vegan! Replace cream cheese with a dairy-free cream cheese option. Use coconut cream instead of heavy cream for a rich texture. For the sweetness, consider maple syrup or agave instead of powdered sugar. These swaps keep the cheesecake creamy and delicious without dairy. You can enjoy this treat while sticking to your diet! For the full recipe, check [Full Recipe]. To keep your no-bake chocolate cheesecake fresh, wrap it well. Use plastic wrap or aluminum foil. If you have a springform pan, you can cover it with the lid. Make sure it is tightly sealed. This helps prevent it from absorbing odors in the fridge. Freezing is a great option if you want to keep it longer. First, let the cheesecake set in the fridge for at least four hours. Once set, slice it into individual pieces. Wrap each piece in plastic wrap, then place them in an airtight container. This keeps them fresh for up to three months. Remember to thaw in the fridge overnight before serving again. Your cheesecake stays good for about five days in the fridge. Check for any off-smells or changes in texture. If the top starts to look dry or cracked, it’s best to eat it quickly. Serve it chilled for the best taste. For more ideas, check out the Full Recipe to explore ways to enjoy your cheesecake. The key ingredients for this cheesecake are: - 1 ½ cups chocolate cookie crumbs - ½ cup unsalted butter, melted - 2 cups cream cheese, softened - 1 cup powdered sugar - 1 teaspoon pure vanilla extract - 1 cup heavy whipping cream, chilled - ½ cup unsweetened cocoa powder - ½ cup semi-sweet chocolate chips, melted These ingredients work together to create a rich and creamy dessert. It takes about 4 hours for the cheesecake to set in the fridge. I recommend chilling it overnight for the best flavor and texture. The longer it chills, the firmer it will become. Yes, you can use alternative sweeteners. I suggest using stevia or monk fruit sweetener. Just make sure to adjust the amount according to the sweetness level you prefer. If your cheesecake is too runny, there are a few things you can try. First, make sure you whipped the cream well. If it’s still runny, you can add a bit more cream cheese or even some gelatin. This will help it set better. In this blog post, we explored making a no-bake chocolate cheesecake. You learned about essential ingredients, tools, and fun garnishes. We provided steps for the crust and filling, along with tips to avoid common mistakes. We also discussed flavor variations and proper storage methods. With these insights, you can create a rich and creamy dessert that impresses. Get creative with flavors and enjoy every bite of your cheesecake!

No-Bake Chocolate Cheesecake Easy and Quick Recipe

Craving a sweet treat that’s easy to make and rich in flavor? Look no further! This No-Bake Chocolate Cheesecake is

- Fresh Basil - Heavy Cream - Parmesan Cheese For Creamy Tomato Basil Pasta, fresh basil is key. It gives a bright, aromatic flavor. Heavy cream adds richness and smoothness to the sauce. Parmesan cheese brings a salty, nutty taste that ties it all together. - Red Pepper Flakes - Additional Seasonings If you like some heat, add red pepper flakes. They give a nice kick. You can also use other seasonings like Italian herbs or garlic powder for extra flavor. - Gluten-free Pasta Options - Alternative Cream Options You can swap out regular pasta for gluten-free pasta if needed. Look for options made from rice or corn. For a lighter sauce, try using coconut cream or almond milk instead of heavy cream. This keeps the dish creamy while changing the flavor slightly. For the Full Recipe, check out the detailed steps to make this dish. - Boiling Water and Cooking Time: Start by filling a large pot with water. Add a good amount of salt. Bring the water to a rolling boil. Add 8 oz of pasta to the pot. Cook it according to the package instructions. Aim for al dente, which means it should be firm to the bite. This usually takes about 8 to 10 minutes. - Draining and Reserving Pasta Water: Once the pasta is cooked, take a measuring cup and save ½ cup of the starchy water. This water is magic for the sauce! Then, drain the pasta in a colander and set it aside for later. - Sautéing Garlic and Combining Ingredients: In the same pot, add 2 tablespoons of extra virgin olive oil over medium heat. Wait until the oil is warm, then add 4 cloves of minced garlic. Sauté for about 1 minute. You want the garlic to smell good and turn golden, not brown. Brown garlic can taste bitter! - Simmering for Flavor Development: Next, pour in 1 can of crushed tomatoes. Stir it well and let it simmer. After a minute, slowly add 1 cup of heavy cream. Let the sauce bubble lightly for 3 to 5 minutes. This helps it thicken and taste rich. - Tossing the Pasta and Adjusting Sauce Consistency: Now it’s time for the fun part! Add the drained pasta back into the pot. Toss it gently with the sauce. If the sauce is too thick, use that reserved pasta water. Add a little at a time until you like the sauce's thickness. - Adding Cheese for Creaminess: Finally, stir in ½ cup of grated Parmesan cheese. Watch it melt into the sauce, making it creamy and delicious. Taste the sauce and add salt and pepper as needed. This step ensures every bite is full of flavor. For the full recipe, check the earlier sections to make this delightful dish at home! To make your creamy tomato basil pasta truly silky, you need to focus on the sauce. Start with high-quality ingredients, like fresh tomatoes and cream. When cooking, keep the heat at medium. This helps the sauce thicken without burning. Stir often to ensure even cooking. For the best cheese incorporation, add the Parmesan at the end. It should melt smoothly into the sauce. If it clumps, it means the sauce is too hot. Let it cool a bit before adding cheese. Want to boost the flavor? Add fresh herbs like thyme or rosemary. These add extra depth and aroma. You can also experiment with spices. A dash of smoked paprika gives a lovely warmth. If you like heat, try red pepper flakes. Start with a small pinch. You can always add more, but it’s hard to take it out! Presentation matters! Serve your pasta in wide, shallow bowls. This gives a nice look and allows for easy twirling. Drizzle a bit of olive oil on top for shine. For side dishes, garlic bread is a classic choice. A simple green salad pairs well, too. It adds a fresh crunch that complements the creamy sauce. Try these tips to elevate your creamy tomato basil pasta experience! {{image_4}} For a vegetarian twist, use plant-based cream and cheese. This keeps the dish rich and creamy while catering to vegan diets. Look for options made from nuts or soy. They mimic the texture of heavy cream well. You can also swap Parmesan for a vegan cheese blend. This way, you enjoy the same great taste without dairy. Add grilled chicken or shrimp for extra protein. This not only boosts nutrition but also adds flavor. Simply season your protein with salt and pepper. Cook it separately and toss it with the pasta at the end. This makes each bite hearty and satisfying. If you want variety, try sautéed mushrooms or roasted vegetables instead. If you're avoiding gluten, choose alternative pasta types. Options like chickpea or lentil pasta work nicely. They bring a new flavor and keep the dish filling. Cook them according to package instructions for best results. You can even use zucchini noodles for a lighter version. They add freshness and a fun twist to the classic recipe. For the full recipe, check the provided link. Enjoy customizing your creamy tomato basil pasta! To keep your creamy tomato basil pasta fresh, use airtight containers. Glass or plastic containers work well. Store the pasta in the fridge for up to three days. If you want it to last longer, consider freezing it. For the best texture, reheat your pasta on the stove. Add a little water or cream to keep it moist. Heat it over low heat and stir often. This method helps avoid dryness. You can also use a microwave. Cover the dish with a lid or a damp paper towel. This keeps the steam in and helps the pasta stay creamy. Enjoy your creamy tomato basil pasta! For the full recipe, check the recipe section above. Creamy Tomato Basil Pasta lasts about 3 to 5 days in the fridge. Store it in an airtight container. Make sure it cools down before sealing. This helps keep it fresh and safe to eat. Yes, you can freeze Creamy Tomato Basil Pasta. First, let it cool completely. Then, place it in a freezer-safe container. Seal it tightly to avoid freezer burn. It can last up to 2 months in the freezer. Thaw it in the fridge overnight before reheating. You can add many ingredients to make it your own! Here are some ideas: - Grilled chicken for protein - Shrimp or scallops for seafood lovers - Spinach or kale for extra greens - Roasted veggies like bell peppers or zucchini - Sun-dried tomatoes for added flavor Use your favorite flavors to create a unique dish. For the complete details on how to make this delicious dish, check out the Full Recipe. In this post, we explored making creamy tomato basil pasta from scratch. We discussed key ingredients like fresh basil, heavy cream, and Parmesan cheese. You learned step-by-step instructions for cooking pasta and making the sauce. We shared tips for a silky texture and flavor enhancements. Finally, we covered variations, storage, and answers to common questions. Enjoy creating your own version of this dish. The creamy texture and rich flavors make it a favorite. Try different ingredients and make it your own!

Creamy Tomato Basil Pasta Delightful and Easy Recipe

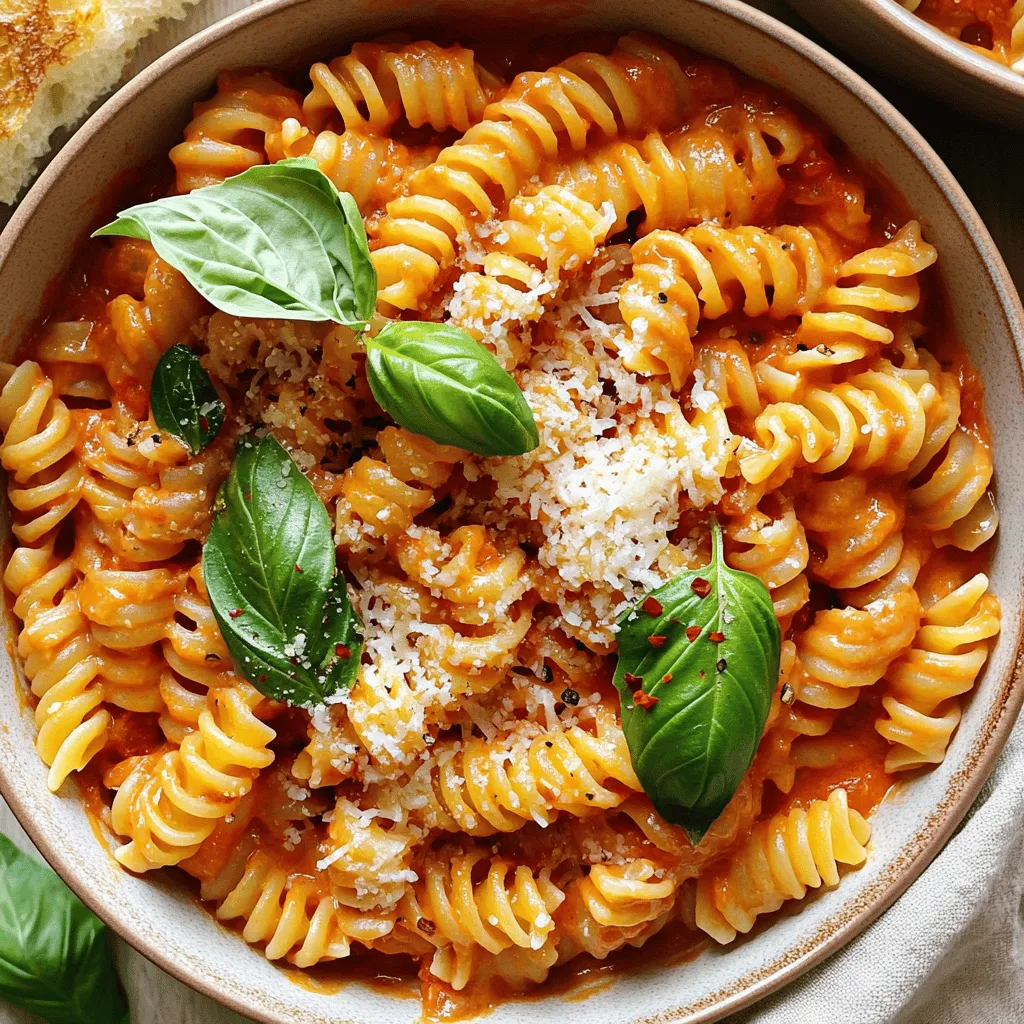
If you’re craving a bowl of comfort food, this Creamy Tomato Basil Pasta is for you! With fresh basil, rich

Older posts
Newer posts
← Previous Page1 Page2 Page3 Page4 … Page26 Next →

dsad

© 2025 mealinmoments • Built with GeneratePress

Our Policies

  • Copyright Policy
  • Cookie Policy
  • GDPR Policy
  • Privacy Policy
  • Disclaimer
  • Terms Of Use

More Information

  • Home
  • About
  • Contact
  • Appetizers
  • Dessert
  • Dinner
  • Drinks
©2025, mealinmoments About Back To Top