![- 2 ripe avocados - 4 slices of whole-grain bread - 4 large eggs - 1 tablespoon white vinegar - 1 lime, juiced - 1/2 teaspoon garlic powder - 1/4 teaspoon crushed red pepper flakes (optional) - Fresh herbs (cilantro or parsley) - Olive oil for drizzling - Salt and pepper to taste When making avocado toast with poached eggs, select ripe avocados. They should feel soft but not mushy. Use whole-grain bread for a nutty flavor and better texture. Large eggs are perfect for poaching, as they have a good amount of white and yolk. For seasoning, white vinegar helps the egg whites set during poaching. Lime juice adds a refreshing zing to the avocado. Garlic powder gives depth, while crushed red pepper flakes bring a hint of heat. You can add salt and pepper to enhance the taste. Feel free to get creative with optional additions. Fresh herbs like cilantro or parsley add brightness. A drizzle of olive oil can enhance richness. First, grab your whole-grain bread. I like to use four slices. Toast them until they turn golden brown. You want that perfect crunch! I often use a toaster or a skillet for this. Once done, remove them and set aside. Next, take the ripe avocados. Cut them in half and scoop out the flesh into a bowl. Add lime juice, garlic powder, salt, and pepper. Use a fork to mash everything together. I like a creamy yet chunky texture. This gives it a nice mouthfeel! Now, it’s time for the eggs. Fill a medium pot with water and add white vinegar. Heat the pot until it simmers softly. Crack one egg into a bowl, then slide it into the water. Do this for the rest of the eggs. Poach them for about 3-4 minutes. The whites should be set, but the yolks need to be runny. Use a slotted spoon to take them out and let them drain on a paper towel. Now, let’s build the toast! Take your toasted bread and spread a thick layer of avocado mash on each slice. Make sure to cover the edges for maximum flavor. Place one poached egg on each slice. This adds a nice touch! Sprinkle with crushed red pepper flakes if you want a bit of spice. Drizzle olive oil over each toast and season with salt and pepper. Finally, sprinkle chopped fresh cilantro or parsley for color and freshness. Enjoy your flavorful avocado toast with poached egg! For the complete recipe, check out [Full Recipe]. - Choosing the right bread: Use whole-grain bread for a hearty base. It adds fiber and keeps you full longer. Sourdough also works well for a tangy kick. Try different types to find your favorite. - Achieving the best avocado consistency: Look for ripe avocados that yield slightly when pressed. Mash them until creamy but still chunky. This gives a nice texture on the toast. - Avoiding common poaching mistakes: Use a gentle simmer, not a rolling boil. Too much movement can ruin the egg shape. Add a splash of vinegar to help the whites set quickly. - Ensuring the yolk remains runny: Poach the eggs for about 3-4 minutes. This time ensures the whites are firm but the yolk is still soft. If you like a firmer yolk, adjust the timing as needed. - Experimenting with spices: Add garlic powder or crushed red pepper flakes for a flavor boost. A sprinkle of smoked paprika can also add depth. Don't be afraid to try new spices! - Suggestions for herb pairings: Fresh herbs like cilantro or parsley brighten the dish. Chives or dill can also bring in unique tastes. Experiment with different herbs to find your perfect match. For the complete recipe, check the [Full Recipe](#). {{image_4}} You can mix up your avocado toast with unique toppings. - Adding smoked salmon: This adds a rich flavor and protein boost. Place a slice on top of your poached egg for a tasty twist. - Incorporating feta cheese: Crumble some feta on the avocado. This adds a salty kick and creamy texture that complements the smooth avocado. The bread you choose can change the whole dish. - Gluten-free alternatives: If you're avoiding gluten, try almond or coconut flour bread. These options maintain a nice texture. - Sourdough or rye variations: Both sourdough and rye add depth and flavor. They give a hearty base that pairs well with avocado. Enhance your toast with some fresh flavors. - Incorporating tomatoes or radishes: Sliced tomatoes add juiciness, while radishes give a nice crunch. Both bring brightness to your dish. - Trying different spices: Experiment with cumin or smoked paprika. These spices can elevate the taste and make your toast pop. Feel free to use the Full Recipe to create your own personalized version! To keep your avocado toast fresh, you need to store it right. First, if you have leftover avocado spread, put it in an airtight container. Make sure to press a piece of plastic wrap on the surface to limit air contact. This helps reduce browning. Store it in the fridge for up to two days. For poached eggs, place them in a separate container. Cover them with water to keep them moist. You can keep them in the fridge for one day. When you want to enjoy your toast again, reheat it carefully. You can put the bread in a toaster or a skillet. Toast it for a few minutes until it is warm and crispy. For the poached eggs, gently warm them in hot water for a minute. This method helps keep the yolk runny and the egg tender. Avoid using the microwave; it can make the eggs tough. To prevent your avocado spread from browning, use lime juice. The acid helps slow down oxidation. In addition, store the spread in a small container to limit air exposure. Use a container with a tight seal to keep it fresh. If you have extra avocado, cut it and store it with the pit. The pit can help slow browning too. To make perfect poached eggs, start with fresh eggs. Fresh eggs hold their shape better. Use a medium pot and fill it with water. Add one tablespoon of white vinegar to help the eggs set. Heat the water to a soft simmer, not a rolling boil. Crack each egg into a small bowl first. Gently slide the egg into the water. Cook for 3-4 minutes for a runny yolk. Use a slotted spoon to lift the egg out. Drain on a paper towel. You can prepare some parts ahead of time. Toast the bread and store it in a sealed bag. Mash the avocados just before serving. To keep the avocado fresh, add lime juice and cover it tightly. If you make the avocado mash early, use it within a few hours. Keep it in the fridge to slow browning. Assemble the toast just before eating for the best taste. There are many delicious toppings you can try. Add smoked salmon for a savory twist. Feta cheese adds a nice creaminess. Fresh tomatoes or radishes can brighten up your toast. For a spicy kick, try sliced jalapeños or hot sauce. You can also mix in herbs like dill or basil for extra flavor. Yes, avocado toast can be healthy every day. Avocados are full of good fats and fiber. They help keep your heart healthy and can lower bad cholesterol. They also contain vitamins like E and C. Pair your toast with a poached egg for protein. This makes a balanced meal that fuels your day. Enjoy without worry! Avocado toast is simple and tasty. It starts with ripe avocados, whole-grain bread, and eggs. Follow the steps to toast bread, mash avocados, and poach eggs perfectly. Don't forget the seasoning and garnishing for extra flavor! You can try different toppings and types of bread to keep things fresh. Store your leftovers properly to enjoy them later. Remember, avocado toast is healthy, making it a great choice every day! Dive in and make your perfect dish today!](https://mealinmoments.com/wp-content/uploads/2025/04/538b9b94-14e2-488e-80f1-40d87478ac07.webp)
Flavorful Avocado Toast with Poached Egg Recipe
Ready to elevate your breakfast game? This flavorful avocado toast with poached egg recipe is a must-try! With creamy avocados,
Ready to elevate your breakfast game? This flavorful avocado toast with poached egg recipe is a must-try! With creamy avocados,
. {{image_4}} You can easily make this creamy soup vegan. Just swap heavy cream for coconut cream. This gives a nice, rich taste. You can also use plant-based milk for a lighter option. Almond or oat milk works well too. If you want to add creaminess, blend in some soaked cashews. It’s a great way to keep the soup smooth and rich without dairy. If you love heat, add some spice! Red pepper flakes are a quick choice. Just sprinkle a pinch while cooking. You can also use fresh jalapeños or serrano peppers. Chop them finely and sauté with the onion. For a smoky flavor, try adding a dash of smoked paprika. This will give your soup a nice kick. Change up your soup with seasonal ingredients! In summer, add fresh tomatoes instead of canned ones. They’ll add a burst of flavor. In fall, try adding roasted butternut squash for sweetness. You can also toss in some fresh spinach or kale for added greens. These adjustments keep your soup exciting and fresh all year round. For the complete recipe, check out the Full Recipe section. After enjoying your creamy tomato basil soup, you want to store leftovers correctly. Allow the soup to cool slightly before you transfer it to an airtight container. Make sure to leave some space at the top, as the soup may expand a little when it freezes. Seal the container tightly. This method helps keep the soup fresh and tasty. You can freeze creamy tomato basil soup for up to three months. To do this, pour the cooled soup into freezer-safe bags or containers. Label the bags with the date. Lay the bags flat in the freezer for easy stacking. When you're ready to eat, just thaw it in the fridge overnight. For the best taste, reheat the soup gently. You can do this on the stove over low heat. Stir often to avoid sticking. If the soup seems too thick, add a splash of water or broth to get the right texture. If you want to use a microwave, heat it in short bursts. Stir in between to heat evenly. Enjoy your creamy tomato basil soup warm and fresh! For complete guidance on making this soup, check out the Full Recipe! You can use coconut cream for a vegan choice. It gives a nice texture and flavor. You can also use half-and-half or whole milk for a lighter option. Both will change the creaminess but keep the soup tasty. This soup lasts about 4 to 5 days in the fridge. Store it in an airtight container to keep it fresh. Always check for any signs of spoilage before eating. Yes, you can make this soup ahead of time. It tastes even better the next day. Just reheat it gently on the stove before serving. For the best flavor, add fresh basil just before serving. For the full recipe, check out the earlier section. This blog post gave you all the tools to make a great soup. We covered key ingredients, step-by-step instructions, and tips to enhance flavor. I shared variations for different tastes and storage tips for leftovers. Remember, great soup comes from using fresh ingredients and avoiding common mistakes. With these insights, you can cook confidently. Embrace your creativity and enjoy every bowl. Happy cooking!](https://mealinmoments.com/wp-content/uploads/2025/04/c013667f-7649-44ef-9588-8ce71e869ce1.webp)
Warm up your kitchen with my creamy tomato basil soup that’s both delicious and simple to make! This comforting recipe
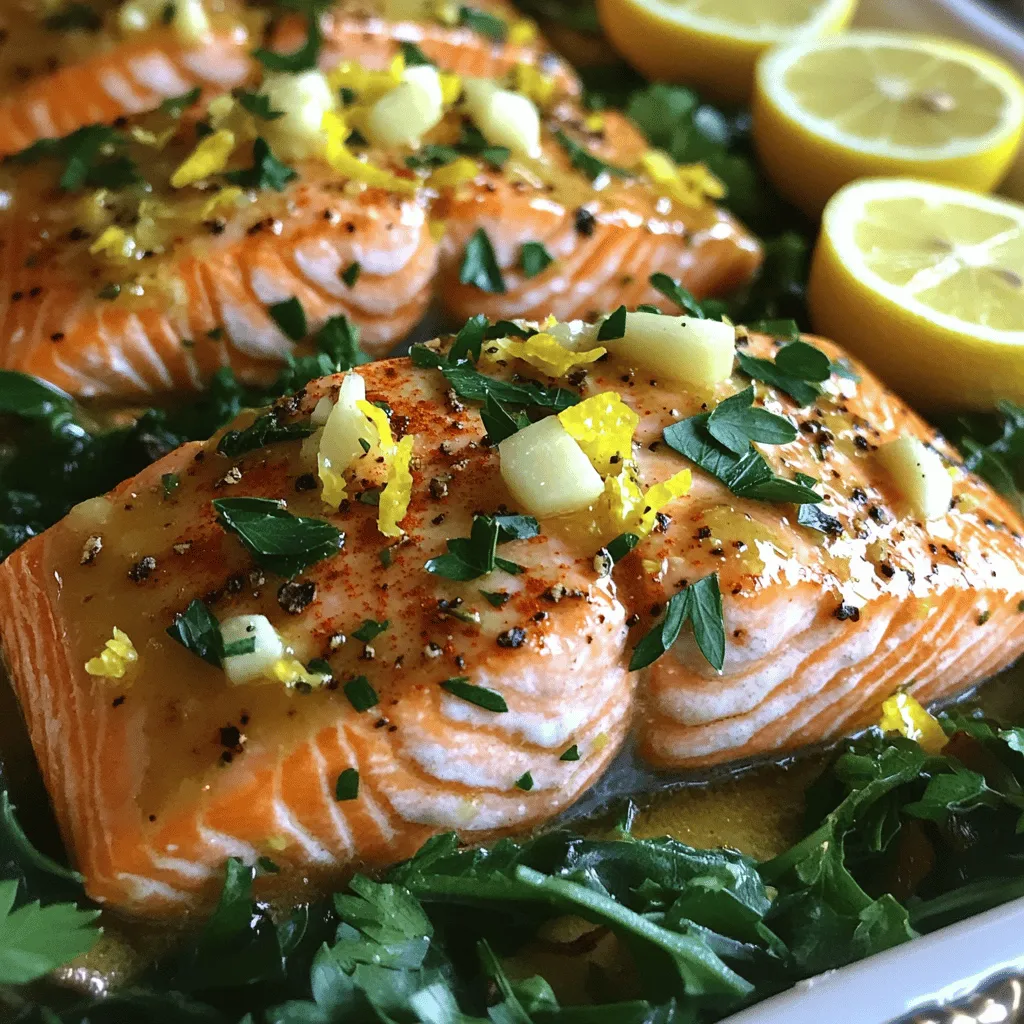
Looking for a simple yet flavorful dish that impresses? Lemon Garlic Butter Salmon hits the mark. With just a few
![- 1 pound flank steak, thinly sliced against the grain - 2 cups fresh broccoli florets - 1 red bell pepper, thinly sliced - 1/4 cup low-sodium soy sauce - 2 tablespoons oyster sauce - 1 tablespoon cornstarch - 2 cloves garlic, finely minced - 1 inch fresh ginger, grated - 1 tablespoon sesame oil - 2 tablespoons vegetable oil - Cooked white rice or quinoa, for serving - Sesame seeds and thinly sliced green onions, for garnish When you gather these ingredients, you set the stage for a great meal. The flank steak adds a tender bite. Fresh broccoli brings a crisp texture. The red bell pepper adds a splash of color and sweetness. For the marinade, I love using low-sodium soy sauce. It gives flavor without too much salt. The oyster sauce adds a rich depth. Cornstarch helps to make the beef tender and gives a nice glaze. The garlic and ginger are key flavor boosters. They add warmth and spice. Sesame oil adds a nutty finish. Vegetable oil is perfect for high-heat cooking. For serving, I recommend cooked white rice or quinoa. They soak up the sauce well. Garnish with sesame seeds and green onions for a fresh touch. Check out the Full Recipe to see how all these ingredients come together! To start, we need to marinate the flank steak. Take 1 pound of thinly sliced flank steak and place it in a medium bowl. Pour in 1/4 cup of low-sodium soy sauce, 2 tablespoons of oyster sauce, and 1 tablespoon of cornstarch. Mix well to coat the beef evenly. This step is key for adding flavor. Let the steak marinate for 15-20 minutes. This time allows the beef to absorb all those delicious flavors. Next, we will blanch the broccoli. In a pot, bring water to a boil. Add 2 cups of fresh broccoli florets and let them cook for 1-2 minutes. This quick cooking makes the broccoli bright green and tender. Then, transfer the broccoli to a bowl filled with ice water. This stops the cooking and keeps the color vibrant. It also helps maintain a nice crunch. Now, it's time to cook! Heat 1 tablespoon of vegetable oil in a large wok over medium-high heat. Once the oil shimmers, add the marinated beef in a single layer. Sear the beef for 2-3 minutes until it turns a nice brown color. Then stir-fry for another 2 minutes until fully cooked. Remove the beef and set it aside. In the same wok, add another tablespoon of vegetable oil. Add 2 cloves of minced garlic and 1 inch of grated ginger. Sauté for about 30 seconds until they release their aroma. Next, toss in the sliced red bell pepper. Stir-fry for about 2 minutes, keeping it slightly crunchy. Finally, return the beef and add the blanched broccoli. Gently toss all the ingredients together to combine. For the last step, drizzle 1 tablespoon of sesame oil over the stir-fry. Stir well for 1-2 minutes until everything is heated through. This oil adds a nutty flavor that ties the dish together. Serve the stir-fry warm over cooked white rice or quinoa. Garnish with sesame seeds and thinly sliced green onions. This adds a great look and extra flavor. For the full recipe, check out the [Full Recipe]. Marination is key to great flavor. I recommend marinating the beef for at least 15-20 minutes. This gives it time to soak in the soy sauce and oyster sauce. You should also balance the sauces well. A mix of salty and sweet flavors makes the dish shine. Stir-frying is all about high heat and quick cooking. Use a wok or a large skillet for the best results. Heat your pan until it is hot but not smoking. This helps cook the beef quickly and keeps it tender. Stir constantly to ensure even cooking and prevent burning. A beautiful dish is just as important as good taste. Serve your stir-fry in shallow bowls or on a large platter. This allows the colors of the beef and broccoli to pop. For a final touch, sprinkle sesame seeds and green onions on top. They add flavor and make the dish look inviting. For the complete recipe, refer to the Full Recipe section. {{image_4}} You can swap beef for chicken or tofu. Chicken thighs work well, too. Just slice it thin, like the beef. If you use chicken, cook it for about 5-6 minutes until it’s done. Tofu needs a bit more time to brown, so aim for 4-5 minutes on each side. This way, you get that lovely crisp texture. Feel free to change up the veggies! Carrots, snap peas, or bell peppers add nice crunch. You can also use baby corn or mushrooms for different flavors. In summer, zucchini or asparagus can shine in this dish. Winter brings great options too, like bok choy or Brussels sprouts. Always pick fresh, in-season veggies for the best taste. If you need gluten-free options, use tamari instead of soy sauce. This keeps the flavor without the gluten. You can also replace the oyster sauce with a homemade mix of mushroom sauce and a bit of sugar. For low-carb choices, skip the rice and serve the stir-fry over cauliflower rice instead. This keeps it light and healthy while still being delicious. For the full recipe, check out the complete cooking guide. To keep your leftovers fresh, store them in airtight containers. This helps keep moisture in and air out. I recommend using glass containers. They are sturdy and do not retain odors. It’s best to let the stir-fry cool down first. Then, transfer it to the container. Store it in the fridge for up to three days. If you want to freeze your stir-fry, cool it completely first. Place it in freezer-safe bags or containers. Remove as much air as you can to prevent freezer burn. You can freeze it for up to three months. To thaw, place it in the fridge overnight. For reheating, a microwave works well. You can also use a pan on low heat. Just add a splash of water to keep it moist. In the fridge, your beef and broccoli stir-fry lasts about three days. If you notice any off smells or slimy textures, it’s best to toss it. Fresh food should always smell good and look vibrant. Trust your senses; they are your best guide! To make beef tender, slice the flank steak thinly against the grain. This helps break down tough fibers. Marinate the beef for at least 15-20 minutes. Use low-sodium soy sauce and oyster sauce for flavor. The cornstarch in the marinade helps create a nice texture. Yes, you can add more veggies! Bell peppers, snap peas, or carrots work great. You can also use mushrooms or zucchini. Just remember to cut them into small pieces to cook evenly. Adding colorful veggies makes the dish more appealing. You can serve this dish with cooked white rice or quinoa. Both options soak up the sauce well. You can also serve it with noodles for a different taste. To add crunch, try serving it with spring rolls on the side. Yes, this recipe is kid-friendly! The beef and broccoli have a mild flavor. You can cut the beef into smaller pieces for easier eating. Kids often enjoy the colorful vegetables, too. If your child likes a sweeter taste, you can add a little sugar to the sauce. To make a spicy version, add red pepper flakes or chili oil to the stir-fry. You can also use sriracha sauce for a flavor boost. Start with a small amount, then taste as you go. This way, you get the heat you like without overwhelming the dish. For the full recipe, check the section above. This recipe for beef and broccoli stir-fry is simple and rewarding. You learned about the main ingredients, like flank steak and fresh veggies. Marinating the beef and cooking it right brings great flavor. Try alternatives like chicken or tofu for variety. Don't forget the tips on storage and serving. Enjoy your stir-fry and feel proud of your cooking skills!](https://mealinmoments.com/wp-content/uploads/2025/04/b177ee8d-ae6d-4cf3-ac96-807c159cfa1e.webp)
Looking for a quick and tasty dinner? Try my Easy Beef and Broccoli Stir-Fry! In just a few simple steps,
![- 2 medium sweet potatoes, peeled and cut into ½-inch cubes - 1 can (15 oz) black beans, thoroughly rinsed and drained - 1 tablespoon extra-virgin olive oil - 1 teaspoon ground cumin - 1 teaspoon smoked paprika - ½ teaspoon chili powder - Sea salt and freshly cracked black pepper to taste - 8 small corn tortillas - ½ cup fresh cilantro, roughly chopped - 1 ripe avocado, sliced into thin wedges - Lime wedges, for serving Sweet potatoes are packed with vitamins A and C. They are great for your eyes and skin. Black beans are rich in protein and fiber. They help keep you full and satisfied. Olive oil offers healthy fats that are good for your heart. The spices not only add flavor but also boost your metabolism. Cilantro gives freshness and can help with digestion. Avocado adds creaminess and healthy fats, making the meal even better. When choosing sweet potatoes, look for ones that are firm and smooth. Avoid those with bruises or soft spots. For black beans, check the can for any dents or leaks. Choose firm avocados that yield slightly when pressed. This means they are ripe. Select fresh cilantro that is bright green and fragrant. Always choose corn tortillas that are soft and flexible for the best taco experience. Start by gathering your ingredients. You will need sweet potatoes, black beans, olive oil, spices, and tortillas. Preheat your oven to 425°F (220°C). This heat is perfect for roasting sweet potatoes. Make sure to rinse and drain the black beans to get rid of extra salt and liquid. On a large baking sheet, place the sweet potato cubes. Drizzle them with olive oil. Sprinkle the ground cumin, smoked paprika, chili powder, sea salt, and black pepper over them. Toss until they are well coated. Spread the sweet potatoes in a single layer. Roast for 20-25 minutes until they are fork-tender. Stir them halfway to ensure even cooking. The sweet potatoes should be golden and caramelized when done. While the sweet potatoes roast, heat the black beans in a small saucepan over medium heat. Stir them occasionally for about 5 minutes until they are hot. Add a pinch of sea salt and black pepper to enhance their flavor. Keep them warm on low heat while you prepare the tortillas. To learn how to finish assembling these tasty tacos, check out the Full Recipe. When making sweet potato and black bean tacos, a few mistakes can happen. Here are the main ones to watch out for: - Overcooking sweet potatoes: They should be tender, not mushy. - Skipping the seasoning: Adding spices makes a big flavor difference. - Not warming tortillas: Cold tortillas can break easily. Always warm them up. - Ignoring texture: Balance creamy avocado with crunchy toppings like cilantro. To boost flavor, consider these tips: - Add lime zest: Grate some lime peel into your taco mix for brightness. - Include fresh herbs: Try adding mint or parsley along with cilantro for a fresh twist. - Use different spices: Experiment with cayenne for heat or coriander for depth. - Drizzle some sauce: A tangy yogurt or hot sauce can elevate your dish. Here are some fun ways to serve these tacos: - Make a taco bar: Lay out all the toppings for a fun family meal. - Pair with a salad: A fresh green salad goes well with the tacos. - Add a side of rice: Serve with cilantro lime rice for a filling meal. - Offer drinks: Cold beverages like iced tea or agua fresca complement the spices nicely. For the complete recipe, check the [Full Recipe]. {{image_4}} You can swap the black beans for other protein sources. Try using lentils for a nutty taste. Chickpeas work well too and add a nice texture. You can also use tofu for a plant-based option. Just make sure to season it well. This recipe is already vegan and gluten-free. Use corn tortillas for the gluten-free option. Ensure that all ingredients are labeled gluten-free to avoid cross-contamination. For a creamier touch, you can add cashew cream or a dollop of dairy-free yogurt. Use seasonal veggies to keep it fresh. In summer, add corn or zucchini for a sweet crunch. Winter calls for roasted bell peppers or carrots. These swaps can change the flavors and keep your meals exciting. You can also mix in fresh herbs for a bright touch. Consider checking out the Full Recipe for detailed cooking steps and ingredient tips! To store leftovers, let them cool first. Place the tacos in an airtight container. You can keep them in the fridge for up to 3 days. If you have extra sweet potatoes and black beans, store them separately. This helps keep the tortillas from getting soggy. When you're ready to eat, reheat the tacos. You can use a microwave, but I recommend the oven for better texture. Preheat your oven to 350°F (175°C). Place the tacos on a baking sheet and heat for about 10 minutes. If you stored the sweet potatoes and beans separately, warm them in a pan or microwave first. Then, assemble your tacos again. If you want to freeze the tacos, wrap them tightly in plastic wrap. Place them in a freezer-safe bag. They can last for up to 3 months. To enjoy, thaw them in the fridge overnight. Reheat as mentioned above. For the best taste, I suggest freezing the filling only, not the tortillas. This keeps everything fresh. You can find the full recipe and more details to help you along the way. Yes, you can use canned sweet potatoes. They save time and work well in tacos. However, fresh sweet potatoes give a better texture and flavor. If you use canned ones, drain and rinse them well. Cut them into smaller pieces to mix with black beans. These tacos pair well with several sides. Here are some great options: - Mexican rice - Corn salad - Fresh guacamole - Spicy salsa - A simple green salad These sides add color and flavor to your meal. They also complement the tacos nicely. To add heat, try these tips: - Use spicy chili powder instead of regular. - Add diced jalapeños or serrano peppers to the filling. - Drizzle hot sauce over the tacos before serving. - Serve with a spicy salsa on the side. Spice can change the whole dish. Adjust it to your taste! For the full recipe, check out the Sweet Potato & Black Bean Tacos section. This blog post shared easy steps to create tasty tacos. We explored fresh ingredients, from sweet potatoes to black beans. I gave tips on avoiding common mistakes and boosting flavor. You learned about protein swaps and storage secrets for leftovers. Remember, cooking should be fun! Experiment with seasonal produce and serve with your favorite sides. Enjoy your cooking journey and make these tacos your own!](https://mealinmoments.com/wp-content/uploads/2025/04/a1e6ba75-2a98-43a0-999a-03d701bd8728.webp)
Are you ready to spice up your taco night? These savory Sweet Potato and Black Bean Tacos are not only
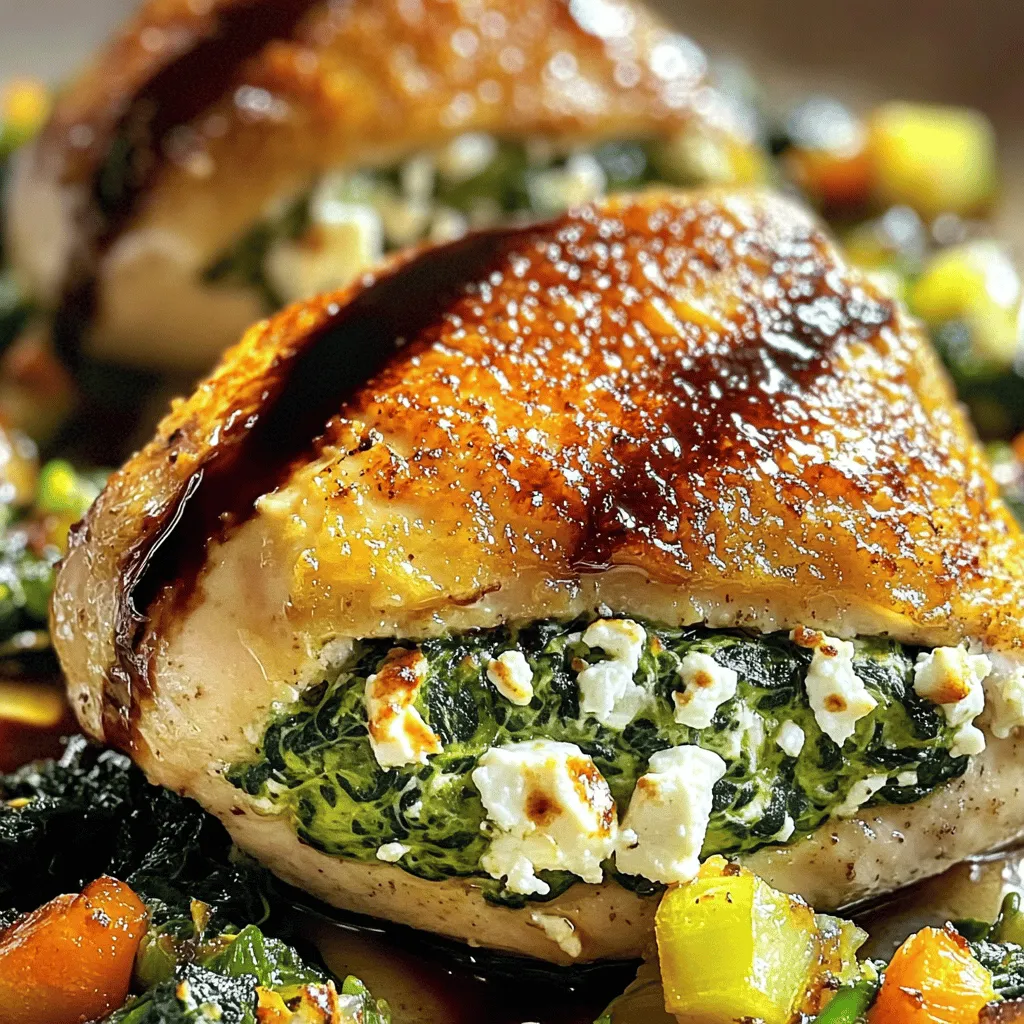
Looking for a meal that bursts with flavor and is easy to make? Spinach and Feta Stuffed Chicken is the

Are you ready to indulge in a creamy, dreamy dessert? This No-Bake Nutella Cheesecake is easy and delicious! You’ll impress
![- 1 cup unsalted butter, melted - 1 cup granulated sugar - 1 cup packed brown sugar - 4 large eggs - 2 teaspoons vanilla extract - 1 cup all-purpose flour - 1/2 cup unsweetened cocoa powder - 1 teaspoon baking powder - 1/2 teaspoon salt - 1 cup semi-sweet chocolate chips The main ingredients create a rich and fudgy brownie base. The melted butter adds moisture, while the sugars give sweetness and depth. Using both granulated and brown sugars helps achieve a balanced flavor. - 1/2 cup unsalted butter, softened - 3/4 cup packed brown sugar - 1/4 cup granulated sugar - 2 tablespoons milk - 1 teaspoon vanilla extract - 1 cup all-purpose flour - 1/2 cup mini chocolate chips This topping adds a creamy and sweet layer. The softened butter and sugars blend well, creating a soft dough. Mini chocolate chips enhance the cookie dough flavor. - Gluten-free flour alternatives - Vegan butter substitutions If you want to make these brownies gluten-free, you can use a gluten-free flour blend. For vegan options, swap the butter for a plant-based version. These changes keep the treat delicious while catering to different diets. For the full recipe, check the details mentioned earlier. - Preheat the oven to 350°F (175°C). - Prepare a 9x13 inch baking pan by greasing it or lining it with parchment paper. - Combine melted butter, granulated sugar, and brown sugar in a large bowl. - Whisk in four large eggs and two teaspoons of vanilla extract. - Blend in one cup of all-purpose flour, half a cup of cocoa powder, one teaspoon of baking powder, and half a teaspoon of salt. Mix until just combined. - In another bowl, cream together half a cup of softened butter, three-quarters of a cup of brown sugar, and a quarter cup of granulated sugar. - Incorporate two tablespoons of milk and one teaspoon of vanilla extract until smooth. - Mix in one cup of flour and half a cup of mini chocolate chips until evenly distributed. - Pour the brownie batter into the prepared pan, spreading it evenly. - Drop spoonfuls of the cookie dough on top of the brownie batter. - Use a spatula to create a marbled effect by gently swirling the cookie dough into the brownie batter. - Bake for 30-35 minutes. - Check for doneness with a toothpick; it should come out mostly clean. - Cool the brownies in the pan for about 20 minutes, then transfer them to a wire rack to cool completely before slicing. For the full recipe, check out the detailed instructions above! - Avoid overmixing the batter. This keeps the brownies soft. Overmixing can make them tough. - Adjust baking time for different ovens. Some ovens run hotter or cooler, so check early. - For a nut-free version, skip nuts or use sunflower seed butter. - For a dairy-free version, try coconut oil instead of butter. Use almond milk in the dough. - You can use honey or maple syrup for a different sweetener. Just adjust the amount. - Dust with powdered sugar for a nice finish. It adds a sweet touch. - Garnish with whipped cream and chocolate chips. This makes your brownies look special. - Serve with a scoop of ice cream on the side for a fun treat. Feel free to explore the [Full Recipe] for more details on making these treats! {{image_4}} You can make these brownies gluten-free. To do this, swap regular flour for a gluten-free flour blend. Look for a blend that has a mix of rice flour, tapioca flour, and potato starch. This mix often works best in baked goods. Use the same amount as listed in the recipe. If you want, add a bit of xanthan gum for better texture. If you want to make these brownies vegan, you can easily replace eggs and butter. For eggs, use flax eggs or applesauce. To make a flax egg, mix one tablespoon of ground flaxseed with three tablespoons of water. Let it sit for five minutes. For butter, use vegan butter or coconut oil. Use the same amount as in the recipe. These swaps keep your brownies rich and tasty. You can add extra flavors to make your brownies unique. Try adding nuts like walnuts or pecans for a nice crunch. You could also use different types of chocolate, like dark or white chocolate, for a twist. If you want something special, add spices like cinnamon or a bit of espresso powder. These flavors can bring out the chocolate's richness and make every bite exciting. To keep your brownies fresh, place them in an airtight container. This helps retain moisture and flavor. I recommend cutting the brownies into squares before storing. This makes it easy to grab one when you're craving a treat. Store them at room temperature for up to five days. If you need to keep them longer, consider freezing them. To freeze brownies, let them cool completely first. Wrap each square in plastic wrap tightly. Then, place all the wrapped brownies in a freezer-safe bag. This keeps them from getting freezer burn. You can freeze them for up to three months. When you're ready to enjoy one, simply take it out and let it thaw at room temperature. For a warm treat, pop it in the microwave for a few seconds. This brings back that soft, gooey texture, just like fresh out of the oven! Yes, you can skip the chocolate chips. If you prefer, use nuts like walnuts or pecans. You can also try dried fruits like cranberries or raisins for a chewy texture. To check if the brownies are done, use a toothpick. Insert it into the center of the brownies. If it comes out mostly clean, they are ready. A few moist crumbs are fine, but wet batter means they need more time. You can make these brownies ahead of time. Just bake them and let them cool completely. Store them in an airtight container at room temperature for up to three days. For longer storage, wrap them tightly and freeze. A single serving, or one brownie, has about 200 calories. It contains 10 grams of fat, 28 grams of carbs, and 2 grams of protein. The exact numbers may vary based on specific ingredients used. Absolutely! You can add mint extract for a fresh twist. Swirl in caramel sauce for a rich flavor. You can also experiment with spices like cinnamon for a warm touch. The options are endless! This blog post covered how to make delicious chocolate chip cookie dough brownies. We explored main ingredients, baking steps, and helpful tips for perfect results. You learned how to add variations, store your treats, and answer common questions. In summary, these brownies are easy to make and always a hit. Enjoy trying different flavors and substitutes to customize your own batch. Happy baking!](https://mealinmoments.com/wp-content/uploads/2025/04/fd8ba0ee-892e-4c90-8906-a21c82907830.webp)
Get ready to delight your taste buds with a treat that combines two fan favorites: brownies and chocolate chip cookie
![- 1 lb large shrimp, peeled and deveined - 4 tablespoons unsalted butter - 4 cloves garlic, finely minced - 1 lemon, freshly juiced - 2 tablespoons fresh parsley, finely chopped - Skillet - Tongs - Measuring spoons - Calories per serving: About 250 - Fat: 18g - Carbohydrates: 2g - Protein: 22g In this dish, you will find shrimp as the star. Shrimp is not only tasty, it cooks fast. This helps make the meal quick and easy. You also need butter. Unsalted butter gives a rich flavor and keeps the dish light. Garlic is another key ingredient. It adds a strong, savory taste. Use fresh garlic for the best flavor. The lemon juice brings brightness. It cuts through the richness of the butter. Lastly, parsley adds color and a fresh touch. For tools, a skillet is required. A good skillet helps with even cooking. You will need tongs to flip the shrimp easily. Measuring spoons ensure you use the right amounts of garlic and butter. Now let's talk about nutrition. Each serving has about 250 calories. This dish is low in carbs, making it great for many diets. The shrimp provides a good amount of protein. This keeps you full longer. The balance of fat from butter and protein makes it satisfying. For details on the cooking process, you can find the Full Recipe. - Rinse and dry shrimp - Mince garlic and chop parsley - Juice lemon First, rinse the shrimp under cold water. This will help remove any dirt. After rinsing, pat them dry with a paper towel. Use a clean plate to keep them ready. Next, mince the garlic finely. This way, it will release its flavor well. Chop the parsley into small pieces for a fresh touch. Lastly, juice the lemon. You need about two tablespoons of juice. This will add a nice zing to the dish. - Melt butter in a skillet - Sauté garlic until fragrant - Add shrimp and cook until pink Now, take a skillet and melt the butter over medium heat. Make sure it does not brown. Swirl the pan to help the butter melt evenly. Once melted, add the minced garlic. Sauté it for 1-2 minutes. You want it fragrant and not brown. Next, raise the heat a bit to medium-high. Add the shrimp to the skillet in a single layer. Let them cook for 2-3 minutes. They should turn pink on one side. Flip them over to cook the other side. - Add lemon juice for flavor - Stir in parsley - Serve hot in a dish After the shrimp turn pink, drizzle the lemon juice over them. Cook for another 1-2 minutes. The shrimp should be fully cooked and opaque. Remove the skillet from heat. Sprinkle the chopped parsley over the shrimp and stir well. This gives the dish a fresh flavor and a pop of color. Serve the shrimp hot in a dish for the best taste. Check out the Full Recipe for more details on this delightful meal! To pick fresh shrimp, look for a slight sheen. They should smell like the ocean, not fishy. If they feel firm and bounce back when pressed, they are fresh. Cooking times vary by size. For large shrimp, 2-3 minutes per side works well. For smaller shrimp, reduce the time to 1-2 minutes. To avoid overcooking, watch for their color. Shrimp turn pink and opaque when ready. Remove them from heat as soon as they are done. The right amount of butter makes a difference. Four tablespoons adds richness without being too greasy. You can adjust this based on taste preferences. When choosing garlic, fresh is best. It gives a strong flavor that dried garlic lacks. If you want to change it up, add herbs like thyme or spices like red pepper flakes. These will give your dish a new twist. Pair this dish with rice or pasta for a hearty meal. Garlic butter shrimp also goes well with a side of steamed vegetables. For garnishes, lemon slices and parsley add color and flavor. A fresh salad can brighten the plate too. As for drinks, a crisp white wine complements the dish nicely. Sparkling water with lemon is a refreshing non-alcoholic option. Enjoy your meal! For the full recipe, check out the details above. {{image_4}} - Using alternative shrimp types: You can use medium or small shrimp for this dish. They cook faster and still taste great. - Dairy-free butter options: If you want a dairy-free option, try using olive oil or coconut oil. They add a nice flavor too. - Different citrus juices: Swap lemon juice for lime or orange juice. Each brings its own unique twist to the dish. - Adding spices like red pepper flakes: If you like heat, sprinkle in some red pepper flakes. They add a nice kick to the shrimp. - Incorporating vegetables like spinach: Toss in a handful of fresh spinach while cooking. It adds color and extra nutrients. - Making it a creamy garlic butter shrimp: Stir in some heavy cream at the end for a rich, creamy sauce. It's a delicious change! - Turning it into a shrimp pasta dish: Serve the shrimp over cooked pasta. Add the sauce for a filling meal. - Skewered shrimp for grilling: Thread the shrimp onto skewers and grill them. This adds a smoky flavor that's perfect for summer. - Shrimp tacos with a twist: Use the shrimp in soft tortillas with your favorite toppings. It's a fun and tasty way to enjoy shrimp! For the full steps and details, check out the Full Recipe. How long can garlic butter shrimp last? Garlic butter shrimp can last in the fridge for about 2-3 days. Store it in a sealable container to keep it fresh. Proper storage containers Use airtight containers to prevent air from getting in. Glass or plastic containers work well. Can you freeze cooked shrimp? Yes, you can freeze cooked shrimp. It stays good in the freezer for about 2-3 months. Best practices for freezing and reheating Wrap shrimp tightly in plastic wrap or foil. Place them in freezer bags. When reheating, thaw in the fridge overnight for the best results. Best methods to reheat without drying out Reheat garlic butter shrimp on low heat. You can use a skillet or microwave. Add a splash of water or butter to keep it moist. Time adjustments based on serving size For small servings, heat for about 1-2 minutes. Larger servings may take 3-5 minutes. Always check to avoid overcooking. For the full recipe, check out the [Full Recipe]. To clean shrimp, follow these steps: - Rinse the shrimp under cold running water. - Use your fingers to remove any debris. - Pat the shrimp dry with a paper towel. - Place the cleaned shrimp on a clean plate. Cleaning shrimp is quick and easy. Keeping them fresh helps your dish shine. Yes, you can use frozen shrimp. Here’s how to thaw them: - Place the shrimp in a bowl of cold water. - Let them sit for about 15-20 minutes. - Change the water halfway for faster thawing. When using frozen shrimp, cook them a bit longer. This ensures they heat through properly. Look for these signs: - Shrimp turn pink and opaque. - They curl into a C-shape. - The flesh feels firm to the touch. These cues mean your shrimp are done and ready to eat. Yes, you can! Try these flavor boosters instead: - Use shallots for a mild onion taste. - Add fresh herbs like basil or cilantro. - Incorporate spices like paprika or cumin. These alternatives can still make your dish tasty and unique. Explore these options for a fun twist on the recipe. For the full recipe, check out Garlic Butter Shrimp Delight. In this post, we explored a simple garlic butter shrimp recipe. We covered the main ingredients, tools needed, and nutritional info. The step-by-step instructions make cooking easy and fun. Tips on perfecting shrimp and serving ideas enhance your dish. Variations allow you to tailor it to your taste. Remember to store your shrimp properly to enjoy leftovers. Whether for a quick dinner or a special occasion, this dish shines. Get cooking and enjoy the delicious experience you've created!](https://mealinmoments.com/wp-content/uploads/2025/04/df53234c-e854-4450-8d66-e212f1286065.webp)
Are you ready to whip up a tasty meal in no time? This 5-Ingredient Garlic Butter Shrimp is quick, easy,
. Enjoy cooking! To start, heat the olive oil in a large pot over medium heat. Add the finely chopped onion. Sauté it for about five minutes. You want the onion to become soft and translucent. Next, stir in the minced garlic and grated ginger. Cook this mix for one to two minutes. You will notice a lovely aroma filling your kitchen. Now it's time to spice things up! Sprinkle in the curry powder, ground cumin, turmeric powder, and red chili flakes. Mix everything well to cover the onions with the spices. This step is key for creating a rich flavor base. Pour in the diced tomatoes, whether fresh or canned. Cook this mixture for about three to four minutes. You want the flavors to meld and thicken a bit. Next, add the rinsed chickpeas and vegetable broth. Stir gently to combine all the ingredients. This will create a thick and hearty mix. Increase the heat slightly and bring everything to a gentle simmer. Once it starts bubbling, pour in the coconut milk and stir to mix. Let the curry simmer uncovered for 15 to 20 minutes. Stir occasionally, so it doesn’t stick. The curry should thicken and the flavors will deepen. Taste it, and add salt if needed. For a creamier texture, you can use an immersion blender. Blend a portion of the curry to create a delightful contrast between chunky and smooth. Serve the hot curry over warm basmati rice or alongside fresh naan. Garnish with chopped fresh cilantro for a pop of color. For the full recipe, check out Chickpea Delight Curry . To make your chickpea curry just right, start with the spices. Adjust chili flakes to fit your heat level. If you prefer less heat, use just a pinch. If you love spice, add more! I often taste as I cook, ensuring it matches my craving. The ideal cooking time is around 15 to 20 minutes. This lets the flavors mix well and grow rich. When serving, use deep bowls. This makes your curry look inviting. You can spoon some warm basmati rice into the bowl first. Then, ladle the curry over it. For garnish, chop fresh cilantro and sprinkle it on top. To add a final touch, drizzle some coconut milk or sprinkle extra chili flakes. This makes your dish pop with color. For simmering, a heavy-bottomed pot works best. It helps distribute heat evenly. A Dutch oven is a great choice, too. When preparing, have sharp knives and a cutting board ready. A can opener is handy for the chickpeas and coconut milk. Also, keep a wooden spoon for stirring. Simple tools make the process smooth and fun! {{image_4}} You can change the curry's flavor with different spice blends. Try garam masala for a warm taste. Or use smoked paprika for a hint of smokiness. If you want a kick, add cayenne pepper. Fresh herbs, like cilantro or mint, can give the dish a bright finish. Chopped herbs added at the end keep flavors fresh and lively. Chickpeas are great, but you can add more. Spinach adds color and nutrients. Tofu gives a nice texture and protein boost. You can also use seasonal vegetables. Think bell peppers in summer or squash in fall. This way, you can enjoy different flavors all year round. Want to amp up the taste? Squeeze in some lime or lemon juice. This adds brightness and lifts the whole dish. You can also personalize it with sauces. A splash of soy sauce or a touch of hot sauce can give it your twist. Try different combinations to find your favorite flavor! Store your leftover vegan chickpea curry in the fridge. Use airtight containers to keep it fresh. This helps prevent any strong smells from other foods. The curry lasts for about 4 to 5 days in the fridge. To reheat, use the stovetop for the best texture. Heat it gently over low to medium heat. Stir it often to prevent sticking. You can also use a microwave, but check often to avoid overcooking. Pair it with fresh basmati rice or naan while reheating for a complete meal. You can freeze chickpea curry for later use. Pour the cooled curry into freezer-safe containers. Leave some space at the top for expansion. It will stay fresh for about 2 to 3 months in the freezer. When you’re ready to eat, thaw it in the fridge overnight. Reheat it on the stovetop to maintain its rich flavor. The cooking time for Vegan Chickpea Curry is quick and easy. Here’s the breakdown: - Prep time: 10 minutes - Cook time: 25 minutes - Total time: 35 minutes You can have a hot, tasty meal ready in less than an hour. Yes, chickpea curry is great for meal prep! - It stores well in the fridge for up to 5 days. - You can freeze it for longer storage, up to 3 months. - It tastes even better the next day as flavors meld. Preparing it in advance saves time on busy days. Absolutely! You can use other beans if you like. - Black beans: These add a rich flavor. - Kidney beans: These offer a hearty texture. - Lentils: These cook faster and add a unique taste. Feel free to mix and match based on your preference. Chickpeas are packed with nutrients and great for health. - High in protein: They help build and repair muscles. - Rich in fiber: This aids digestion and keeps you full. - Vitamins and minerals: They contain iron, magnesium, and potassium. Eating chickpeas can support overall health and energy. The spice level of this recipe is adjustable. - Mild: Use no red chili flakes if you prefer less heat. - Medium: Add half a teaspoon for a gentle kick. - Hot: Increase the red chili flakes for more heat. You can adjust to fit your taste and comfort. You can find the complete recipe here: [Full Recipe: Chickpea Delight Curry ](#) In this blog post, we explored making a delicious chickpea curry. We covered all the key ingredients, from chickpeas to spices, and detailed how to prepare and combine them. You learned how to adjust flavors and present the dish beautifully. Lastly, we discussed tips for storing leftovers and meal prepping. With this knowledge, you can create a flavorful and healthy dish that suits your taste. Enjoy experimenting with variations and make this recipe your own!](https://mealinmoments.com/wp-content/uploads/2025/04/0ad3ec18-a079-4c04-9800-3328c6f09691.webp)
If you’re searching for a quick, easy meal packed with flavor, this Vegan Chickpea Curry is for you! With just
