Skip to content
DisclaimerTerms Of UseGDPR PolicyCookie Policy

mealinmoments

  • Home
  • Drinks
  • Appetizers
  • Dinner
  • Dessert
  • About
  • Contact
  • Privacy Policy
DisclaimerTerms Of UseGDPR PolicyCookie Policy

Megan

To make my Easy Vegetable Curry, you need a few simple items: - 1 tablespoon coconut oil - 1 medium onion, finely chopped - 2 garlic cloves, minced - 1 tablespoon fresh ginger, grated - 1 tablespoon curry powder - 1 teaspoon ground cumin - 1 can (14 oz) coconut milk - 1 cup vegetable broth - 1 large carrot, thinly sliced - 1 bell pepper (any color), chopped into bite-sized pieces - 1 zucchini, diced - 1 cup cauliflower florets - 1 cup green peas (fresh or frozen) - Salt and pepper, to taste - Fresh cilantro, roughly chopped, for garnish These ingredients come together to create layers of flavor and texture. You can use both fresh and frozen vegetables in this recipe. Fresh veggies have a crisp texture and vibrant flavor. However, frozen vegetables are convenient and often just as nutritious. They are picked at peak ripeness and frozen quickly. If you use frozen peas or cauliflower, just add them at the last few minutes of cooking. This way, they stay bright and tasty! Spices are key in any curry. If you don't have curry powder, try garam masala or turmeric. Both will give a nice flavor twist. Ground cumin adds warmth, but you can use coriander instead for a lighter taste. Always taste as you go. Adjust the spices to fit your palate. With these substitutions, you’ll still make a delicious dish. For the full recipe, check out the details above! To start, grab a large pot and heat 1 tablespoon of coconut oil over medium heat. You want it to shimmer, not smoke. Add 1 medium onion, finely chopped. Sauté it for about 5 minutes until it turns soft and clear. Next, add 2 minced garlic cloves and 1 tablespoon of grated ginger. Stir for 1-2 minutes until it smells amazing. Now, sprinkle in 1 tablespoon of curry powder and 1 teaspoon of ground cumin. Stir to coat the onions in the spices. Let this cook for another minute to wake up those flavors. Now it's time for the fun part! Slowly pour in 1 can of coconut milk and 1 cup of vegetable broth. Stir until combined. Add 1 sliced carrot, chopped bell pepper, diced zucchini, and 1 cup of cauliflower florets. Mix everything well. Raise the heat a bit and bring it to a gentle simmer. Cover the pot and let it cook for 15-20 minutes. You want the veggies tender but still bright and colorful. After that, stir in 1 cup of green peas. Season with salt and pepper to your taste. Cook for another 5 minutes to heat the peas through. Once done, take the pot off the heat and let it cool for a minute. Serve the curry in bowls. Don’t forget the garnish! Add freshly chopped cilantro on top. For a nice touch, serve it over fluffy basmati rice or with warm naan bread. A squeeze of fresh lime juice adds a zesty kick. For the full recipe, check out the details above. Enjoy your Easy Vegetable Curry! To make your easy vegetable curry truly shine, focus on the aromatics. Start with fresh garlic and ginger. They add depth to the dish. When you sauté the onion, cook it until it's soft. This helps unlock its natural sweetness. Don't rush this step; it makes a big difference. Also, consider adding a splash of lime juice at the end. It brightens the flavors and balances the creaminess of the coconut milk. Spice levels can make or break your curry. If you like it mild, cut back on the curry powder. You can always add more later. On the flip side, if you crave heat, toss in some chili flakes or fresh chilies. Start with a small amount and taste as you go. This way, you control the spice and create a dish just right for you. A thick curry feels hearty and rich. If your curry is too thin, don’t worry! You can use a few tricks. One way is to mash some of the cooked vegetables. This adds body without extra ingredients. Another option is to simmer the curry uncovered. This allows some liquid to evaporate, thickening the sauce naturally. If you want, you can also stir in a bit of cornstarch mixed with water. This will quickly thicken your curry while keeping it smooth. For the full recipe, refer to the earlier sections and get cooking! {{image_4}} You can boost the protein in your easy vegetable curry easily. Chickpeas are a great choice. They add a nice texture and flavor. One can of chickpeas gives protein and fiber. You can also use tofu. Firm tofu works best. Just cube it and add it during cooking. It absorbs the curry flavors well. Feel free to change the veggies in your curry. You can use what you like or have. Sweet potatoes add sweetness. Spinach wilts nicely and adds color. Broccoli florets add crunch. Cauliflower is a classic, but you can swap it out. Get creative with seasonal vegetables. Each mix changes the flavor profile. This easy vegetable curry is perfect for both diets. Use coconut milk for a creamy base. It’s vegetarian and vegan-friendly. If you want to add dairy, consider a dollop of yogurt. For vegan options, skip the dairy completely. Always check labels for hidden animal products. This recipe is flexible and can fit your diet needs well. For the full recipe, visit the section above. After enjoying your Easy Vegetable Curry, store any leftovers in an airtight container. This keeps the curry fresh. Place it in the fridge if you plan to eat it within three days. To reheat, pour the curry into a pot over medium heat. Stir gently to avoid burning. Heat it until warm, about 5-7 minutes. You can also use a microwave. Just cover the bowl and heat for 2-3 minutes, stirring halfway. If you want to save the curry for later, freezing works well. Let the curry cool completely before transferring it to freezer-safe bags. Remove as much air as possible to prevent freezer burn. The curry can last up to three months in the freezer. When you're ready, thaw it in the fridge overnight before reheating. Enjoy your flavorful dish again! For the full recipe, see [Full Recipe]. Easy Vegetable Curry lasts about 3 to 4 days in the fridge. Store it in an airtight container. The flavors will deepen as it sits. Always check for any signs of spoilage before eating. Yes, you can make this curry in advance. It actually tastes better the next day! This time allows the flavors to meld and develop. Just cool it down before storing it in the fridge. There are many great sides to pair with vegetable curry. Here are a few ideas: - Basmati rice - Naan bread - Quinoa - Raita (yogurt sauce) - Fresh salad Each of these options brings a unique taste and texture. They complement the curry well and make for a complete meal. For the full recipe, check the section above. This blog post covered everything you need for a great vegetable curry. We talked about ingredients, how to prepare and cook them, and tips to enhance flavor. I provided variations for proteins and vegetables, plus storage info to keep leftovers fresh. Now you have the tools to make a delicious curry. Dive into this tasty dish, and enjoy sharing it with friends and family!

Easy Vegetable Curry Simple and Flavorful Recipe

Are you ready for a dish that is simple to make and full of flavor? In this post, I will

- 2 ripe avocados - 12 ounces pasta of choice - Fresh basil leaves - 2 cloves garlic - 1 tablespoon lemon juice - 1/4 cup Parmesan cheese - Cherry tomatoes - Extra basil leaves - Olive oil To create creamy avocado pasta, start with fresh ingredients. The avocados give a smooth texture and rich flavor. Choosing the right pasta is key. You can pick spaghetti, penne, or any type you love. Next, garlic adds a punch. A hint of lemon juice brightens the dish. It helps balance the creaminess of the avocados. Parmesan cheese adds a salty note, but you can swap it for nutritional yeast for a vegan option. For garnishes, cherry tomatoes add color and sweetness. Extra basil leaves give a fresh touch. Drizzling olive oil enhances the dish’s richness. For the full recipe, check out the detailed instructions. This dish is not just easy to make; it is also fun to enjoy! - Fill a large pot with water. - Add a generous pinch of salt. - Bring water to a boil. - Add your pasta choice. - Cook until al dente, according to package directions. - Reserve 1/2 cup of pasta water before draining. - Drain the pasta and set aside. - In a food processor, add the avocado flesh. - Add minced garlic and lemon juice. - Toss in fresh basil leaves and grated Parmesan cheese. - Pour in extra virgin olive oil. - Blend until smooth and creamy. - If too thick, add reserved pasta water a little at a time. - In a large bowl, combine the drained pasta with the avocado sauce. - Gently toss until the pasta is coated. - Season with salt and pepper to taste. For the full recipe, check out the details above. Enjoy your creamy avocado pasta! To make your sauce truly creamy, use ripe avocados. They give the best texture and taste. Look for avocados that yield slightly when you press them. This means they are ready. Next, adjust seasoning according to your taste. You may want more salt or lemon juice. Always taste as you go. Before you serve, drizzle olive oil on top. This adds flavor and a nice shine. You can also add garnishes for visual appeal. Think fresh basil leaves or colorful cherry tomatoes. These make your dish look even more inviting. This dish is quick! It takes about 10 minutes to prep and another 10 minutes to cook. So, you can have a delicious meal ready in just 20 minutes. Perfect for busy days! {{image_4}} For a vegan twist on creamy avocado pasta, swap the Parmesan cheese with nutritional yeast. Nutritional yeast adds a cheesy flavor without any dairy. It also boosts the dish with extra vitamins, like B12. This simple change makes this meal plant-based and keeps it creamy. If you need a gluten-free option, use gluten-free pasta alternatives. Many types are available, like rice or chickpea pasta. They cook similarly to regular pasta. Just follow the package instructions. You can enjoy the same creamy sauce with these gluten-free choices. Want to make your creamy avocado pasta more filling? Consider adding protein like grilled chicken or shrimp. Cook the protein separately, then mix it in with the pasta and sauce. This keeps your meal balanced and adds new flavors. You can customize it to fit your taste. For the full recipe, check out the Creamy Avocado Pasta Delight! To keep your creamy avocado pasta fresh, refrigerate it in an airtight container. This method helps maintain its flavor and texture. Be sure to consume it within 2-3 days for the best taste. This dish is best served fresh. However, if you have leftovers, you can reheat them gently in a pan. Heat on low, stirring often. You may want to add a splash of olive oil or a bit of reserved pasta water to help revive the creaminess. Freezing is not recommended for this dish. When you freeze avocado, its texture can change. It may become mushy when thawed, which affects the overall quality of your meal. Enjoy your creamy avocado pasta fresh for the best experience! If you want to save time, consider making the sauce ahead and storing it separately. Typically, creamy avocado pasta lasts about 2-3 days in the fridge. Make sure to store it in an airtight container. This will help keep it fresh for as long as possible. Over time, you may notice the avocado darkening, but it’s still safe to eat within this time frame. Yes, you can make this recipe ahead of time. I recommend storing the sauce separately from the pasta. This keeps the sauce creamy and prevents the pasta from getting soggy. When you are ready to eat, just combine them. Absolutely! Creamy avocado pasta is great for meal prep. You can cook a big batch and store it for quick meals throughout the week. This way, you save time and have a tasty dish ready to go. Just remember to keep the sauce and pasta separate until you’re ready to eat. This blog post details how to make creamy avocado pasta with ease. We covered essential ingredients like ripe avocados, pasta, and fresh basil. You learned how to cook pasta, blend a smooth avocado sauce, and combine the two. Tips helped you perfect the sauce and offered serving suggestions. In the end, this dish is not only quick but adaptable too. You can customize it to fit your taste or dietary needs. Enjoy your cooking, and savor every bite of this fresh, vibrant meal!

Creamy Avocado Pasta Delightful and Easy Meal

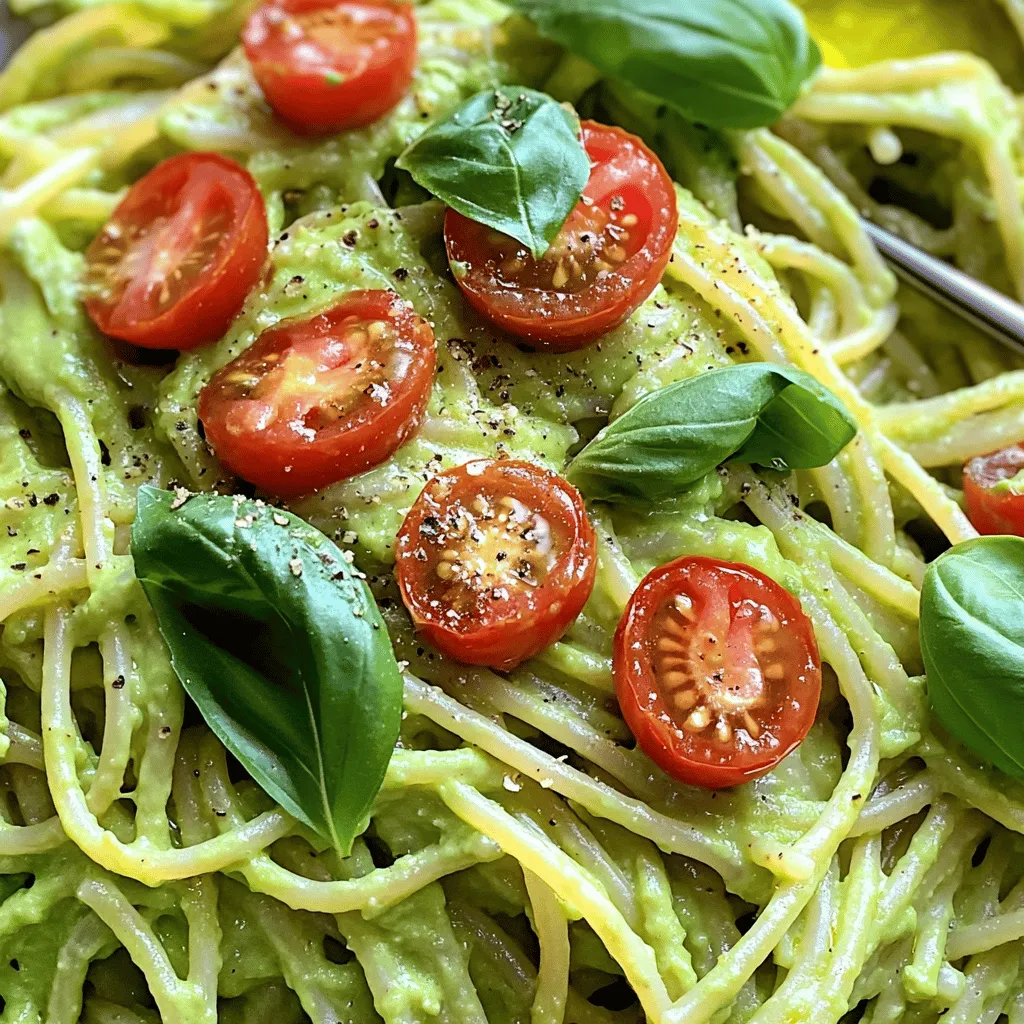
Looking for a quick and tasty meal that impresses? Try my Creamy Avocado Pasta! This dish is full of flavor

To make tasty homemade garlic Parmesan wings, you need a few key items: - 2 pounds chicken wings - 1/4 cup unsalted butter, melted - 4 cloves garlic, finely minced - 1 cup freshly grated Parmesan cheese - 1 tablespoon dried Italian herb blend - 1/2 teaspoon red pepper flakes (optional) - Salt and freshly ground black pepper to taste - Fresh parsley, finely chopped (for garnish) These ingredients work together to create a rich, savory flavor. The garlic gives a nice kick, while the Parmesan adds creaminess. When picking chicken wings, choose fresh or high-quality frozen ones. Look for wings that are plump and firm. Organic or free-range options are often more flavorful. Avoid wings that look discolored or have a slimy texture. You can add some optional ingredients to make your wings even better: - Lemon zest for a citrusy twist - Fresh herbs like thyme or rosemary for added fragrance - Honey for a touch of sweetness - Hot sauce for extra heat These additions can elevate your dish and allow you to customize it to your taste. Enjoy experimenting! Start by preheating your oven to 425°F (220°C). This high heat helps the wings get crispy. Next, line a baking sheet with parchment paper or a silicone mat. This makes cleanup easy and keeps wings from sticking. Take your chicken wings and pat them dry using paper towels. This step is very important. Dry wings help make them crispy when baked. You want to remove any extra moisture for the best results. In a large bowl, mix melted butter, minced garlic, and dried Italian herbs. You can also add red pepper flakes for some heat. Sprinkle in salt and black pepper to taste. Whisk it all together until well blended. This marinade packs a lot of flavor. Add the dry chicken wings to the bowl with the marinade. Toss the wings with your hands or a spatula. Make sure every wing is coated with that tasty garlic butter mix. This ensures they all have great flavor. Then, lay the wings out on the lined baking sheet. Make sure they are spaced apart. This allows hot air to circulate and crisp them up. Place the baking sheet in your preheated oven. Bake the wings for about 35-40 minutes. Halfway through, flip the wings to help them cook evenly. You want them golden brown and crispy all around. When the wings are done, take them out of the oven. Right away, sprinkle freshly grated Parmesan cheese over the hot wings. The heat will melt the cheese just a bit, making it stick. Gently toss the wings to spread the cheese evenly. Now transfer them to a nice platter. For a pop of color, sprinkle on some chopped parsley. Serve with ranch or blue cheese dressing for dipping. For the full recipe, check out the details above. Enjoy your tasty homemade Garlic Parmesan Wings! To get wings that are crispy, start with dry wings. Pat them with paper towels to remove moisture. This is key for a crunchy skin. Bake at a high temperature, around 425°F (220°C). Space the wings out on the tray. This allows hot air to flow and crisp them up evenly. Flip them halfway through baking for a golden finish. You can change the flavor of your wings easily. For a spicy kick, add more red pepper flakes. You can mix in some lemon zest for a refreshing twist. Try adding different herbs like rosemary or thyme. If you love cheese, increase the Parmesan or add another type like Asiago. Don’t be afraid to experiment with flavors! Having the right tools makes cooking easier. Use a large mixing bowl for the marinade. A sturdy baking sheet lined with parchment paper helps with cleanup. A good set of tongs is great for flipping wings. If you love garlic, a garlic press makes mincing quick and easy. A meat thermometer ensures your wings cook to the right temperature. Check for doneness at 165°F (74°C). For the full recipe, follow the detailed steps to get the best results. {{image_4}} You can make your wings spicy by adding red pepper flakes. If you like heat, use one teaspoon. This will give your wings a nice kick. Mix the flakes into the garlic butter marinade. You can also add hot sauce for more flavor. Try a tablespoon of your favorite hot sauce if you want extra spice! You can bake or fry your wings. Baking is healthier and keeps them crispy. Frying gives a different flavor but adds more fat. If you choose to fry, use a deep pot and heat oil to 375°F (190°C). Cook the wings for about 10 minutes until golden. Both methods are tasty, so choose what you like best! Feel free to mix up your seasonings! Try adding lemon zest for a fresh twist. You can also use smoked paprika for a deeper flavor. Other herbs like thyme or rosemary work well too. For cheese lovers, try mixing in some blue cheese. Experiment and find what you enjoy most! For the full recipe, check out the guide above. To keep your wings fresh, store them in an airtight container. Let them cool to room temperature before sealing. This step prevents moisture build-up, which can make them soggy. You can keep them in the fridge for up to four days. If you want to keep them longer, freezing is a great option. When you reheat your wings, aim to keep them crispy. The best method is to use an oven. Preheat it to 350°F (175°C). Spread the wings on a baking sheet in a single layer. Bake them for about 10-15 minutes. This method helps restore their crunch. Avoid using a microwave, as it can make them rubbery. If you want to freeze your wings, place them in a single layer on a baking sheet. Freeze them for about an hour until solid. Then, transfer them to a freezer-safe bag or container. They can last up to three months in the freezer. When you’re ready to enjoy them, thaw in the fridge overnight before reheating. Yes, you can use frozen wings. Just make sure to thaw them first. Thawing helps the wings cook evenly. You can thaw them overnight in the fridge. If you’re in a rush, you can also use the microwave. Follow your microwave’s instructions for defrosting meat. After thawing, pat the wings dry to ensure a crispy finish. Garlic Parmesan wings taste great with several sides. Here are some options: - Celery sticks - Carrot sticks - Creamy ranch dressing - Blue cheese dressing - Potato wedges - Coleslaw These sides add crunch and freshness to your meal. They also help balance the rich flavors of the wings. To make Garlic Parmesan wings in an air fryer, follow these steps: 1. Prepare the wings as usual. 2. Preheat your air fryer to 400°F (200°C). 3. Place the wings in a single layer in the air fryer basket. 4. Cook for 25-30 minutes, shaking the basket halfway through. 5. Once done, remove them and toss in the garlic Parmesan mixture. Using the air fryer gives a crispy texture without much oil. To prevent wings from sticking, use parchment paper or a silicone mat on the baking sheet. Both options help with easy removal. Also, make sure to space the wings apart. This allows hot air to circulate. Avoid overcrowding the pan; this keeps them from getting soggy. Yes, you can prepare the marinade ahead of time. Mix it and store it in the fridge for up to 24 hours. This lets the flavors develop more. When you're ready, toss the wings in the marinade. This step makes for a quick and easy meal when you're short on time. For the full recipe, check out the details above. Making homemade garlic parmesan wings is fun and simple. We covered key ingredients, including essential flavors and quality chicken. The step-by-step guide helps you prep, bake, and serve crispy wings perfectly. Using tips, you can customize your wings and achieve a perfect crisp. We also explored variations for different tastes and discussed proper storage for leftovers. Enjoy this recipe with your friends and family. It’s a great way to share delicious food and create special moments together. Happy cooking!

Homemade Garlic Parmesan Wings Tasty and Simple Recipe

Get ready to impress your friends with my Homemade Garlic Parmesan Wings! This tasty and simple recipe will elevate your

- 4 large bell peppers - 2 cups fresh spinach - 1 cup feta cheese - 1 cup cooked quinoa - 1/2 cup onion - 2 garlic cloves - 1/4 cup sun-dried tomatoes - 1 teaspoon dried oregano - Fresh parsley When making Spinach & Feta Stuffed Peppers, the choice of ingredients is key. The main ingredients are colorful bell peppers, fresh spinach, and creamy feta cheese. These items come together to give a rich taste. You’ll need four large bell peppers. You can choose any color: red, yellow, or green. Each brings its own sweet flavor. Fresh spinach adds a pop of green and healthy nutrients. Use two cups of chopped spinach. Feta cheese is a must. It adds a tangy taste that pairs well with the peppers. You will need one cup of crumbled feta for the filling. Additional ingredients include a cup of cooked quinoa. Quinoa adds a nice texture and protein. Half a cup of finely chopped onion brings sweetness. Two garlic cloves, minced, add depth to the flavor. For seasoning, a quarter cup of sun-dried tomatoes adds a sweet and savory touch. One teaspoon of dried oregano brings a warm, herbal note. Finally, fresh parsley is perfect for garnish, adding color and freshness. For the complete recipe, check the [Full Recipe]. - Preheat the oven to 375°F (190°C). - Prepare the bell peppers by cutting off the tops and removing the seeds. Lightly brush the outside with olive oil. Stand them up in a baking dish. - In a large skillet, heat olive oil over medium heat. - Add finely chopped onion and sauté for about 3-4 minutes. Stir often until the onion turns clear. - Now, add minced garlic and cook for one more minute. This makes the kitchen smell great! - Next, mix in the chopped spinach and sun-dried tomatoes. Stir for 2-3 minutes until the spinach wilts. - Remove the skillet from heat. Now, add cooked quinoa, crumbled feta cheese, dried oregano, salt, and black pepper. Stir until all is well mixed. - Carefully stuff each bell pepper with this tasty mixture. Press down gently to fill them well. - Cover the baking dish with aluminum foil. Bake in the oven for 25-30 minutes. - After this time, take off the foil. Bake for another 10-15 minutes until the peppers are soft and the tops are golden. - Let them cool for a few minutes before serving. Garnish with fresh parsley for a nice touch. For the full recipe, check out the recipe section above. Enjoy your healthy meal! To select the best bell peppers, look for firm, shiny skin. Choose peppers that feel heavy for their size. Avoid any with soft spots or blemishes. Any color works for stuffing, so pick your favorite. For cooking times, every oven is different. If your oven runs hot, check the peppers early. Bake them for about 25-30 minutes covered, then remove the foil for 10-15 minutes more. This gives them a nice golden top. Spices can take your dish to the next level. Consider adding a pinch of cayenne for heat or smoked paprika for depth. Both pair well with spinach and feta. If you want to swap cheeses, try goat cheese or ricotta. Each brings a unique flavor. You can also use vegan cheese for a dairy-free option. When serving stuffed peppers, arrange them on a colorful platter. A drizzle of olive oil or balsamic glaze adds shine. For an extra touch, sprinkle some feta on top before serving. Garnish each pepper with fresh parsley. This not only looks nice but adds a fresh flavor. Enjoy making your meal as appealing as it is tasty! {{image_4}} For a vegan version, swap the feta cheese for tofu or cashew cheese. Both options work well to mimic the creamy texture. Instead of quinoa, try using brown rice or lentils. These alternatives provide a nice bite and protein. For added protein, consider mixing in chickpeas or black beans. They will enhance the dish and keep it filling. If you love meat, add ground beef, turkey, or chicken to the filling. Start by cooking the meat in the skillet before adding the onions and garlic. This step adds rich flavors to your dish. You can also spice it up with taco seasoning or Italian herbs. Adjusting the seasoning can give a new twist to the classic recipe. For a low-carb version, replace quinoa with cauliflower rice. Cauliflower rice absorbs flavors well and stays light. You can also use zucchini or eggplant as a filling base. For keto-friendly swaps, avoid high-carb veggies and stick to leafy greens. This way, you keep the meal nutritious and satisfying without extra carbs. For the full recipe, check out the Spinach & Feta Stuffed Peppers section! To store your spinach and feta stuffed peppers, let them cool first. Place them in an airtight container. Make sure to cover them well to keep air out. I recommend using glass containers for better storage. They help keep the peppers fresh and are easy to clean. You can store them in the fridge for up to three days. If you want to freeze your stuffed peppers, wrap each one tightly in plastic wrap. Then, place them in a freezer-safe bag or container. This way, they stay fresh. When you're ready to eat, thaw them in the fridge overnight. To reheat, bake them in the oven at 350°F (175°C) for about 25 minutes. This method keeps the peppers tasty and warm. In the fridge, your stuffed peppers will last about three days. If you freeze them, they can last up to three months. Check for signs of spoilage before eating. Look for any mold or off smells. If anything seems wrong, it’s best to throw them away. Ensuring your food is safe helps you enjoy your meals worry-free. Yes, you can make them ahead. Prepare the filling and stuff the peppers. You can store them in the fridge for up to two days. Just cover them tightly with plastic wrap or foil. When you are ready to cook, bake them straight from the fridge. You might need to add a few extra minutes to the baking time. This method saves time on busy days. Stuffed peppers pair well with many sides. Here are some great options: - A fresh green salad with a light vinaigrette - Quinoa pilaf with herbs and nuts - Roasted vegetables for added flavor - Crusty bread to soak up any sauce These sides complement the rich flavors of the stuffed peppers. Absolutely! You can try different cheeses for fun flavors. Some great options include: - Mozzarella for a gooey texture - Goat cheese for a tangy taste - Cheddar for a sharp kick Each cheese brings a new twist to your dish. Feel free to mix and match for exciting results! For the full recipe, check out the detailed instructions above. In this post, we explored how to make delicious spinach and feta stuffed peppers. We covered essential ingredients, step-by-step instructions, and helpful tips. You can enhance your dish with various flavors and even adapt it to different diets. These stuffed peppers are easy to make and fun to customize. I hope you enjoy creating your own version. Happy cooking!

Spinach & Feta Stuffed Peppers Tasty and Healthy Meal

Looking for a meal that’s both tasty and healthy? Try my Spinach & Feta Stuffed Peppers! Packed with fresh spinach,

To make a savory vegetable frittata, gather these ingredients: - 6 large eggs - 1/2 cup whole milk - 1 cup assorted bell peppers (diced, in vibrant colors) - 1 cup zucchini (shredded) - 1/2 cup red onion (finely chopped) - 1 cup fresh spinach (roughly chopped) - 1/2 cup cherry tomatoes (halved) - 1 cup shredded cheese (options: cheddar or feta) - 2 tablespoons olive oil - 1 teaspoon garlic powder - 1/2 teaspoon smoked paprika - Salt and pepper (to taste) - Fresh herbs for garnish (such as parsley or basil) You can customize your frittata with these optional ingredients: - Add cooked meats like ham or bacon for protein. - Use different cheeses like goat cheese or mozzarella for unique flavors. - Swap in seasonal vegetables such as asparagus or mushrooms for a fresh twist. To make cooking easier, have these tools ready: - A large mixing bowl for whisking the eggs. - An oven-safe skillet for sautéing and baking. - A whisk for blending the egg mixture smoothly. - A spatula for stirring and serving the frittata. - A cutting board and knife to chop the vegetables. This simple list will help you create a delicious savory vegetable frittata. For the full cooking details, refer to the Full Recipe. Start by preheating your oven to 375°F (190°C). This step is key. A hot oven cooks the frittata evenly. In a large bowl, whisk together 6 large eggs and 1/2 cup whole milk. Mix until smooth. Add 1 teaspoon garlic powder, 1/2 teaspoon smoked paprika, and a sprinkle of salt and pepper. Stir well to blend all flavors. Heat 2 tablespoons of olive oil in a large oven-safe skillet over medium heat. Add 1/2 cup finely chopped red onion and 1 cup diced assorted bell peppers. Cook for 3 to 4 minutes until soft. Next, stir in 1 cup shredded zucchini and cook for 2 more minutes. Add 1 cup roughly chopped spinach and 1/2 cup halved cherry tomatoes. Cook until the spinach wilts. Remove the skillet from heat. Pour the egg mixture over the cooked veggies. Gently stir to mix everything. Top with 1 cup shredded cheese of your choice. Place the skillet in your preheated oven. Bake for 20 to 25 minutes. The frittata is done when the center is set and the top is lightly golden. After baking, let the frittata cool for a few minutes. Cut it into wedges for serving. Enjoy this tasty dish warm or at room temperature. For extra creaminess, reheat slices in the microwave for 15 to 20 seconds before serving. This recipe is perfect for any time of day! To make your frittata creamy, use fresh eggs and whole milk. Whisk them together until smooth. Avoid overcooking it in the oven. When it’s done, let it cool for a bit. You can warm slices in the microwave for about 15 to 20 seconds to bring back the creaminess. Herbs add great taste to your frittata. Fresh herbs like parsley or basil work well. Dried herbs can also be nice. Try thyme or oregano for different flavors. Garlic powder and smoked paprika add depth. Adjust salt and pepper to your liking for a personal touch. One mistake is not preheating the oven. This can lead to uneven cooking. Also, avoid overcrowding the pan with too many veggies. This can make the frittata watery. Lastly, don’t skip the cooling step. Cutting it too soon can make it fall apart. For more tips, check the Full Recipe for more details! {{image_4}} You can add meat to your frittata for extra flavor. Ham and bacon are popular choices. Diced ham gives a nice, savory taste. Bacon adds a crispy texture and a smoky touch. Both meats pair well with the vegetables. If you use cooked meat, add it right before pouring the egg mixture. This way, the meat warms up without cooking too much. Cheese makes a frittata rich and creamy. While cheddar and feta are great options, you can try different cheeses too. Goat cheese adds a tangy flavor that brightens the dish. Mozzarella melts beautifully and gives a soft texture. Feel free to mix cheeses for a unique taste. Experimenting with cheese can change the whole vibe of your dish. Using seasonal veggies keeps your frittata fresh and exciting. In spring, try asparagus or peas for a crisp bite. Summer is great for tomatoes and corn, adding sweetness to each slice. In fall, use hearty vegetables like squash or sweet potatoes. Winter brings root veggies like carrots and turnips, which add depth. Swap veggies based on what you have at home. This not only saves money but also brings new flavors to your table. You can store leftover frittata in the fridge. First, let it cool to room temperature. Then, wrap it tightly in plastic wrap or place it in an airtight container. This keeps it fresh for up to three days. Make sure to label the container with the date. This way, you know when to eat it. If you want to save the frittata for longer, freezing is a great option. Cut the frittata into wedges. Wrap each wedge in plastic wrap. Then, place the wrapped wedges in a freezer-safe bag. Remove as much air as you can. You can freeze the frittata for up to three months. When you're ready to eat, just thaw it in the fridge overnight. Reheating frittata is quick and easy. You can use the oven or microwave. For the oven, preheat it to 350°F (175°C). Place the frittata on a baking sheet and heat for about 10 to 15 minutes. If you use the microwave, heat each slice for about 30 to 45 seconds. If you want it creamier, add a splash of milk before reheating. Enjoy your frittata just as fresh as the day you made it! For the full recipe, check out the earlier section. A frittata and an omelet are both egg dishes, but they differ in how you cook them. An omelet cooks quickly on the stovetop and is folded over. A frittata cooks slower and is often baked in the oven. You mix all the ingredients into the eggs before cooking for a frittata. This gives it a thicker, richer texture. Yes, you can make a frittata ahead of time. In fact, it tastes great when made in advance. Just cook it, let it cool, and store it in the fridge. You can serve it cold or reheat it in the oven or microwave. This makes it a perfect choice for meal prep or brunch. You can use many types of vegetables in a frittata. Some great choices include: - Bell peppers - Spinach - Zucchini - Onions - Mushrooms - Broccoli You can mix and match to your taste. Using seasonal veggies can add fresh flavor. A frittata is done when it is set in the center and has a light golden color on top. You can check by inserting a knife in the middle. If it comes out clean, it’s ready. The edges may puff up a bit, which is a good sign of a fluffy frittata. In this article, we covered the key ingredients for a perfect frittata and shared step-by-step instructions. You learned how to sauté vegetables, mix eggs, and bake to perfection. We also discussed tips to enhance flavor and avoid common mistakes. Plus, you explored variations and storage options for leftovers. Now, go ahead and create your delicious frittata. Experiment with ingredients and enjoy each bite!

Savory Vegetable Frittata Quick and Easy Recipe

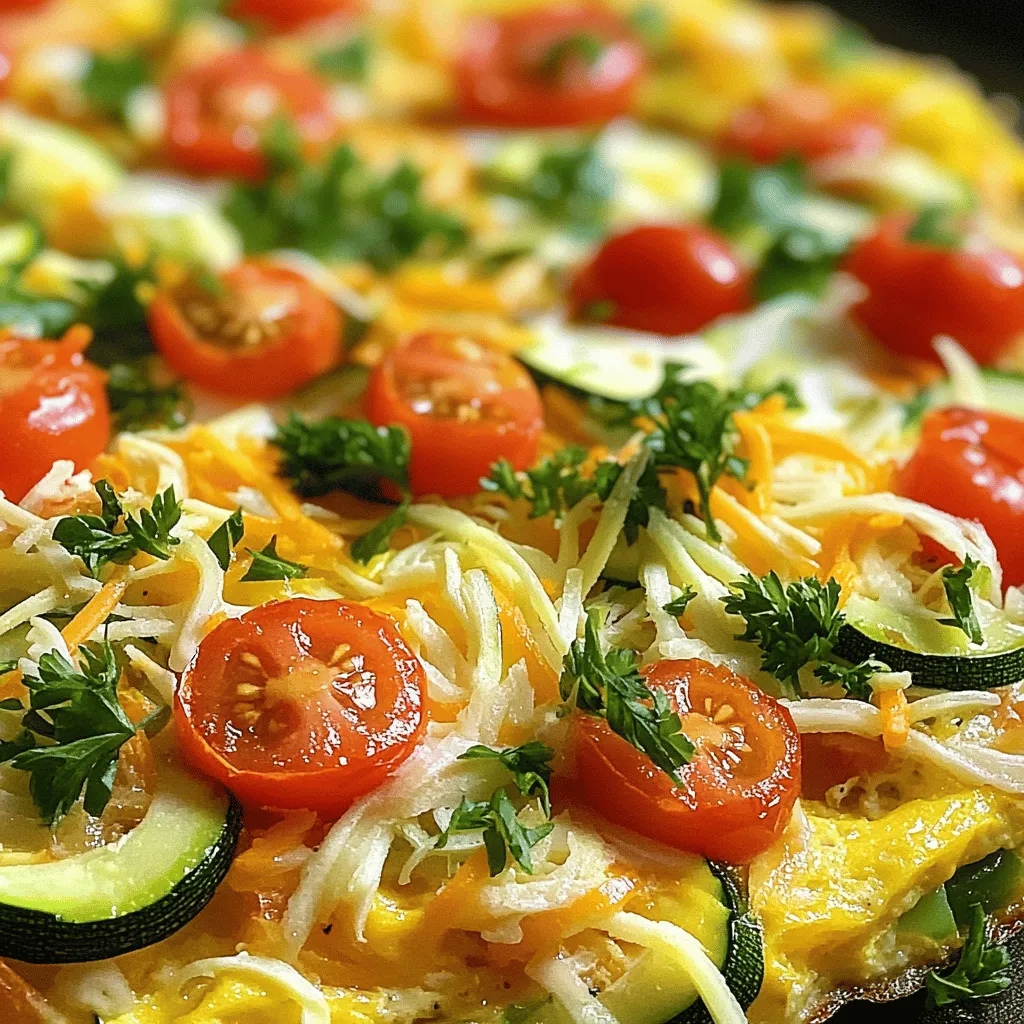
Are you ready to whip up a delicious Savory Vegetable Frittata? This quick and easy recipe is perfect for busy

- 4 boneless, skinless chicken thighs - 1 bunch of asparagus, trimmed - 4 cloves of garlic, minced - 2 tablespoons of olive oil - 1 tablespoon of lemon juice - 1 teaspoon of dried oregano - 1 teaspoon of paprika - Salt and pepper, to taste - Lemon wedges for serving - Fresh parsley, chopped, for garnish - Each serving has about 350 calories. - Macronutrients include 25g protein, 20g fat, and 8g carbs. - Fresh ingredients make a big difference in taste. - You can swap chicken thighs for chicken breasts or drumsticks. Using high-quality chicken and fresh asparagus gives you a dish full of flavor. Fresh garlic adds a nice kick. Always check for vibrant color and firmness in your vegetables. This recipe creates a simple yet tasty meal. For the full recipe, refer to the earlier section. 1. Preheat your oven to 400°F (200°C). This step is key to cooking the chicken and asparagus evenly. 2. In a large bowl, mix together the olive oil, minced garlic, lemon juice, dried oregano, and paprika. Add salt and pepper to taste. Use a whisk to blend until smooth. 3. Add the chicken thighs to the bowl. Make sure each piece gets a good coat of the marinade. Let the chicken sit for at least 15 minutes. This helps build flavor. 4. Heat a large oven-safe skillet over medium-high heat. Once hot, add the marinated chicken thighs. Sear each side for about 4-5 minutes. You want them golden brown. 5. After searing, take the chicken out and place it on a plate. In the same skillet, add the trimmed asparagus. Sauté the asparagus for 2-3 minutes. They should be tender but still crisp. 6. Return the seared chicken thighs to the skillet. Nestle them among the asparagus. Drizzle any remaining marinade over the top. 7. Transfer the skillet to the oven and bake for 15-20 minutes. Check the chicken’s internal temperature. It should reach 165°F (74°C). 8. Once done, take the skillet out of the oven. Let the dish rest for a few minutes. This helps the juices settle. Garnish with chopped parsley and serve with lemon wedges. For the full recipe, check the earlier sections. How to avoid dry chicken To keep chicken juicy, don't overcook it. Use a meat thermometer to check for doneness. Aim for 165°F (74°C). Marinating the chicken for at least 15 minutes helps add moisture and flavor. Always let it rest after cooking. This helps keep the juices inside. Best practices for cooking asparagus When cooking asparagus, keep it crisp. Sauté for just 2-3 minutes. You want them tender yet still bright green. Don't overcrowd the pan; give them space to cook evenly. Trim the tough ends before cooking for the best texture. Adding herbs and spices Fresh herbs like rosemary or thyme can brighten the dish. You can also add a pinch of red pepper flakes for heat. Experiment with spices like cumin or coriander to create a unique twist. Alternative marinades If you want to switch things up, try a soy sauce and ginger marinade. For a sweeter touch, mix honey and balsamic vinegar. Both options add their own special flair to the chicken and asparagus. Serving style suggestions Serve the chicken and asparagus right from the skillet for a homey feel. You can also plate them individually for a fancier look. Drizzle the pan juices over everything for added flavor. Garnishing ideas Fresh parsley or chives make great garnishes. They add color and a fresh taste. Lemon wedges on the side give a zesty kick when squeezed over the dish. This simple touch makes everything pop! For the complete recipe, check the [Full Recipe]. {{image_4}} You can swap chicken for turkey or tofu. Turkey gives a similar taste. It cooks well and stays juicy. Tofu is a great plant-based option. Press it to remove water, then marinate like chicken. This makes a tasty vegan dish. Want to spice things up? Use Cajun or Italian seasoning for a kick. You can also add more veggies. Try carrots, bell peppers, or snap peas. These add color and crunch. They blend well with the garlic and lemon flavors. You can grill or bake the dish. Grilling adds smoky flavor and crispy edges. Baking keeps it simple and easy. A slow cooker is a perfect choice for meal prep. Just set it and forget it. The flavors meld beautifully over time. For the full recipe, check the One-Pan Garlic Chicken and Asparagus section. To store leftover One-Pan Garlic Chicken and Asparagus, first, let it cool. Place the chicken and asparagus in the fridge within two hours. Use airtight containers for best results. Glass or plastic containers work well. Make sure to keep the dish covered to prevent drying. To reheat, use the oven or a skillet. Both methods keep the food juicy. Microwaving can dry out the chicken. If using a microwave, cover the dish with a damp paper towel. This helps retain moisture. When using the oven, preheat to 350°F (175°C) and heat for about 10-15 minutes. Yes, you can freeze this dish! To freeze, let it cool completely. Then, place it in a freezer-safe container. Make sure to seal it tightly to avoid freezer burn. When ready to eat, thaw in the fridge overnight. Reheat the dish in the oven or on the stove for the best texture. How long does One-Pan Garlic Chicken and Asparagus last in the fridge? This dish lasts about 3 to 4 days in the fridge. Store it in an airtight container to keep it fresh. When you want to eat it, just reheat it until warm. Can I use frozen chicken thighs? Yes, you can use frozen chicken thighs. Just remember to thaw them first. You can leave them in the fridge overnight or use the microwave for a quick thaw. Make sure they are fully thawed before marinating. How can I make this recipe gluten-free? To make this dish gluten-free, check the spices and olive oil. Most are safe, but always read labels. You can also use gluten-free soy sauce instead of lemon juice for a different flavor. What can I substitute for asparagus? You can use green beans, broccoli, or zucchini. These veggies will cook well with this recipe. Just adjust the cooking time to make sure they stay crisp and tender. Can this meal be prepared ahead of time? Yes, you can prepare this meal ahead of time. You can marinate the chicken and chop the veggies a day before. Just store them in the fridge until you're ready to cook. How to meal prep for the week with this recipe? To meal prep, make a large batch of One-Pan Garlic Chicken and Asparagus. Divide it into meal containers. This way, you have easy lunches or dinners ready all week long. Just heat and enjoy! This blog post covered a simple yet tasty recipe for One-Pan Garlic Chicken and Asparagus. You learned about essential ingredients, easy steps, and useful tips. Fresh ingredients, like chicken and asparagus, make a big difference in taste. I shared ways to store leftovers and offered variations, like vegan swaps or different cooking methods. Try this recipe, and enjoy a healthy, delicious meal. Cooking doesn't have to be hard—keep it fun!

One-Pan Garlic Chicken and Asparagus Flavorful Dish

If you’re craving a quick and tasty meal, this One-Pan Garlic Chicken and Asparagus dish is perfect for you. With

- 2 cups cooked rice (white or brown) - 2 cups fresh broccoli florets - 1 cup shredded sharp cheddar cheese - 1 cup shredded mozzarella cheese - 1 cup milk - 1 small onion, finely chopped - 2 cloves garlic, minced - 1/2 cup sour cream - 1 teaspoon Dijon mustard - 1 teaspoon salt - 1/2 teaspoon black pepper - 1/2 teaspoon paprika - 1/4 teaspoon cayenne pepper (optional) - 1/2 cup breadcrumbs - 2 tablespoons olive oil To make my cheesy broccoli rice casserole, I focus on fresh and simple ingredients. The key is to have a mix of creamy and cheesy flavors. The rice acts as a base, while the broccoli adds color and nutrition. I love using fresh broccoli florets because they stay crisp and bright. The cheeses I use are sharp cheddar and mozzarella. They melt perfectly and give the dish that gooey texture we all crave. The milk and sour cream make the casserole creamy. The Dijon mustard adds a slight tang that brightens the whole dish. For seasoning, I use salt, black pepper, paprika, and a touch of cayenne. Cayenne adds a little kick but is optional. Finally, breadcrumbs on top add crunch and contrast to the creamy filling. - Large pot for blanching broccoli - Mixing bowl - Casserole dish (9x13 inch) - Small bowl for breadcrumb topping Having the right tools makes the cooking process smooth. A large pot is great for blanching the broccoli. This keeps it vibrant and tender. A mixing bowl helps combine all the ingredients without a mess. I recommend using a 9x13 inch casserole dish. It gives enough space for everything to cook evenly. A small bowl is handy for mixing the breadcrumbs with olive oil before topping the casserole. For more details and techniques, check out the [Full Recipe]. - Set your oven to 350°F (175°C). This step is crucial for even cooking. - Boil water with a pinch of salt. Add the fresh broccoli florets and blanch for 2-3 minutes. This keeps them bright and crisp. Drain the broccoli and set it aside. - Heat 2 tablespoons of olive oil in a pot over medium heat. Add the finely chopped onion and minced garlic. Sauté until the onion is translucent, about 5 minutes. This step adds great flavor to your dish. - In a large mixing bowl, combine the cooked rice, blanched broccoli, sautéed onion and garlic, cheddar cheese, mozzarella cheese, milk, sour cream, Dijon mustard, salt, black pepper, paprika, and cayenne pepper if you like it spicy. Stir well until all ingredients are mixed evenly. - Grease a 9x13 inch casserole dish with cooking spray or a little olive oil. Pour the rice and broccoli mixture into the dish. Spread it out evenly for even baking. - Place the dish in the preheated oven. Bake for 25-30 minutes until the top is golden brown and the edges are bubbling. This gives you a crispy top and creamy inside. You can find the full recipe with more details in the earlier section. Enjoy the process of making this comforting dish! To make the best Cheesy Broccoli Rice Casserole, focus on a few key steps: - Ensure broccoli is crisp after blanching for texture. This keeps it bright green and crunchy. - Use freshly shredded cheese for better melt quality. Pre-shredded cheese often has anti-caking agents that affect melting. Presentation makes a big difference. After baking, garnish your casserole with chopped parsley or chives. This adds color and freshness to your dish. Serve your casserole hot. It pairs well with a fresh green salad or crusty bread. These sides balance the rich flavors and add texture. {{image_4}} You can boost your casserole with extra protein. Consider adding cooked chicken, ham, or tofu. These ingredients mix well with the rice and cheese. They also add flavor and texture. If you use chicken, make sure it’s shredded. For ham, diced pieces work best. Tofu should be firm and cubed for the right bite. This way, you make the dish heartier and more satisfying. If you want a vegetarian version, you can swap heavy cream. Use a plant-based milk alternative instead. Almond milk or oat milk works great. This keeps the dish creamy without the dairy. You can also add nutritional yeast for a cheesy flavor. It’s a simple change that still gives you rich taste. Cheese is key in this casserole. You can try different cheese blends to change the flavor. Pepper jack adds a kick, while gouda gives a smoky taste. Mixing cheeses can make your casserole unique and fun. I love using a mix of cheddar and mozzarella for the best melt. Feel free to experiment with your favorites. Each cheese choice will give your dish a new twist. For the full recipe, check the section above! Store leftovers in an airtight container in the refrigerator for up to 3 days. This keeps the casserole fresh and ready for a quick meal. Make sure to let it cool before sealing it up. This helps prevent moisture from building up inside, which can make your dish soggy. You can freeze the casserole in portions for easy reheating later. Just wrap each portion tightly in plastic wrap or foil. Place them in a freezer-safe bag, and consume within 2 months. This way, you’ll always have a delicious meal on hand for busy nights. To reheat, place the casserole in the oven at 350°F until heated through. This usually takes about 20-25 minutes. To keep it moist, add a splash of milk before covering it with foil. This will help the cheese melt nicely and keep the rice from drying out. Enjoy your warm and cheesy broccoli rice casserole again! Yes, you can prepare and assemble it a day before baking. Just cover the dish with plastic wrap and store it in the fridge. This way, you save time on busy days. When you are ready, just pop it in the oven. It comes out just as tasty! You can use quinoa or cauliflower rice for a low-carb option. Quinoa adds a nutty flavor and nice texture. Cauliflower rice is light and healthy. Both alternatives work well in this dish. To make it gluten-free, use gluten-free breadcrumbs. Check all other ingredients for gluten. Many brands offer gluten-free options for cheese and milk. This way, everyone can enjoy the dish! Absolutely! It stores well and reheats nicely, making it perfect for meal prep. You can divide leftovers into containers. They are easy to grab for lunch or dinner during the week. Enjoy tasty meals without the fuss! This blog post covered how to make a creamy Cheesy Broccoli Rice Casserole. You learned about the key ingredients, cooking steps, and tips for the best flavor and texture. I shared fun variations like adding proteins or different cheese types. Make it your own! This dish keeps well, too, perfect for meal prep. Enjoy serving it at dinner or a gathering. You’ll impress everyone with this simple and tasty recipe!

Cheesy Broccoli Rice Casserole Creamy and Easy Recipe

Looking for a quick and tasty dinner idea? You’ve just found it! This Cheesy Broccoli Rice Casserole is creamy, comforting,

To make a Mango Avocado Quinoa Salad, you will need: - 1 cup quinoa, thoroughly rinsed - 2 cups water - 1 ripe mango, diced into bite-sized pieces - 2 ripe avocados, diced - 1 medium red bell pepper, finely chopped - 1/4 cup red onion, finely chopped - 1/4 cup fresh cilantro, roughly chopped - Juice of 1 lime - 2 tablespoons extra-virgin olive oil - Salt and pepper to taste - Quinoa: A great source of protein and fiber. It has all nine essential amino acids. - Mango: Low in calories and high in vitamins A and C. It boosts your immune system. - Avocado: Packed with healthy fats, fiber, and potassium. It supports heart health. - Red bell pepper: Rich in vitamins C and A. It adds crunch and color. - Red onion: Provides antioxidants and vitamins. It adds a nice bite. - Cilantro: High in vitamins K and C. It adds a fresh, herbal note. - Lime juice: Rich in vitamin C. It brightens the flavors in the salad. - Olive oil: Heart-healthy fat that helps absorb nutrients. It adds richness. - Salt and pepper: Enhances all the flavors in the dish. If you want to switch things up, consider these options: - For quinoa, use brown rice or farro for a different texture. - Instead of mango, try pineapple or peaches for a sweet twist. - Swap avocados with diced cucumber for a lighter salad. - Use any color bell pepper, like yellow or green, for variety. - If you dislike cilantro, use parsley or basil for a fresh taste. - Instead of lime juice, lemon juice can also work well. - For a vegan option, replace olive oil with avocado oil or nut oil. This way, you can make your Mango Avocado Quinoa Salad just the way you like it. For a full recipe, check out the link. Start by rinsing 1 cup of quinoa under cold water. This removes the bitter coating called saponin. In a medium pot, bring 2 cups of water to a boil. Add the rinsed quinoa along with a pinch of salt. Cover the pot, reduce the heat to low, and let it simmer for 15 minutes. When the quinoa is cooked, the water should be gone. Remove the pot from heat and let it cool to room temperature. While the quinoa cools, prepare the other ingredients. Dice 1 ripe mango and 2 ripe avocados into bite-sized pieces. Chop 1 medium red bell pepper, 1/4 cup of red onion, and 1/4 cup of fresh cilantro. In a large mixing bowl, combine the cooled quinoa with the diced mango, avocados, chopped red bell pepper, red onion, and cilantro. Gently stir to mix everything. Drizzle the juice of 1 lime and 2 tablespoons of extra-virgin olive oil over the salad. Use a spatula to toss the salad without mashing the avocados. Season with salt and pepper to taste, and fold the mixture again to spread the seasoning. Let the salad rest for about 10 minutes before serving. To achieve perfect quinoa, use a 2:1 water-to-quinoa ratio. This helps ensure the grains cook evenly and remain fluffy. Always rinse the quinoa to remove bitterness. Do not skip the resting step after cooking; it allows the quinoa to absorb any remaining moisture. This makes it light and fluffy, perfect for your salad. To slice a mango, first stand it upright. Cut along the seed, creating two halves. Score the flesh in a grid pattern without cutting through the skin. Then, scoop the pieces out with a spoon. For avocados, cut in half around the pit. Twist to separate the halves and remove the pit with a spoon. Slice each half into wedges, then scoop out the flesh. This method keeps your fruit intact and beautiful for the salad. For the full recipe, check out the main section. Enjoy your fresh and flavorful Mango Avocado Quinoa Salad! When mixing the salad, be gentle. Start by adding the cooled quinoa to a large bowl. Next, add the diced mango, avocados, red bell pepper, red onion, and cilantro. Use a spatula to fold the ingredients. This method keeps the avocado pieces whole. If you stir too hard, you might mash the avocados. Aim for a light touch to mix everything. Letting the salad rest is key. After mixing, allow it to sit for about 10 minutes. This time helps the flavors blend together. The lime juice and olive oil soak into the quinoa and veggies. It makes each bite taste even better. Plus, the resting time cools the salad slightly, making it more refreshing. Having the right tools makes prep easy. Use a medium saucepan for cooking quinoa. A large mixing bowl is perfect for combining the salad. A sharp knife helps you slice the mango and avocado neatly. A spatula is great for folding the salad without mashing. For measuring, use a set of dry measuring cups. These simple tools make cooking fun and stress-free. You can find the full recipe in the article for all the details! {{image_4}} You can boost the taste of your Mango Avocado Quinoa Salad with extra ingredients. Try adding: - Black beans for protein - Corn for sweetness - Cherry tomatoes for color - Jalapeños for heat - Feta cheese for creaminess Each of these will bring unique flavors and textures. Feel free to mix and match based on what you enjoy! This salad is naturally vegan and gluten-free. To keep it that way, avoid adding cheese or any animal products. If you want to make it more filling, add chickpeas or nuts. These options are also vegan-friendly. Always check labels for gluten-free status if using packaged goods. This salad is flexible. Serve it as a main dish by adding grilled chicken or shrimp. It also works well as a side dish for barbecues or picnics. Pair it with grilled meat or fish. It adds a fresh touch to any meal. For the full recipe and more details, check out the instructions above! To keep your Mango Avocado Quinoa Salad fresh, store leftovers in an airtight container. Make sure to seal the container well to avoid air exposure. This will help preserve the flavors and textures of the ingredients. If possible, keep the dressing separate until you are ready to eat. This prevents the salad from getting soggy. For best results, use glass containers with tight-fitting lids. Glass is non-reactive and helps maintain the taste. If you need something lightweight, use BPA-free plastic containers. Ensure they are also airtight to keep your salad fresh. Label the containers with the date you made the salad. This way, you can track how long it has been stored. To extend the freshness of your ingredients, consider these tips: - Store diced avocados in lemon juice to slow browning. - Keep mango pieces in the fridge to maintain their sweetness. - Store cooked quinoa in a separate container to avoid sogginess. - Use fresh herbs like cilantro right before serving for better flavor. Following these tips will help you enjoy your Mango Avocado Quinoa Salad for days. For the full recipe, check the previous section. You can use rice or couscous instead of quinoa. Both options offer a nice texture. If you want a gluten-free choice, try millet or amaranth. These grains cook quickly and absorb flavors well. You can also use farro for a chewier bite. Yes, you can make this salad a few hours ahead. Just store it in the fridge. The flavors will blend nicely as it sits. To keep the avocados fresh, add them just before serving. This helps prevent browning and keeps the salad looking vibrant. To pick ripe mangos, look for smooth skin with a slight give when you press lightly. The color can vary by type, so don’t focus only on that. For avocados, choose ones that feel soft but not mushy. They should yield gently to your touch. If they’re hard, let them ripen on the counter. This blog post shared key steps to create a vibrant and healthy salad. We covered the best ingredients, their nutrition, and useful tips for preparing quinoa, mango, and avocado. You learned simple ways to mix and serve your salad, plus ideas for variations and dietary needs. Remember to store leftovers well to keep them fresh. With this guide, you can enjoy a delicious salad that’s easy to make and tailored to your taste. Now, you can impress your friends and family with your new skills!

Mango Avocado Quinoa Salad Fresh and Flavorful Delight

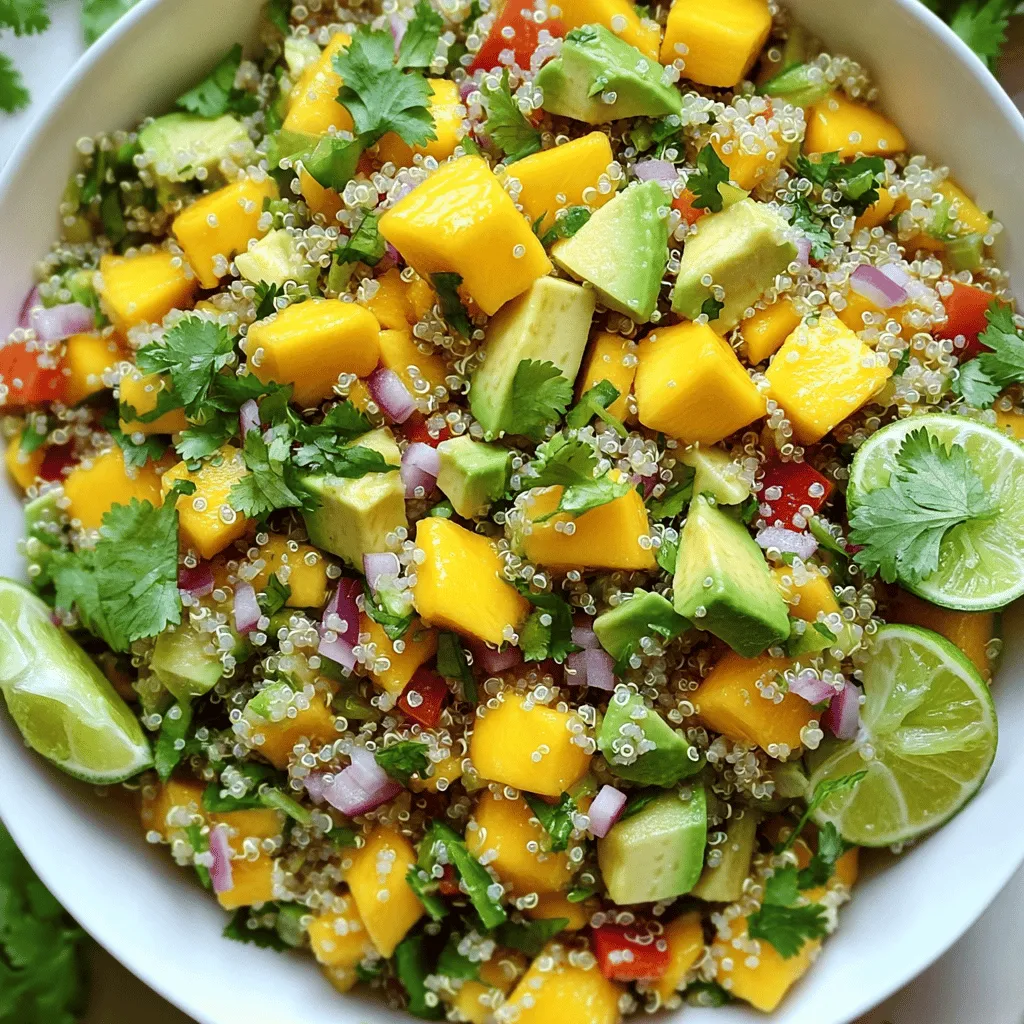
If you’re looking for a fresh and vibrant dish, this Mango Avocado Quinoa Salad is for you! Packed with flavor

To make these tasty Lemon Basil Chicken Skewers, gather the following ingredients: - 1 lb (450g) boneless chicken breasts, cut into 1-inch cubes - 1/4 cup fresh basil leaves, finely chopped - Zest from 2 lemons (approximately 2 tablespoons) - 1/4 cup fresh lemon juice (from about 1-2 lemons) - 3 cloves garlic, minced - 2 tablespoons extra virgin olive oil - 1 tablespoon honey - Salt and freshly ground black pepper, to taste - Skewers (bamboo or metal) These ingredients create a burst of flavor. The lemon and basil pair well with chicken. You can boost the flavor with these optional ingredients: - Red pepper flakes for heat - Cherry tomatoes for sweetness - Bell peppers for crunch - Onions for a savory touch Adding these can enhance your skewers. Each brings a unique taste and texture. Need to swap an ingredient? Here are some easy substitutions: - Chicken thighs instead of breasts for more flavor. - Lime juice and zest can replace lemon for a twist. - Maple syrup can stand in for honey if desired. - Dried basil can work if fresh is not available. These substitutions help keep the recipe flexible. You can still enjoy delicious skewers! For the full recipe, check out the complete guide. To start, gather your ingredients. You need fresh basil, lemon zest, lemon juice, garlic, olive oil, honey, salt, and pepper. Begin by chopping the basil leaves finely. In a medium bowl, mix the basil, lemon zest, and lemon juice. Add minced garlic, olive oil, honey, salt, and pepper. Whisk everything well until combined. This fragrant marinade will pack your chicken with flavor. Now, it's time to marinate the chicken. Cut the boneless chicken breasts into 1-inch cubes. Place them in the bowl with your marinade. Gently toss the chicken so each piece is coated. Cover the bowl with plastic wrap. Let it sit in the fridge for at least 30 minutes, or up to 2 hours for more flavor. This step is key to making the chicken juicy and tasty. While the chicken marinates, get your grill ready. Preheat it to medium-high heat. If using bamboo skewers, soak them in water for 30 minutes to stop them from burning. Thread the marinated chicken onto the skewers, leaving small gaps between pieces. This helps them cook evenly. Once your grill is hot, place the skewers on it. Grill for about 10-12 minutes. Turn them every few minutes for even cooking. Make sure the internal temperature of the chicken reaches 165°F (75°C). After grilling, let the skewers rest for 5 minutes to keep them juicy. For a stunning presentation, serve the skewers on a platter. Garnish with extra basil and lemon wedges. Enjoy this bright and flavorful dish! For the complete recipe, check out the Full Recipe section. To get juicy chicken on your skewers, use boneless chicken breasts. Cut them into 1-inch cubes. This size helps them cook evenly. Always check the internal temperature. It should reach 165°F (75°C) for safety. After grilling, let the skewers rest for five minutes. This step keeps the chicken moist. A great marinade makes all the difference. Use fresh basil, lemon zest, and lemon juice. These add bright flavor to the chicken. Mix in minced garlic, olive oil, and honey for depth. Make sure to coat every piece of chicken well. Let it marinate for at least 30 minutes. For a stronger taste, marinate for up to 2 hours. This allows the flavors to soak in. Prevent your chicken from sticking to the grill. First, preheat your grill or grill pan over medium-high heat. A hot surface helps create a good sear. Lightly oil the grill grates with cooking spray or a brush of oil. If using bamboo skewers, soak them in water for 30 minutes first. This keeps them from burning. Place the skewers on the grill and turn them every few minutes for even cooking. {{image_4}} You can use other proteins for your skewers. Shrimp works well with lemon and basil. Just marinate them for a shorter time. Salmon also pairs nicely with these flavors. Cut it into cubes and follow the same marinade steps. For beef lovers, try using sirloin cut into chunks. The key is to adjust the cooking time based on the protein. If you prefer a vegetarian option, use firm tofu or tempeh. Cut the tofu into cubes and press it to remove excess water. This helps it absorb the marinade better. You can also use mushrooms like portobello or button. Cut them into thick slices for grilling. Bell peppers and zucchini add color and taste. Skewer them with cherry tomatoes for a vibrant mix. Adjust the flavor by adding spices or herbs. You can mix in some red pepper flakes for heat. Try adding fresh mint or parsley for a different taste. If you want sweetness, add more honey or a dash of maple syrup. For a tangy twist, use lime juice instead of lemon juice. These small changes can create a whole new dish. Explore and find what you love! For the complete recipe, check out the Full Recipe section. After enjoying your Lemon Basil Chicken Skewers, you might have some leftovers. To store them properly, place the skewers in an airtight container. This keeps them fresh and safe to eat. You can refrigerate them for up to three days. Make sure they cool down before sealing the container to avoid steam buildup. When you are ready to eat your leftovers, reheating is easy. The best method is to use a grill or grill pan. This method revives the flavor and texture. Heat the grill to medium heat. Place the skewers on the grill for about 5-7 minutes. Turn them often to warm evenly. You can also use a microwave for quick reheating. Heat them in short bursts, checking to avoid overcooking. If you want to save your skewers for later, freezing is a great option. First, let the skewers cool completely. Then, wrap each skewer in plastic wrap or foil. After that, place them in a freezer bag. Remove as much air as possible before sealing. You can freeze them for up to three months. When ready to eat, thaw in the fridge overnight. Then, reheat as mentioned above for the best flavor. Enjoy your Lemon Basil Chicken Skewers anytime! For the full recipe, check out the earlier section. You can tell if chicken is cooked by checking its color and temperature. The meat should be white, not pink. The best way is to use a meat thermometer. Insert it into the thickest part of the chicken. It should read 165°F or 75°C. This ensures it is safe to eat. Always check each piece, as sizes may vary. Yes, you can prepare Lemon Basil Chicken Skewers ahead of time. Marinate the chicken and store it in the fridge. You can marinate it for up to 2 hours for the best flavor. If you need to prepare it even earlier, you can marinate it the night before. Just make sure to cover it well. This saves time and allows the flavors to soak in. These skewers pair well with many sides. Here are some great options: - Grilled vegetables for a smoky taste - A crisp salad for a fresh crunch - Rice or quinoa for a hearty base - Garlic bread for a warm, comforting touch - Lemon wedges for extra zing Feel free to mix and match these sides. They all enhance the bright flavors of the skewers. For the full recipe, check the earlier section. Enjoy your cooking! Lemon Basil Chicken Skewers are easy and fun to make. We covered main ingredients and substitutes to suit your taste. I shared tips for perfect cooking and grilling methods to enhance flavor. You can even explore variations and vegetarian options. Storing and reheating leftovers keeps the meal fresh and tasty. Now, you have the tools to create a delicious dish your family will love. Enjoy!

Lemon Basil Chicken Skewers Flavorful Grilling Recipe

Fire up your grill! Lemon Basil Chicken Skewers are a bright and tasty choice for your next cookout. I’ll guide

- 2 cups cooked chicken, shredded - 1 cup black beans, drained and rinsed - 1 cup corn kernels (fresh, frozen, or canned) - 1 cup shredded cheddar cheese, divided - 1 teaspoon ground cumin - 1 teaspoon chili powder - ¼ teaspoon garlic powder - Salt and pepper, to taste - 8 small flour tortillas - 1 cup enchilada sauce (store-bought or homemade) - Fresh cilantro, for garnish - Sour cream, for serving (optional) Gather these ingredients before you start. You’ll find that they come together quickly to make a delicious meal. Using cooked chicken saves time, while black beans add protein and fiber. Corn gives a nice sweetness. The shredded cheddar cheese melts beautifully, creating a rich flavor. The spices bring warmth and depth to the dish. Ground cumin adds earthiness, while chili powder gives a gentle kick. Garlic powder enhances the flavor without being too strong. Don’t forget salt and pepper to taste; they balance all the flavors. For the tortillas, choose small flour ones. They are soft and easy to roll. The enchilada sauce is the star here. It adds zest and moisture to the enchiladas. Finally, fresh cilantro and sour cream can elevate your dish when served. You can find the full recipe for these enchiladas [here](#). Enjoy cooking! First, preheat your oven to 375°F (190°C). This helps the enchiladas bake evenly. While the oven warms up, you can make the filling. In a large bowl, mix together the shredded chicken, black beans, corn, and spices. Add ground cumin, chili powder, garlic powder, salt, and pepper. Stir it well until all the ingredients blend together. Now, it's time to roll the tortillas. Take one tortilla and lay it flat on your workspace. Spoon a good amount of the chicken filling into the center. Fold the sides in, then roll it up tightly from one end to the other. Be sure the filling stays inside. Place the rolled tortilla seam-side down in a greased 9x13 inch baking dish. Repeat this for all the tortillas until the dish is full. After assembling, pour the enchilada sauce evenly over the rolled tortillas. Make sure each one gets a good coating. Next, sprinkle the rest of the cheddar cheese on top. Cover the baking dish with aluminum foil, then place it in the oven. Bake for 20 minutes, then remove the foil. Bake for another 10-15 minutes until the cheese is bubbly and lightly golden brown. Once done, take them out and let them cool. Garnish with fresh cilantro and serve with sour cream if you like. To make great enchiladas, start with cooked chicken. You can poach it, bake it, or use leftovers. Shred the chicken into small pieces to mix well with other ingredients. This helps the filling blend nicely. When filling the tortillas, don’t overstuff them. A little goes a long way. This way, they will roll easily and hold their shape. Cheese is key to tasty enchiladas. I like to use sharp cheddar for its strong flavor. You can also mix in some Monterey Jack for creaminess. Seasoning is just as important. Don’t skip the spices! Ground cumin and chili powder add warmth and depth. Always taste the filling before rolling. Adjust the salt and pepper to your liking. Make your enchiladas look great on the plate. Use a colorful serving dish to catch the eye. Arrange the enchiladas neatly, side by side. A sprinkle of fresh cilantro adds a pop of green. You can also serve with avocado slices and lime wedges. These not only look good but also enhance the flavors. For a creamy touch, add a dollop of sour cream on top. This makes the dish even more inviting! For the Full Recipe, check the main article. {{image_4}} You can change up the black beans and corn in your enchiladas. Try using pinto beans or chickpeas instead of black beans. If you want to skip corn, use diced peppers or zucchini. For cheese, cheddar works great, but you can also use Monterey Jack or pepper jack for a twist. These changes keep your meal fresh and exciting. If you need gluten-free options, choose corn tortillas instead of flour. They taste great and hold the filling well. For a vegetarian version, swap the chicken for more beans or sautéed mushrooms. You can add spinach or butternut squash for extra flavor and nutrients. These adaptations make the dish fit different diets. Want to add some heat? Toss in sliced jalapeños to the filling or top your enchiladas with them before baking. Spices can also change the taste. Try adding smoked paprika for a deeper flavor or oregano for a hint of earthiness. Experimenting with these options makes your chicken enchiladas unique every time. To keep your enchiladas fresh, use airtight containers. Glass or plastic containers work well. Make sure to let the enchiladas cool before sealing them. This prevents steam from making them soggy. Store them in the fridge for up to four days. You can reheat enchiladas in the oven or microwave. For the oven, preheat it to 350°F (175°C). Place the enchiladas in a baking dish and cover with foil. Heat for about 15-20 minutes. This keeps them moist and helps the cheese melt nicely. In the microwave, place one or two enchiladas on a plate. Heat for 1-2 minutes, checking to avoid overcooking. To freeze enchiladas, first cool them completely. Wrap each one tightly in plastic wrap. Then, place them in a freezer-safe bag or container. They can last up to three months in the freezer. When you're ready to eat them, thaw them in the fridge overnight. To reheat, follow the oven instructions above. Enjoy your enchiladas hot and cheesy! Yes, you can! Prepare the enchiladas and place them in the baking dish. Cover them tightly with plastic wrap or foil. Store them in the fridge for up to 24 hours before baking. This saves time on busy nights. Just add a few extra minutes to the baking time. I recommend using cooked chicken. You can use rotisserie chicken or poach your own. Shredded chicken works best, as it mixes well with the other ingredients. It absorbs flavors nicely, making your enchiladas taste amazing. To spice things up, add chopped jalapeños to the filling. You can also use spicy enchilada sauce. For an extra kick, sprinkle some cayenne pepper into the mix. Adjust the spice level to fit your taste. These enchiladas pair well with many sides. Try serving them with Mexican rice or refried beans. A fresh salad or guacamole also makes a great addition. For a fun twist, offer tortilla chips with salsa for dipping. Enjoy the full flavor experience! This blog post explored easy chicken enchiladas, from key ingredients to storage tips. I shared how to prep, assemble, bake, and garnish your dish for great results. You can customize with ingredient swaps, dietary changes, and flavor boosts. Remember, practice makes perfect. With a few simple tricks, you can achieve a delicious meal every time. Enjoy your cooking journey!

Easy Chicken Enchiladas Simple and Tasty Recipe

Craving a tasty meal that’s easy to make? I’ve got the perfect solution: Easy Chicken Enchiladas! This dish is packed

Older posts
Newer posts
← Previous Page1 … Page21 Page22 Page23 … Page27 Next →

dsad

© 2025 mealinmoments • Built with GeneratePress

Our Policies

  • Copyright Policy
  • Cookie Policy
  • GDPR Policy
  • Privacy Policy
  • Disclaimer
  • Terms Of Use

More Information

  • Home
  • About
  • Contact
  • Appetizers
  • Dessert
  • Dinner
  • Drinks
©2025, mealinmoments About Back To Top