![To make stuffed bell peppers, you need a few key items. Here’s what you’ll need: - 4 medium bell peppers (I like to use a mix of colors for fun) - 1 cup cooked quinoa (red or white quinoa both work great) - 1 can (15 oz) black beans, drained and rinsed - 1 cup corn kernels (fresh or frozen is fine) - 1 cup diced tomatoes (you can use canned or fresh) - 1 teaspoon ground cumin - 1 teaspoon smoked paprika - 1 teaspoon garlic powder - Salt and freshly ground black pepper to taste These ingredients create a tasty base for your stuffed peppers. The quinoa and black beans give protein and fiber, while the bell peppers add crunch and flavor. You can change the taste with some extra ingredients. Here are some ideas: - ½ cup shredded cheddar cheese (for a cheesy topping) - ¼ cup fresh cilantro, chopped (adds fresh flavor) - Lime wedges (for serving, adds a zesty kick) Feel free to mix and match these options to make the dish your own! Stuffed bell peppers can fit many diets. Here are a few options: - Vegetarian: Use all plant-based ingredients. - Vegan: Skip the cheese and use plant-based toppings. - Gluten-free: All the ingredients here are gluten-free. Nutritionally, this dish is full of vitamins and minerals. It's a healthy choice for meals. You can enjoy these stuffed peppers without worry. If you want detailed nutritional info, check out the full recipe! To start, take your bell peppers and cut off the tops. Use a sharp knife for this task. Be careful not to cut too deep. After that, scoop out the seeds and membranes inside the peppers. You want them empty for stuffing. Next, brush the outside of each pepper with olive oil. This adds flavor and helps them roast well. Make sure to coat them lightly but evenly. Set them aside as we prepare the filling. In a large bowl, combine the cooked quinoa with the black beans. Add in the corn and diced tomatoes, mixing well. This base is both filling and healthy. Now, season the mixture. Sprinkle in the ground cumin, smoked paprika, and garlic powder. Add salt and pepper to taste. Stir everything together until the spices coat each ingredient. This balance of flavors makes each bite delicious. Time to fill the peppers! Spoon the quinoa mixture into each pepper. Press down gently to pack it in. You want to fill them well without overflowing. If you like cheese, sprinkle some shredded cheddar on top of each pepper. This adds a tasty melted layer. Next, place the stuffed peppers upright in a baking dish. Pour a splash of water into the dish to create steam while baking. Cover the dish with aluminum foil. Bake in a preheated oven at 375°F (190°C) for 25 minutes. After that, remove the foil and bake for another 10 minutes. This will make the peppers tender and, if you used cheese, melty. Once done, take the peppers out of the oven. Let them cool for a few minutes. Add fresh cilantro on top before serving. Enjoy your colorful and tasty stuffed bell peppers! For the full recipe, click [Full Recipe]. When picking bell peppers, look for bright colors. Red, yellow, and orange peppers are sweeter. Green peppers are less sweet but still tasty. Check the skin; it should be smooth and shiny. Firmness matters too. A firm pepper will stay fresh longer. Avoid any with soft spots or wrinkles. This ensures the best flavor and texture for your stuffed bell peppers. You can cook stuffed bell peppers in different ways. The oven method is popular and easy. Just follow the [Full Recipe] for a great bake. If you prefer using a slow cooker, it works well too. Set your cooker to low for about 4 hours. This method gives you a softer pepper and a warm, hearty meal. You can also grill them for a smoky flavor. Just wrap them in foil and place them on the grill for about 20 minutes. Experiment with these methods to find your favorite! Stuffed bell peppers pair well with a variety of sides. Try serving them with a light salad. A fresh green salad or a tangy coleslaw complements the dish nicely. Rice or quinoa on the side can add more texture. For garnishes, fresh herbs like cilantro or parsley enhance the look. A squeeze of lime adds a zesty touch that brightens the flavors. Enjoy your stuffed peppers with these tasty sides! {{image_4}} For meat lovers, stuffed bell peppers can be filled with ground beef or turkey. These proteins add a hearty touch and boost flavor. When using meat, cook it first. Brown the meat in a pan and drain excess fat. Then mix it with your other filling ingredients. This step makes sure the meat is safe to eat and fully cooked. You can also add spices like chili powder or onion for extra taste. If you prefer plant-based meals, try lentils or mushrooms as your filling. Cooked lentils provide protein and fiber while mushrooms add a rich texture. For a tasty plant-based experience, sauté the mushrooms before mixing them in. This step enhances their flavor and makes them tender. You can also toss in spinach or zucchini for added nutrients. Season well to ensure every bite is packed with flavor. Stuffed bell peppers can explore different cuisines. Try adding spices like cumin, curry powder, or taco seasoning. These spices create a unique twist. You can also use ingredients from various cultures. For example, swap out black beans for chickpeas or add feta cheese for a Mediterranean flair. Fusion ideas include using kimchi for a Korean twist or adding curry for an Indian vibe. The options are endless, so feel free to get creative! For a complete guide on how to make these delicious meals, check out the Full Recipe. To keep stuffed peppers fresh, place them in a sealed container. Use a glass or plastic container with a tight lid. Store them in the fridge. They last for about 3 to 4 days. If you have extra filling, store it separately. This keeps the peppers from getting soggy. To reheat stuffed peppers, use the oven for best results. Preheat the oven to 350°F (175°C). Place the peppers in a baking dish. Add a splash of water to keep them moist. Cover with foil and heat for about 15 to 20 minutes. You can also use the microwave. For the microwave, heat on high for 2 to 3 minutes. Check if they are warm enough before serving. If they need a refresh, add a sprinkle of cheese or fresh herbs before reheating. To freeze stuffed peppers, let them cool completely. Wrap each pepper tightly in plastic wrap. Then, place them in a freezer-safe bag or container. They can stay in the freezer for up to 3 months. When ready to cook, take them out of the freezer. Thaw them in the fridge overnight. Bake them straight from the fridge at 375°F (190°C) for 25 to 30 minutes. This method keeps them tasty and fresh for your next meal. Baking stuffed bell peppers takes about 35 minutes in total. First, you bake them covered for 25 minutes. Then, you remove the foil and bake for another 10 minutes. This helps the peppers become tender and the cheese melt nicely, if you choose to add it. Yes, you can prepare stuffed peppers ahead of time. First, make the filling and stuff the peppers. Then, store them in the fridge for up to 24 hours before baking. If you want to freeze them, wrap each pepper tightly with plastic wrap. You can freeze them for up to 3 months. When ready to bake, thaw them in the fridge overnight and bake as usual. Stuffed bell peppers pair well with many sides. Consider serving them with a fresh garden salad. You might also enjoy some crusty bread or garlic bread on the side. For a heartier meal, roasted veggies or a grain salad would complement the dish nicely. You can find more ideas in the Full Recipe. Stuffed bell peppers are easy to make and delicious. We covered essential and optional ingredients, pressing flavor into every bite. You learned how to prepare, stuff, and cook them. I shared tips for picking the best peppers and ways to change up the flavors. Storing and reheating tips help you keep your dishes fresh. Now, you can craft your perfect stuffed pepper meal that fits your taste. Enjoy exploring flavors and sharing this recipe with others!](https://mealinmoments.com/wp-content/uploads/2025/05/e8002c8d-9622-4345-99ac-dd4021d1d9cc.webp)
Stuffed Bell Peppers Easy and Flavorful Recipe
Stuffed bell peppers are not only easy to make, but they are also packed with flavor! With just a few
Stuffed bell peppers are not only easy to make, but they are also packed with flavor! With just a few
![To make the perfect maple glazed Brussels sprouts, you need a few simple ingredients. Here is the list: - 1 lb Brussels sprouts, halved - 3 tablespoons pure maple syrup - 2 tablespoons extra virgin olive oil - 1 tablespoon balsamic vinegar - 1 teaspoon garlic powder - Salt and freshly ground black pepper to taste - 1/4 cup chopped pecans (optional) - 1 tablespoon fresh thyme leaves (optional) These ingredients create a sweet and savory blend. The maple syrup gives sprouts a lovely glaze. Olive oil helps them roast evenly, while balsamic vinegar adds depth. Garlic powder and seasonings bring out the natural flavors. If you want a crunch, add pecans. For fresh taste, use thyme leaves. You can find the full recipe to make this delightful side dish in the recipe section. - Preheat oven to 425°F (220°C). - Toss Brussels sprouts with glaze ingredients. - Arrange on a baking sheet. First, you need to preheat your oven to 425°F (220°C). This step helps the sprouts roast evenly. Next, take your halved Brussels sprouts and place them in a large bowl. Add the extra virgin olive oil, pure maple syrup, balsamic vinegar, garlic powder, salt, and freshly ground black pepper. Mix everything well until each sprout gets a nice coat of glaze. Now, grab a baking sheet. Line it with parchment paper to keep things tidy. Spread the Brussels sprouts out in a single layer with the cut sides down. This position helps them caramelize perfectly while roasting. - Roast for 20-25 minutes, stirring halfway. - Optional: Add pecans in the last 5 minutes. Once the oven is ready, put the baking sheet inside. Roast the Brussels sprouts for 20-25 minutes. Be sure to stir them halfway through. This helps them brown evenly and get tender. If you want a nice crunch, add chopped pecans to the sheet during the last 5 minutes. They will toast up and add a lovely flavor. - Add fresh thyme leaves before serving. - Drizzle remaining glaze over Brussels sprouts. When the sprouts are golden brown, take them out of the oven. For a fresh touch, sprinkle fresh thyme leaves over the Brussels sprouts. This adds a nice aroma and flavor. Don’t forget to drizzle any extra glaze from the baking sheet over the sprouts. This step gives them an extra kick of sweetness. Enjoy your maple glazed Brussels sprouts as a tasty side dish! For the full recipe, check out the details above. - Ensuring even roasting: To get great results, you need to spread the sprouts out. Use a large baking sheet and place them cut side down. This allows them to brown evenly and get that nice caramelized look. Stir them halfway through roasting as well. - Adjusting glaze sweetness: If you love it sweeter, add more maple syrup. If you prefer it less sweet, cut back a bit. Taste the glaze before cooking to find the right balance for you. - Additional seasonings to consider: You can spice things up with a dash of red pepper flakes. You might also like adding smoked paprika for a hint of smokiness. Try these to make your dish pop. - Usage of different vinegars: Besides balsamic vinegar, apple cider vinegar works well too. It gives a tangy flavor that complements the maple syrup nicely. Experiment with these to find your favorite. - Serving suggestions for visual appeal: Use a large, colorful bowl to serve the Brussels sprouts. A white bowl can also make the green and brown colors stand out beautifully. - Garnishing ideas for added flavor: For extra flair, sprinkle some chopped pecans on top. Fresh thyme leaves or a light drizzle of maple syrup can also make your dish look and taste amazing. {{image_4}} Spicy Maple Glazed Brussels Sprouts If you like heat, add red pepper flakes to the glaze. Start with a pinch and taste. You can always add more if you want. This twist gives the dish a nice kick. The sweet maple and spicy flakes work well together. Adding bacon for extra flavor Bacon adds a savory touch. Chop the bacon into small pieces and cook it until crispy. Then, mix it in with the Brussels sprouts before roasting. The bacon fat will add a rich flavor to the dish. It’s a great way to make it even more delicious. Vegan alternatives You can keep this dish vegan by replacing bacon with smoked paprika. This spice gives a nice, smoky flavor. Also, make sure your maple syrup is pure and not mixed with other ingredients. Nut-free options If you have nut allergies, you can skip the pecans. Instead, try sunflower seeds for a bit of crunch. They add texture without the risk of nuts. Incorporating seasonal vegetables You can mix in other vegetables too. Try adding carrots or sweet potatoes for color and taste. These veggies roast well and add even more flavor to the dish. Remember to cut them into similar sizes for even cooking. Changing the glaze according to seasons In fall, you might like to add cinnamon or nutmeg to the glaze. These spices enhance the warm flavors of the season. In summer, a splash of lemon juice can brighten the dish. Adjust the glaze to match what’s fresh and in season. For the full recipe, check out the [Full Recipe]. If you have leftovers, refrigerate them right away. Place the Brussels sprouts in an airtight container. They will stay fresh for about 3 to 5 days in the fridge. When you reheat, use the oven or a skillet for the best results. This keeps them crispy. Heat at 350°F (175°C) for about 10 minutes. Stir them a bit to ensure even warming. For long-term storage, you can freeze Brussels sprouts. First, blanch them in boiling water for 3 to 5 minutes. This stops enzyme action and keeps them fresh. After blanching, cool them in ice water. Drain and dry well. Then, place them in freezer bags, removing air. They can last up to 12 months in the freezer. When you’re ready to cook, thaw them overnight in the fridge. Reheat in the oven or skillet to restore their texture. Brussels sprouts can last about a week in the fridge before they spoil. Maple syrup can last for years if stored properly. Olive oil is good for about 6 months after opening. Signs of spoilage include slimy leaves or a strong odor. Always check your ingredients before using them. Proper storage extends their life and keeps your dishes fresh. Can I use frozen Brussels sprouts? Yes, you can use frozen Brussels sprouts. They work well in this recipe. Just remember to thaw them first. You may need to adjust cooking time since they are softer. Aim for a crisp texture by roasting them on a higher heat. How do I make Brussels sprouts less bitter? To reduce bitterness, try a few tricks. First, cut off the stem end and remove any yellow leaves. Roasting at high heat caramelizes the natural sugars. Adding maple syrup also helps balance the bitterness. What are the best sides to pair with maple glazed Brussels sprouts? Maple glazed Brussels sprouts pair well with many dishes. Try them with roasted chicken or pork. They also go great with quinoa or wild rice. Feel free to serve them with a tangy salad for freshness. How to check for doneness? Check for doneness by piercing a sprout with a fork. It should feel tender but not mushy. Look for a golden-brown color on the edges. This means they are caramelized and flavorful. Can I roast other vegetables with Brussels sprouts? Yes, you can roast other vegetables with Brussels sprouts. Carrots, sweet potatoes, and red onions work well. Just cut them to a similar size for even cooking. Toss them in the same glaze for extra flavor. Are Maple Glazed Brussels Sprouts healthy? Yes, maple glazed Brussels sprouts are healthy. They are low in calories and high in fiber. Brussels sprouts are also packed with vitamins C and K. Using maple syrup adds some natural sweetness without refined sugar. What are the calorie and nutritional facts? One serving of maple glazed Brussels sprouts contains about 120 calories. They have 7g of fat, 15g of carbs, and 3g of protein. The pecans add healthy fats and extra nutrients too. For the full recipe, check the detailed nutritional information. In this post, we covered how to make delicious maple glazed Brussels sprouts. You learned about essential ingredients, step-by-step cooking instructions, and helpful tips for perfect results. I shared variations and storage tips to keep your dish fresh. Remember, small changes can lead to big flavors. Enjoy experimenting with different flavors and ingredients. This dish is simple to make and perfect for any meal. Now, it's time to enjoy your tasty Brussels sprouts!](https://mealinmoments.com/wp-content/uploads/2025/05/bb8f3425-f705-433d-8c1f-50bbdfbf26e9.webp)
Looking for a side dish that will impress at your next meal? Look no further! Maple Glazed Brussels Sprouts are
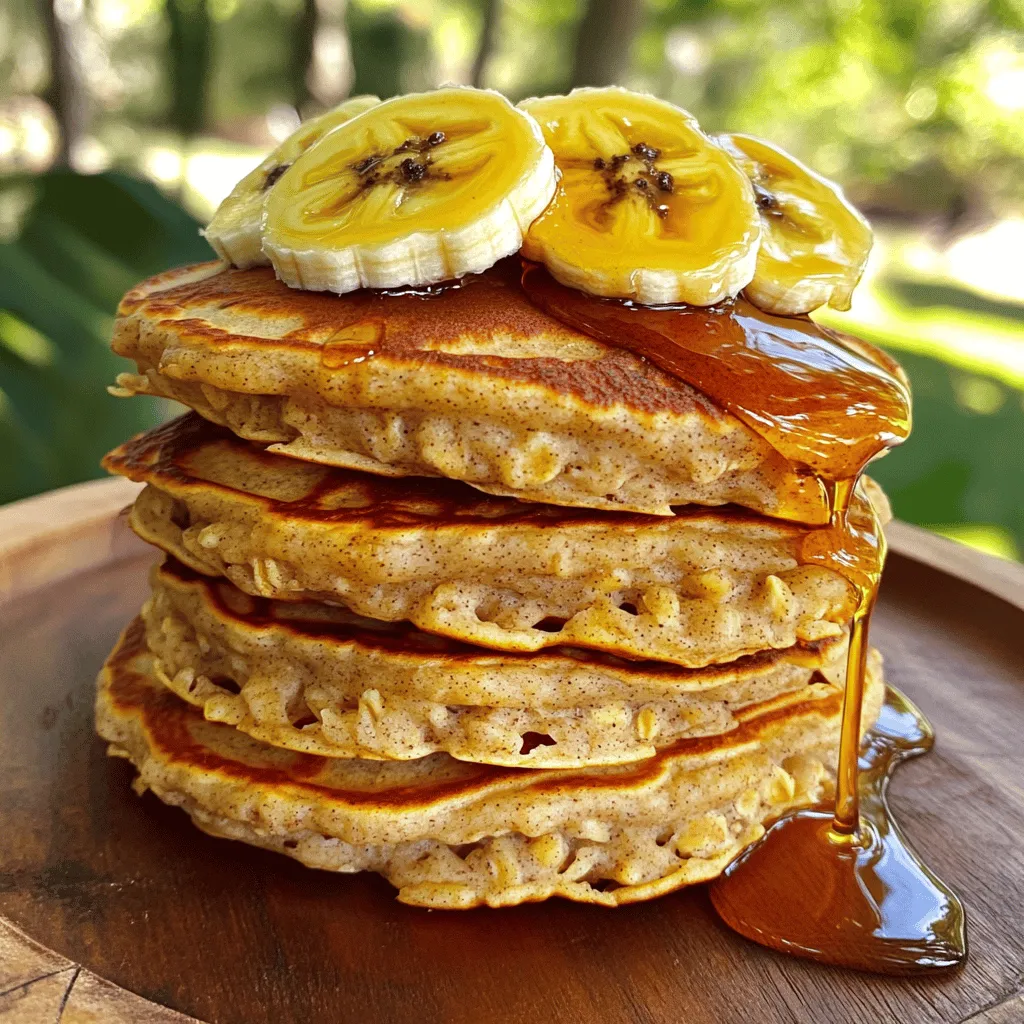
Looking for a quick, healthy breakfast? Try these Savory Banana Oatmeal Pancakes! Packed with good stuff, they are easy to
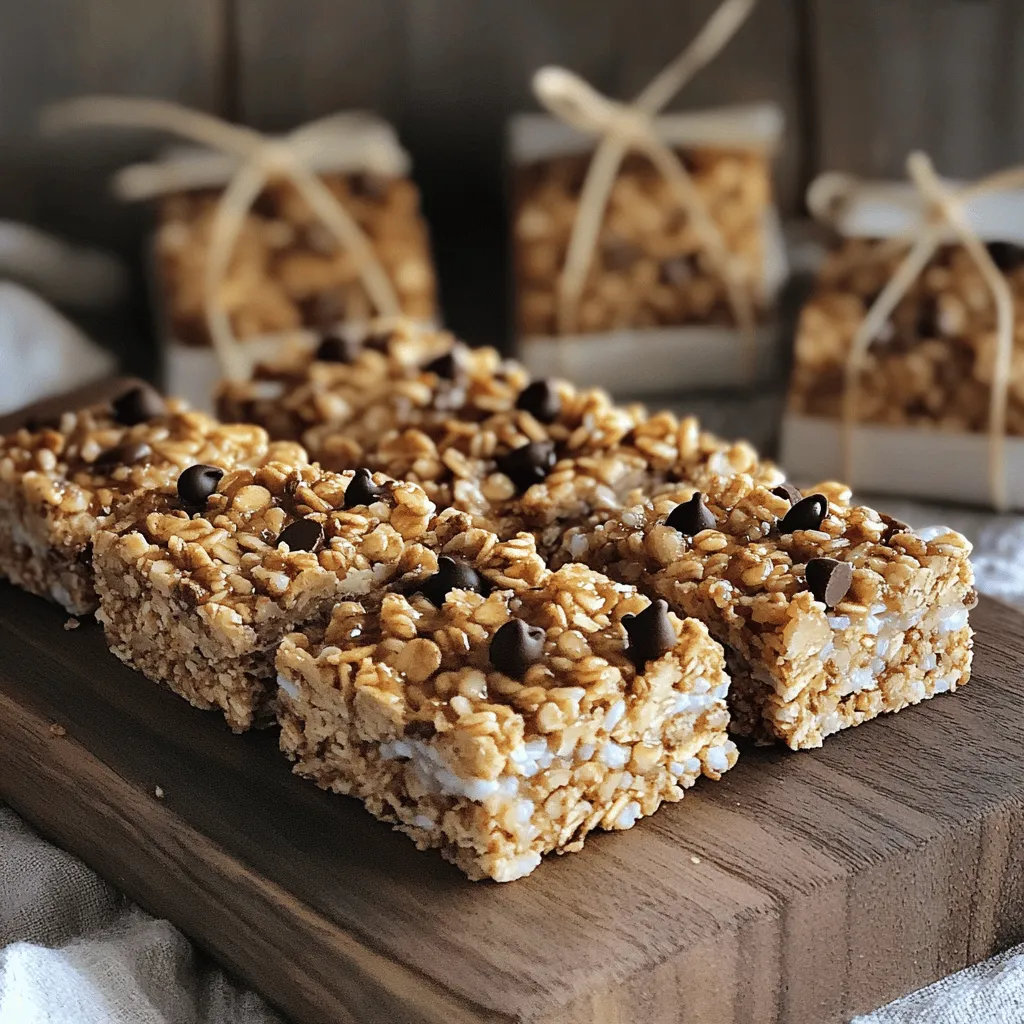
Looking for a tasty snack that’s safe for everyone? These nut-free granola bars are both crunchy and flavorful! Packed with
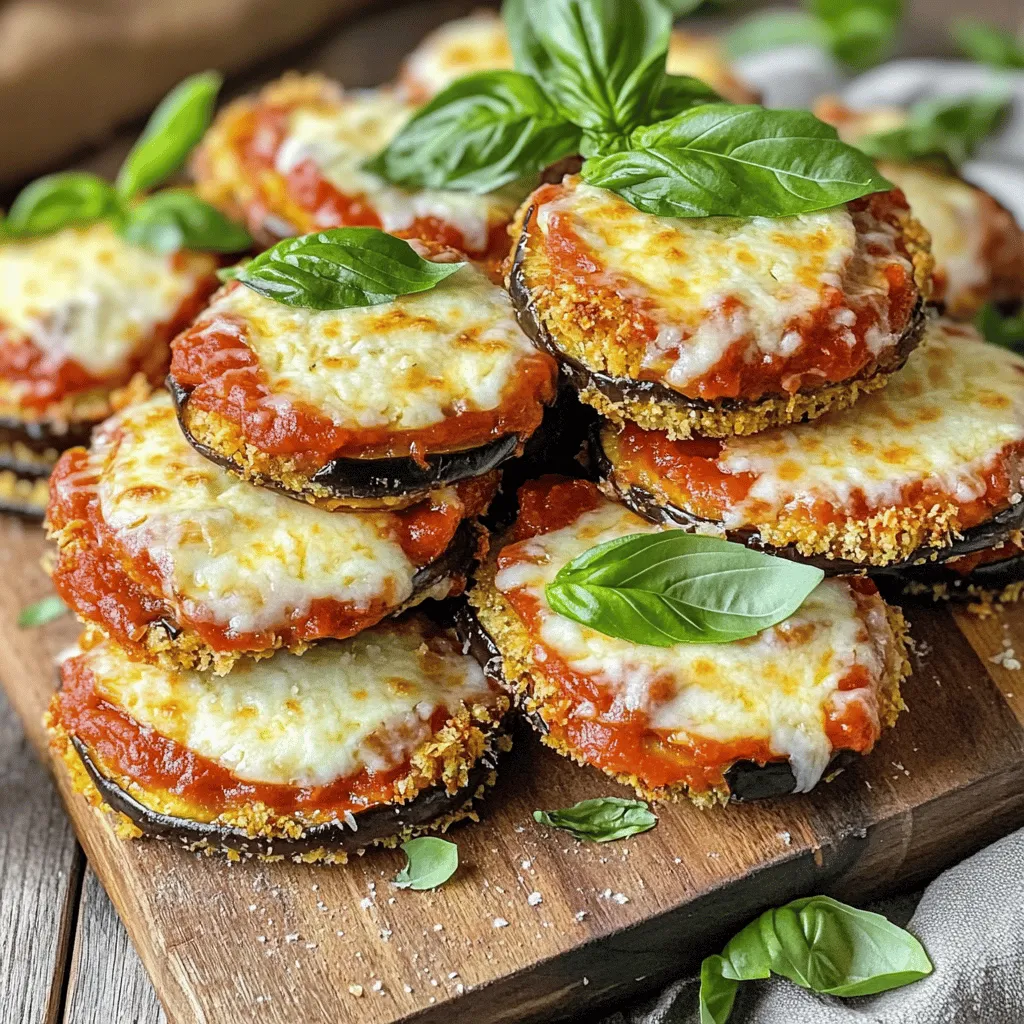
Craving a delicious snack that’s both easy to make and full of flavor? Look no further! These Eggplant Parmesan Bites
![- 1 can (15 oz) chickpeas, drained and thoroughly rinsed - 4 cups mixed greens (like baby spinach, arugula, and romaine lettuce) - 1 cup cherry tomatoes, halved - 1 medium cucumber, diced - 1/4 red onion, thinly sliced - 2 tablespoons tahini - 1 tablespoon fresh lemon juice - 1/4 cup feta cheese, crumbled - 1/2 ripe avocado, sliced - 1 teaspoon smoked paprika - 1 teaspoon garlic powder - Sea salt and freshly cracked black pepper to taste I love how each ingredient in this salad plays a role. The chickpeas bring protein and crunch. Mixed greens offer freshness and color. Cherry tomatoes add sweetness and juiciness. The cucumber brings a nice crunch, while the red onion introduces a sharp bite. The tahini and lemon juice in the dressing balance the flavors perfectly. You can also add feta cheese for a salty punch. Sliced avocado adds creaminess and healthy fats. For spices, I always use smoked paprika and garlic powder. They give depth and warmth to the salad. A pinch of salt and black pepper ties everything together. This combination makes the Crispy Chickpea Salad not just a meal but a nourishing treat. You can find the Full Recipe to explore the step-by-step process! 1. Preheat your oven to 400°F (200°C). This step helps make the chickpeas crispy. 2. Drain and rinse the chickpeas. Pat them dry with paper towels to remove excess water. 3. In a large bowl, mix the chickpeas with olive oil, smoked paprika, garlic powder, sea salt, and pepper. Toss them well. 4. Prepare your mixed greens by washing them thoroughly. Tear or chop them into bite-sized pieces. 5. In a salad bowl, combine the greens with halved cherry tomatoes, diced cucumber, and thinly sliced red onion. Toss gently to mix. 1. Spread the seasoned chickpeas in a single layer on a baking sheet. 2. Roast them for 20-25 minutes, shaking the pan halfway through. This ensures even cooking. 3. Look for a golden brown color and a crispy texture. If they aren’t crispy yet, roast for a few more minutes. 1. In a small bowl, whisk together tahini, fresh lemon juice, a pinch of salt, and water. Adjust the water for a creamy consistency. 2. Once the chickpeas cool slightly, add them to the salad bowl. 3. Gently toss in the sliced avocado and crumbled feta cheese, if using. 4. Drizzle the tahini dressing over the salad and toss again to combine. 5. Serve your salad right away, garnished with fresh lemon wedges. Squeeze the lemon for extra flavor. For the Full Recipe, refer back to the ingredient list and steps outlined above. Enjoy the crunch and flavor in every bite! To get the best crispy chickpeas, start by drying them well. After rinsing, let them sit on a paper towel for a few minutes. This step helps remove excess moisture. The dryer they are, the crispier they get. You can also adjust the cooking time based on your crispiness preference. If you want them super crunchy, roast them a little longer. Keep an eye on them to prevent burning. Shake the pan halfway through cooking for even results. Make your salad pop by presenting it in bright bowls. Arrange the chickpeas and veggies in a colorful way. You can also sprinkle extra feta on top for a fun touch. Serve lemon wedges on the side. This adds a burst of flavor. For a complete meal, pair the salad with grilled chicken or fish. You can also add a slice of whole-grain bread. This gives you extra fiber and keeps you full longer. Chickpeas are packed with protein and fiber. They help keep you full and satisfied. The mixed greens and veggies add vitamins and minerals. A serving of this salad has around 300 calories. You get a healthy mix of fats, carbs, and proteins. Adjust portion sizes if you want more or less. Check the [Full Recipe] for more details on servings. {{image_4}} You can mix things up with different legumes or greens. Instead of chickpeas, try black beans or lentils. They bring unique flavors and textures. For greens, switch to kale or collard greens for a heartier bite. You can also swap dressings or cheeses. Use a yogurt dressing instead of tahini for a creamier taste. If you want a different flavor, try goat cheese instead of feta. It adds a tangy twist. Adding seasonal vegetables or fruits is a great way to enhance your salad. In the summer, toss in fresh corn or bell peppers for crunch. In the fall, consider adding roasted butternut squash for warmth. Adjusting spices can change the salad's flavor profile. Use cumin and coriander for a warm, earthy taste. Alternatively, add fresh herbs like basil or cilantro for a bright touch. For vegan options, choose plant-based dressings and skip the cheese. Nutritional yeast can add a cheesy flavor without dairy. If you need low-carb or gluten-free alternatives, use leafy greens as a base. This keeps the dish light and fresh. You can also skip the chickpeas and add more veggies instead. To keep your salad fresh, use an airtight container. Glass or plastic containers work well. You can store it in the fridge for up to three days. However, avoid adding the dressing until you are ready to eat. This helps keep the greens crisp. If you want to enjoy crispy chickpeas again, reheat them in the oven. Preheat the oven to 400°F. Spread the chickpeas on a baking sheet. Heat for about 10 minutes. This method keeps their texture. Avoid microwaving, as it can make them soggy. Yes, you can freeze chickpeas after roasting. Place them in a freezer-safe bag. Make sure to remove as much air as possible. They can last for up to three months in the freezer. To use, thaw them in the fridge overnight. Then, reheat in the oven to regain crispiness. Yes, you can use dried chickpeas. To prepare them, soak one cup of dried chickpeas overnight in water. The next day, drain and rinse them. Then, boil them in fresh water for about one hour, or until they are tender. After cooking, follow the same steps to roast them as in the recipe. This method adds a lovely texture and flavor. You can boost the protein in your salad by adding: - Grilled chicken - Tofu or tempeh - Quinoa or farro - Hard-boiled eggs These options keep the salad filling and tasty while adding nutrition. To thicken your tahini dressing, try these tips: - Add more tahini or a splash of olive oil. - Mix in a few tablespoons of Greek yogurt for creaminess. - Blend in nut butter for a different flavor. These methods create a rich and smooth dressing. For meal prepping, follow these best practices: - Store the crispy chickpeas in a separate container to keep them crunchy. - Prepare the salad ingredients, but keep the dressing separate. - Assemble the salad just before serving for the best taste. This way, you can enjoy a fresh salad anytime! Absolutely! You can personalize your salad by adding: - Your favorite vegetables, like bell peppers or carrots. - Different greens, such as kale or cabbage. - Nuts or seeds for crunch. Feel free to mix and match to suit your taste! You can find the Full Recipe in the earlier sections. The Crispy Chickpea Salad combines nutritious ingredients for a healthy meal. You learned about the main components, preparation steps, and how to get the best crispy chickpeas. Remember, it’s easy to customize with extras or alternative ingredients. This salad is not just tasty; it’s also fun to make and adapt. Keep these tips in mind when preparing your salad. Enjoy your cooking and the delicious meal ahead!](https://mealinmoments.com/wp-content/uploads/2025/05/a9c912cf-5376-406c-9b69-2c4417fe027a.webp)
Looking for a salad that’s both tasty and healthy? You’ve just found it! My Crispy Chickpea Salad is a flavorful
![- 1 cup quinoa, rinsed under cold water - 2 cups vegetable broth or water - 1 cup cherry tomatoes, halved - 1 cucumber, diced into bite-sized pieces - 1 red bell pepper, diced - 1/2 red onion, finely chopped - 1/2 cup Kalamata olives, pitted and sliced - 1/2 cup feta cheese, crumbled - 1/4 cup fresh parsley, finely chopped The star of this salad is quinoa. This tiny grain packs a protein punch. It’s light, fluffy, and has a nutty taste. I love how it absorbs flavors. Fresh vegetables bring crunch and color. Cherry tomatoes add sweetness. Cucumbers give a refreshing bite. Red bell peppers add a lovely crunch. Red onion offers a bit of zing. Kalamata olives add a salty depth. They pair perfectly with creamy feta cheese. The cheese adds richness and a tangy twist. These main ingredients create a vibrant dish. - 1/4 cup extra-virgin olive oil - 2 tablespoons fresh lemon juice - 1 teaspoon dried oregano - Salt and freshly ground black pepper, to taste For the dressing, I use extra-virgin olive oil. It brings a fruity flavor and a smooth texture. Fresh lemon juice brightens the salad. It adds a lovely tartness. Dried oregano gives an earthy taste. It ties the Mediterranean flavors together. I always season with salt and pepper to finish. A good dressing can transform your salad. For the full recipe, check out the details above. First, rinse 1 cup of quinoa under cold water. This step removes any bitter taste. Next, place the rinsed quinoa in a medium saucepan. Add 2 cups of vegetable broth or water. Heat over medium-high heat until it boils. Once it boils, reduce the heat to low. Cover the saucepan and let it simmer for 15 minutes. The quinoa should absorb all the liquid. After that, remove it from heat and keep it covered for 5 more minutes. This lets the quinoa steam and become fluffy. Fluff it gently with a fork. Then, spread it out on a large plate or baking sheet to cool. In a large mixing bowl, combine the cooled quinoa with chopped vegetables. Add 1 cup of halved cherry tomatoes, 1 diced cucumber, 1 diced red bell pepper, 1/2 finely chopped red onion, and 1/2 cup of sliced Kalamata olives. Crumble 1/2 cup of feta cheese on top. Finally, sprinkle 1/4 cup of finely chopped parsley. In a small bowl, mix the dressing. Whisk together 1/4 cup of extra-virgin olive oil, 2 tablespoons of fresh lemon juice, and 1 teaspoon of dried oregano. Taste the dressing and add salt and black pepper as desired. Drizzle the dressing over the salad mixture. Gently toss all the ingredients together until they are well combined. Taste the salad and adjust the seasoning if needed. You can add more salt, pepper, or lemon juice to match your taste. For best flavor, cover the salad and chill it in the refrigerator for at least 30 minutes before serving. This allows all the flavors to meld beautifully. For the complete instructions, check out the Full Recipe. How to achieve the right quinoa texture To get the best quinoa, rinse it first. This removes the bitter coating called saponin. Use two cups of vegetable broth or water for each cup of quinoa. Bring it to a boil, then lower the heat. Cover it and let it cook for about 15 minutes. When it’s done, let it sit for five more minutes. Fluff it gently with a fork for that perfect texture. Best practices for chopping vegetables Chop your vegetables into uniform pieces. This makes your salad look nice and helps it blend well. Use a sharp knife for clean cuts. Dice tomatoes, cucumbers, and bell peppers into bite-sized pieces. For the red onion, slice it thinly. This helps spread the flavor evenly throughout the salad. Ideal serving dishes and garnishes Serve your Mediterranean quinoa salad in a large bowl or a pretty platter. For a pop of color, drizzle extra olive oil on top. Sprinkle some parsley and feta cheese for a nice finish. This adds flair and makes the salad look inviting. Pairing Mediterranean quinoa salad with other dishes This salad is great on its own but also pairs well with grilled chicken or fish. You can serve it alongside pita bread or hummus for a complete meal. It also makes a fresh side dish for barbecues or picnics. Enjoy the flavors together for a delightful experience. For the full recipe, check out the [Full Recipe]. {{image_4}} You can switch up the grains in this salad. Try farro or bulgur instead of quinoa. Both give a nice texture and flavor. You can also change the vegetables. Use bell peppers, zucchini, or carrots for a twist. If you want a different cheese, try goat cheese or even a vegan option. These swaps can make your salad unique and fun. Want to make your salad heartier? Add proteins like grilled chicken or shrimp. They pair well with the fresh veggies. For extra crunch, toss in some nuts or seeds. Almonds, walnuts, or sunflower seeds work great. They add a nice contrast to the soft quinoa and veggies. To get the full recipe, check out the Mediterranean Quinoa Salad. To keep your Mediterranean quinoa salad fresh, store it in an airtight container. This keeps moisture out and flavor in. Place it in the fridge within two hours of making it. This step is important for food safety. If you plan to eat it later, you can freeze it. However, the texture may change a bit. To freeze, divide the salad into portions. Use freezer-safe containers or bags. Label them with dates for easy tracking. In the fridge, your quinoa salad lasts about three to five days. Check for any signs of spoilage. If you see mold, throw it away. Also, if the salad smells off or looks discolored, it’s best to discard it. Trust your senses! Keeping an eye on freshness helps you enjoy your delicious salad longer. Can I make Mediterranean quinoa salad ahead of time? Yes, you can make this salad ahead of time. It lasts well in the fridge for up to three days. Making it early lets the flavors blend. Just keep it in a sealed container. What can I substitute for feta cheese? If you want a substitute for feta cheese, try goat cheese or a vegan cheese. Both add a nice tangy flavor. You can also leave it out if you prefer. This salad still tastes great without cheese. Caloric breakdown per serving One serving of Mediterranean quinoa salad has about 200-250 calories. This depends on the amount of olive oil and cheese used. It’s a filling meal that won’t weigh you down. Health benefits of main ingredients - Quinoa: High in protein and fiber. It helps keep you full longer. - Vegetables: Full of vitamins and minerals. They add color and crunch. - Olives: Rich in healthy fats. They support heart health. - Feta cheese: Provides calcium and adds flavor. Gluten-free concerns This salad is naturally gluten-free because quinoa is a seed, not a grain. It’s perfect for those who avoid gluten. Vegan modifications To make this salad vegan, skip the feta cheese or use a plant-based version. You can also add chickpeas for extra protein. This keeps the salad tasty and satisfying. This blog post covers everything you need for a delicious Mediterranean quinoa salad. We explored key ingredients like quinoa, fresh vegetables, and feta cheese. I shared easy steps to cook quinoa and prepare the salad. You learned handy tips for perfect texture and tasty variations for your dish. I also included storage info to keep it fresh. Enjoy making this healthy, colorful salad. It's simple and can fit many diets. Let your creativity shine with unique flavors!](https://mealinmoments.com/wp-content/uploads/2025/05/e9483839-1f45-4007-baf2-81ea34b02d05.webp)
Want a fresh, tasty meal that’s easy to make? This Mediterranean Quinoa Salad packs vibrant flavors from wholesome ingredients. I’ll

If you love chocolate, wait until you try Chocolate Avocado Mousse! This creamy dessert blends rich cocoa with smooth avocados
![- 2 medium sweet potatoes, peeled and cut into 1/2-inch dice - 1 can (15 oz) black beans, rinsed and drained - 1 tablespoon olive oil - 1 teaspoon ground cumin - 1 teaspoon smoked paprika - 1/2 teaspoon chili powder - Salt and freshly ground black pepper to taste - 8 small corn or flour tortillas - 1 ripe avocado, sliced - 1 cup red cabbage, finely shredded - 1/2 cup fresh cilantro, roughly chopped - 1 lime, cut into wedges - Optional: Hot sauce, for serving These sweet potato black bean tacos are not just tasty; they’re also healthy. Each serving provides a good mix of nutrients. Sweet potatoes are rich in vitamins A and C, while black beans offer protein and fiber. This meal can help with digestion and keep you full longer. Sweet potatoes are great for your health. They boost your immune system and help your skin glow. They contain antioxidants that fight free radicals. Black beans are also a superfood. They support heart health and stabilize blood sugar levels. Together, these ingredients make a powerful and nourishing meal. Plus, they are both easy to find and affordable. Enjoy these tacos knowing you are eating well! For the full recipe, check out the link provided. Start by peeling the sweet potatoes. Cut them into 1/2-inch dice. This size helps them cook evenly. In a bowl, mix the diced sweet potatoes with olive oil. Add ground cumin, smoked paprika, chili powder, and a sprinkle of salt and pepper. Toss until every piece is coated well. Preheat your oven to 425°F (220°C). Line a baking sheet with parchment paper for easy cleanup. Spread the seasoned sweet potatoes on the sheet in a single layer. Roast them for 25-30 minutes. Halfway through, turn them for even browning. They should be tender with a light caramelization when done. While the sweet potatoes roast, rinse the black beans in a colander. Transfer them to a small saucepan. Heat them over medium heat, stirring occasionally. Add a pinch of salt and pepper for flavor. For the tortillas, warm them in a dry skillet over medium-high heat. Heat each side for about 20 seconds. Make sure they stay soft and pliable. Grab a warm tortilla and start layering. Add a generous scoop of roasted sweet potatoes. Follow that with a spoonful of black beans. Top with shredded red cabbage and a few slices of creamy avocado. Finish with fresh cilantro for flavor. Serve with lime wedges on the side. If you like spice, drizzle hot sauce on top. For the full recipe, check the link! Roasting sweet potatoes brings out their natural sweetness. I recommend cutting them into small cubes. This size cooks faster and gets crispy edges. Toss the cubes with olive oil and spices before roasting. I like to use cumin and smoked paprika for a bold flavor. Roast at 425°F (220°C) for 25-30 minutes. Make sure to turn them halfway. This ensures even cooking and browning. Soft tortillas make tacos easy to eat. To keep them soft, warm them in a dry skillet over medium heat. Heat each side for about 20 seconds. This warms them up without making them crispy. You can also wrap them in a clean kitchen towel. This keeps them warm and soft until ready to serve. To make your tacos stand out, add fresh herbs. Cilantro adds a bright touch. Squeeze fresh lime juice over the tacos for a zesty kick. For extra heat, drizzle some hot sauce on top. You can also add toppings like sliced jalapeños or pico de gallo. These enhance the flavor and add texture. Try mixing in some corn or diced tomatoes with the black beans for more variety. Check out the Full Recipe for more ideas! {{image_4}} You can swap out sweet potatoes and black beans for many other tasty options. Try using roasted butternut squash or cooked quinoa for a twist. If you enjoy meat, shredded chicken or ground turkey works well too. For a spicy kick, add jalapeños or roasted peppers. This recipe is already vegan. To keep it gluten-free, just use corn tortillas. You can also try lettuce wraps for a fresh, crunchy base. Enjoy the same great flavors while keeping your diet in mind. Pair your tacos with a fresh salad or a side of rice. A simple corn salad adds sweetness, while a refreshing cucumber salad brightens the meal. You can also serve these tacos with a zesty lime or avocado dip for extra flavor. Check out the Full Recipe for more ideas! After you enjoy your sweet potato black bean tacos, store leftovers in an airtight container. Place the tacos in the fridge. They will stay fresh for about three days. Keep the toppings separate to maintain their crunch. This helps the avocado and cabbage stay fresh. To reheat the tacos, remove the filling and toppings from the tortillas. Warm the sweet potatoes and black beans in a pan over medium heat. Heat the tortillas in a dry skillet for about 20 seconds on each side. This keeps them soft. Once warmed, reassemble your tacos and enjoy! If you want to freeze the filling, let it cool first. Place the sweet potatoes and black beans in a freezer-safe bag. Squeeze out the air before sealing. This will keep them fresh for up to three months. When ready to eat, thaw in the fridge overnight and reheat as directed. Just remember, avoid freezing the tortillas and toppings for best results. For the full recipe, click here [Full Recipe]. Yes, you can use different beans. Pinto beans, kidney beans, or chickpeas work well. Just rinse and drain them like black beans. Each bean adds its own taste and texture. Experimenting with beans can change the flavor of your tacos. To add heat, try these options: - Add more chili powder. - Use jalapeños or serrano peppers. - Drizzle hot sauce on top. - Mix in diced chipotle peppers in adobo sauce. These choices will give your tacos a nice kick. These side dishes pair well: - Mexican rice - Guacamole - Black bean salad - Grilled corn - Fresh salsa These sides brighten up the meal and boost flavors. Yes, this recipe is great for meal prep. You can store the sweet potato and black bean mix in containers. Just reheat them when you’re ready to eat. The tortillas can stay fresh in a bag. Assemble your tacos right before serving for the best taste. You can find the full recipe for Sweet Potato Black Bean Tacos [here](#). This link provides all the steps and tips to make this dish delicious. Sweet potato and black bean tacos are a tasty, healthy choice. We covered key ingredients, their benefits, and how to make these tacos step by step. I shared tips to enhance flavor and keep tortillas soft. You can mix up the fillings to suit your taste. Store leftovers correctly for future meals. Whether you're vegan or want options, this dish works for everyone. Enjoy making and eating these fun tacos!](https://mealinmoments.com/wp-content/uploads/2025/05/af839ca6-d143-4048-ad90-6272aec49779.webp)
Looking for a quick and tasty meal? Sweet Potato Black Bean Tacos are your answer! They are easy to make,
![- 4 boneless, skinless chicken breasts - 1/4 cup extra virgin olive oil - 2 large lemons (zested and juiced) - 4 cloves garlic, finely minced - 2 tablespoons fresh rosemary, finely chopped - 2 tablespoons fresh thyme, finely chopped - 1 tablespoon honey - Salt and freshly ground black pepper to taste - Alternatives for olive oil: You can use avocado oil or canola oil if needed. Both oils work well for grilling and have mild flavors. - Lemon substitutes: If you don’t have lemons, try using limes or even orange juice. They can add a nice twist to the dish. - Fresh herbs vs. dried herbs: Fresh herbs give the chicken a vibrant taste. If you use dried herbs, use less since they are stronger. A good rule is to use one-third of the amount. To start, gather your marinade ingredients. You will need: - 1/4 cup extra virgin olive oil - 2 large lemons (zested and juiced) - 4 cloves garlic, finely minced - 2 tablespoons fresh rosemary, finely chopped - 2 tablespoons fresh thyme, finely chopped - 1 tablespoon honey - Salt and freshly ground black pepper to taste In a large mixing bowl, combine the olive oil, lemon zest, lemon juice, garlic, rosemary, thyme, honey, salt, and pepper. Whisk the mixture until it blends well. This ensures the flavors mix and coat the chicken evenly. Now it's time to marinate the chicken. Place the chicken breasts into your bowl of marinade. Make sure each piece is coated completely. You can seal the bowl with plastic wrap or put the chicken in a resealable bag. Refrigerate for at least 1 hour. If you want a richer taste, allow it to marinate for up to 4 hours. This helps the flavors soak into the meat. Before you grill, preheat your grill to medium-high heat. Aim for a temperature of about 375°F to 450°F (190°C to 230°C). Brush the grill grates lightly with oil or spray them to avoid sticking. Once the grill is ready, take the chicken out of the marinade. Let any extra marinade drip off, and discard the used marinade. Place the chicken on the grill and cook for about 6-8 minutes on each side. Flip the chicken once during cooking. The chicken is done when it reaches an internal temperature of 165°F (75°C) and has lovely grill marks. After cooking, move the chicken to a serving plate and let it rest for 5 minutes. This helps keep the chicken juicy and tender when you cut into it. You can find the Full Recipe for more details and serving suggestions. To check if your chicken is done, use a meat thermometer. Insert it into the thickest part of the chicken. The safe internal temperature is 165°F (75°C). This helps ensure juicy chicken every time. Avoid pressing down on the chicken while it grills. This releases juices and can dry out your meat. Common grilling mistakes include cooking on too high heat. This can burn the outside while leaving the inside raw. Another mistake is not oiling the grill. This can make your chicken stick and tear apart. To boost flavor, think about adding spices. Paprika, cumin, or even chili powder can change the taste. You can also try adding different herbs. Basil or oregano can be great choices. Remember to rest the chicken after grilling. This lets the juices settle in, making each bite tender. Plating is key to making your dish look great. Arrange the grilled chicken on a large platter. Add fresh lemon wedges and herbs around it. This makes the dish colorful and inviting. You can also serve it with a salad or grilled veggies. This adds more color and texture to your meal. For a fresh touch, sprinkle some chopped herbs on top before serving. For the full recipe, check out the Lemon Herb Grilled Chicken . {{image_4}} You can switch up the citrus to change the flavor of your chicken. Try using oranges or limes in place of lemons. Each citrus fruit brings its own unique taste. If you want a kick, add some red pepper flakes or cayenne pepper to the marinade. This will give your dish a spicy twist that pairs well with the herbs. To make a complete meal, serve your lemon herb grilled chicken with fresh salads or grains. A light cucumber salad or quinoa works great. You can also try pairing it with roasted vegetables. These sides add color and flavor to your plate. If you want to explore more, consider making a lemon herb vinaigrette to drizzle over your salad. If you need gluten-free options, this recipe is naturally gluten-free. Just ensure any sides you choose are also gluten-free. For those on a low-carb diet, swap out grains for leafy greens or cauliflower rice. This keeps your meal light and healthy without losing flavor. To keep your Lemon Herb Grilled Chicken fresh, follow these tips: - Refrigeration: Place cooled chicken in an airtight container. Store in the fridge for up to 3 days. - Freezing: Wrap chicken pieces tightly in plastic wrap or aluminum foil. Place them in a freezer bag. Freeze for up to 3 months. When you want to enjoy your leftovers, reheating is key. Here’s how to do it right: - Avoiding Dryness: Reheat chicken in the oven at 350°F (175°C). Cover it with foil to keep moisture. - Microwave vs. Oven: The microwave is quick but can dry the chicken. If you use it, add a splash of water and cover the dish. Keep an eye on your leftover chicken to ensure it stays safe and tasty: - Freshness Timeline: After cooking, aim to eat leftovers within 3 days if refrigerated. If frozen, use within 3 months. - Signs of Spoilage: Look for any off smells, discoloration, or a slimy texture. These indicate it's time to toss it out. Now, you can enjoy your Lemon Herb Grilled Chicken at its best! For the complete recipe, check out the [Full Recipe]. You should marinate chicken for at least one hour. This time helps the flavors soak in. For a richer taste, try to marinate for up to four hours. This longer time enhances the lemon and herb flavors. Yes, you can grill indoors. Use a grill pan or an electric grill. Ensure proper ventilation by opening a window or using a fan. Indoor grilling gives you great flavor without the need for an outdoor grill. The chicken should reach an internal temperature of 165°F. This temperature ensures the chicken is safe to eat. Use a meat thermometer to check the temperature. This step keeps your meal healthy and safe. Absolutely! Chicken thighs are a great option. They have more fat, which makes them juicy and flavorful. You can use bone-in or boneless thighs. Adjust the cooking time, as they may take a bit longer. Many sides pair nicely with this dish. Here are a few suggestions: - Grilled vegetables - A fresh green salad - Quinoa or rice - Garlic bread - Roasted potatoes These sides will complement the bright flavors of the chicken. For the full recipe, check out the Lemon Herb Grilled Chicken details. This blog post covered how to make Lemon Herb Grilled Chicken. We discussed the key ingredients, including chicken, olive oil, and fresh herbs. I shared steps for marinating and grilling. Tips on perfect doneness and presentation can help you shine in the kitchen. Remember, you can adjust flavors and sides to fit your taste. Cooking should be fun and satisfying. With these techniques, you’ll impress friends and family at your next meal. Enjoy your grilling adventure!](https://mealinmoments.com/wp-content/uploads/2025/05/4ba7039f-fb72-4f51-b5a2-a1ba01347f86.webp)
Looking for a tasty and easy meal? Look no further than Lemon Herb Grilled Chicken! This dish combines juicy chicken
