Skip to content
DisclaimerTerms Of UseGDPR PolicyCookie Policy

mealinmoments

  • Home
  • Drinks
  • Appetizers
  • Dinner
  • Dessert
  • About
  • Contact
  • Privacy Policy
DisclaimerTerms Of UseGDPR PolicyCookie Policy

Megan

- 4 large sweet potatoes - ¼ cup pure maple syrup - ½ cup milk (or almond milk) - 1 teaspoon pure vanilla extract - ½ teaspoon ground cinnamon - ¼ teaspoon ground nutmeg - Salt to taste - 1 cup pecans - ½ cup packed brown sugar - 2 tablespoons unsalted butter - 1 cup mini marshmallows (optional) When making maple pecan sweet potato casserole, you need fresh ingredients. Start with sweet potatoes. Choose large ones that are firm and smooth. They should have no blemishes. Pure maple syrup gives the dish a rich flavor. Look for 100% maple syrup for the best taste. Almond milk works well if you want a dairy-free option. For spices, ground cinnamon and nutmeg add warmth. They balance the sweetness of the potatoes. A pinch of salt enhances all the flavors. Pecans are the star of the topping. Chopped pecans provide a nice crunch. The brown sugar blends with butter to create a sweet, crumbly layer. Finally, mini marshmallows can add a fun touch on top. They melt and create a sweet layer. For the complete flavor experience, check the Full Recipe. You can easily swap some ingredients for different needs. If you want a dairy-free version, use almond milk or oat milk. Coconut milk also adds a unique taste. For gluten-free options, this recipe is naturally gluten-free. Just make sure your brown sugar is gluten-free. If you need a nut replacement, try sunflower seeds. They provide a similar crunch without the nuts. Pumpkin seeds are another great option. - Preheat the oven to 350°F (175°C). - Cook sweet potatoes until fork-tender, about 15 minutes in boiling water. - Mash the sweet potatoes in a bowl until smooth. - Combine the mashed sweet potatoes with maple syrup, milk, vanilla, cinnamon, nutmeg, and salt. Mix well. - Grease a 9x13 inch baking dish with cooking spray or butter. Pour the sweet potato mix into the dish and spread it evenly. - In a separate bowl, mix chopped pecans, brown sugar, and melted butter until crumbly. - Sprinkle the pecan topping over the sweet potato layer. If you want, add mini marshmallows on top for extra sweetness. - Bake the casserole for 30-35 minutes until the topping is golden and crunchy. - Let the casserole cool for a few minutes before serving. This recipe brings warmth and comfort to any meal. For full details, check the Full Recipe. How to select sweet potatoes When picking sweet potatoes, look for firm ones. Avoid those with soft spots or blemishes. Choose medium to large sizes for even cooking. Color should be vibrant, ranging from orange to purple. These colors indicate ripe sweet potatoes full of nutrients. Tips for mashing sweet potatoes After boiling, let your sweet potatoes cool a bit. This helps with mashing. Use a potato masher or fork for smoothness. If you want creamy texture, add a little milk or butter while mashing. This makes your casserole richer and tastier. Ways to visually enhance the dish For an eye-catching look, sprinkle extra chopped pecans on top. A light drizzle of maple syrup adds shine and sweetness. Use a colorful dish to make the casserole pop. You can also garnish with fresh herbs for a fresh touch. Serving suggestions for special occasions Serve this casserole warm at family gatherings or holiday meals. It pairs well with roasted turkey or ham. For a festive touch, add seasonal decorations to the table. Your guests will love both the taste and the look of this dish. Adjusting sweetness levels If you prefer less sweetness, cut back on the maple syrup. You can also add a pinch of salt to balance the flavors. Tasting while mixing helps you find your perfect balance. Remember, you can always add more sweetener later! Aromatic enhancements (spices) To boost flavor, consider adding spices like ginger or cloves. These spices add warmth and depth. Experimenting with spices can make your dish unique. Just a little goes a long way, so start small. {{image_4}} You can change the flavors to make this dish unique. Adding spices like ginger or cloves enhances the taste. These spices bring warmth and depth. You can also try using different sweeteners. Honey or agave syrup can replace maple syrup for a new twist. Each sweetener adds its own flavor profile, making the dish special. You can create fun textures in your casserole. For a crunchy topping, try adding granola or oats. These ingredients give a nice crunch that contrasts well with soft sweet potatoes. You can also mix in fruits like raisins or cranberries. These fruits add sweetness and a chewy texture, making each bite exciting. If you want a vegan option, it's easy to adjust this dish. Use almond milk instead of regular milk. You can also skip the butter or use coconut oil. For a low-sugar version, reduce the brown sugar or use stevia. These swaps keep the dish delicious while meeting your dietary needs. To keep your Maple Pecan Sweet Potato Casserole fresh, follow these simple tips: - Refrigerate: Place leftovers in an airtight container. Store them in the fridge for up to four days. - Freeze: If you want to save it longer, freeze it. Wrap it tightly in plastic wrap and foil. It can last for about three months in the freezer. When it's time to enjoy your casserole again, you have options: - Microwave: This method is quick. Place the casserole in a microwave-safe dish. Heat in short bursts, stirring in between, until warm. - Oven: For better texture, reheat in the oven. Preheat your oven to 350°F (175°C). Cover the dish with foil to keep it moist. Bake for about 20 minutes or until hot. Knowing how long to store your casserole is key: - Storage Time: You can keep it in the fridge for four days or in the freezer for three months. - Signs of Spoilage: Look for off smells, mold, or a change in texture. If it looks or smells bad, don't eat it! For the full recipe, check out the Maple Pecan Sweet Potato Casserole and enjoy! How do I know when the casserole is done? You know the casserole is done when the topping turns golden brown. It should also feel firm to the touch. A toothpick inserted into the center should come out clean. This means the sweet potatoes are heated through. Can I make this casserole ahead of time? Yes, you can prepare the casserole a day in advance. Just cover it and store it in the fridge. When you're ready, bake it straight from the fridge. You may need to add a few extra minutes to the baking time. What can I substitute for pecans or marshmallows? If you need a nut-free option, try sunflower seeds or pumpkin seeds. For the marshmallows, you can use crushed graham crackers or leave them out entirely. Both options will still taste great! Can I use fresh sweet potatoes instead of canned? Yes, fresh sweet potatoes work perfectly! Just peel and cut them into cubes. Boil them until fork-tender, then mash. This will give your casserole a fresh flavor and texture. Nutritional information per serving Each serving has about 250 calories, 6 grams of fat, and 45 grams of carbs. It also has a good amount of fiber and vitamins from the sweet potatoes. Is this recipe suitable for meal prep? Yes, this casserole is great for meal prep. You can make it ahead and store it in the fridge for up to four days. Just reheat individual portions when ready to eat. Check out the Full Recipe for more details! This blog post covered a delicious sweet potato casserole. You learned about the simple ingredients, like sweet potatoes, maple syrup, and pecans. I shared easy steps to prepare and bake your dish. You also found tips for enhancing flavor and presentation. In closing, I encourage you to try this recipe. Feel free to adapt it to suit your taste and dietary needs. Enjoy impressing friends and family with your tasty creation!

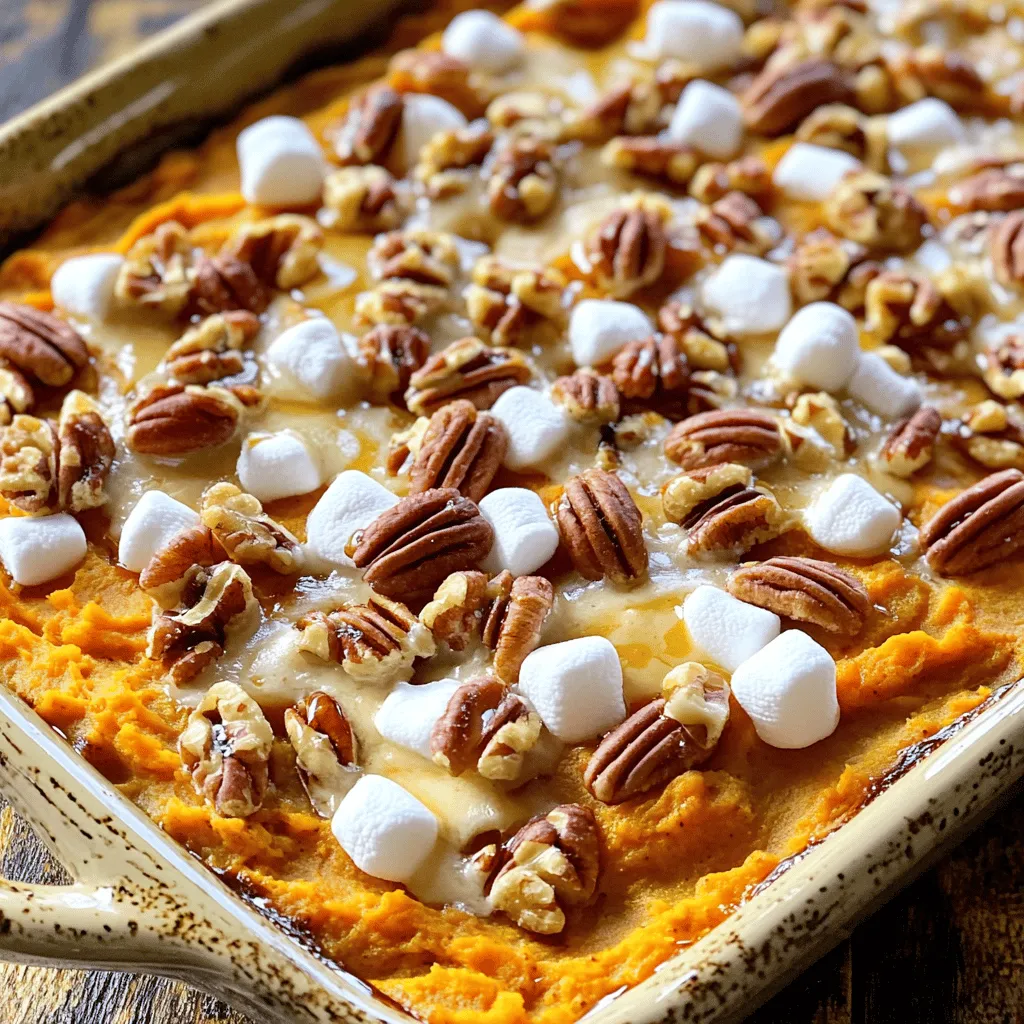
Maple Pecan Sweet Potato Casserole Delightful Dish

If you’re looking for a dish that combines sweet and nutty flavors, you’ve found it! My Maple Pecan Sweet Potato

- 4 medium zucchinis, spiralized into noodles - 1 bell pepper (your choice of color), sliced into strips - 1 cup cherry tomatoes, halved - 1 cup broccoli florets, cut into bite-sized pieces - 1 medium carrot, julienned - 1 small red onion, thinly sliced - 3 cloves garlic, minced - 3 tablespoons olive oil, divided - 1 teaspoon dried oregano - 1 teaspoon dried basil - Salt and freshly cracked pepper to taste I love using fresh, colorful veggies. They make this dish pop. The zucchini noodles serve as a light base. They soak up the flavor without overwhelming the dish. The bell pepper adds crunch, while cherry tomatoes bring sweetness. Broccoli gives it a nice texture, and carrots add a touch of earthiness. - Grated Parmesan cheese - Fresh basil leaves, for garnish For a finishing touch, I sprinkle grated Parmesan cheese on top. It adds a savory note that complements the veggies. Fresh basil leaves elevate the dish with a burst of flavor. Feel free to adjust these toppings based on your taste. You can find the full recipe in the article for more detailed steps and tips. Spiralizing Zucchini To start, take 4 medium zucchinis. Use a spiralizer to create long, noodle-like strands. This tool turns the zucchinis into perfect noodles for your dish. If you don’t have a spiralizer, a vegetable peeler can work in a pinch. Draining Excess Moisture Once spiralized, place the noodles in a colander. Let them drain for about 10 minutes. This step is key to avoid sogginess in your final dish. You can even sprinkle a bit of salt to help draw out more water. Heating the Olive Oil In a large skillet, heat 2 tablespoons of olive oil over medium heat. A good pan is crucial for even cooking. You want the oil to shimmer but not smoke. Cooking the Red Onion and Garlic Next, add the sliced red onion. Sauté for about 3 minutes until soft. Then, add 3 minced garlic cloves. Cook these for 1 minute until fragrant. Stir often to prevent burning. Adding Bell Pepper, Carrot, and Broccoli Now, toss in the sliced bell pepper, julienned carrot, and broccoli florets. Stir everything together and sauté for about 5-7 minutes. You want them tender but still crisp. Incorporating Cherry Tomatoes and Herbs Add 1 cup of halved cherry tomatoes next. Sprinkle in 1 teaspoon of dried oregano and 1 teaspoon of dried basil. Cook for another 3 minutes, stirring gently. The tomatoes should soften and release their juices. Sautéing Zucchini Noodles In another pan, heat the last tablespoon of olive oil over medium heat. Add the drained zucchini noodles and sauté for 2-3 minutes. They should be warm but not mushy. Season with salt and freshly cracked pepper to taste. Combining All Ingredients Now, combine the vegetable mix with the zucchini noodles. Gently toss everything together for about 1 minute. This helps all the flavors meld together. You’ll see the vibrant colors blend beautifully. For the full recipe, check out the details provided earlier. Enjoy your colorful Zucchini Noodle Primavera! Avoiding Sogginess To keep your zucchini noodles from getting soggy, always drain them after spiralizing. Place the noodles in a colander. Let them sit for about 20 minutes. This will help remove excess moisture. You can also sprinkle them with salt to draw out more water. Pat them dry with a paper towel before cooking. Cooking Technique Tips Cook the zucchini noodles quickly. Use medium heat to sauté them for just 2 to 3 minutes. You want them warm but still firm. Overcooking makes them mushy, which isn't ideal for this dish. Alternative Seasonings If you want to switch up the flavor, try different herbs. Fresh thyme and parsley work well. You can also add a pinch of red pepper flakes for some heat. Experiment with your favorite spices to find the perfect blend. Adding Protein Options To make your dish heartier, add protein. Grilled chicken or shrimp pairs nicely with the veggies. Tofu is a great option for a vegan version. Cook the protein separately and toss it in at the end. Creative Plating Ideas For a lovely presentation, use a large platter. Arrange the zucchini noodles in a nest in the center. Surround them with the colorful sautéed vegetables. This adds a nice pop of color. Garnishing for Visual Appeal Finish your dish with fresh basil leaves on top. A sprinkle of grated Parmesan cheese can add a finishing touch. This not only looks nice but enhances the flavor too. For the complete recipe, check out the [Full Recipe]. {{image_4}} Gluten-Free Substitutions Zucchini noodles are naturally gluten-free. This dish fits well into a gluten-free diet. You can swap traditional pasta for zucchini noodles without losing flavor. Vegan Options To make this dish vegan, skip the Parmesan cheese. You can use nutritional yeast for a cheesy flavor. Fresh herbs add a nice touch, too. Spicy or Herby Adjustments To spice things up, add red pepper flakes while cooking. This gives the dish a nice kick. You can also try fresh herbs like thyme or rosemary for a twist. Adding Seasonal Vegetables Feel free to mix in seasonal veggies. Asparagus, spinach, or peas work great in spring. In the fall, add roasted squash for a hearty bite. Cold Pasta Salad Version For a refreshing cold dish, let the cooked noodles cool. Toss them with olive oil and lemon juice. Add cherry tomatoes and herbs for a vibrant pasta salad. Casserole Variation To create a casserole, layer the sautéed veggies and zucchini noodles in a baking dish. Top with breadcrumbs and bake until golden. This adds a comforting twist to the classic dish. For the full recipe, check out Zucchini Noodle Primavera Delight! To keep your Zucchini Noodle Primavera fresh, use proper storage containers. Glass or BPA-free plastic containers work well. Make sure the lid seals tightly to avoid air exposure. You can store it in the fridge for about 3 days. After that, the noodles might get soggy. If you notice any signs of spoilage, like an off smell or discoloration, throw it away. Freezing zucchini noodles is easy. First, blanch them in boiling water for about one minute. This step helps preserve their color and texture. Once blanched, place the noodles in a single layer on a baking sheet. Freeze them for a few hours until solid. Then, transfer the noodles to a freezer bag. Remove as much air as possible before sealing. When you’re ready to use them, defrost in the fridge overnight. To reheat, sauté them in a pan over medium heat for 3-5 minutes. This will warm them up without making them mushy. If you have leftovers, don’t worry! You can easily make a new dish. Try mixing them into an omelet for breakfast. This adds great flavor and nutrition. Another idea is to toss them into a soup. They add texture and make the soup heartier. You can also use unused ingredients like bell pepper or broccoli in stir-fries or salads. For more tasty ideas, check out the Full Recipe for Zucchini Noodle Primavera. Zucchini Noodle Primavera is a fresh, light dish that uses zucchini instead of pasta. It is packed with colorful vegetables, making it healthy and fun. The dish combines sautéed zucchini noodles with bell peppers, tomatoes, broccoli, and herbs. Nutritional Benefits: - Zucchini is low in calories and high in fiber. - Bell peppers provide vitamin C and antioxidants. - Tomatoes add lycopene, great for heart health. - This dish is full of vitamins and minerals, supporting overall well-being. You can still enjoy zucchini noodles without a spiralizer. Here are some methods: - Vegetable Peeler: Use a peeler to make long strips of zucchini. - Box Grater: Grate the zucchini for smaller noodle-like pieces. - Knife: Cut thin slices, then stack them and slice into noodles. Tools You Can Use: - A sharp knife for cutting. - A box grater for grating. - A vegetable peeler for long strips. Yes, you can meal prep Zucchini Noodle Primavera. It’s a great dish to make ahead of time. Best Practices for Meal Prep: - Cook the veggies and store them separately from the noodles. - Keep each ingredient in airtight containers. Storing and Reheating Tips: - Refrigerate for up to three days. - Reheat on the stove for best results. - Avoid microwaving, as it can make the noodles soggy. Adding protein can make Zucchini Noodle Primavera a complete meal. Here are some great options: - Grilled Chicken: Add slices for a hearty boost. - Shrimp: Sauté shrimp for a seafood twist. - Tofu: Use cubed tofu for a vegetarian option. - Chickpeas: Add for plant-based protein. Pairing Ideas for a Complete Meal: - Serve with a side salad for extra greens. - Pair with garlic bread for a filling dinner. For the full recipe, check out the detailed instructions above! In this post, I explored how to make Zucchini Noodle Primavera. You learned about key ingredients, like zucchini and colorful veggies. I walked you through each step, from spiralizing to sautéing. I also shared tips to boost flavor and ways to store leftovers. Zucchini Noodle Primavera is fun and easy to customize. So, feel free to try new ingredients or serve it in different styles. Enjoy your cooking adventure and make this dish your own!

Zucchini Noodle Primavera Fresh and Flavorful Recipe

If you’re looking for a fresh and healthy dinner option, look no further! Zucchini noodle primavera is vibrant, packed with

- 1 lb boneless, skinless chicken breasts, cut into bite-sized pieces - 1 tablespoon extra virgin olive oil - 4 cups low-sodium chicken broth - 2 cups pasta of your choice (farfalle or penne work beautifully) - 1 cup heavy cream - 1 cup freshly grated Parmesan cheese - 1 cup fresh baby spinach - 1 teaspoon garlic powder - 1 teaspoon onion powder - 1 teaspoon Italian seasoning - Sea salt and freshly ground black pepper to taste - Fresh basil leaves for garnish - Extra Parmesan cheese for serving - A splash of lemon juice for brightness When making Instant Pot creamy chicken pasta, you want the best ingredients. Fresh chicken adds flavor and texture. Olive oil gives a nice base for sautéing. Chicken broth is key for a rich sauce. Choose pasta shapes that hold sauce well, like farfalle or penne. Heavy cream and Parmesan cheese create that creamy texture we all love. Spinach adds color and nutrition. Seasonings are simple but vital. Garlic powder and onion powder add depth. Italian seasoning brings herbs together. Don't forget salt and pepper to enhance all these flavors. Optional add-ins can elevate your dish. Fresh basil leaves add a pop of freshness. Extra Parmesan cheese gives a richer taste. A splash of lemon juice brightens the dish, making it even more delightful. For the full recipe, check out the details above. 1. Start by cutting your chicken breasts into bite-sized pieces. This helps them cook evenly. 2. Gather your spices. You will need garlic powder, onion powder, and Italian seasoning. 3. Measure out the chicken broth, heavy cream, and Parmesan cheese for later use. 4. Rinse your fresh baby spinach. It adds great color and flavor to the dish. 5. Have your pasta ready. Farfalle or penne work best for this recipe. 1. Turn on your Instant Pot and select the sauté function. Wait until it heats up. 2. Pour in the olive oil. Once it shimmers, add the seasoned chicken pieces. 3. Sauté the chicken for about 3-4 minutes until it is golden brown. 4. Carefully add the chicken broth. Use a wooden spoon to scrape up any bits. 5. Add the pasta to the pot, making sure it is covered with broth. 6. Close the lid and set the Instant Pot to manual high pressure for 4 minutes. 7. When the timer beeps, perform a quick release. Turn the valve to venting slowly. 1. Once the steam has escaped, open the lid carefully. Stir the mixture gently. 2. Pour in the heavy cream and add the grated Parmesan cheese. Mix until creamy. 3. Fold in the fresh baby spinach. It will wilt quickly in the warm pasta. 4. Taste the dish and add more salt or pepper if needed. 5. Serve hot, garnishing with fresh basil leaves for a pop of color. For the full recipe, check out the Instant Pot Creamy Chicken Pasta Delight. Enjoy your meal! To get pasta just right, follow a few simple steps. First, choose the right type of pasta. I find farfalle or penne work best. They hold sauce well and cook evenly. When adding pasta to the Instant Pot, make sure it is fully submerged. This helps it cook without becoming mushy. For an extra flavor boost, think about adding fresh herbs. Chopped parsley or thyme can make a big difference. You can also squeeze a little lemon juice before serving. This brightens the dish and balances the creaminess. If you like heat, red pepper flakes add a nice kick. One common mistake is not scraping the bottom of the pot. This can lead to burnt bits and a less tasty dish. Always use a wooden spoon to deglaze the pot after browning the chicken. Another mistake is overcooking the pasta. Stick to the 4-minute cooking time for perfect pasta. Lastly, don’t forget to taste before serving. Adjust salt and pepper to your liking for a perfect finish. For the full recipe, check out Instant Pot Creamy Chicken Pasta Delight. {{image_4}} You can swap the chicken for other proteins. Try using shrimp or turkey instead. Both options work well and taste great. You can also use tofu if you want a lighter meal. Just remember to adjust cooking times. Shrimp cooks fast, while turkey may need a few extra minutes. If you need a gluten-free version, choose gluten-free pasta. Many brands offer great options that taste good. Make sure to check the cooking time on the package. You may need to adjust the liquid in your recipe. You can also use rice or quinoa for a unique twist. For a vegetarian dish, skip the chicken. Add more veggies like bell peppers or mushrooms. You could also add chickpeas for extra protein. Make sure to keep the rest of the recipe the same. The creamy sauce will still be rich and satisfying. Explore the [Full Recipe] for more details and tips! To keep your creamy chicken pasta fresh, place it in an airtight container. Make sure to let it cool to room temperature first. Store the leftovers in the fridge for up to three days. This way, you can enjoy it again without losing flavor. When you’re ready to eat, reheat the pasta in a pot over medium heat. Stir it gently to heat evenly. If it looks a bit dry, add a splash of chicken broth or cream to bring back the moisture. You can also microwave it in a bowl. Heat it for 1-2 minutes, stirring halfway through. If you want to freeze your creamy chicken pasta, portion it into freezer-safe containers. Leave a little space at the top for expansion. It can stay in the freezer for up to two months. To thaw, move it to the fridge for a night before reheating. This keeps the pasta tasty and smooth. For the full recipe, check out the details above. Cooking chicken in the Instant Pot takes about 4 minutes on high pressure. This time is perfect for boneless, skinless chicken breasts. Always ensure the chicken is cut into small pieces for even cooking. If the pieces are larger, increase the cooking time by a few minutes. The Instant Pot cooks the chicken quickly and keeps it juicy. Yes, you can use whole wheat pasta. It adds a nice nutty flavor and is healthier. Just keep in mind that whole wheat pasta may need a little more water. Check the package for the recommended cooking time. You might need to adjust the cooking time by one minute in the Instant Pot for the best results. This creamy chicken pasta pairs well with many sides. Here are some ideas: - A fresh garden salad - Steamed broccoli or green beans - Garlic bread or crusty rolls - Roasted vegetables like zucchini or bell peppers Each of these sides complements the rich flavors of the creamy chicken pasta. For even more flavor, sprinkle some extra Parmesan cheese on top of your dish. You can find the complete recipe in the [Full Recipe]. You learned about key ingredients and how to prepare creamy chicken pasta in an Instant Pot. We covered cooking steps, tips for perfect texture, and spices that boost flavor. You also discovered variations for different diets and how to store leftovers for later meals. Cooking doesn't need to be hard. With the right ingredients and steps, you can create delicious dishes. So, grab your Instant Pot and enjoy making this creamy pasta tonight!

Instant Pot Creamy Chicken Pasta Quick and Tasty Meal

Looking for a quick and tasty meal? You’ll love this Instant Pot Creamy Chicken Pasta! In just minutes, you can

To make a tasty Quick Veggie Stir-Fry with Tofu, you need fresh and colorful ingredients. Each one adds flavor, texture, and nutrients to your meal. Here’s what you should gather: - 1 block (14 oz) firm tofu, drained and cubed - 2 tablespoons soy sauce - 1 tablespoon sesame oil - 2 tablespoons vegetable oil - 1 red bell pepper, thinly sliced - 1 cup broccoli florets - 1 cup snow peas - 1 medium carrot, julienned - 2 cloves garlic, finely minced - 1 teaspoon fresh ginger, grated - 2 green onions, chopped - Sesame seeds for garnish The star of the dish is tofu. It soaks up the sauce and provides great protein. Firm tofu holds its shape well while cooking. The fresh veggies bring color and crunch. Red bell pepper adds sweetness. Broccoli and snow peas give a fresh, crisp bite. Carrots add a nice texture. For a finishing touch, sprinkle sesame seeds and chopped green onions on top. They add a pop of flavor and make your dish look beautiful. If you want, you can also add crushed red pepper for heat. This way, you can adjust the taste to your liking. Check out the Full Recipe for all the details you need to create this delicious dish. To start, you need to press the tofu. Wrap the tofu block in a clean kitchen towel. Place a heavy object on top, like a skillet or a plate. Let it sit for about 15 minutes. This step helps remove excess water. Removing water is key for a great texture when you cook it. Next, unwrap the tofu. Cut it into bite-sized cubes. Make sure they are uniform in size. This helps them cook evenly and brown nicely. Now, let’s get to the fun part: cooking! First, mix the sauce. In a small bowl, combine the soy sauce and sesame oil. Stir it until well mixed and set this aside. Heat a large skillet or wok over medium-high heat. Add the vegetable oil and wait until it shimmers. Carefully add the cubed tofu to the hot skillet. Stir-fry it for about 5-7 minutes. You want the tofu to turn a nice golden brown on all sides. Once it’s done, remove it from the skillet and place it on a plate. In the same skillet, add minced garlic and grated ginger. Sauté for about 30 seconds. Keep stirring so they don’t burn. Next, toss in the sliced red bell pepper, broccoli florets, snow peas, and julienned carrot. Stir-fry these veggies for 3-4 minutes. You want them tender-crisp and bright in color. Return the golden tofu to the skillet. Pour the soy sauce mixture over everything. Gently toss to coat all the ingredients. Continue to stir-fry for another 2 minutes. This allows the flavors to meld and everything to heat through. When it's time to serve, remove the skillet from heat. Sprinkle chopped green onions and sesame seeds over the stir-fry. This adds a pop of color and flavor. For a great meal, serve the veggie stir-fry over fluffy jasmine rice or nutrient-packed quinoa. You can also add extra sesame seeds and green onions as a final touch. This dish is easy and looks beautiful on the plate. Enjoy this tasty and easy meal! For the complete details, check the [Full Recipe]. To boost flavor in your stir-fry, consider adjusting the seasoning. Add a splash of lime juice for brightness. A pinch of sugar can balance the saltiness of soy sauce. For heat, try adding red pepper flakes or sriracha. These spices give your dish a nice kick. Achieving the perfect tofu texture is key. Press the tofu well to remove excess water. This step helps it become crispy. Cook the tofu in a hot skillet to get a golden brown crust. For crisp vegetables, avoid overcooking. Stir-fry them just enough to keep their crunch and bright colors. Prep your ingredients in advance to save time. Chop your veggies and tofu the night before. Store them in airtight containers in the fridge. If you have leftovers, use them in your next meal. Toss them into soups, salads, or wraps for quick lunches. For the full recipe, check out the Quick Veggie Stir-Fry with Tofu. {{image_4}} You can swap tofu for other proteins to change the dish. Chicken works great if you want meat. Simply cut it into bite-sized pieces and cook it in the same way as the tofu. Shrimp also makes a nice option. Just add it to the skillet until it turns pink. For a plant-based twist, you could try tempeh. Tempeh adds a nutty flavor and has a firmer texture, making it a great choice. Feel free to mix and match veggies based on what you have. Seasonal vegetables are often the best choice. You could use zucchini, bell peppers, or snap peas. If you like mushrooms, they can add a nice umami taste. For something different, try adding leafy greens like spinach or bok choy. These can wilt down nicely and add color to your stir-fry. The sauce can change your stir-fry's flavor. You might want to try different sauces to fit your taste. Adding a splash of lime juice can give a fresh kick. If you like it spicy, try adding some chili paste or sriracha. For something sweet, a dash of honey or maple syrup can do the trick. You can even make your own sauce with ingredients like garlic, ginger, and soy sauce. This way, you can control the flavors and make it just right for you. For the full recipe, check out the complete guide to Quick Veggie Stir-Fry with Tofu. To keep your Quick Veggie Stir-Fry with Tofu fresh, store leftovers in the fridge. Use airtight containers for best results. Glass or BPA-free plastic containers work great. Let the stir-fry cool down before sealing. This helps avoid moisture build-up. You can enjoy leftovers for up to three days. If you want to save your stir-fry for later, freezing is a good option. Pack the stir-fry in freezer-safe bags or containers. Make sure to remove as much air as possible. This keeps the flavors strong. When you're ready to eat, thaw it overnight in the fridge. Reheat in a skillet over medium heat. Adding a splash of water helps revive the veggies. Stir until heated through. Enjoy your tasty meal once more! You can keep the veggie stir-fry in the fridge for about 3 to 4 days. To keep it safe, store it in an airtight container. This helps prevent bacteria growth and keeps the food fresh. Always check for any off smells or changes in texture before eating leftovers. Yes, you can make this dish ahead of time. Prepare the tofu and vegetables in advance, but keep the sauce separate until you are ready to cook. This keeps the veggies crisp. When you are ready to eat, just stir-fry everything quickly. It will taste fresh and delicious. If you need a substitute for soy sauce, try tamari or coconut aminos. Both options are gluten-free and add a nice flavor. You can also make a mix of water, vinegar, and a dash of salt. This will give you a similar taste without using soy sauce. Yes, this recipe is great for meal prep. You can portion the stir-fry into individual containers. It reheats well, so it's perfect for lunches or quick dinners. Just make sure to store the sauce separately if you want to keep it fresh. Using frozen vegetables is a great option for this stir-fry. They are convenient and often pre-washed and cut, saving you time. Just remember to thaw them before cooking. This helps them cook evenly and keeps the dish from getting watery. In this blog post, we explored making a Quick Veggie Stir-Fry with Tofu. We covered the key ingredients, preparation steps, and cooking process to get the best flavors. You learned tips for enhancing taste and achieving perfect texture. You also saw variations to keep every meal fresh and exciting. Remember, this recipe is versatile and easy. Use different veggies or proteins to match what you have. Enjoy the cooking process, and make it your own!

Quick Veggie Stir-Fry with Tofu Tasty and Easy Meal

Looking for a quick, tasty meal? Try my Quick Veggie Stir-Fry with Tofu! This dish packs fresh veggies and protein

- 1 cup creamy peanut butter - 1/2 cup honey or maple syrup - 2 cups rolled oats - 1/2 cup dark cocoa powder - 1 teaspoon vanilla extract - 1/4 teaspoon salt - 1/2 cup dark chocolate chips - 1/4 cup chopped peanuts When making no-bake chocolate peanut butter bars, quality ingredients matter. The creamy peanut butter gives the bars their rich flavor and creamy texture. Honey or maple syrup adds sweetness and moisture. Rolled oats provide bulk and a chewy texture. Dark cocoa powder gives the bars that deep chocolate taste. Vanilla extract enhances the flavor, while salt balances it out. Dark chocolate chips add extra chocolatey goodness. Finally, chopped peanuts on top add crunch. - Alternatives for peanut butter: If you have a nut allergy, sunflower seed butter works well. It has a similar texture and taste. - Sweeteners: Honey is thicker, while maple syrup is lighter. Both options are tasty, so choose what you prefer. - Gluten-free options for rolled oats: Make sure to use certified gluten-free oats. This way, everyone can enjoy these bars without worry. For the full recipe, refer to the instructions at the beginning. 1. Start by preparing an 8-inch square baking dish. Line it with parchment paper. Leave some paper over the edges. This helps lift out the bars later. 2. In a large mixing bowl, add 1 cup of creamy peanut butter and 1/2 cup of honey or maple syrup. Mix them until smooth and well combined. 3. Now, add 2 cups of rolled oats, 1/2 cup of dark cocoa powder, 1 teaspoon of vanilla extract, and 1/4 teaspoon of salt to the bowl. Stir until everything is mixed well. You should have a thick, sticky dough. 4. Gently fold in 1/2 cup of dark chocolate chips. Make sure they are evenly spread throughout the mixture. This gives you delightful chocolatey bites in every bar. 5. Transfer the mixture into your prepared baking dish. Use a spatula to evenly spread it out. Press it down firmly to make it compact. 6. Sprinkle 1/4 cup of chopped peanuts on top. Press them down a little so they stick. 7. Cover the dish with plastic wrap. Place it in the refrigerator for at least 2 hours. This helps the bars firm up. 8. Once set, lift the bars out using the parchment paper. Cut them into squares or bars of your choice. 9. Store any leftovers in an airtight container in the fridge to keep them fresh. For the full recipe, check out the earlier section. Enjoy making these tasty no-bake chocolate peanut butter bars! To get the right texture, you need a thick and sticky mixture. Start with creamy peanut butter. Mix it well with honey or maple syrup until smooth. This step helps the bars hold together. When you add the rolled oats and cocoa powder, mix slowly. Use a sturdy spoon or spatula. You want everything fully combined without overmixing. Overmixing can make the bars too tough. For extra flavor, consider adding a pinch of cinnamon or a splash of almond extract. These can make the bars even more delightful. If you want a richer chocolate taste, use a higher quality cocoa powder. Dark chocolate chips also add depth to the flavor. You can even drizzle melted chocolate on top before serving for a gourmet touch. When serving, cut the bars into neat squares. Place them on a colorful plate for a nice effect. You can also add a light dusting of cocoa powder on top. If you have leftover bars, store them in an airtight container in the fridge. This keeps them fresh and tasty. Enjoy your no-bake chocolate peanut butter bars as a fun treat! You can find the full recipe earlier in this article. {{image_4}} You can easily adapt my no-bake chocolate peanut butter bars to fit different diets. For a vegan option, use maple syrup instead of honey. Replace the chocolate chips with dairy-free ones. This way, you keep the same great taste while making it plant-based. If you need a nut-free version, swap out the peanut butter for sunbutter or soy nut butter. Just be sure to check the labels for allergens. This change still gives you a creamy base and keeps the bars tasty. Spicing things up can make your bars even more exciting. One easy way is to add a pinch of cinnamon or a dash of cayenne. Cinnamon gives warmth, while cayenne adds a kick. Both flavors pair well with chocolate. You can also try different types of chocolate. Use milk chocolate for a sweeter taste or white chocolate for a creamy twist. Each type of chocolate brings a new layer of flavor. Get creative by mixing in fun add-ins. Dried fruits like cranberries or raisins add sweetness and chewiness. You can also add seeds, like chia or flax, for extra nutrition. If you want a crunchier bite, consider adding other nuts like almonds or walnuts. Chocolates or candies, like M&Ms or crushed pretzels, can also give a fun surprise in every bite. These little additions can transform your bars into something truly unique. Store your no-bake chocolate peanut butter bars in the fridge. This keeps them cool and fresh. If you want to save them for longer, the freezer is a great option. Just wrap them tightly in plastic wrap. This protects against freezer burn. To maintain freshness, always keep them in an airtight container. This prevents them from drying out and losing flavor. I recommend cutting the bars into 16 squares. This way, everyone can enjoy a piece without overindulging. When serving, use a sharp knife. It helps prevent crumbling. For a fun twist, try stacking a few bars on a plate. This adds a nice touch for guests. These bars last about a week in the fridge. If you store them in the freezer, they can last up to three months. Always check for signs of spoilage. Look for changes in color or a strange smell. If you notice these signs, it’s best to discard them. Enjoy your no-bake chocolate peanut butter bars fresh! Yes, you can use crunchy peanut butter. It will add a fun texture. The crunchy bits give each bite a nice surprise. The flavor stays rich and nutty, which is great. If you don’t have cocoa powder, try using carob powder. You can also use melted dark chocolate. This will change the taste, but it still tastes good. You may need to adjust the sweetness if you use chocolate. To make the bars firmer, add more oats. You can also reduce the amount of honey. Another option is to chill them longer in the fridge. This helps them hold their shape better. Yes, you can freeze these bars. Just wrap them tightly in plastic wrap first. When you want to eat one, let it thaw in the fridge for a few hours. This keeps them fresh and tasty. These bars have a mix of protein and fiber. The peanut butter adds healthy fats. Using honey or maple syrup gives you natural sweetness. However, they are also high in calories, so enjoy them in moderation. For the full recipe, check the details above. You learned how to make delicious no-bake bars with simple ingredients. We explored ingredient substitutions, preparation steps, and tips for a perfect texture. Variations let you customize flavors and cater to diets. Proper storage keeps your bars fresh for longer. These bars offer a tasty treat that fits many needs. Enjoy experimenting with different flavors and ingredients. Happy snacking!

No-Bake Chocolate Peanut Butter Bars Irresistible Treat

Craving a sweet treat that’s easy to make and delicious? Let me introduce you to my No-Bake Chocolate Peanut Butter

- Ground meats and fillers - 1 lb ground beef - 1/2 lb ground pork - 1/2 cup breadcrumbs (preferably seasoned) - 1/4 cup fresh parsley, finely chopped - 1 large egg - Vegetables - 1 bell pepper, diced (red or green) - 1 medium onion, diced - 2 celery stalks, diced - Broth, tomatoes, and seasonings - 3 cups vegetable broth (homemade or low-sodium) - 1 can (14 oz) diced tomatoes (with juices) - 2 teaspoons Worcestershire sauce - 1 bay leaf - Optional ingredients for spice and thickness - 1 cup okra, sliced (fresh or frozen) - 1 tablespoon hot sauce (optional) - 1 tablespoon cornstarch (optional) - Salt and black pepper, to taste - 1 tablespoon Cajun seasoning (adjust for spice preference) - 2 tablespoons extra virgin olive oil Each ingredient plays a key role in making this stew rich and tasty. The mix of ground beef and pork gives the meatballs a nice flavor. The bell pepper, onion, and celery add crunch and sweetness. You can adjust the spice to match what you like. If you want a thicker stew, use cornstarch. The optional hot sauce can give it a kick! For the full recipe, check out the details I provided earlier. To start, I combine the ground beef and ground pork in a large mixing bowl. I add breadcrumbs, fresh parsley, and a large egg. Then, I mix in minced garlic, Cajun seasoning, and a pinch of salt and black pepper. I use my hands or a spoon to blend everything together until it's well mixed. Next, I shape the mixture into small meatballs, about 1 inch in size. I place them on a plate, making sure they don’t touch. This keeps them from sticking together. I heat olive oil in a large pot over medium heat. Once hot, I add diced onion, bell pepper, and celery. I sauté these vegetables, stirring them often. After about 5 minutes, they become soft and fragrant. I carefully add the meatballs to the pot. I let them brown on all sides, which takes about 8 to 10 minutes. To cook them evenly, I work in batches if needed. Once browned, I remove the meatballs and set them aside on a plate. In the same pot, I pour in the vegetable broth. Then, I add diced tomatoes with their juices, Worcestershire sauce, sliced okra, and a bay leaf. If I want some heat, I include hot sauce. I stir gently and bring the mixture to a low simmer. After it starts simmering, I return the meatballs to the pot. I cover the pot and let it simmer on low heat for 30 minutes. I stir occasionally to keep everything from sticking. If I want a thicker stew, I dissolve cornstarch in a small bowl with a few tablespoons of water. This creates a slurry. I stir this into the stew and cook for another 5 minutes. This helps it thicken to my liking. Before serving, I remove the bay leaf and taste the stew. I adjust the seasoning with more salt, pepper, or hot sauce as needed. For the full recipe, check out the details provided. To ensure even cooking, start by heating your pot before adding any ingredients. This helps to achieve a nice brown color on the meatballs. Work in batches when browning the meatballs. This way, they get the heat they need without crowding. Crowding can lead to steaming rather than browning. If spice is your concern, you can adjust the Cajun seasoning. Start with less than the recipe calls for. Taste the stew before serving. If you want more heat, add more Cajun seasoning or hot sauce. You control the spice level! When serving, ladle the stew into deep bowls. Garnish with fresh parsley and a sprinkle of Cajun seasoning. This adds color and freshness. Serve with crusty bread or toasted baguette slices. They are perfect for dipping. You can also pair the stew with a simple green salad. A fresh salad offers a nice crunch and balances the dish’s heartiness. Another great side is cornbread. It adds a sweet touch that complements the stew. Enjoy your meal! For the full recipe, check out the details above. {{image_4}} If you want to change up the flavor, consider different meats. Ground turkey or chicken can work well instead of beef and pork. You can also try plant-based meat for a healthier option. For a lighter stew, use leaner proteins. When it comes to veggies, you can be creative. Swap out okra for zucchini or carrots. You can also add mushrooms or spinach for extra nutrition. Use what you have on hand. This stew is flexible, and that makes it fun! To make the stew gluten-free, substitute regular breadcrumbs with gluten-free ones. You can also use cooked rice or quinoa as a binder. This keeps the stew tasty and safe for those with gluten issues. For vegetarian or vegan options, skip the meat entirely. Use lentils or chickpeas for protein. They add a nice texture and soak up the stew's flavors. For broth, stick to vegetable broth, and you're all set! You can still enjoy a hearty meal without animal products. Check out the Full Recipe for all the details! After enjoying Cajun meatball stew, it’s easy to store leftovers. Let the stew cool down before transferring it to an airtight container. This helps keep it fresh. You can store the stew in the fridge for up to four days. This gives you time to enjoy it again. If you want to keep the stew longer, freezing is a great choice. Pour the cooled stew into freezer-safe containers or bags. Make sure to leave space in the container for expansion. The stew can last in the freezer for up to three months. When you are ready to eat it, thaw the stew in the fridge overnight. You can also use the microwave for quick thawing. Once thawed, heat it on the stove until it bubbles. Stir often to keep it from sticking. Enjoy this hearty dish again! For the full recipe, check out the details above. Store leftover Cajun Meatball Stew in an airtight container. You want to keep it in the fridge. It will stay fresh for up to four days. Make sure to let it cool before sealing the container. Yes, you can prepare Cajun Meatball Stew ahead of time. Cook the stew fully, then cool it down. Once cool, store it in the fridge. Reheat it on the stove for the best taste. You can even freeze it for later. Just thaw it in the fridge before reheating. Cajun Meatball Stew pairs well with crusty bread or rice. You can also serve it with a fresh salad. Some enjoy it with cornbread for a Southern twist. These sides add texture and balance to the meal. Cajun Meatball Stew can be spicy, but you control the heat. Use less Cajun seasoning if you want a milder taste. Add hot sauce to individual bowls for those who like it hot. This way, everyone can enjoy it their way. Yes, frozen okra works well in this stew. It saves time and is easy to use. Fresh okra has a better texture, but frozen is still tasty. Just add it to the stew as you would fresh. The flavor remains rich and comforting. For the full recipe, check out the details above. This article showed how to make a tasty Cajun Meatball Stew. We covered ingredients, step-by-step cooking, and tips to enhance flavor. You can adjust this dish for your taste and dietary needs. Store leftovers for future meals or freeze to save time. With a few simple changes, you can make this stew your own. Now, grab your ingredients and start cooking. Enjoy a warm and hearty meal that brings everyone together.

Cajun Meatball Stew Flavorful and Hearty Comfort Dish

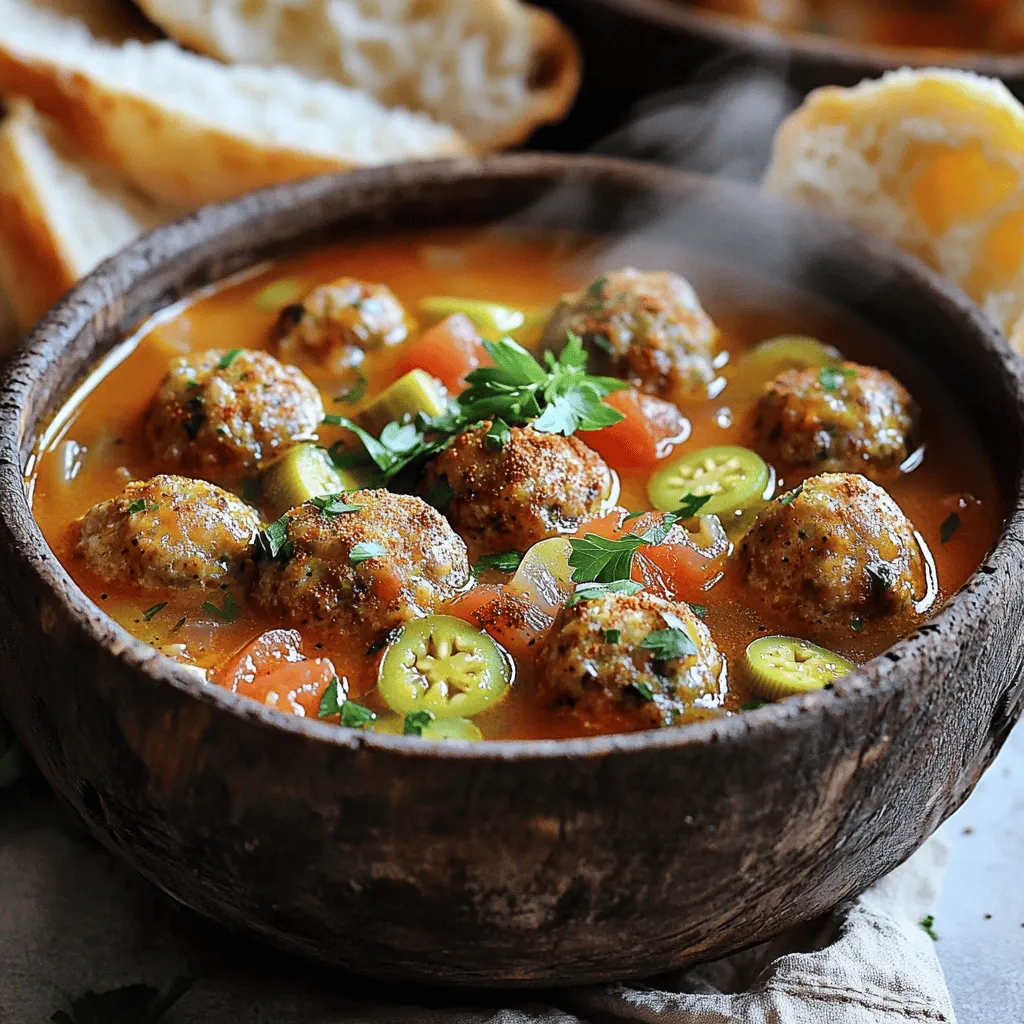
Are you ready to warm up with a bowl of Cajun Meatball Stew? This dish is a tasty mix of

To make a tasty chickpea salad sandwich, gather these simple ingredients: - 1 can (15 oz) chickpeas, drained and rinsed - 1/4 cup plain Greek yogurt - 2 tablespoons mayonnaise - 1 tablespoon Dijon mustard - 1 small celery stalk, finely chopped - 1/4 cup red bell pepper, finely chopped - 1/4 cup red onion, finely chopped - 1 tablespoon fresh dill, chopped (or 1 teaspoon dried dill) - Salt and pepper to taste - 4 slices whole grain bread - Fresh lettuce leaves for garnish - Sliced tomatoes for serving (optional) Chickpeas are the star of this dish. They are rich in protein and fiber. One can gives you about 12 grams of protein. This helps you feel full. Greek yogurt adds creaminess and provides calcium and probiotics, good for your gut. Whole grain bread gives you healthy carbs and more fiber. Fresh veggies like celery and bell pepper add crunch and vitamins. Dill brings a fresh flavor, making each bite enjoyable. When buying fresh ingredients, look for these tips: - Chickpeas: Choose canned chickpeas without added salt or preservatives. This helps keep your salad healthy. - Vegetables: Pick veggies that are firm and vibrant. Avoid any that look wilted or brown. - Herbs: If using fresh dill, look for bright green leaves. They should smell fragrant. - Bread: Select whole grain bread that feels soft but firm. Check the date to ensure freshness. These tips help you get the best taste and nutrition for your sandwich. For a full recipe, check the sections above. Making a chickpea salad sandwich is quick and simple. You can whip it up in about 20 minutes. Gather your ingredients first. You'll need chickpeas, Greek yogurt, mayonnaise, mustard, and fresh veggies. This recipe is perfect for lunch or a light dinner. 1. Start with a large bowl. Add the drained and rinsed chickpeas. Use a fork to mash them lightly. Leave some chunks for texture. 2. Next, add the Greek yogurt, mayonnaise, and mustard. Mix well until it is creamy and smooth. 3. Now, gently fold in your finely chopped celery, red bell pepper, red onion, and dill. Make sure all ingredients are mixed, but don’t over-mash the chickpeas. 4. Season your mixture with salt and pepper to taste. Adjust to your liking. 5. The chickpea salad is now ready! You can use it right away or chill it for a bit in the fridge. Toasting the bread makes a big difference. If you want the best flavor, toast the whole grain slices until golden brown. You can use a toaster or a skillet. Toasting adds a nice crunch to your sandwich. Once the bread is ready, spread the chickpea salad on two slices. Then layer with fresh lettuce. If you like, add sliced tomatoes for extra flavor. Top with the other slices of bread and press down gently. Cutting the sandwiches diagonally makes them look fancy and easier to eat. For the full recipe, check out the detailed guide above. Enjoy your tasty chickpea salad sandwich! To make a great chickpea salad, start with fresh ingredients. Use ripe tomatoes and crunchy celery. Drain and rinse the chickpeas well. This step removes extra salt and helps the flavors pop. Mash the chickpeas lightly with a fork. Leave some chunks for texture; it makes the salad more fun to eat. Mix in Greek yogurt and mayonnaise for creaminess. Dijon mustard adds a nice tang. Don’t forget fresh herbs! Dill brightens the salad and gives it a fresh taste. One common mistake is over-mashing the chickpeas. If you mash them too much, the salad turns mushy. You want a mix of creaminess and chunkiness. Another mistake is skipping the seasoning. Always taste your salad before serving. A pinch of salt and pepper can really enhance the flavors. Lastly, don't forget to chill your salad for at least 30 minutes before serving. This helps the flavors meld together. Layering is key to a great sandwich. Start with a slice of toasted bread. Spread a generous layer of the chickpea salad on top. Add fresh lettuce leaves next; they add crunch and freshness. If you like, add slices of tomato for extra flavor. Top it with another slice of bread. Press down gently to hold everything in place. Cut the sandwich diagonally for a nice presentation. Serve it with a side of crunchy veggies for a full meal. For the full recipe, check out the Chickpea Delight Salad Sandwich. {{image_4}} You can easily make a vegan version of the chickpea salad sandwich. Just replace Greek yogurt and mayonnaise with plant-based options. Use cashew yogurt or silken tofu for creaminess. You will still enjoy a tasty and filling meal without dairy. To boost flavor, add ingredients like chopped pickles, jalapeños, or sun-dried tomatoes. Each adds a unique taste. You might also try spices like cumin or paprika for a warm kick. Fresh herbs like parsley or cilantro can brighten the dish. Mix and match to find what you love best. Chickpeas shine in many cuisines. In the Mediterranean, add olives and feta for a Greek twist. In India, include curry powder and raisins for a sweet and savory mix. You can also try Middle Eastern flavors with tahini and lemon juice. Each version offers a new way to enjoy your sandwich. For the full recipe, check out the complete details on how to create this delicious dish! To keep your chickpea salad fresh, store it in an airtight container. Make sure the container is clean and dry. If you made extra sandwiches, wrap them in plastic wrap or foil. This helps prevent them from drying out. Keep the salad and sandwiches in the fridge right away. This keeps harmful bacteria away. Chickpea salad stays fresh for about 3 to 5 days in the fridge. If you notice any strange smell or change in color, it’s best to toss it out. The sooner you eat the leftovers, the better they taste. So enjoy them fast! You can get creative with leftover salad ingredients. Use extra chickpeas in soups or stews. Add them to rice dishes for a protein boost. Leftover veggies, like celery or red pepper, can go into stir-fries or omelets. You can even make a colorful veggie dip. There are many tasty ways to use what you have left! The best bread for a chickpea salad sandwich is whole grain bread. It adds a nice texture and flavor. You can also use sourdough or multigrain bread. These breads are sturdy and hold up well to the filling. They also offer a healthy boost with extra nutrients. Choose a bread you enjoy. This makes your sandwich even better. Yes, you can make this sandwich gluten-free! Just use gluten-free bread instead of regular bread. Many stores sell gluten-free options now. Look for brands that taste good and have a nice texture. You can also try wraps made from gluten-free grains. This gives you more choices while keeping your sandwich tasty. You can easily make chickpea salad ahead of time. Just prepare the salad and store it in the fridge. It stays fresh for up to three days. Make sure to keep it in an airtight container. This helps keep the flavors intact. Before serving, you may want to stir it again. This ensures a nice mix of flavors. For the full recipe, check out the detailed steps above! In this post, we covered how to make a tasty chickpea salad sandwich. We explored key ingredients, their nutritional benefits, and how to pick fresh items. Detailed steps helped you create delicious layers, while tips and tricks offered best practices and common pitfalls to avoid. We also shared exciting variations and smart storage methods for leftovers. Overall, this recipe is simple and flexible. You can enjoy it in many ways. Dive in and make your own chickpea salad sandwich today!

Chickpea Salad Sandwich Tasty and Simple Recipe

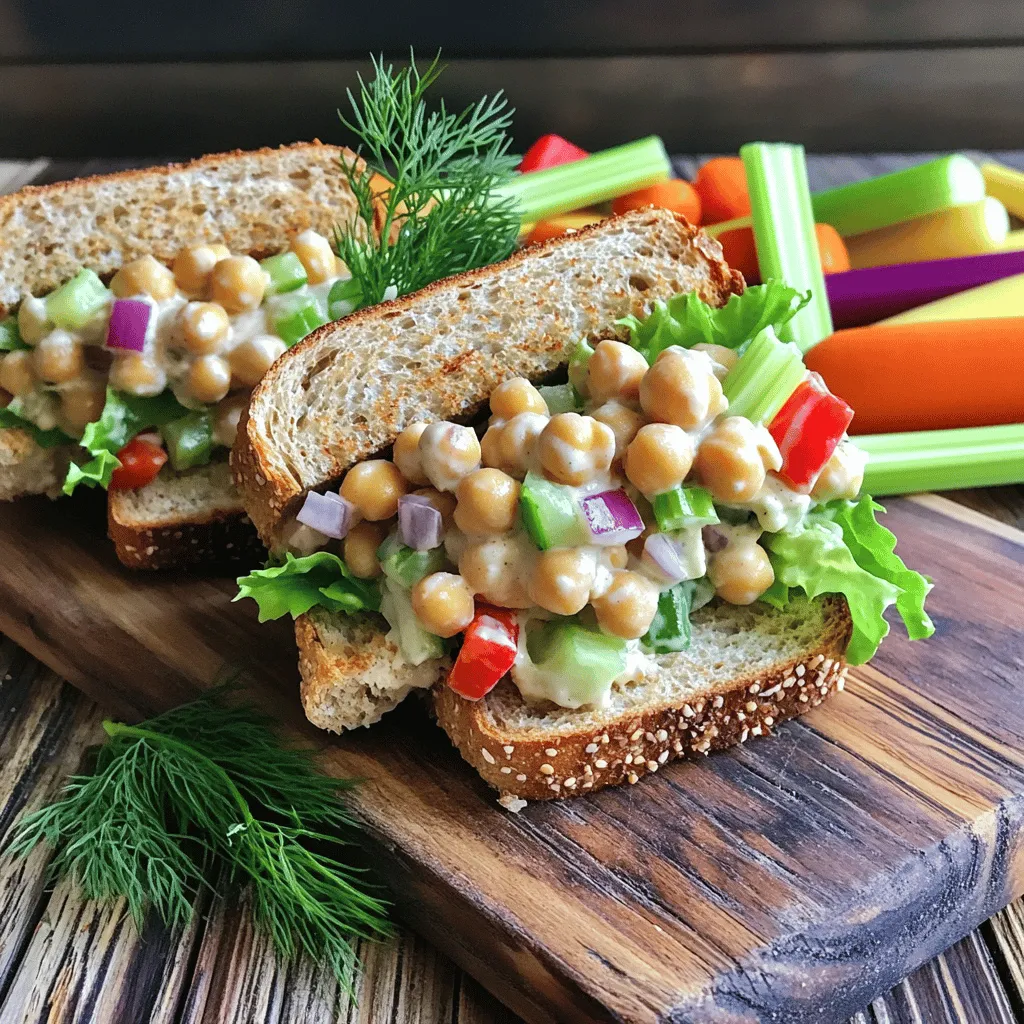
Welcome to a quick and tasty recipe for a Chickpea Salad Sandwich! This easy meal is perfect for lunch or

- 1 large head of cauliflower, cut into bite-sized florets - 4 cloves of garlic, finely minced - 1/2 cup finely grated Parmesan cheese - 1/4 cup extra virgin olive oil - 1 teaspoon smoked paprika - 1/2 teaspoon freshly ground black pepper - 1 teaspoon sea salt - 1 tablespoon fresh parsley, finely chopped (for garnish) The main ingredients for Garlic Parmesan Roasted Cauliflower are simple yet flavorful. The cauliflower brings texture, while the garlic adds depth. Parmesan cheese gives a rich, savory finish that is hard to resist. The additional ingredients enhance the dish beautifully. Olive oil helps the florets roast to perfection. Smoked paprika adds a subtle warmth that pairs nicely with the cheese. Black pepper and sea salt bring out all the flavors. Finally, fresh parsley adds a nice touch of color and brightness when you serve it. For the full recipe, check out the details above! - Preheat your oven to 425°F (220°C). - Line a baking sheet with parchment paper for easy cleanup. - In a bowl, whisk together olive oil, garlic, smoked paprika, sea salt, and black pepper. - Toss cauliflower florets in the garlic oil mixture until well coated. - Spread the florets in a single layer on the baking sheet. - Roast for 20 minutes, tossing halfway through. - Add Parmesan and continue roasting for another 10-15 minutes until golden. This method ensures that each piece of cauliflower gets that lovely garlic flavor. The high heat makes it crisp and tender. Roasting brings out the sweet, nutty flavor of the cauliflower. You can find the full recipe for Garlic Parmesan Roasted Cauliflower to guide you through every step. Enjoy making this tasty side dish! - Experiment with additional herbs like thyme or rosemary. - Add a squeeze of lemon juice before serving for an extra zing. When you enhance the flavor, you create layers of taste. Thyme or rosemary can bring warmth and depth. A squeeze of lemon juice adds brightness and balances the richness of the cheese. - Ensure florets are evenly coated for consistent roasting. - Space the florets out to avoid steaming and promote crispiness. Proper coating makes a big difference. It helps the cauliflower absorb the garlic and cheese well. Spacing the florets on the baking sheet ensures they roast instead of steam. This method gives you that perfect crispy texture. - Serve directly from the baking dish, garnished with parsley. - Consider using a stylish serving platter for gatherings. For a cozy meal, serve right from the baking dish. A sprinkle of fresh parsley adds color and freshness. If you want to impress guests, a stylish platter elevates the dish. Consider adding extra Parmesan on top for a touch of elegance. {{image_4}} You can easily add some heat to your dish. - Add red pepper flakes for a spicy kick. This will make each bite exciting. - Incorporate a dash of cayenne pepper for warmth. It adds a nice depth of flavor. If you want to change the cheese, here are some ideas. - Try different cheeses like Gruyère or Pecorino Romano. They give a unique taste. - Use nutritional yeast for a vegan version. It adds a cheesy flavor without dairy. Make your Garlic Parmesan Roasted Cauliflower even more fun. - Include other vegetables like Brussels sprouts or carrots. This adds color and texture. - Top with toasted nuts for added crunch. Nuts like almonds or walnuts work great. These variations let you customize your dish to suit your taste. For the full recipe, check out the detailed steps above. Store leftovers in an airtight container in the fridge for up to 3 days. This helps keep the garlic Parmesan roasted cauliflower fresh. When you want to enjoy it again, just take it out and reheat. You can freeze this dish after cooking. Place it in a freezer-safe container for up to 1 month. This way, you can enjoy it later. When ready to eat, reheat it in the oven to regain that crispy texture. To reheat, set your oven to 350°F (175°C). This keeps the cauliflower crispy, just like when it was fresh. Avoid using a microwave, as it may make the cauliflower soggy. Enjoy your Garlic Parmesan Roasted Cauliflower warm and crisp! For the full recipe, check the earlier section. Yes, but fresh cauliflower yields better texture and flavor. Frozen cauliflower can become mushy. Fresh cauliflower gives a nice crunch and a firmer bite. For the best taste, always choose fresh when you can. This dish pairs well with meat dishes like chicken or steak. You can also toss it over a salad for added crunch. The rich flavor of the garlic and cheese will enhance any meal. To make this recipe vegan, simply replace the Parmesan with nutritional yeast. Nutritional yeast gives a cheesy flavor without any dairy. You should also omit any other dairy products for a fully vegan dish. It’s done when it is tender and golden brown. The cheese should be melted and crispy. You can test a floret with a fork; if it goes in easily, it's ready to enjoy! This blog post explores making Garlic Parmesan Roasted Cauliflower. You learned about essential ingredients like cauliflower, garlic, and cheese. I shared simple steps to prepare the dish and tips to boost flavor and presentation. You can also experiment with variations and know how to store leftovers properly. Enjoy this easy recipe that can impress anyone. Try adding your favorite spices or cheeses! It's a tasty way to enjoy vegetables.

Garlic Parmesan Roasted Cauliflower Tasty Side Dish

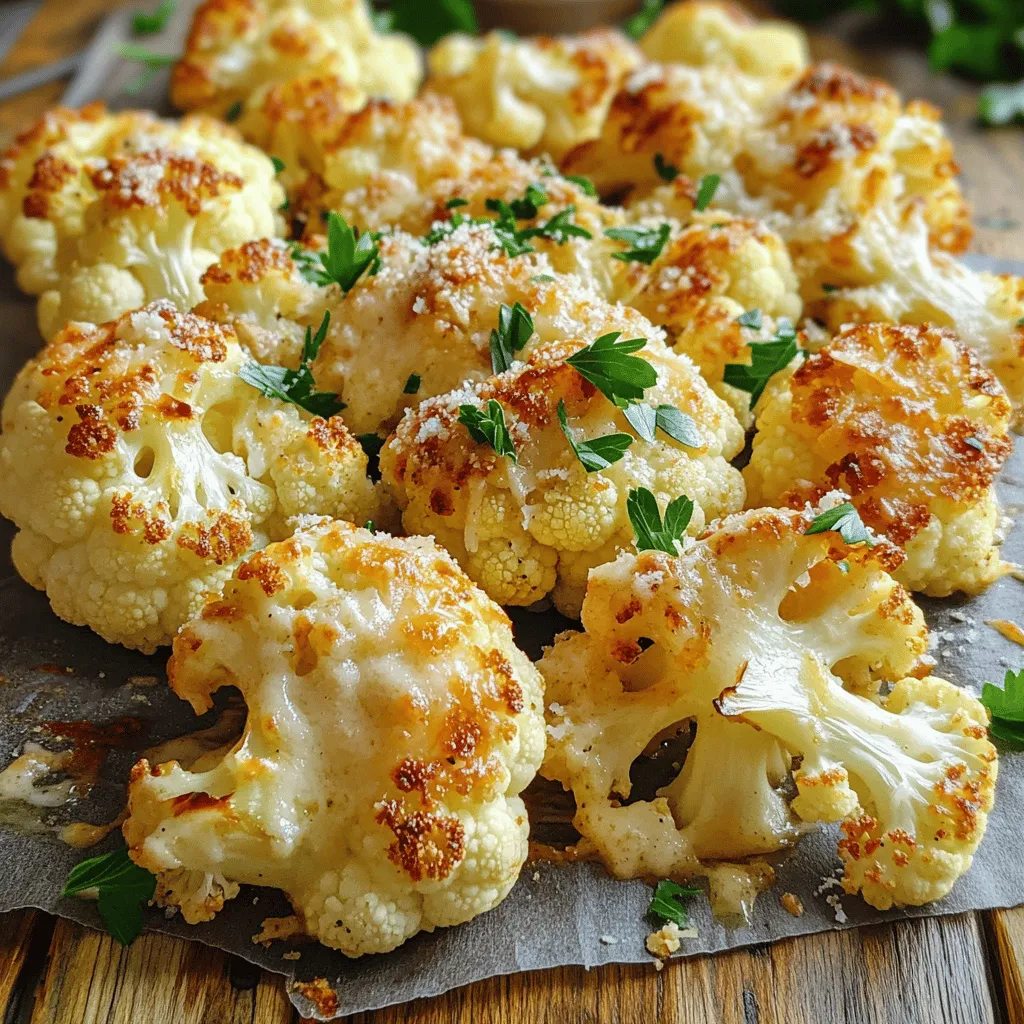
Are you ready to transform your meals with a simple yet delicious side dish? Garlic Parmesan Roasted Cauliflower is a

To make this tasty treat, gather these key items: - 1 cup coconut milk (canned for richness or boxed for lightness) - 1/2 cup almond milk (or any plant-based milk of your choice) - 1/4 cup chia seeds - 2 tablespoons maple syrup (or honey for sweetness) - 1 teaspoon vanilla extract (pure for best flavor) - 1 ripe mango, diced into bite-sized pieces - Toasted coconut flakes, for a delightful garnish - Fresh mint leaves, for a refreshing touch on top These ingredients blend to create a creamy texture that is both smooth and satisfying. You can customize your pudding with fun extras. Consider adding: - A pinch of sea salt to enhance sweetness - A dash of cinnamon for a warm, spicy kick - A handful of berries for added color and tartness - A scoop of nut butter for richness and protein These add-ins can change the flavor and make it your own. If you have dietary needs, don't worry! Here are some easy swaps: - Use oat milk or soy milk instead of almond milk for nut-free options. - Replace maple syrup with agave nectar for a vegan-friendly sweetener. - Swap chia seeds with flaxseeds if you prefer them. These substitutions ensure everyone can enjoy this mango coconut chia pudding. For the full recipe, check back to see how to bring it all together! Start by gathering your ingredients. You need coconut milk, almond milk, chia seeds, maple syrup, and vanilla extract. In a medium bowl, mix the coconut milk and almond milk. Then add the chia seeds, maple syrup, and vanilla extract. Use a whisk to blend everything well. Make sure the chia seeds are evenly spread and there are no clumps. This step is key to a smooth pudding. Once your mixture is ready, cover the bowl with plastic wrap or a lid. Place it in the refrigerator. Let it chill for at least four hours, but overnight is best. This time allows the chia seeds to soak up the liquid. They will expand and create a thick, creamy texture. Remember, the longer you chill, the better the consistency. When you're ready to serve, take the pudding out of the fridge. Stir it well to break up any clumps. Spoon the chia pudding into bowls or jars. Next, add a layer of diced mango on top. This adds a pop of color and flavor. For extra flair, sprinkle toasted coconut flakes and add fresh mint leaves. Serve in clear glasses if you want to show off those lovely layers. You can find the full recipe details above. To get the best chia pudding, let it rest. After mixing, cover the bowl and chill it. Four hours is good, but overnight is better. This time allows the chia seeds to soak up the liquid. They will swell and create that lovely pudding texture. Stir the mixture again after chilling. This breaks any clumps and ensures a smooth consistency. The sweetness in your pudding can change based on your taste. I suggest starting with two tablespoons of maple syrup. Taste the mixture before chilling. If you want it sweeter, add more syrup or honey. You can also try using ripe fruit. It adds natural sweetness without extra sugar. Mango and coconut are a perfect pair, but you can mix it up! Add berries for a tart kick. Pineapple gives it a tropical twist. You can also try a hint of lime or ginger for zest. These flavors blend well with the creamy pudding. Enjoy experimenting to create your favorite combinations. For the full recipe, check out the instructions above! {{image_4}} You can add other fruits to your mango coconut chia pudding. Try diced pineapple for a sweet twist. Sliced bananas add a creamy texture. Kiwi brings a tart kick that pairs well with mango. You can also mix berries for a burst of color and flavor. Each fruit adds its own taste, making each spoonful exciting. If you want a vegan version, stick with coconut and almond milk. You can swap almond milk for oat milk if you need a nut-free option. Maple syrup works great as a sweetener. If you want a sugar-free choice, use mashed ripe bananas. This keeps the pudding sweet and creamy while fitting your diet. To make your pudding pop, use toppings like toasted coconut flakes. They add a crunchy texture. Fresh mint leaves offer a refreshing hint. You can also drizzle extra maple syrup for more sweetness. A sprinkle of cinnamon or nutmeg can give a warm flavor. These small touches make your dish not just tasty but also beautiful. Store your leftover mango coconut chia pudding in an airtight container. This helps keep it fresh and tasty. If you use a glass jar, it makes it easy to see the layers. Keep it in the fridge and try to eat it within three days for the best flavor. Chia pudding can last about five days in the fridge. The chia seeds absorb moisture, so the pudding stays thick and creamy. If you notice any changes in smell or texture, it’s best to toss it out. Always trust your senses! You can freeze chia pudding for later. Just pour it into ice cube trays or small containers. Leave some space at the top, as it will expand when frozen. When you want to eat it, thaw it in the fridge overnight. Enjoy your delicious treat whenever you want! For the full recipe, check out the delicious instructions above. Chia seeds are small but mighty. They are rich in fiber, protein, and healthy fats. When you soak them, they expand and create a gel-like texture. This helps the pudding become thick and creamy. Chia seeds also provide a boost of energy. They can keep you full longer, making them a great addition to breakfast or snacks. Yes, you can! This pudding is perfect for meal prep. You can make it up to three days ahead. Just keep it in the fridge. The flavors will blend nicely, and the pudding will remain fresh. This makes it easy to grab a quick snack or breakfast. You can easily adjust the recipe to fit your needs. Want to make less? Just halve the ingredients. Need more? Double them! Use a measuring cup to keep track. This recipe is very flexible, so you can make just what you need. Absolutely! This pudding packs a lot of nutrition. It is full of healthy fats from coconut and chia seeds. It also has vitamins from fresh mango. The natural sweeteners, like maple syrup, keep it wholesome. Enjoy this treat guilt-free as a nutritious dessert or snack. For the complete recipe, check the [Full Recipe]. Mango Coconut Chia Pudding is easy and fun to make. We explored the main ingredients, add-ins, and substitutions. I shared steps for preparing, chilling, and serving the pudding. Tips for consistency and sweetness help you customize your dish. We also discussed variations and storage methods. Now you can enjoy this healthy treat anytime. Get creative and make it your own!

Mango Coconut Chia Pudding Simple and Fresh Treat

Craving a fresh and tasty treat? Look no further than Mango Coconut Chia Pudding! This simple dessert combines sweet mango,

To make a rich chocolate lava cake, you will need the following ingredients: - 1 cup semi-sweet chocolate chips - ½ cup unsalted butter - 1 cup powdered sugar - 2 large eggs - 2 large egg yolks - 1 teaspoon vanilla extract - ½ cup all-purpose flour - Pinch of salt - Butter and cocoa powder (for greasing ramekins) Each ingredient plays a key role in creating that gooey center we all love. The chocolate chips give it that deep, rich flavor. The butter adds creaminess, while the powdered sugar sweetens the mix. The eggs and egg yolks help the cake rise and keep it moist. Vanilla extract enhances the taste, and flour gives the cake structure. Don’t forget the salt; it balances the sweetness. When preparing your ramekins, use both butter and cocoa powder. This will help the cakes release easily after baking. This is a crucial step for that perfect presentation. For the full recipe, refer to the Full Recipe section. Enjoy the process; each step adds to the magic of your chocolate lava cake! - Preheat the oven to 425°F (220°C). - Prepare and grease four ramekins with butter and cocoa powder. - Melt 1 cup of chocolate chips and ½ cup of butter in the microwave. - Heat in 30-second bursts, stirring in between. - Mix in 1 cup of powdered sugar, 2 large eggs, and 1 teaspoon of vanilla. - Incorporate ½ cup of all-purpose flour and a pinch of salt gently. - Fill the ramekins about ¾ full with the batter. - Bake for 12-14 minutes until edges are firm and centers are soft. - Let the cakes cool for about 1 minute. - Run a knife around the edges to loosen the cakes. - Invert each ramekin onto a plate and tap to release. - Serve warm for the best gooey center experience. For more detailed steps, check the Full Recipe. To get that ooey-gooey center, timing is key. Your oven might bake differently than mine. If you have a convection oven, it may cook faster. Always check your cake at 12 minutes. It should look set around the edges but still soft in the middle. To test doneness, gently shake the ramekin. If the center jiggles slightly, it’s perfect. You can also insert a toothpick; it should come out with a bit of batter clinging to it. Garnishing makes your lava cake look fancy. You can add fresh berries on top for color. Mint leaves add a nice touch too. A light dusting of powdered sugar makes it look elegant. Pair your cake with a scoop of vanilla ice cream. The cold ice cream contrasts well with the warm cake. You can also drizzle chocolate or caramel sauce on the plate for extra flair. One big mistake is overmixing the batter. This can make your cake tough instead of soft. Mix just until you don’t see any flour. Another common issue is the oven temperature. Use an oven thermometer to check if your oven is accurate. If it’s too hot, your cake may bake too fast and won’t have that lava center. Follow the Full Recipe for best results. {{image_4}} You can easily change this recipe to fit special diets. For a gluten-free option, use almond flour or coconut flour instead of all-purpose flour. Both flours create a rich taste with a slightly different texture. They work great, and you won’t miss the gluten. If you want a vegan lava cake, substitute eggs and butter. Use flaxseed meal mixed with water as a binder. For butter, try coconut oil or a plant-based spread. This way, you keep the cake moist and delicious without using animal products. Want to spice things up? Add a dash of cinnamon or a bit of brewed coffee to the batter. These flavors deepen the chocolate and make each bite even richer. You can also infuse the batter with orange zest. Just stir in a teaspoon and enjoy that citrus twist! You can get creative with other flavors too. Think about adding mint extract or even a hint of chili powder for a unique kick. The possibilities are endless with chocolate. When it's time to serve, the fun really begins. You can top your lava cake with creamy caramel or a dollop of whipped cream. Both add sweetness and a nice texture contrast. For a fun twist, create a lava cake sundae. Place a warm lava cake in a bowl, add a scoop of ice cream, and drizzle with chocolate sauce. This treat is sure to impress! For the full recipe, check out the complete guide that covers all the steps and tips. Enjoy your cooking adventure! To keep your chocolate lava cakes fresh, refrigerate them. Place the cooled cakes in an airtight container. This way, they stay moist and tasty. You can store them for up to three days. Can you freeze chocolate lava cakes? Yes, you can! Wrap each cake tightly in plastic wrap. Then, place them in a freezer bag. They can last for up to three months in the freezer. To reheat the cakes, use your oven or microwave. For the oven, preheat it to 350°F (175°C). Place the cakes on a baking sheet. Heat them for about 10 minutes. This keeps the gooey center intact. If you use the microwave, heat each cake for 20-30 seconds. Check the cake to see if it's warm. Be careful not to overheat, or the center will lose its charm. Enjoy your delicious dessert again! Yes, you can prepare the batter ahead of time. Store it in the fridge for up to a day. Just remember to fill the ramekins before baking. Baking straight from the fridge may need a few extra minutes. The edges should feel firm, while the center remains soft. A toothpick inserted in the edge should come out clean, but one from the center should be gooey. This perfect balance gives you that delicious lava effect. Absolutely! You can use dark, milk, or even white chocolate. Each type changes the flavor. Dark chocolate gives a rich taste, while milk chocolate is sweeter. Experiment and find your favorite! This often happens if you bake too long. Each oven is different, so keep an eye on the time. If the center is not gooey, it may need less baking. Serve it warm for the best experience. A scoop of vanilla ice cream on top adds a lovely creaminess. You can also dust with powdered sugar or add fresh berries for a pop of color. Enjoy every bite! - Ingredient List - 1 cup semi-sweet chocolate chips - ½ cup unsalted butter - 1 cup powdered sugar - 2 large eggs - 2 large egg yolks - 1 teaspoon vanilla extract - ½ cup all-purpose flour - Pinch of salt - Butter and cocoa powder (for greasing ramekins) To make a chocolate lava cake, you start by gathering your ingredients. This cake is a true treat. The gooey center is what makes it special. 1. Preheat the Oven: Set your oven to 425°F (220°C). This heat gives the cake the perfect bake. 2. Prepare Ramekins: Grease four ramekins with butter. Dust each with cocoa powder. This helps the cakes come out easily. 3. Melt Chocolate & Butter: In a bowl, mix the chocolate chips and butter. Microwave them in short bursts. Stir until smooth. 4. Incorporate Sugar: Add the powdered sugar to the melted mix. Stir until it is lump-free. 5. Add Eggs & Vanilla: Crack the eggs into the bowl. Pour in the vanilla. Whisk the mix until fully combined. 6. Mix the Dry Ingredients: Sift the flour and salt over the chocolate mix. Gently fold it in. Don’t overmix; just combine until no flour shows. 7. Fill Ramekins: Pour the batter into the ramekins. Fill each about ¾ full. 8. Bake: Place the ramekins on a baking sheet. Bake for 12-14 minutes. The edges should be firm, but the center must be soft. 9. Cool Slightly: Remove the ramekins from the oven. Let them cool for 1 minute. Run a knife around the edges. 10. Invert and Serve: Turn each ramekin onto a plate. Tap to release the cake. 11. Enjoy Warm: Serve right away. Pair it with vanilla ice cream or a sprinkle of powdered sugar. - Prep Time: 15 minutes - Total Time: 25 minutes - Servings: 4 When it's done, your cake will be rich and warm. Enjoy this dessert with friends or family for a special treat! You learned how to make a delicious chocolate lava cake with simple steps. Start by gathering the right ingredients and preparing your ramekins. Then, melt and mix everything together carefully. Bake and watch for that gooey center. Remember to avoid common mistakes like overmixing. Explore fun variations to suit your taste. With proper storage and reheating, you can enjoy this treat anytime. Dive in and impress your friends or family with this sweet dessert!

Chocolate Lava Cake Rich and Indulgent Delight

If you’re craving a dessert that’s rich, indulgent, and utterly delicious, you’re in the right place! Chocolate Lava Cake is

Older posts
Newer posts
← Previous Page1 … Page16 Page17 Page18 … Page27 Next →

dsad

© 2025 mealinmoments • Built with GeneratePress

Our Policies

  • Copyright Policy
  • Cookie Policy
  • GDPR Policy
  • Privacy Policy
  • Disclaimer
  • Terms Of Use

More Information

  • Home
  • About
  • Contact
  • Appetizers
  • Dessert
  • Dinner
  • Drinks
©2025, mealinmoments About Back To Top