Skip to content
DisclaimerTerms Of UseGDPR PolicyCookie Policy

mealinmoments

  • Home
  • Drinks
  • Appetizers
  • Dinner
  • Dessert
  • About
  • Contact
  • Privacy Policy
DisclaimerTerms Of UseGDPR PolicyCookie Policy

Megan

To make tasty granola bars, you need a few key items. Here’s what I use: - 2 cups rolled oats - 1 cup mixed nuts (almonds, walnuts, pecans), coarsely chopped These rolled oats give a great base. They add fiber and keep you full. The mixed nuts add crunch and healthy fats. Next, we need to bind our bars together. Here are the sweeteners and binders I recommend: - ½ cup honey or maple syrup - ½ cup natural peanut butter or almond butter Honey or maple syrup adds sweetness. The nut butter helps hold everything together. You can mix it up based on your taste. Finally, let’s add some fun flavors. These extras really make the bars pop: - ½ cup dark chocolate chips - ¼ cup unsweetened coconut flakes Dark chocolate chips add a rich taste. Coconut flakes give a nice texture. You can even add dried fruits for more flavor if you like. For the full recipe, you can explore the Nutty Chocolate Bliss Granola Bars. - Preheat your oven to 350°F (175°C). - Line an 8x8-inch baking dish with parchment paper. Leave some paper hanging out for easy lifting later. - In a large bowl, combine 2 cups of rolled oats, 1 cup of chopped mixed nuts, and ¼ cup of coconut flakes. - Add in ½ teaspoon of sea salt and ½ teaspoon of ground cinnamon. Mix them well to blend the flavors. - In a microwave-safe bowl, combine ½ cup of honey (or maple syrup) and ½ cup of peanut butter. - Microwave for about 30 seconds. Stir until smooth. Then add 1 teaspoon of pure vanilla extract and mix it all together. - Pour the wet mixture over the dry ingredients. Mix well to coat everything evenly. - Gently fold in ½ cup of dark chocolate chips and ¼ cup of dried fruits, if you like, making sure they are spread out. - Transfer the mixture into the prepared baking dish. Press it down firmly to form an even layer. - Bake in the oven for 20-25 minutes. Look for golden edges, and make sure the center feels set. - Let the dish cool for about 10 minutes. Use the hanging parchment paper to lift the granola out. Place it on a cutting board to cool completely. - Once cool, cut into the desired size bars. You can store them in an airtight container for up to a week or freeze them for later use. For the full recipe, check the details above. To get the best texture in your granola bars, packing the mixture tightly is key. When you press down hard, it helps the bars stick together. If you want chewy bars, bake them for about 20 minutes. For crunchy bars, keep them in the oven for 25 minutes. Watch the edges; they should turn golden brown. You can make these granola bars your own! Add seeds, like chia or flax, for extra crunch. You can also sprinkle in some spices, such as nutmeg or ginger, for extra flavor. If you want to make nut-free bars, swap the nuts for sunflower seeds or pumpkin seeds. This keeps the taste great without allergens. How you present your bars can make them more fun! Use vibrant snack boxes to show them off. You can also wrap each bar in parchment paper. Tie it with twine for a cute gift. Adding a tag with the ingredients makes it personal and special. For the full recipe, check the details earlier. Enjoy your tasty creation! {{image_4}} You can change up the flavor of your granola bars easily. Adding different types of chocolate can give new tastes. Try using milk chocolate or white chocolate chips instead of dark chocolate. Each type adds a unique sweetness. Switching nut butters also helps. You can use cashew butter or sunbutter instead of peanut butter. This change will create a new flavor profile. Plus, it's fun to experiment with different combinations! Do you want a vegan option? Replace honey with agave syrup. This swap keeps the bars sweet without using animal products. If you have nut allergies, swap nuts for seeds. Use pumpkin seeds or sunflower seeds instead. This change keeps your bars tasty and safe for everyone to enjoy. Seasonal ingredients can add fun flavors to your granola bars. For holidays, incorporate dried fruits like cranberries or apricots. These fruits bring a festive touch to your snack. You can also use seasonal spices. Try adding pumpkin spice in the fall or peppermint in the winter. These spices will make your granola bars feel special for each season. For the full recipe, check out the Nutty Chocolate Bliss Granola Bars 🥜 recipe. To keep your granola bars fresh, use airtight containers. You want to prevent air from getting in. This helps keep them chewy and tasty. Store them at room temperature if you eat them within a week. If you want them to last longer, consider freezing them. Freezing granola bars is easy. First, cut them into desired sizes. Then, wrap each bar in plastic wrap or foil. Place them in a freezer-safe bag or container. Make sure to label the bag with the date. To thaw, leave them out at room temperature for a few hours. If you want to keep them fresh, avoid using the microwave, as this can make them dry. Check for spoilage by looking for any off smells or unusual texture. If your bars feel hard and dry, they may be over-baked. To revive them, try wrapping them in a damp paper towel and microwaving for a few seconds. This can help restore some moisture and improve their taste. For the full recipe, check out the Nutty Chocolate Bliss Granola Bars. You can use seeds like pumpkin or sunflower seeds. You could also add more oats or use dried fruit. For a nut-free recipe, try this: - 2 cups rolled oats - ½ cup sunflower seeds - ½ cup honey or maple syrup - ½ cup sunflower seed butter - ½ cup dark chocolate chips - ¼ cup unsweetened coconut flakes Mix the seeds and oats, then follow the steps in the Full Recipe. This keeps the bars tasty and crunchy! Yes, but the texture will change. Quick oats may make the bars softer. Rolled oats give a chewier bite. Here are the pros and cons: - Quick Oats Pros: Cooks faster, smoother texture - Quick Oats Cons: Softer bars, less chew - Rolled Oats Pros: Chewy texture, holds shape - Rolled Oats Cons: Takes longer to mix If you want chewy bars, stick with rolled oats! Homemade granola bars last about one week at room temperature. If you store them in the fridge, they can last longer, up to two weeks. Keep them in an airtight container to avoid moisture. To cut granola bars without crumbling, wait until they cool completely. Use a sharp knife for clean edges. You can also score the bars before they cool. This helps guide your cuts later. Yes! Use gluten-free rolled oats. Make sure other ingredients like chocolate and sweeteners are also gluten-free. Adjust the recipe as needed, and enjoy your tasty bars! You now have a complete guide to making delicious granola bars. We covered essential ingredients like rolled oats and mixed nuts. Then, I shared easy steps for mixing and baking. You learned tips for texture and creativity. Plus, we discussed how to store and customize your bars. Remember, homemade granola bars are tasty and fun to make. Enjoy experimenting with flavors and share them with friends! Happy snacking!

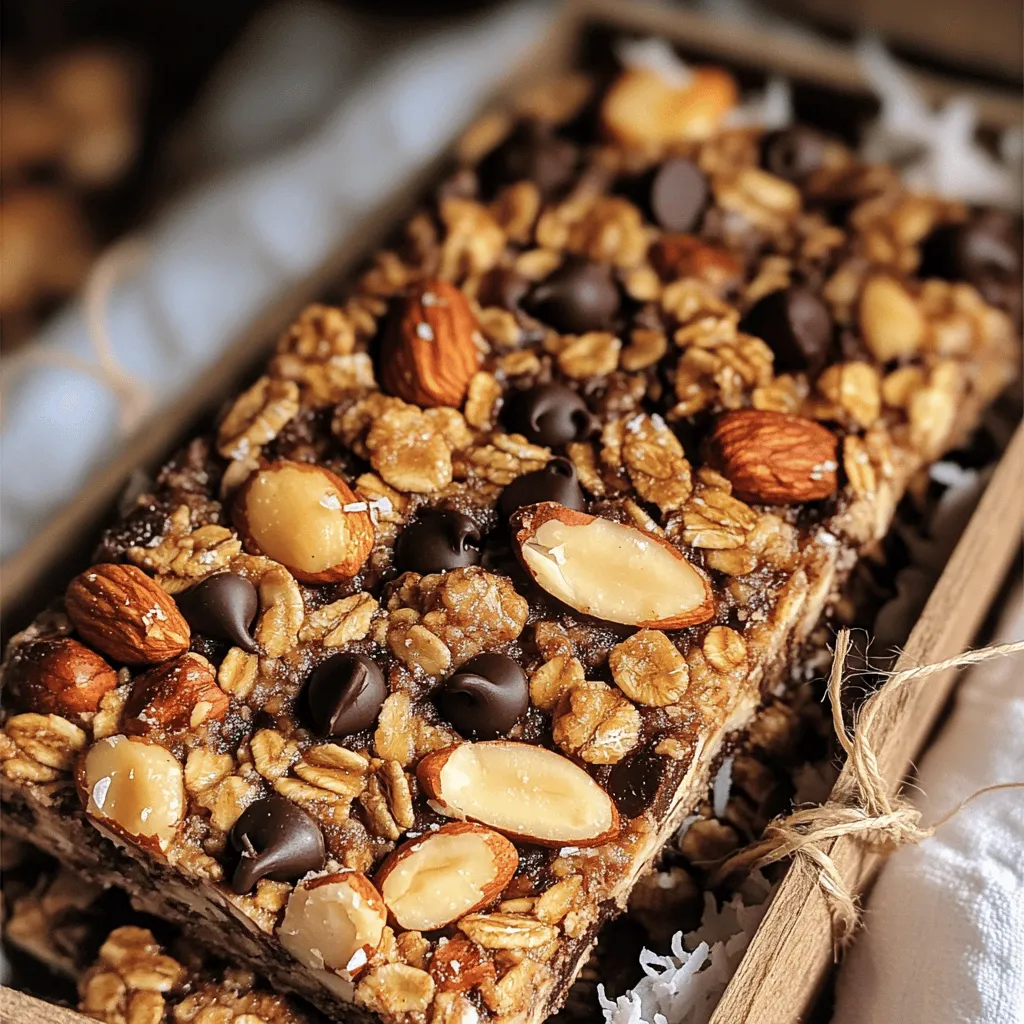
Homemade Granola Bars Simple and Tasty Recipe

Are you tired of store-bought snacks that never quite satisfy? Let’s make homemade granola bars that hit the spot every

- 1 lb boneless, skinless chicken thighs, diced - 1 can full-fat coconut milk - 2 tablespoons red curry paste - 1 medium onion, finely chopped - 2 cloves garlic, minced - 1-inch piece of fresh ginger, grated - 1 red bell pepper, sliced - 1 cup green beans, trimmed - 1 tablespoon fish sauce - 1 tablespoon brown sugar - Juice of 1 fresh lime - Fresh cilantro leaves for garnish In this recipe, the chicken provides a rich protein base. The coconut milk adds creaminess and a slight sweetness. Red curry paste brings in the right amount of heat and spice. The onion, garlic, and ginger create a strong flavor base. These aromatics enhance the dish and give it warmth. Red bell peppers and green beans add color, crunch, and nutrition. For seasoning, fish sauce adds depth, while brown sugar balances the flavors. Fresh lime juice brightens every bite. Finally, cilantro gives a fresh finish that ties everything together. You can find the full recipe [here](#). Enjoy cooking this delicious dish! To start, heat the vegetable oil in a large skillet. Use medium heat for this. Once hot, add the finely chopped onion. Sauté the onion for about 3 to 4 minutes. You want it to be soft and see-through. Next, add the minced garlic and grated ginger. Stir them in for 1 to 2 minutes. This step fills your kitchen with an amazing smell. Just be careful not to burn the garlic. Now, add the diced chicken thighs to the skillet. Sprinkle a little salt and pepper over the chicken. Cook it for about 5 to 6 minutes. Stir it often so it turns brown on all sides. This browning step helps build rich flavor. After that, add the red curry paste. Make sure each piece of chicken gets coated. Let it cook for another 1 to 2 minutes. This helps the flavors blend nicely. Now comes the fun part—adding the coconut milk! Gradually pour it into the skillet. Stir it well to mix everything. Next, toss in the sliced red bell pepper and green beans. Mix it all together so the veggies are spread out in the curry. Add the fish sauce and brown sugar next. Bring the mixture to a gentle simmer. Lower the heat and let it cook for 10 to 15 minutes. This gives the chicken time to cook through and the veggies to get tender. When everything is cooked, squeeze the juice of one lime into the curry. This brightens the dish. Taste it and adjust the seasoning if needed. You might want more salt, pepper, or lime juice. Serve the coconut curry chicken hot. Garnish it with fresh cilantro leaves. This adds a nice pop of color and flavor. If you want the full recipe, check out the [Full Recipe]. To get great flavor in your coconut curry chicken, you must balance the spices. Start by adding the right amount of red curry paste. If you want more heat, add a little more. The fish sauce adds umami, while the brown sugar helps to balance the heat. Always taste as you go. Add lime juice at the end to brighten up the dish. This way, you can adjust the flavors to your liking. For cooking, heat is key. Use medium heat when sautéing the onions. This helps them become soft without burning. When you add the chicken, keep it on medium heat until it browns nicely. Once you add the coconut milk, reduce the heat. A gentle simmer lets the flavors blend well. Cooking too high can make the coconut milk oily or split. Presentation matters when serving your dish. For a great look, serve the coconut curry over fluffy jasmine rice or quinoa. This lets the grains soak up the sauce. Garnish the dish with fresh cilantro for a pop of color. You can also add lime wedges on the side. This makes the dish look fresh and inviting. Enjoy making your meal beautiful before you eat it! For the full recipe, check out the [Full Recipe]. {{image_4}} You can easily make this dish vegetarian. Substitute chicken with tofu or chickpeas. Tofu absorbs flavors well. Use firm tofu for the best texture. Drain and press it before dicing. For chickpeas, canned ones work great too. Rinse them to remove excess sodium. Both options make a tasty coconut curry. Changing the curry paste can alter the dish's flavor. Red curry paste is bold and spicy. Yellow curry paste is milder and sweeter. Green curry paste has a fresh, herbal taste. Each paste offers a unique twist. Try mixing them for a custom flavor. You can add more veggies for extra nutrition and color. Seasonal add-ins can include squash, carrots, or spinach. Chop them into small pieces for even cooking. Add them along with the red bell pepper. This way, they cook perfectly together. More veggies make the meal heartier and more satisfying. To store leftover coconut curry chicken, let it cool first. Place it in an airtight container. This helps keep it fresh and tasty. You can store it in the fridge for up to three days. When ready to eat, just reheat it on the stove or in the microwave. If you want to keep it longer, freezing is a great option. Pour the cooled curry into a freezer-safe container. Leave some space at the top for expansion. Seal it tightly and label it with the date. You can freeze coconut curry chicken for up to three months. When you want to eat it, thaw it overnight in the fridge. Then, reheat it gently on the stove until hot. Coconut curry chicken stays fresh in the fridge for about three days. If frozen, it can last up to three months. Be sure to check for any off smells or changes in texture before eating. Enjoy the flavors at their best by eating them within these time frames. For more details, check the Full Recipe. Coconut curry chicken is a warm and creamy dish. It features tender chicken cooked in coconut milk and red curry paste. This dish blends sweet, savory, and spicy flavors. The coconut milk gives it a rich texture, while the curry paste adds depth. You will also find fresh veggies like bell peppers and green beans in the mix. This dish is perfect over rice or quinoa. It's a favorite for those who enjoy a taste of the tropics. Yes! You can easily adjust the spice level. Start by adding more red curry paste to the dish. Each brand has its own heat, so taste as you go. You can also add fresh chili peppers or chili flakes for extra heat. If you want more flavor without too much spice, try adding a dash of hot sauce. Coconut curry chicken pairs well with various sides. Here are some great options: - Steamed jasmine rice - Fluffy quinoa - Warm naan bread - Crispy vegetable spring rolls - Fresh salad with lime dressing These sides help balance the rich flavors of the curry. You can also offer lime wedges for a zesty touch. For the full recipe, check out the complete guide. In this blog post, we explored how to make Coconut Curry Chicken. We covered key ingredients like chicken, coconut milk, and vegetables. I shared step-by-step instructions to sauté, brown, and create a flavorful curry. Tips on balancing spices and serving suggestions help enhance the dish. You learned about variations, storage, and common questions too. Coconut Curry Chicken is versatile and tasty. Experiment with flavors and enjoy!

Coconut Curry Chicken Easy and Tasty Recipe

Are you ready to impress your family with an easy and tasty meal? This Coconut Curry Chicken recipe is a

- 2 medium sweet potatoes, peeled and diced into 1/2-inch cubes - 1 can (15 oz) black beans, rinsed and drained - 1 can (15 oz) diced tomatoes with green chilies - 1 medium onion, finely chopped - 3 cloves garlic, minced - 1 bell pepper (choose red or green), diced - 2 cups vegetable broth - 1 tablespoon olive oil - 2 teaspoons chili powder - 1 teaspoon ground cumin - 1 teaspoon smoked paprika - 1/2 teaspoon cayenne pepper (optional, for extra heat) - Salt and pepper to taste - Fresh cilantro, chopped (for garnish) - Slices of avocado (for serving) Sweet Potato Black Bean Chili is full of flavor and nutrients. Sweet potatoes bring a natural sweetness and creaminess to this dish. Black beans add protein and fiber, making it hearty. Diced tomatoes give the chili a nice tang. Aromatics like onion, garlic, and bell pepper create a great base full of flavor. Don't forget the spices! Chili powder, cumin, and smoked paprika elevate the taste. If you love heat, cayenne pepper adds a kick. You can adjust the spices based on your taste. For a fresh finish, top your chili with cilantro and creamy avocado slices. Each ingredient plays a role in making this dish vibrant and satisfying. You can find the full recipe for Sweet Potato Black Bean Chili to get started on this delicious meal. 1. Sauté Aromatics: Start by heating the olive oil in a large pot over medium heat. Add the finely chopped onion and diced bell pepper. Sauté them for about 5 minutes until the onion turns soft and clear. 2. Add Spices: Next, stir in the minced garlic along with chili powder, ground cumin, smoked paprika, and cayenne pepper if you want some heat. Cook this mix for another minute. The spices will smell great as they heat up. 3. Incorporate Sweet Potatoes: Now, add the diced sweet potatoes to the pot. Mix them well with the other ingredients. Let them cook for another 5 minutes, stirring occasionally. 4. Combine Rest of Ingredients: Pour in the vegetable broth, and then add the diced tomatoes with green chilies and the black beans. Use a wooden spoon to stir everything until it blends well. 5. Simmer the Chili: Raise the heat to bring the mixture to a boil. Once boiling, lower the heat and cover the pot. Let the chili simmer for 25 to 30 minutes. The sweet potatoes should become fork-tender. 6. Season to Taste: After simmering, taste your chili. Add salt and pepper to your liking. For a heartier texture, mash some sweet potatoes against the pot with a fork. 7. Serve: Ladle the chili into bowls while it’s hot. Top each bowl with fresh cilantro and slices of avocado for a creamy touch. This Sweet Potato Black Bean Chili is full of flavor and very satisfying. You can find the Full Recipe above to guide you through each step! To achieve the perfect texture in your chili, cook the sweet potatoes until they are fork-tender. This means they should be soft but not mushy. Stir them gently while cooking. If you want to adjust the spice levels, start with the suggested amount of cayenne pepper. You can always add more later if you like more heat. Remember, it’s easier to add than to take away! To enhance the flavors, let your chili simmer longer. This allows the spices to blend with the sweet potatoes and black beans. A splash of lime juice at the end adds brightness too. For garnishing, fresh cilantro and avocado work wonders. Just chop the cilantro finely and sprinkle it on top. Slices of avocado add a creamy touch that contrasts well with the chili's heat. You can pair this chili with warm cornbread or tortilla chips. Both add a nice crunch. If you want to keep it light, serve it with a simple green salad on the side. Try out these tips to make your Sweet Potato Black Bean Chili even better! For more detailed steps, check the Full Recipe. {{image_4}} You can change a few ingredients in this chili to suit your taste. - Alternative beans: If you want, you can swap black beans for pinto or kidney beans. Each type brings its own flavor. - Vegan options: This recipe is already vegan! You can keep it simple and tasty. - Adding protein: For extra protein, add cooked quinoa or lentils. You can also use shredded chicken or turkey if you like meat. To boost the taste of your chili, try these tips. - Experimenting with spices: You can add more spices like oregano or coriander. A pinch of cinnamon can give a warm flavor. - Adding vegetables: Feel free to toss in chopped carrots, zucchini, or corn. These veggies add color and nutrients. Remember, cooking is all about having fun and trying new things. Check the Full Recipe for more ideas! To keep your Sweet Potato Black Bean Chili fresh, store it properly. - Refrigeration tips: Place your chili in an airtight container. It will stay good for up to 5 days in the fridge. Make sure it cools down before sealing. - Freezing instructions: For longer storage, freeze the chili. Use freezer-safe containers or bags. It will last for about 3 months. Label the containers with the date so you can track freshness. When it comes to reheating, you want to keep the flavor intact. - Best methods for reheating chili: The stovetop works best. Pour the chili into a pot and heat on medium until warm. Stir often to avoid sticking. You can also use the microwave. Heat in a microwave-safe bowl, covering it loosely. Stir halfway through. - Storage duration for freshness: If stored properly, the chili stays tasty for about 5 days in the fridge and three months in the freezer. After that, the flavor may fade. Always check for any off smells before serving again. For the full recipe, refer to the Sweet Potato Black Bean Chili section. Yes, Sweet Potato Black Bean Chili is vegan. It contains no meat or animal products. The main ingredients are sweet potatoes, black beans, and vegetables. This makes it a healthy choice for everyone. It takes about 40 minutes to cook this chili. You will spend 10 minutes on prep and 30 minutes simmering. This timing gives the flavors time to blend well. Yes, you can make this chili in a slow cooker. Just sauté the aromatics first. Then, add everything to the slow cooker. Cook on low for 6–8 hours or on high for 3–4 hours. This helps the flavors develop nicely. You can use many toppings for this chili. Some great options are: - Fresh cilantro - Slices of avocado - Lime wedges - Shredded cheese (if not vegan) - Sour cream (if not vegan) These toppings add flavor and texture to the dish. To serve more people, simply double the ingredients. You can use a larger pot to cook it all. Remember to adjust the cooking time if needed. Check the chili for doneness after the usual 30 minutes. Enjoy the Full Recipe for more details! This blog explored making Sweet Potato Black Bean Chili. We covered its key ingredients, like sweet potatoes and black beans, and offered step-by-step instructions for preparation. You learned tips for perfect texture and flavor, plus fun serving ideas. We also discussed variations and shared storage and reheating advice. In conclusion, this dish is simple, tasty, and flexible. With a few adjustments, you can make it your own. I hope you enjoy creating this chili as much as I do.

Sweet Potato Black Bean Chili Flavorful and Hearty Dish

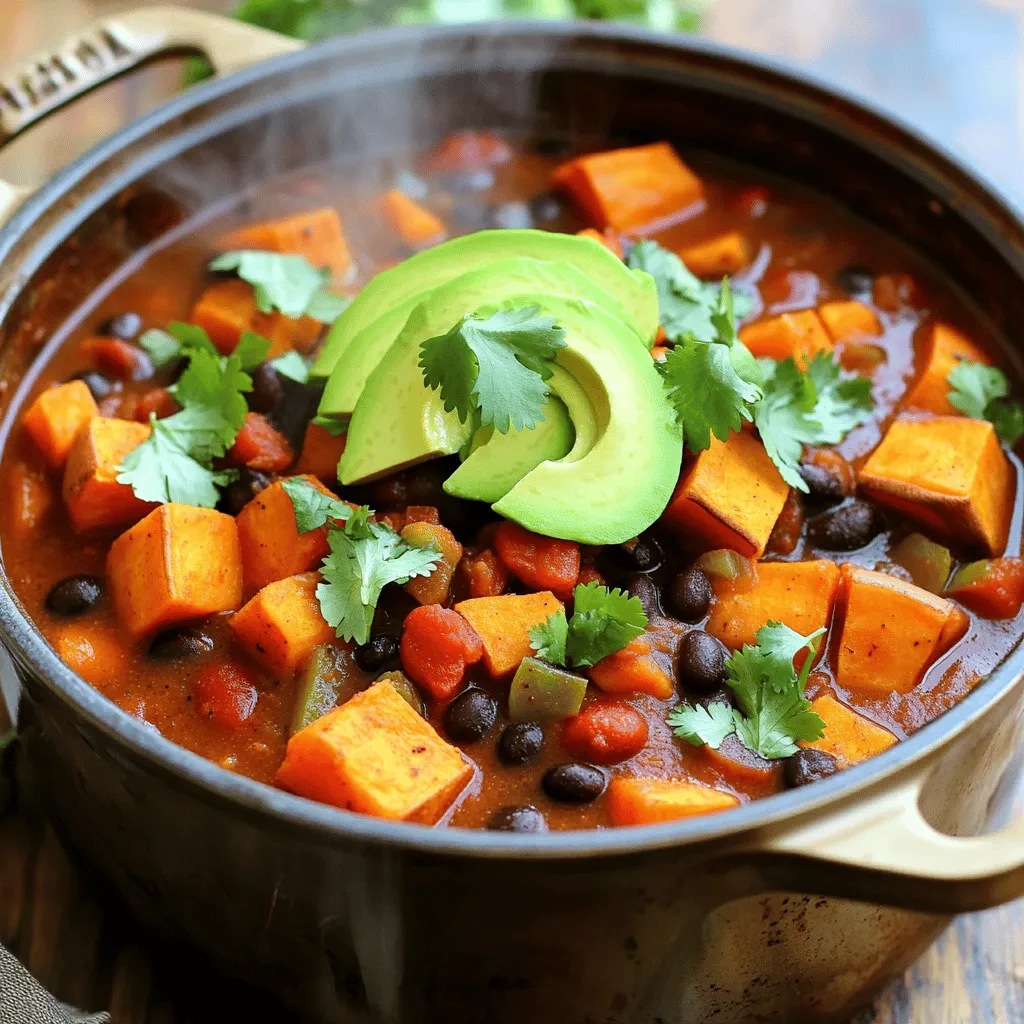
Looking for a warm, satisfying meal? Sweet Potato Black Bean Chili is packed with flavor and heartiness. This dish combines

To make Garlic Parmesan Roasted Cauliflower, you need the following ingredients: - Large head of cauliflower - Minced garlic - Grated Parmesan cheese - Extra virgin olive oil - Smoked paprika - Sea salt - Freshly ground black pepper - Fresh parsley - Fresh lemon juice (optional) This simple list packs a lot of flavor. Start with a large head of cauliflower. Cut it into bite-sized florets for even cooking. Minced garlic brings a strong, delightful taste. Grated Parmesan cheese adds a rich, creamy texture. Extra virgin olive oil helps everything roast perfectly. Smoked paprika gives a warm, smoky flavor. Sea salt and freshly ground black pepper enhance the taste. Fresh parsley adds color and freshness. You can also choose to add fresh lemon juice for a zesty finish if you like. Each ingredient plays a vital role. With these items, you’ll create a dish that’s both tasty and satisfying. For the full recipe and detailed steps, check the provided link. Set your oven to 425°F (220°C). This hot temperature helps the cauliflower roast well. A hot oven gives you crispy edges and tender centers. Rinse the cauliflower under cold water. This step cleans away any dirt. Cut it into bite-sized florets. Make sure all the pieces are close in size. This helps them cook evenly. After cutting, pat the florets dry with a paper towel. Removing moisture helps them roast better. In a large bowl, mix the minced garlic and extra virgin olive oil. Add the smoked paprika, sea salt, and black pepper. Stir the mixture well. You want all the flavors to blend nicely. Add the cauliflower florets to the bowl. Use a spatula or your hands to toss them. Make sure every piece is coated with the garlic mixture. This step is key for flavor. Now, sprinkle the grated Parmesan cheese over the cauliflower. Toss gently again to ensure the cheese sticks to the florets. The cheese adds a savory taste that pairs well with garlic. Spread the seasoned florets onto a lined baking sheet. Place them in a single layer. This helps them roast evenly. Bake for about 25-30 minutes. Flip the florets halfway through. This step encourages even browning and crispiness. Remove the baking sheet from the oven when done. If you like, drizzle fresh lemon juice over the cauliflower. This adds a bright flavor. Garnish with chopped parsley for a colorful finish. Serve it warm and enjoy your simple delight. For the full recipe, check out the details above. To get that perfect golden brown color, you need to space the cauliflower well on the baking sheet. If the pieces touch, they steam instead of roast. This can make them mushy and not very tasty. Aim for a single layer, where each floret has room to breathe. Roast the cauliflower at 425°F (220°C). This high heat helps caramelize the natural sugars in the cauliflower, giving it a nice crunch and rich flavor. Halfway through cooking, flip the florets with a spatula for even browning. When they are done, they should be tender and golden. You can play around with spices to make this dish your own. Here are some ideas: - Italian Herbs: Add oregano or thyme for a classic touch. - Chili Flakes: Sprinkle in some heat if you like spice. - Lemon Zest: Fresh zest brightens the dish and adds a fresh flavor. Feel free to mix and match these flavors. Just remember to keep the balance right so the garlic and cheese still shine. Presentation matters! To make your dish look as good as it tastes, serve the roasted cauliflower in a large bowl or on a pretty platter. Garnish with fresh parsley for a pop of green, and add lemon wedges on the side. This gives your guests a chance to add a zesty touch if they want. The bright colors will make your dish stand out at any meal. For the full recipe, check out the Garlic Parmesan Roasted Cauliflower recipe. {{image_4}} You can easily make this dish gluten-free. Just ensure your Parmesan cheese is labeled gluten-free. Most brands are safe, but it’s wise to check. For those wanting a vegan option, swap out the Parmesan for nutritional yeast. This gives a cheesy flavor without any dairy. Get creative with your spices! Try adding a pinch of cayenne pepper for heat. Rosemary or thyme makes a lovely herbal twist. You can also sprinkle in some Italian seasoning for a fragrant touch. Each of these options adds a unique flair to your roasted cauliflower. Feel free to switch up the veggies! Broccoli, Brussels sprouts, or carrots all work great. Just chop them into similar sizes as the cauliflower for even cooking. This adds variety to your meals and keeps things exciting. You can use the same garlic and cheese mix for these veggies, too. Store your Garlic Parmesan Roasted Cauliflower in an airtight container. It will stay fresh for about 3 to 5 days. Make sure it cools to room temperature before sealing. This helps keep it crisp and tasty. To reheat, use the oven or air fryer. Preheat to 350°F (175°C). Place the cauliflower on a baking sheet. Heat for about 10 to 15 minutes. This method keeps the texture crunchy and the flavor intact. Avoid using the microwave, as it can make the cauliflower soggy. You can freeze Garlic Parmesan Roasted Cauliflower for up to 3 months. First, let it cool completely. Then, spread the cauliflower in a single layer on a baking sheet. Freeze until solid, then transfer to a freezer-safe bag or container. When ready to eat, you can roast it straight from the freezer. Just add a few extra minutes to the cooking time. Enjoy this simple delight anytime! Garlic Parmesan Roasted Cauliflower lasts about 3 to 5 days in the fridge. To store it, place the cauliflower in an airtight container. Make sure it cools to room temperature first. This keeps the flavor fresh and the texture nice. If you see any signs of spoilage, like an off smell or mushy spots, it’s best to toss it. Yes, you can use frozen cauliflower. However, it may need some adjustments. First, thaw the cauliflower fully and drain any excess water. This helps the garlic mix stick better. You may need to roast it a bit longer since frozen florets hold more moisture. Keep an eye on it for that perfect golden color. Garlic Parmesan Roasted Cauliflower pairs well with many dishes. You can serve it with grilled chicken or fish for a tasty meal. It also goes nicely with quinoa or rice for a vegetarian option. For a complete feast, add a fresh salad or some crusty bread. The flavors blend well and make for a delightful dining experience. Yes, it’s great for meal prep. You can make a big batch and store it in the fridge. Divide it into portions for easy lunches or dinners. Just reheat it in the oven or microwave before serving. This dish stays tasty for several days, making it a smart choice for busy weeks. If you want more ideas, check out the Full Recipe for tips on making this dish shine! This recipe for Garlic Parmesan Roasted Cauliflower brings flavor and health together. We covered ingredients, step-by-step instructions, and helpful tips for perfecting your dish. You can even explore variations that fit your dietary needs. When you try this dish, I hope you enjoy its rich taste and crispy texture. It’s easy to share, so don’t hesitate to tell friends about it! Happy cooking!

Garlic Parmesan Roasted Cauliflower Simple Delight

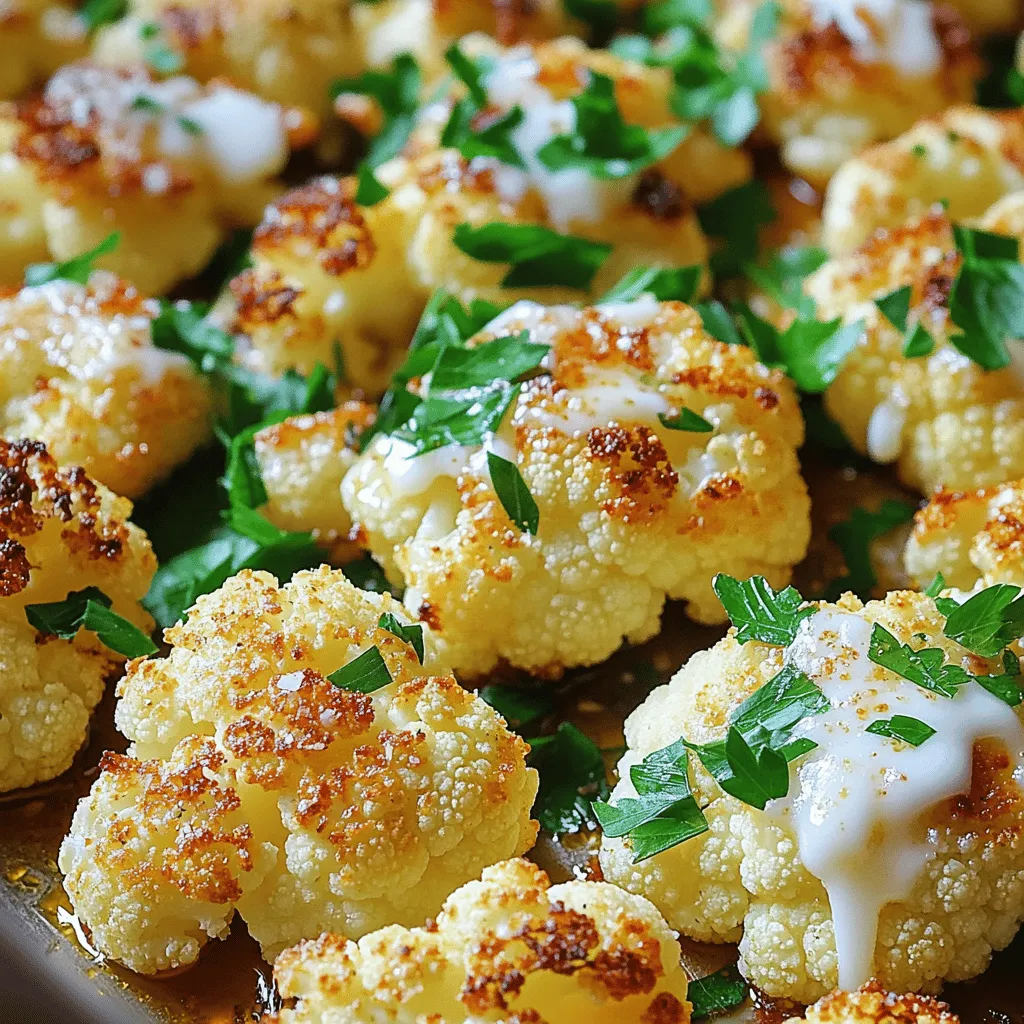
Are you ready to make a dish that’s both tasty and easy? Garlic Parmesan Roasted Cauliflower is a simple delight!

- Chicken - Mango - Red onion - Jalapeño pepper The main ingredients bring a burst of flavor to the tacos. For the chicken, I use boneless, skinless breasts. They cook quickly and stay juicy. The ripe mango adds sweetness. I like to peel and dice it for easy mixing. Red onion gives crunch and a mild bite. I prefer to chop it finely. The jalapeño pepper brings heat. I always deseed it to control the spice level. - Ground cumin - Smoked paprika - Olive oil - Fresh cilantro The seasonings elevate the dish. Ground cumin adds warmth and depth. Smoked paprika gives a hint of smokiness. I use extra virgin olive oil to cook the chicken. It adds richness and keeps everything moist. Fresh cilantro brightens the tacos. I chop it roughly to sprinkle on top. - Corn tortillas - Lime wedges For serving, I choose small corn tortillas. They hold the filling well and have a great texture. Warming them adds softness. Lime wedges are a must. A squeeze of lime enhances the flavors. For a full recipe, check the details above. First, combine the diced chicken with the spices. Use ground cumin, smoked paprika, minced garlic, and jalapeño. Then, add salt and pepper to taste. Toss everything well. Cover the bowl and let it rest for at least 15 minutes. This resting time helps the chicken soak up all the flavors. Next, heat olive oil in a large skillet over medium-high heat. When the oil is hot, add the marinated chicken. Cook it for about 7 to 10 minutes. Stir occasionally until the chicken turns golden brown and reaches 165°F inside. This step ensures your chicken is juicy and packed with flavor. While the chicken cooks, prepare the mango salsa. In a separate bowl, mix the diced mango with the finely chopped red onion. This fresh topping adds sweetness and crunch. It pairs perfectly with the spicy chicken and brightens the dish. To warm the corn tortillas, place each one in a dry skillet over medium heat. Heat for about 30 seconds on each side, just until soft. Keep the warmed tortillas in a clean kitchen towel. This way, they stay warm and ready for assembly. Now it's time to assemble the tacos. Take a warmed tortilla and add a spoonful of the cooked chicken to the center. Top it with a generous amount of mango salsa. Finally, add fresh cilantro for a burst of flavor. Enjoy your Spicy Mango Chicken Tacos! For the complete recipe, check the Full Recipe section. - Marination time suggestions: Let the chicken marinate for at least 15 minutes. This gives the spices time to soak in. For even better taste, marinate for an hour. - Spice level adjustments: You can change the heat by adding more or less jalapeño. If you want it milder, use less. For more heat, keep the seeds or add a pinch of cayenne. - Garnishing with lime: A wedge of lime adds a pop of color and flavor. Squeeze lime over the tacos just before eating. This brightens the taste. - Arranging ingredients for visual appeal: Stack the tacos neatly on a platter. Use colorful toppings to create a vibrant look. This makes your meal more inviting. - Best methods for cooking chicken: I recommend using a skillet over medium-high heat. This gives the chicken a nice sear and locks in juices. Make sure it reaches 165°F for safety. - Achieving the perfect tortilla texture: Warm the corn tortillas in a dry skillet. Heat each side for about 30 seconds. This makes them soft and easy to fold. It's key to a great taco experience. Try these tips to elevate your Spicy Mango Chicken Tacos. For the full recipe, check out the Full Recipe section. {{image_4}} You can switch up the protein in your tacos. Shrimp or tofu works well. Shrimp cooks fast and adds a nice flavor. For tofu, choose firm tofu for the best texture. Just marinate it like chicken. If you prefer beef or pork, use ground meat. Cook it until brown and mix in the spices. Both options add a unique twist to the meal. Salsas can change how your tacos taste. You can add avocado to make it creamy. Pineapple adds sweetness and goes well with spicy flavors. Mixing fresh herbs like mint or basil can also make a great salsa. These herbs add a fresh bite. Experimenting with different fruits and herbs keeps it interesting. You don’t have to stick to tortillas. Try taco bowls instead. They hold all the tasty toppings and add crunch. For a low-carb option, use lettuce wraps. They are light and fresh. Both styles make your tacos fun and versatile. Enjoy the same great flavors in a new way! To keep your cooked chicken fresh, place it in an airtight container. Refrigerate it within two hours after cooking. This keeps it safe and tasty for up to four days. If you have leftover mango salsa, store it in a separate container. Cover it tightly to avoid air exposure. Use it within two days for the best flavor and freshness. When warming up your tacos, use a skillet. Heat it over medium heat, adding the chicken. Stir it gently until it’s hot. This helps keep the chicken juicy. For the tortillas, place them on the skillet for about 20 seconds on each side. This brings back their soft texture. Avoid using the microwave, as it can make them soggy. Yes, you can freeze the chicken and salsa. For chicken, cool it completely first. Then, place it in a freezer bag. Remove as much air as possible. You can freeze the salsa too, but it may lose some texture. To thaw, move the chicken to the fridge overnight. For the salsa, let it sit at room temperature for about an hour before using. Reheat the chicken as mentioned earlier for the best taste. For the full recipe, visit the provided link. Enjoy your Spicy Mango Chicken Tacos! To adjust the spice level, focus on the jalapeño. For milder tacos, use less jalapeño or remove the seeds. If you crave more heat, add more minced jalapeño. You can also sprinkle in extra spices like cayenne or chili powder. Taste as you go to find your perfect balance. These tacos pair well with many sides. Consider serving with: - Black beans for a hearty touch - Mexican rice for a classic combo - Tortilla chips with salsa for crunch - A fresh salad with lime vinaigrette - Cold drinks like horchata or a light beer Yes, you can make the mango salsa ahead. Prepare it and store it in an airtight container. It will stay fresh in the fridge for about one day. If you want to keep it longer, wait to add the onion until just before serving. This way, it stays crisp and flavorful. In this blog post, I detailed how to make Spicy Mango Chicken Tacos. We covered the main ingredients, like chicken and mango, and added spices for flavor. I shared step-by-step instructions, from marinating the chicken to dressing the tacos. We explored variations and storage tips for leftovers. Tacos can be fun and easy to make. Experiment with different flavors and ingredients. Enjoy your delicious creations!

Spicy Mango Chicken Tacos Flavorful and Simple Recipe

Looking for a taco recipe that bursts with flavor and is easy to make? You’ve come to the right place!

- 1 cup rolled oats - 2 cups almond milk (or any milk of your choice) - 2 ripe bananas (one sliced and one mashed) - 1/4 cup peanut butter (choose between smooth or crunchy for texture) - 2 tablespoons honey or maple syrup (optional, depending on your desired sweetness) - 1/2 teaspoon ground cinnamon - 1 tablespoon chia seeds (optional, for a nutritious crunch) - Pinch of sea salt - Toppings: sliced almonds, additional banana slices, cocoa nibs, or granola When making peanut butter banana overnight oats, you need simple, fresh ingredients. Rolled oats form the base. They are hearty and absorb flavors well. Almond milk adds creaminess. You can swap it for any milk you enjoy. I prefer almond milk for its light taste. Ripe bananas bring sweetness and a creamy texture. I always mash one banana into the mix. It makes the oats taste great. Slicing another banana adds a nice look and extra flavor on top. Peanut butter gives a rich, nutty taste. Choose between smooth or crunchy based on your liking. I love crunchy peanut butter for the texture. If you want a bit of sweetness, add honey or maple syrup. This step is optional; adjust it to your taste. Ground cinnamon adds warmth and depth. A little pinch of sea salt brightens all the flavors. Chia seeds are optional, but they add a nice crunch and are good for you. For toppings, think about sliced almonds, more banana slices, or even cocoa nibs for a fun twist. Granola also adds great crunch. With these ingredients, you create a delicious breakfast that is easy and fun to make. Check out the Full Recipe for more details! Step 1: Mixing the base ingredients Start by gathering your ingredients. In a medium bowl, mix 1 cup of rolled oats, 2 cups of almond milk, 1/4 cup of peanut butter, and 2 ripe bananas (one mashed). If you want it sweeter, add 2 tablespoons of honey or maple syrup. Include 1/2 teaspoon of ground cinnamon and a pinch of sea salt. Stir well until everything is combined. Step 2: Portioning the oatmeal mixture Next, take the oatmeal mixture and divide it into jars or bowls. Fill them about two-thirds full. This gives the oats room to soak up the milk without overflowing. Step 3: Adding bananas for flavor Slice the second banana and place the slices on top of each jar. This adds a burst of banana flavor and looks great too! Step 4: Sealing and refrigerating overnight Cover the jars with lids or plastic wrap. Put them in the fridge overnight. Letting the oats sit allows them to absorb the liquid and flavors. Aim for at least 4 hours if you’re short on time. Step 5: Final mixing before serving In the morning, take the jars out and stir the oats. If they seem too thick, add a splash of milk to reach your desired texture. Mix well to combine all the yummy flavors. Step 6: Adding toppings for enhanced flavor Now for the fun part! Before serving, top your oats with sliced almonds, more banana slices, or granola. You can also drizzle on some honey or sprinkle cocoa nibs for extra crunch. These toppings make your breakfast look and taste even better. For the complete recipe, check out the [Full Recipe]. Enjoy making your Peanut Butter Banana Overnight Oats! To get the best texture, aim for a creamy mixture. Mix your rolled oats with enough liquid. Too little will make it dry, while too much will turn it into soup. I suggest using two cups of almond milk for every cup of oats. You can use different types of milk. Almond, soy, or oat milk all work well. Each will change the flavor a bit. Try them all to find your favorite. Adding natural sweeteners can enhance the taste. If you like it sweet, use honey or maple syrup. Start with two tablespoons and adjust to your liking. Serving matters too! Use clear glass jars to show off those lovely layers. You can also sprinkle cinnamon on top for a pop of color. For garnishing, think about adding sliced almonds or extra banana slices. Add a few cocoa nibs for a crunchy touch. These small details make your dish look and taste great. Prepping in batches saves time. Make several jars at once for busy mornings. You can store them in the fridge for up to five days. Just grab a jar, and you’re ready to go. Consider mixing different flavors. You can make one jar with chocolate and another with berries. This way, you'll have a fun variety to enjoy all week. For the full recipe, check out the Peanut Butter Banana Bliss Overnight Oats. {{image_4}} You can switch up the taste of your Peanut Butter Banana Overnight Oats in fun ways. - Different nut butters: Try almond, cashew, or sunflower seed butter. Each one adds a unique twist. - Adding fruits or berries: Toss in strawberries, blueberries, or apples for extra flavor and nutrients. - Using different spices: Cinnamon is great, but you can also use nutmeg or cocoa powder for a new taste. Making your overnight oats fit your diet is easy. - Vegan adaptations: Use maple syrup instead of honey. Replace regular milk with almond or oat milk. - Gluten-free alternatives: Choose certified gluten-free rolled oats. This way, you can enjoy them without worry. Incorporating seasonal fruits or spices can make your oats exciting year-round. - Spring: Add fresh strawberries and a touch of mint for a refreshing taste. - Summer: Mix in peaches or blueberries for a sweet summer treat. - Fall: Use pumpkin puree and pumpkin spice for a cozy autumn flavor. - Winter: Add chopped apples and a sprinkle of cinnamon for warmth. These variations keep your breakfast interesting and help you enjoy this dish through every season. For the complete recipe, check out the [Full Recipe]. Overnight oats can last up to five days in the fridge. This means you can make them ahead of time. Store them in jars or bowls and enjoy them all week. Just check for freshness before eating. Use airtight jars or bowls for the best storage. Mason jars work great for this. They keep the oats fresh and allow for easy serving. If you don’t have jars, any bowl with a lid will do. You can enjoy your oats cold or warm them up. If you like them warm, microwave for about 30 seconds. Stir well and check the temperature. If it’s too thick, add a splash of milk. Enjoy your oats just the way you like! For full details, check the Full Recipe. How long can you keep overnight oats in the fridge? You can keep overnight oats in the fridge for up to five days. This makes them great for meal prep. Just remember to store them in a sealed container. Can you substitute the peanut butter? Yes, you can use any nut butter you like. Almond butter or sunflower seed butter works well, too. Just choose what you enjoy most. Is it necessary to refrigerate overnight oats? Yes, refrigeration is key. It helps the oats absorb the liquid. This makes them creamy and delicious. What’s the best way to customize the recipe? You can add different fruits, nuts, or seeds. Try berries, apples, or even chocolate chips for a sweet twist. Mix in your favorite spices, too. How can I make this recipe nut-free? To make this nut-free, swap peanut butter with sunflower seed butter. Use oat milk or soy milk instead of almond milk. You can still enjoy this tasty breakfast! For the complete recipe, check out the Full Recipe section above. In this blog post, we covered all you need for delicious overnight oats. We looked at the key ingredients like oats, bananas, and peanut butter. I shared easy steps to mix, refrigerate, and serve them. There are also tips for the right texture and fun presentation ideas. Consider variations to keep things fresh. Remember, these oats store well and can fit any diet. Enjoy your tasty breakfast! With these tips, you can make perfect overnight oats every time. Happy cooking!

Peanut Butter Banana Overnight Oats Easy Breakfast Delight

Are you looking for a simple and tasty breakfast? Peanut Butter Banana Overnight Oats are your answer! This easy recipe

- 4 boneless, skinless chicken thighs - 2 cups broccoli florets - 1 red or yellow bell pepper, sliced into thin strips - 1 medium zucchini, sliced into half-moons - 1 red onion, chopped into bite-sized pieces - 4 cloves garlic, finely minced - 1 large lemon, zested and juiced - 2 tablespoons extra virgin olive oil - 1 teaspoon dried oregano - 1 teaspoon smoked paprika - Salt and freshly ground black pepper, to taste - Fresh parsley, finely chopped, for garnish The chicken thighs are the star of this dish. They are juicy and tender, perfect for soaking up flavors. The colorful veggies add crunch and nutrition. Broccoli, bell pepper, zucchini, and red onion not only taste great but also make your plate look amazing. The garlic and lemon juice give it a bright, zesty taste. Oregano and smoked paprika add depth. - Mixing bowls - Baking sheet or oven-safe pan - Whisk and measuring spoons Having the right tools makes cooking easier. Mixing bowls help combine your marinade. A baking sheet or oven-safe pan is essential for roasting. A whisk and measuring spoons ensure you get the flavors just right. You can find these tools in most kitchens. To see how all these ingredients come together, check out the Full Recipe. Enjoy the journey of creating a delightful meal! 1. Preheat the oven: Start by setting your oven to 400°F (200°C). This gets it hot and ready for roasting. 2. Prepare the marinade: Take a small bowl. Whisk together the lemon juice, lemon zest, olive oil, minced garlic, oregano, smoked paprika, salt, and pepper. This mix gives your chicken and veggies a bright flavor. 3. Marinate the chicken: Place the chicken thighs in a large bowl or plastic bag. Pour half of your marinade over them. Make sure each piece gets coated well. Let the chicken marinate for at least 15 minutes to soak in the flavors. 1. Arrange chicken and vegetables: In another bowl, combine broccoli, bell pepper, zucchini, and red onion. Drizzle the rest of the marinade over them and toss well. On a large baking sheet, lay the marinated chicken in the center. Spread the veggies around the chicken. 2. Roast in the oven: Place the baking sheet in your preheated oven. Roast for 25 to 30 minutes. The chicken should reach 165°F (75°C). The veggies should look tender and caramelized. 3. Check for doneness: Once the time is up, check the chicken’s internal temperature. If it’s right, take the pan out of the oven. Let it rest for a few minutes. This helps keep the juices in the chicken. Enjoy your One-Pan Lemon Garlic Chicken and Veggies delight! For the complete cooking experience, check the Full Recipe. Choosing the right herbs Fresh herbs bring life to your dish. I love using parsley, thyme, or rosemary. They add a bright taste that pairs well with lemon and garlic. You can also try basil for a sweet touch. Experiment with what you have on hand! Marinade variations You can switch up the marinade for more fun. Try adding honey for sweetness or a dash of soy sauce for a savory kick. If you like heat, add some crushed red pepper flakes. This way, you can make it your own! Importance of resting time Resting your chicken is key. Once it comes out of the oven, let it sit for at least five minutes. This helps the juices settle, making the meat tender and juicy. Don't skip this step; it's worth it! Achieving perfect roast To get the best roast, spread your chicken and veggies evenly on the pan. Don’t overcrowd them. This allows hot air to circulate. It gives you that golden brown look and a yummy texture. Keep an eye on the time and check for doneness, aiming for that perfect 165°F (75°C) inside. For the full experience, check out the Full Recipe and enjoy making this dish! {{image_4}} You can switch up the proteins in this recipe. Instead of chicken thighs, try chicken breasts or even fish like salmon. Both options work well with the bright lemon and garlic flavors. When it comes to veggies, feel free to explore different seasonal options. Asparagus, green beans, or snap peas can add great crunch and color. Use what’s fresh and available to make this dish your own. If you need a gluten-free meal, you’re in luck! This dish is naturally gluten-free. Just make sure your seasonings and olive oil are certified gluten-free. For those following a low-carb diet, this recipe is perfect. The veggies provide fiber and flavor without the carbs. If you’d like to lower the carbs even further, swap out the zucchini for cauliflower. It will still taste amazing! Remember, you can find the Full Recipe above. Enjoy customizing this dish to suit your needs! After you enjoy your one-pan lemon garlic chicken and veggies, store the leftovers in an airtight container. This keeps them fresh and safe. You can refrigerate the dish for up to three days. If you want to enjoy it later, try to cool it first before sealing it up. This helps keep the flavors intact. To reheat your chicken and veggies, the best method is the oven. Preheat your oven to 350°F (175°C). Place the leftovers on a baking sheet. Cover them with foil to keep moisture in. Heat for about 15-20 minutes or until hot. You can also use the microwave for a quick option. Just place a portion in a microwave-safe dish, cover it, and heat for 2-3 minutes. Stir halfway to keep the flavors even. Both methods help maintain the juicy chicken and tender veggies. Yes, you can prepare this dish ahead of time. Marinate the chicken and prep the vegetables the night before. Store them in the fridge. When you're ready to eat, just roast them together. This saves time and boosts flavor. To add heat, toss in red pepper flakes or diced jalapeños. You could also use a spicy marinade or sauce. Adjust the amount to suit your taste. The heat will balance well with the lemon and garlic. This meal goes well with rice or quinoa. A simple green salad also complements it nicely. You can serve crusty bread to soak up the juices. For a light touch, steamed green beans add freshness. For the complete recipe, check out the [Full Recipe]. This blog post covered a simple and tasty chicken dish. We explored key ingredients, tools, and clear steps for preparation and cooking. I shared tips for flavor enhancement and various substitutions to fit your needs. Proper storage and reheating methods were also included for your convenience. Cooking can be fun and creative. I hope you try this recipe and enjoy it!

One-Pan Lemon Garlic Chicken and Veggies Delight

Looking for a quick and tasty meal? Let me introduce you to my One-Pan Lemon Garlic Chicken and Veggies Delight.

- Flour Tortillas: Use large flour tortillas. They should be soft and easy to fold. A size of 10 inches works best for a good filling. - Cheese Choices: I love using a mix of cheddar and mozzarella. Cheddar gives a sharp flavor, while mozzarella makes it gooey. Aim for one cup of each for the best taste. - Vegetables: Choose fresh veggies. Bell peppers add color and crunch. Zucchini brings a nice texture. Spinach gives a healthy boost. You can also use corn for sweetness. - Spices: Ground cumin adds warmth. Smoked paprika gives depth and a bit of smokiness. Use one teaspoon of each for a balanced flavor. - Optional Accompaniments: Serve with sour cream or salsa. Both add creaminess and zest. You can choose your favorite brand or make your own for an extra touch. For the full recipe, be sure to check out the detailed instructions to make these easy veggie quesadillas. How to Properly Dice and Prepare Vegetables Start by washing your vegetables. For the bell pepper, slice it in half and remove the seeds. Then, chop it into small pieces. For the zucchini, cut off the ends and slice it into rounds, then dice. This size helps them cook evenly in the skillet. Lastly, rinse the spinach and roughly chop it. This makes it easier to mix with the other veggies. Tips for Shredding Cheese Efficiently Use a box grater for quick shredding. Hold the cheese firmly and move it up and down the grater. This method gives you soft, fluffy cheese. Mix cheddar and mozzarella for a great blend of flavors. The cheddar adds sharpness, while mozzarella gives that gooey texture we all love. Detailed Cooking Instructions for Perfectly Sautéed Vegetables Heat a large skillet over medium heat. Add one tablespoon of olive oil. Once hot, toss in the diced bell pepper and zucchini. Stir them for about five minutes. You want them tender and slightly browned. Then, add the corn and spinach for another two to three minutes. The spinach should wilt, and the corn needs to be warmed. Season with cumin, smoked paprika, salt, and pepper. This mix gives your quesadillas a great flavor. Best Practices for Layering Ingredients in the Tortilla Wipe the skillet clean and add the rest of the olive oil. Place a tortilla in the skillet. Sprinkle half with cheese, then add the veggie mix on top. Top it off with more cheese. This helps hold everything together. Carefully fold the tortilla in half. Cook for about three to four minutes on each side. Press down gently with a spatula. You want a nice golden crust and melted cheese. Repeat this with the remaining tortillas. Once done, cut them into wedges and serve with salsa or sour cream. For the Full Recipe, check out the complete details. Achieving the Ideal Cheese Melt To get that perfect cheese melt, use a mix of cheddar and mozzarella. The cheddar adds sharpness, while mozzarella brings creaminess. Always sprinkle a bit more cheese on top of your filling. This helps bind the quesadilla and gives a gooey texture. Cook them on medium-low heat. This way, the cheese melts evenly without burning the tortilla. How to Avoid Soggy Quesadillas To keep your quesadillas crispy, avoid overloading them with veggies. Use just enough filling to cover half the tortilla. Sauté your vegetables until they are tender but not watery. Let them cool slightly before adding to the quesadilla. This prevents extra moisture from making the tortilla soggy. Presentation Ideas for an Attractive Platter Arrange your quesadilla wedges on a colorful plate. Use a variety of colors to make it pop. Garnish with fresh cilantro and lime wedges. This not only looks great but adds fresh flavor. You can even drizzle a little sauce over the top for a stylish touch. Side Dishes to Complement Veggie Quesadillas Pair your quesadillas with simple sides. A fresh salad with tomatoes and avocado works well. You can also serve them with a bowl of salsa or guacamole. These dips add great flavor and make your meal more fun. They also help balance the richness of the cheese. {{image_4}} Adding Proteins: Options for Meat Lovers If you enjoy meat, you can add cooked chicken, beef, or shrimp. These proteins work well in quesadillas. Just ensure to season the meat with spices like cumin or paprika for extra flavor. Add about 1 cup of your chosen protein to the veggie mix. This helps create a heartier meal that everyone will love. Creative Veggie Combinations for Flavor Boosts Feel free to get creative with your veggies. You can add mushrooms, onions, or black beans. These ingredients add great taste and texture. For a fresh twist, try adding fresh herbs like cilantro or basil. Experimenting with different combinations will keep your quesadillas exciting! Oven-Baked Veggie Quesadillas: Instructions and Tips To make oven-baked quesadillas, preheat your oven to 400°F (200°C). Line a baking sheet with parchment paper. Assemble the quesadillas as you would in a skillet. Place them on the sheet and brush the tops with olive oil. Bake for 15 minutes or until golden brown. This method allows multiple quesadillas to cook at once. Air Fryer Method for Crispier Texture Using an air fryer is another great option. Set your air fryer to 375°F (190°C). Place one or two quesadillas in the basket, ensuring they do not touch. Cook for about 8 minutes, flipping halfway through. This method gives you a crispy texture while keeping the inside gooey and delicious. To keep your leftover quesadillas fresh, follow these easy steps. First, let them cool completely. This prevents moisture buildup in the container. Place the quesadillas in an airtight container. You can also wrap them in plastic wrap. Store them in the fridge for up to three days. For long-term storage, freezing works great. Wrap each quesadilla in foil or plastic wrap. Then, place them in a freezer-safe bag. Squeeze out as much air as you can. This helps prevent freezer burn. You can freeze them for up to three months. When it’s time to enjoy your quesadillas again, reheating is key. The best method is to use a skillet. Heat it over medium heat. Add a little oil if needed. Place the quesadilla in the skillet. Cook for about three minutes on each side. This keeps the tortilla crispy and the cheese melty. Avoid using a microwave if you can. Microwaving makes quesadillas soggy. If you must, use a paper towel to cover them. This helps absorb excess moisture. Reheat in short bursts, checking often to prevent overcooking. For more details on making these tasty quesadillas, check out the Full Recipe. Can I make these quesadillas gluten-free? Yes, you can easily make these quesadillas gluten-free. Simply swap the flour tortillas for gluten-free ones. Look for brands that use brown rice or almond flour. These options work well and still taste great. What are some good substitutes for cheese? If you're looking to skip cheese, try using mashed avocado or a nut-based cheese. These options can add creaminess without dairy. You could also use thinly sliced tofu for a different texture. How long can I store cooked quesadillas in the fridge? You can store cooked quesadillas in the fridge for up to three days. Make sure to wrap them tightly in plastic wrap or foil. This keeps them fresh and prevents them from drying out. What are easy side dishes to serve with veggie quesadillas? Great side dishes include a fresh salad or guacamole. You can also serve salsa on the side. These options add flavor and texture to your meal. Are veggie quesadillas healthy? Yes, veggie quesadillas can be quite healthy. They offer fiber from the vegetables and protein from the cheese. This combination makes them a balanced meal. How can I make this recipe lower in calories? To cut calories, use less cheese or choose lower-fat cheese. You can also add more veggies to increase volume without adding many calories. This keeps your meal filling while reducing calorie intake. You learned about making easy veggie quesadillas, their key ingredients, and prep steps. Remember, choosing the right cheese and seasoning is vital for flavor. Pay attention to cooking methods for great texture and taste. You can customize your quesadillas and store leftovers well. With these tips, you can enjoy delicious meals anytime. Experiment with different veggies and proteins to find your favorite combo. Healthy, easy, and fun—veggie quesadillas can be a great dish for you!

Easy Veggie Quesadillas Quick and Delicious Meal

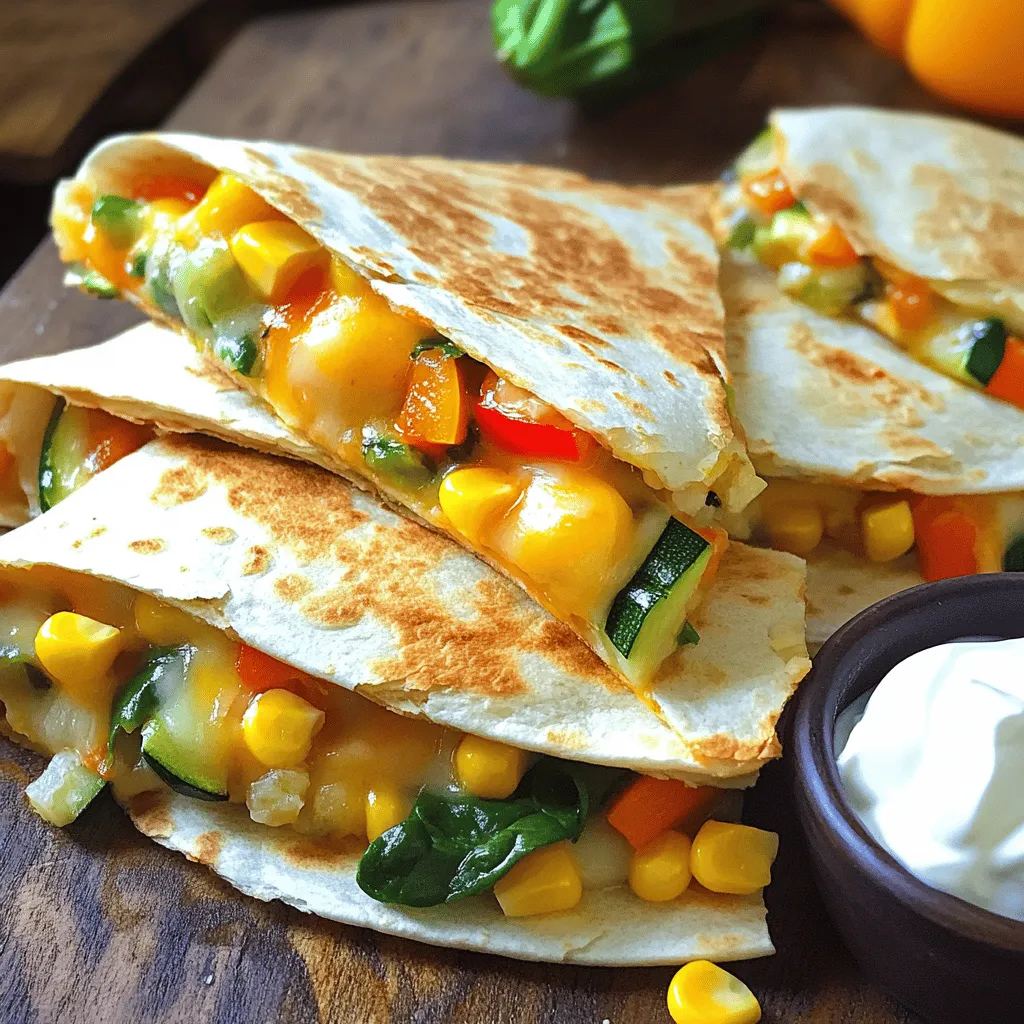
Looking for a quick and tasty meal? Easy veggie quesadillas are the answer! You can whip them up in no

To make a delightful chocolate chip banana bread, you need the following ingredients: - 3 ripe bananas, thoroughly mashed - 1/3 cup coconut oil, melted - 1 teaspoon pure vanilla extract - 1 teaspoon baking soda - Pinch of sea salt - 3/4 cup packed brown sugar - 1 large egg, lightly beaten - 1 teaspoon ground cinnamon - 1 1/2 cups all-purpose flour - 1 cup dark chocolate chips - 1/2 cup chopped walnuts (optional) Using ripe bananas is key. They add natural sweetness and moisture. The coconut oil gives a rich flavor while keeping the bread moist. Pure vanilla extract enhances the overall taste, making each bite more enjoyable. Baking soda helps the bread rise, while a pinch of sea salt balances the sweetness. Brown sugar adds a nice depth of flavor. The egg provides structure and helps bind the ingredients together. Ground cinnamon gives a warm note that pairs perfectly with chocolate. All-purpose flour forms the base of the bread. Dark chocolate chips add a rich, melty texture. If you like, add walnuts for a crunchy texture contrast. This combination of ingredients creates a balance of flavors and a moist texture. You can find the full recipe above, and I promise it will be a hit! - Set to 350°F (175°C) - Grease the 9x5-inch loaf pan Start by preheating your oven to 350°F (175°C). This is key for even baking. While the oven heats, grab a 9x5-inch loaf pan. Use cooking spray or coconut oil to grease it well. This step helps the bread slide out easily later. - Combine bananas and coconut oil - Add vanilla extract and egg In a large bowl, mash the ripe bananas until smooth. You can use a fork for this. Next, pour in the melted coconut oil. Mix them well until they blend into a creamy texture. Now, add the vanilla extract and the lightly beaten egg. Stir gently to combine everything. - Sprinkle in baking soda and sea salt - Mix in brown sugar and ground cinnamon - Gradually add all-purpose flour Now it’s time for the dry ingredients. Sprinkle the baking soda and a pinch of sea salt over the banana mix. Stir briefly to blend them in. Next, add the packed brown sugar and ground cinnamon. Mix until the sugar dissolves. Gradually sift in the all-purpose flour, folding it gently with a spatula. Remember, don’t overmix! The batter should have a few lumps. - Include dark chocolate chips and walnuts (if using) Now, fold in the dark chocolate chips. If you like a nutty crunch, add chopped walnuts too. Gently mix until the chips and nuts are evenly distributed throughout the batter. - Pour batter into the prepared pan - Bake for 55-60 minutes and check for doneness Pour the batter into your prepared loaf pan. Smooth the top with a spatula. Bake in the oven for 55-60 minutes. To check if it’s done, insert a toothpick into the center. It should come out clean. - Let cool in the pan for 10 minutes - Transfer to a wire rack to cool completely Once baked, let the banana bread cool in the pan for 10 minutes. Then, carefully transfer it to a wire rack to cool completely. This cooling step is important for the best texture. Enjoy this delicious treat with your favorite beverage! For the full recipe, check out the details above. - Choose ripe bananas for optimal sweetness. Ripe bananas make the bread moist and flavorful. - Avoid overmixing for a light texture. Mixing too much can lead to a dense loaf. - Serve warm with whipped cream or ice cream. This adds a creamy touch to each slice. - Add extra chocolate chips on top for visual appeal. It makes the bread look even more tempting. - How to fix a dense texture? If your bread is dense, try mashing the bananas smoother next time. - Tips for preventing a domed top: Ensure your oven is at the right temperature. Use a toothpick to check for doneness without opening the door too soon. For more details on making this tasty treat, check out the Full Recipe. {{image_4}} If you have nut allergies, you can still enjoy banana bread. Use sunflower seed butter as a great egg substitute. This option works well and keeps the bread moist. You can also swap regular chocolate chips for nut-free chocolate chips. This way, you can enjoy the same rich flavor without the worry. To make your banana bread even tastier, consider adding spices. A hint of nutmeg or allspice can brighten the flavor. You can also mix in dried fruits like cranberries or raisins. These additions give a nice twist to the classic recipe and add a bit of chewy texture. If you need a gluten-free option, it’s easy to modify the recipe. Just replace the all-purpose flour with a gluten-free blend. Many blends work well and give the same light texture. This way, everyone can enjoy a slice of this delightful banana bread. For the complete recipe, check out the [Full Recipe]. To store banana bread at room temperature, wrap it well in plastic wrap. Place it in a cool, dry place. This keeps it fresh and moist. The shelf life is about 3 to 4 days. After this, it may start to dry out. For long-term storage, freezing is best. Slice the banana bread into pieces. Wrap each slice in plastic wrap and then place them in a freezer bag. You can freeze banana bread for up to 3 months. When you're ready to enjoy it, take out a slice and let it thaw in the fridge overnight. This method helps keep the texture great. To reheat banana bread, use the oven for best results. Preheat the oven to 350°F (175°C). Place the slices on a baking sheet and heat for about 10 minutes. You can also use the microwave. Heat each slice for about 15-20 seconds. To keep it moist, place a damp paper towel on top of the slice. Enjoy your warm, delicious banana bread! Yes, you can use frozen bananas. They work well for banana bread. Just thaw them first. Frozen bananas may be softer than fresh ones. This helps to make your bread even more moist. When you mash them, they blend easily. If you have ripe bananas, use them. They will give your bread a sweeter taste. Yes, you can easily make this recipe vegan. Replace the egg with a flax egg or applesauce. For a flax egg, mix 1 tablespoon of ground flaxseed with 2.5 tablespoons of water. Let it sit for five minutes. For milk, use almond, soy, or oat milk. Both options keep your banana bread moist and tasty. You’ll know your banana bread is done when a toothpick comes out clean. Insert it into the center of the bread. If it has batter on it, bake a little longer. The top should be golden brown. You can also gently press the top. If it springs back, it's ready. Yes, you can double the recipe. Use a larger pan, like a 9x13-inch one. Cooking times may change, so check for doneness sooner. A larger batch may need a few extra minutes. Keep an eye on it as it bakes. Always use a toothpick to check for doneness. You can create delicious banana bread with simple, healthy ingredients. We walked through the steps, from mixing to baking. Remember to use ripe bananas for sweetness and avoid overmixing for a light texture. You can also explore fun variations, like gluten-free options or adding nuts and spices. With proper storage, this banana bread stays fresh and tasty. Now, you can enjoy your homemade treat and impress friends and family! Happy baking!

Chocolate Chip Banana Bread Delightful and Moist Recipe

Are you ready for a warm, sweet treat that brings joy to every bite? This Chocolate Chip Banana Bread is

- 1 lb large shrimp, peeled and deveined - 4 tablespoons unsalted butter - 4 cloves garlic, finely minced - 1 teaspoon lemon zest - 1 tablespoon freshly squeezed lemon juice - 1 teaspoon red pepper flakes - 1 cup cooked quinoa or rice - 2 tablespoons fresh parsley, finely chopped - Salt and black pepper to taste Gathering the right ingredients is key to making this dish shine. For the shrimp, I like to use large ones. They cook faster and stay juicy. You need unsalted butter to control the salt level. Fresh garlic adds a punch of flavor. The lemon zest and juice balance the richness of the butter. A pinch of red pepper flakes gives it a nice kick. You can serve it over a bed of quinoa or rice. This adds texture and makes the meal filling. Fresh parsley not only looks pretty but also adds freshness. Don’t forget the salt and pepper! They enhance all the flavors in the dish. For the full recipe, check out the details above and get cooking! - Prepare the shrimp by rinsing and drying. - Melt the butter in a skillet over medium heat. Let's dive into the preparation first. Rinse the shrimp under cold water. This helps to clean them. After rinsing, use a paper towel to dry them gently. Dry shrimp cook better and absorb flavors well. Next, take a large skillet and put it on medium heat. Add the unsalted butter to the skillet. Keep an eye on it as it melts. You want it to melt but not turn brown. - Sauté garlic until golden. - Cook the shrimp until pink and opaque. Once the butter is melted, add the minced garlic. Sauté the garlic for about one minute. You want it to turn golden and smell great. Be careful not to let it burn, as burnt garlic can taste bitter. Now, it’s time for the shrimp. Place the shrimp in the skillet in one layer. Season them with salt, black pepper, and red pepper flakes. Cook the shrimp for about 2-3 minutes on each side. They should turn pink and opaque when done. - Incorporate lemon juice and zest. - Add fresh herbs and plate the dish. After the shrimp are cooked, drizzle fresh lemon juice over them. Don’t forget to add the lemon zest as well. Stir gently to mix the flavors. Cook for another minute to let the lemon shine. Now, take the skillet off the heat. Stir in the chopped parsley for freshness. On individual plates, serve a bed of cooked quinoa or rice. Top each plate with the garlic butter shrimp. Drizzle any extra sauce from the skillet over the shrimp for added flavor. For a pretty touch, serve the dish hot with lemon wedges on the side. Garnish with extra parsley to make it look nice. Enjoy this quick and tasty meal! For the complete recipe, check the [Full Recipe]. - Always watch the butter as it melts. You want it soft, not brown. - Shrimp size matters. Larger shrimp need more time to cook than smaller ones. - Try adding herbs like thyme or basil for a twist. - Use high-quality butter; it makes a big difference in taste. - For a pretty plate, stack the shrimp high. It looks great! - Serve with lemon wedges and parsley for a fresh touch. Quinoa or rice makes a nice side too. For the full recipe, please check the [Full Recipe]. {{image_4}} You can easily switch shrimp for other proteins. Scallops work well and taste great. Chicken is another option. Just make sure to cut it into small pieces for even cooking. For a vegetarian twist, try using mushrooms. They soak up the garlic butter and add a nice texture. You can change up the flavors in this dish. Adding smoked paprika gives a warm, smoky taste. You can also toss in some fresh spinach or diced bell peppers. These veggies add color and extra nutrition to your meal. If you're serving this dish with rice, you can make it gluten-free. Simply choose gluten-free rice or quinoa to enjoy. If you want a low-carb option, try serving the shrimp over zucchini noodles. This keeps the meal light but still very tasty. You can find the full recipe [here](#). To store leftover garlic butter shrimp, place it in an airtight container. This keeps the shrimp fresh and prevents odors from spreading. You can keep it in the fridge for up to two days. After that, the shrimp may lose flavor and texture. If you want to freeze garlic butter shrimp, follow these steps: - Let the shrimp cool completely. - Place it in a freezer-safe bag or container. - Remove as much air as possible before sealing. This shrimp can last in the freezer for up to three months. When you’re ready to use it, thaw it in the fridge overnight. Avoid thawing at room temperature, as this can cause bacteria to grow. To reheat garlic butter shrimp, use one of these methods: - Heat in a skillet over low heat, stirring gently. - Microwave in short bursts at medium power, checking often. Both methods help keep the shrimp juicy and flavorful. Avoid using high heat, as this can make the shrimp rubbery. Enjoy your meal again without losing its yummy taste! For the full recipe, check out the details above. Cooking garlic butter shrimp takes about 30 minutes. You need 10 minutes for prep and 20 minutes for cooking. This quick meal is perfect for busy days. You will love how fast it comes together! Yes, you can use frozen shrimp. Just make sure to thaw them first. To thaw, place the shrimp in the fridge overnight or run them under cold water for 10-15 minutes. This way, they cook evenly and taste great. Garlic butter shrimp pairs well with many sides. Here are some ideas: - Cooked quinoa - Rice - Steamed vegetables - Garlic bread - A fresh salad These sides complement the shrimp and make a complete meal. You can tell shrimp is done when it turns pink and opaque. The flesh should be firm but not rubbery. If you see a nice curl shape, that’s a good sign too. Always check to ensure it is fully cooked for safety. This blog post shared a simple garlic butter shrimp recipe. We covered the key ingredients, preparation steps, and cooking methods. I offered tips for perfecting your dish and some tasty variations. Remember, you can easily adjust flavors and sides to fit your taste. With practice, you'll impress everyone with your shrimp cooking skills. Enjoy your cooking journey and make it your own!

30-Minute Garlic Butter Shrimp Quick and Tasty Meal

Looking for a quick and tasty meal? This 30-Minute Garlic Butter Shrimp recipe is perfect. With just a few simple

Older posts
Newer posts
← Previous Page1 … Page15 Page16 Page17 … Page27 Next →

dsad

© 2025 mealinmoments • Built with GeneratePress

Our Policies

  • Copyright Policy
  • Cookie Policy
  • GDPR Policy
  • Privacy Policy
  • Disclaimer
  • Terms Of Use

More Information

  • Home
  • About
  • Contact
  • Appetizers
  • Dessert
  • Dinner
  • Drinks
©2025, mealinmoments About Back To Top