Skip to content
DisclaimerTerms Of UseGDPR PolicyCookie Policy

mealinmoments

  • Home
  • Drinks
  • Appetizers
  • Dinner
  • Dessert
  • About
  • Contact
  • Privacy Policy
DisclaimerTerms Of UseGDPR PolicyCookie Policy

Megan

- All-purpose flour: This is the main base for your pancake. It gives the pajeon its chewy texture. You can find it at any grocery store. - Scallions: Scallions are key to flavor. They add a fresh and mild onion taste. Use a bunch of scallions and chop them finely for the best results. - Optional ingredients: You can add carrots for extra sweetness. Grating them makes them mix well. Gochugaru brings heat if you want some spice. Just half a teaspoon will do. - Mixing bowls and whisk: You need these to mix your batter. A bowl will hold your ingredients, and a whisk will blend them smoothly. - Non-stick frying pan: This is crucial to cook your pancakes without sticking. It helps you achieve that golden, crispy outside. - Spatulas: Use one to flip the pancakes and another to serve them. A good spatula can handle the flipping without breaking the pancake. For the complete recipe, check out the Full Recipe section. To make the batter, start with a large bowl. Add 1 cup of all-purpose flour. Pour in 1 cup of water and 1/2 teaspoon of salt. Whisk these together until you see a smooth mixture. It should be free of lumps. A smooth batter helps create a tasty pancake. Next, it's time to add flavor. Chop one bunch of scallions finely. If you want, grate 1/2 cup of carrots for sweetness. You can also add 1/2 teaspoon of gochugaru for heat. Fold these ingredients into the batter carefully. Mixing well ensures that the scallions and carrots spread evenly. Now, heat a non-stick frying pan over medium heat. Add 2 tablespoons of vegetable oil. Wait until the oil shimmers, which takes about two minutes. Carefully pour half of the batter into the pan. Use a spatula to spread it into a flat, round shape. Cook the pancake for 3 to 4 minutes. Look for crispy edges and a golden bottom. When it's ready, gently flip it over using two spatulas. Cook for another 3 to 4 minutes on the other side. When both sides are golden and crispy, transfer the pancake to a plate lined with paper towels. This helps remove extra oil. Repeat with the remaining batter and add more oil to the pan if needed. Cut the pancakes into wedges. Serve warm with soy sauce for dipping. Enjoy your crispy Korean scallion delight! For the full recipe, check out the details above. To make great Pajeon, you need to focus on the oil temperature. Use enough oil to cover the bottom of the pan. Heat it until it shimmers. This helps create a crispy outer layer. Cook each pancake for about 3-4 minutes on each side. You'll know it's ready to flip when the edges turn golden and crisp. This timing is key to achieving the perfect texture. When serving Pajeon, presentation matters. Place the pancakes on a bright platter. You can garnish with sesame seeds or fresh cilantro for color. This not only looks nice but also adds flavor. For dipping, soy sauce is a must. You can enhance it with chopped scallions or a splash of vinegar. This will give your Pajeon a fresh kick. Serve warm for the best experience! Remember, you can find the full recipe above! {{image_4}} You can change up your pajeon by using different veggies. Add bell peppers, zucchini, or even mushrooms for a twist. These swaps can change the taste and texture of the pancake. If you prefer a gluten-free version, use rice flour or a gluten-free flour blend. This makes pajeon tasty for everyone. In Korea, pajeon varies by region. Some places like to add seafood, such as shrimp or squid, for extra flavor. Others might use different herbs or spices for unique tastes. Traditional serving customs also differ. Some people enjoy pajeon with a side of kimchi or pickled vegetables. Others might serve it with a spicy dipping sauce. Each region brings its own flair to this delicious dish. To keep your pajeon fresh, store any leftovers in the fridge. Use an airtight container. This keeps them from drying out. They can last up to three days. When you’re ready to eat, reheating is key. Use a frying pan over medium heat. Add a drop of oil to the pan. This helps the pancake regain its crispiness. Heat for about two minutes on each side. You'll enjoy that crunchy texture again. You can freeze pajeon for later enjoyment. If you freeze uncooked batter, it stays fresh longer. Just mix the batter and pour it into a freezer-safe bag. When you’re ready, thaw it in the fridge overnight. If you freeze cooked pancakes, stack them with parchment paper between each one. This prevents sticking. To thaw, leave them in the fridge or use a microwave. For best results, reheat them in a pan. This keeps them crispy, just like fresh! For the full recipe of crispy Korean scallion delight, refer back to the earlier section. Pajeon is a savory Korean pancake made mainly with scallions. It has roots in Korean history and is often enjoyed during rainy days. This dish brings people together, often served at gatherings. The crispy texture and soft inside make it a favorite. Pajeon is also a popular bar snack, enjoyed with drinks. Yes, you can easily make Pajeon vegetarian! Simply skip any meat and stick to veggies. Use the basic ingredients like flour, water, and salt. Add scallions as the star of the dish. You can also include grated carrots for sweetness. For extra flavor, toss in other vegetables like bell peppers or zucchini. To achieve a crispy Pajeon, focus on the frying technique. Start with a hot pan and enough oil. Use vegetable oil for a higher smoke point. Spread the batter thinly in the pan for even cooking. Cook until the edges turn golden brown, then flip carefully. This helps keep the texture light and crisp. Pajeon is a delicious Korean pancake that blends simple ingredients and techniques. You learned about the key ingredients, like flour and scallions, and the tools needed to make it. I shared step-by-step instructions to ensure perfect texture and taste. Remember, experimenting with vegetables can lead to fun variations. Proper storage keeps your leftovers fresh. Enjoy your cooking and share this tasty dish with others, knowing you can adapt it to fit your tastes easily.

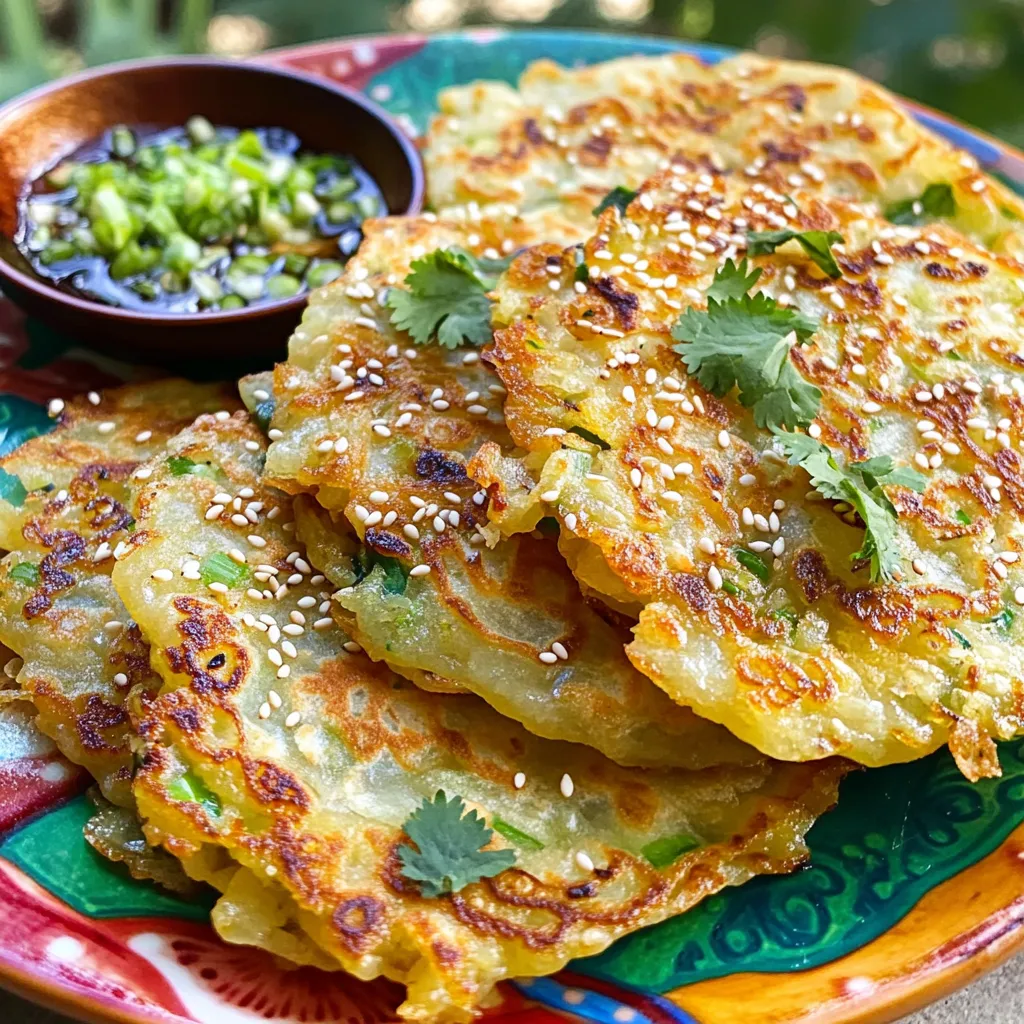
Pajeon: Korean Scallion Pancake Made Simple and Easy

If you crave a tasty snack, let’s dive into Pajeon, the Korean scallion pancake! This simple recipe combines just a

- 8 ounces fusilli pasta - 1 cup cherry tomatoes, halved - 1 cup cooked shrimp, peeled and deveined - 1 cup calamari rings, cooked - 1 cup scallops, cooked and quartered - 1/2 cup red bell pepper, diced - 1/4 cup red onion, finely chopped - 1/4 cup black olives, sliced - 1/3 cup fresh parsley, finely chopped The main star of this dish is fusilli pasta. Its spiral shape holds sauce well, creating a delightful bite. Next, seafood brings life to your salad. I love using shrimp, calamari, and scallops. Each adds a unique flavor and texture. Fresh vegetables enhance the dish, adding crunch and color. Cherry tomatoes and bell peppers are my favorites. They blend perfectly with seafood. Red onion gives a nice sharpness, while black olives add a salty kick. Lastly, fresh parsley brightens everything. It adds a hint of freshness that ties all the flavors together. - 1/4 cup extra-virgin olive oil - 2 tablespoons freshly squeezed lemon juice - 1 teaspoon garlic powder - 1 teaspoon dried oregano - Salt and freshly ground pepper to taste A great dressing can make or break your salad. I use extra-virgin olive oil for a rich flavor. Fresh lemon juice adds a zesty touch. Garlic powder and oregano bring warmth and depth. Season with salt and pepper to taste. This dressing balances the seafood and veggies perfectly. You can adjust the ingredients based on your taste. Want it tangier? Add more lemon juice! - Caloric content per serving: around 400 calories - Breakdown of macronutrients: 15g fat, 25g protein, 50g carbs - Dietary modifications: gluten-free pasta options available This seafood pasta salad is not just delicious; it’s healthy too! Each serving has about 400 calories. With 15g of fat, it provides healthy fats from the olive oil. The seafood adds around 25g of protein, making it filling. Carbs from the pasta offer energy for the day. If you need a gluten-free option, swap fusilli with gluten-free pasta. Enjoy this dish without worry! For the full recipe, check out [Full Recipe]. First, bring a large pot of salted water to a boil. Add 8 ounces of fusilli pasta. Cook the pasta for about 10-12 minutes. You want it to be al dente, which means it should be firm but not hard. To check, taste a piece a minute before the time is up. Once it's ready, drain the pasta in a colander. Rinse it under cold water to stop the cooking. This cools the pasta and helps it mix better later. While the pasta cools, get your seafood and veggies ready. For the seafood, use 1 cup each of cooked shrimp, calamari rings, and scallops. Make sure they are all cooked and cut to size. In a bowl, add the seafood along with 1 cup of cherry tomatoes, 1/2 cup of diced red bell pepper, 1/4 cup of chopped red onion, and 1/4 cup of sliced black olives. Mix these gently so you don’t break the seafood. In a small bowl, whisk together 1/4 cup of extra-virgin olive oil and 2 tablespoons of lemon juice. Add 1 teaspoon of garlic powder and 1 teaspoon of dried oregano. Toss in a pinch of salt and some freshly ground pepper. Whisk until it’s combined and well mixed. You want the dressing to be smooth and flavorful. Now, drizzle the dressing over the seafood and veggies. Use a spatula to mix everything gently. You want to coat all the ingredients without breaking the seafood. Next, add the cooled pasta to the bowl. Toss it all together until the pasta and the seafood mix well. Make sure everything is evenly distributed. Chilling is vital for this salad. It helps the flavors blend. Cover the bowl with plastic wrap or a lid. Place it in the fridge for at least 30 minutes. This resting time makes the salad taste even better. For the best flavor, let it chill longer if you can. For the Full Recipe, check the detailed steps. Enjoy your vibrant and flavorful seafood pasta salad! Serve the salad in a large, shallow bowl. This helps guests see all the bright colors. Garnish with chopped parsley for a fresh touch. Add lemon wedges around the bowl for a zesty flair. Guests can squeeze lemon juice for extra flavor. Adjust seasoning to your taste. Add a pinch more salt or pepper for a kick. Want more zest? Add a splash of lemon juice. You can swap out seafood too. Use crab or lobster instead of shrimp or scallops. This keeps the dish exciting. For seafood, grilling or poaching works well. Both options bring out great flavors. When cooking pasta, use plenty of water and salt. This helps achieve a great texture. After boiling, rinse the pasta under cold water. This cools it down and stops the cooking process. Follow these tips for a delightful experience with your seafood pasta salad. For the complete dish, check the Full Recipe. {{image_4}} You can mix up the seafood in this salad. Lobster and crab make great options. They add a sweet taste and a nice texture. Fresh seafood is often better. It has more flavor and a firmer bite. However, canned seafood is quick and easy. It saves time, but may lack some taste. Always check the quality when buying canned seafood. If you want a gluten-free option, try brown rice pasta or chickpea pasta. They work well and keep the dish tasty. Whole grain pasta is another healthy choice. It adds fiber and a nutty flavor. You can even swap pasta for orzo or quinoa. Both are light and absorb flavors nicely. Adding vegetables boosts the salad's flavor and color. Try bell peppers, cucumber, or arugula. They add crunch and freshness. You can also sprinkle cheese on top. Feta or Parmesan add creaminess. For a crunch, add nuts like pine nuts or almonds. They bring texture and nutritional value. Use these ideas to make your salad unique! Store your seafood pasta salad in an airtight container. This keeps it fresh. Make sure to eat leftovers within three days. To maintain flavor, avoid adding dressing until you're ready to serve. If you must store dressed salad, mix gently to prevent seafood from breaking apart. Freezing seafood pasta salad is not ideal due to seafood texture changes. However, if you choose to freeze, do so in a freezer-safe container. Leave some space at the top for expansion. To reheat, thaw in the fridge overnight and gently warm on low heat. Avoid high heat to keep the seafood from becoming tough. When stored properly, seafood pasta salad lasts up to three days in the fridge. Look for signs of spoilage like off smells or slimy textures. If it looks or smells unusual, it’s best to toss it out. Keeping an eye on your salad ensures you enjoy it at its freshest. Yes, you can make this salad ahead of time. I recommend preparing it a few hours before serving. This way, the flavors meld well. If you want the best taste, chill it for at least 30 minutes. But if you make it the night before, that works too. Just keep it in the fridge until you’re ready to eat. You can use many types of seafood in this salad. Here are some great options: - Shrimp - Calamari - Scallops - Lobster - Crab - Clams - Mussels These seafood choices add different flavors and textures. Feel free to mix and match based on what you like or have on hand. Absolutely! You can change the dressing to suit your taste. Here are some ideas: - Add a dash of hot sauce for spice. - Mix in some honey for sweetness. - Use fresh herbs like basil or dill for extra flavor. - Swap lemon juice for lime juice for a twist. - Add some mustard for a tangy kick. These changes can make the dressing unique and exciting. Feel free to get creative! In this post, we explored the delicious world of seafood pasta salad. We covered essential ingredients like fusilli, seafood, and fresh veggies, along with easy dressing instructions. I shared tips for cooking, presentation, and storage. You can even customize this salad to fit your taste and dietary needs. Remember, using fresh ingredients makes all the difference. Enjoy your cooking journey and create a dish that impresses everyone!

Seafood Pasta Salad Vibrant and Flavorful Dish

Seafood pasta salad is a fun and colorful dish that bursts with flavor. It’s the perfect blend of fresh seafood,

- 1 cup green or brown lentils, thoroughly rinsed - 2 tablespoons high-quality olive oil - 1 medium onion, finely chopped - 2 medium carrots, peeled and diced - 2 celery stalks, diced - 4 cloves of garlic, minced - 1 teaspoon ground cumin - 1 teaspoon smoked paprika - 1 bay leaf - 4 cups vegetable broth (preferably homemade or low-sodium) - 1 can (14 oz) diced tomatoes, with their juice - 1 cup fresh kale or spinach, chopped - Salt and freshly ground black pepper to taste - Fresh parsley, chopped, for garnish This recipe showcases simple, wholesome ingredients. Lentils are the star here. They provide protein and fiber, making this stew filling and healthy. You can choose green or brown lentils. Both work well and give a nice texture. The mix of fresh veggies adds great flavor. Onion, carrots, and celery create a solid base. Garlic adds depth, while spices like cumin and smoked paprika bring warmth. The bay leaf adds a subtle hint of earthiness. Using vegetable broth brings richness to the stew. If you have homemade broth, use it! Canned tomatoes add acidity and sweetness, balancing the dish. Finally, kale or spinach gives a pop of color and nutrition. This hearty meal is not just tasty. It is also a great option for those seeking health benefits. Lentils help with digestion and provide essential vitamins and minerals. Plus, the veggies keep you feeling full and satisfied. For the full recipe, check out the details above. You'll love how easy it is to make this nourishing dish! To start, gather your ingredients. Chop the onion, carrots, and celery. This adds flavor and texture. Heat 2 tablespoons of olive oil in a large pot over medium heat. Once it shimmers, add the chopped onion, carrots, and celery. Sauté them for about 5-7 minutes. Stir occasionally. The goal is to soften the veggies and make the onion translucent. Next, add 4 minced garlic cloves, 1 teaspoon of ground cumin, 1 teaspoon of smoked paprika, and 1 bay leaf. Cook for one more minute. This helps release the spices' fragrant flavors. Now, it’s time to add 1 cup of rinsed lentils, 4 cups of vegetable broth, and a can of diced tomatoes (with their juice). Bring this mixture to a rolling boil. Then, reduce the heat to low. Cover the pot and let it simmer for about 25-30 minutes. You'll want the lentils tender but not mushy. During the last 5 minutes of cooking, add 1 cup of chopped kale or spinach. Stir well, letting the greens wilt and brighten. This adds nutrients and color to your stew. It’s essential to monitor the cooking time closely. You don’t want to overcook the lentils. Once your stew is ready, taste it. Add salt and freshly ground black pepper as needed. Don’t forget to remove the bay leaf before serving. For a beautiful presentation, ladle the stew into warm bowls. Garnish each serving with fresh parsley. This adds a pop of color and flavor. Serve with crusty bread or a warm baguette. It’s perfect for soaking up the delicious broth! Enjoy your meal! For the complete recipe, check out the Full Recipe. To cook lentils perfectly, rinse them well before use. This step removes dirt and debris. Use a pot with a heavy base to prevent burning. Start cooking lentils in boiling water for best results. For flavor, fresh herbs can make a big difference. Try adding thyme, rosemary, or bay leaves during cooking. Spices like cumin and smoked paprika boost the taste too. A splash of lemon juice at the end adds brightness to your stew. Lentil stew pairs well with many sides. Serve it with crusty bread or warm rice. A fresh salad on the side adds a nice crunch. For garnishing, sprinkle fresh parsley over each bowl. This not only adds color but enhances flavor. You can also add a dollop of yogurt for creaminess. One common mistake is overcooking lentils. They should be tender but not mushy. Keep an eye on them as they cook. Another mistake is not seasoning enough. Taste your stew before serving. Add salt and pepper as needed to bring out the flavors. {{image_4}} You can easily swap lentils for other legumes. Red lentils cook faster and become softer. Split peas offer a similar texture. For added flavor, try mixing in some diced sweet potatoes or butternut squash. You can also add any veggies you have on hand, like zucchini or bell peppers. These swaps help you create unique tastes with each batch. To make this stew heartier, consider adding meats. Bacon or sausage can add a nice richness. Just sauté them with the veggies at the start. For a spicy kick, toss in chopped chili or a dash of cayenne pepper. This adds warmth and depth to the stew. You can adjust the spice level to your taste. If you need a gluten-free option, this stew is already safe. Just ensure your broth is gluten-free. For a low-sodium version, use low-sodium broth and skip extra salt. If you want a vegan stew, skip any meat. This recipe is flexible and can fit many diets. You can enjoy a warm bowl of stew no matter your dietary needs. To store leftovers properly, let the stew cool first. Transfer it to an airtight container. This keeps out air and moisture. You can keep it in the fridge for up to five days. Always check for any signs of spoilage before eating. To freeze the stew, first cool it completely. Pour it into freezer-safe bags or containers. Remove as much air as possible to avoid freezer burn. Label the bags with the date. The stew can be frozen for up to three months. To reheat frozen lentil stew, thaw it overnight in the fridge. You can also use the microwave for quick thawing. Once thawed, heat it on the stove over low heat. Stir often until it warms up. For best results, add a splash of broth if it seems thick. For reheating, use a medium pot on low heat. Stir gently to mix the flavors. This helps maintain the stew's texture. If using a microwave, cover the bowl to keep moisture in. Heat in short bursts and stir in between. This way, you avoid hot spots or uneven heating. Lentil stew can last about five days in the fridge. To keep it fresh, store it in an airtight container. Make sure to let it cool before sealing. This helps prevent moisture buildup. If you want, you can freeze the stew for up to three months. Just thaw it in the fridge before reheating. Yes, you can use other beans. Black beans, kidney beans, or chickpeas work well. Each type will change the stew's taste and texture. Just make sure to adjust the cooking time. Some beans may take longer to cook than lentils. Absolutely! Lentil stew is great for meal prep. You can make a large pot and store it for the week. It keeps well in the fridge and tastes even better after a day or two. Portion it out into containers for easy meals. Just reheat and enjoy whenever you want. Yes, you can make lentil stew in a slow cooker. Just add all the ingredients to the slow cooker. Set it on low for six to eight hours or high for three to four hours. This method allows the flavors to blend nicely. Stir it occasionally if you can for the best taste. Lentil stew pairs well with many sides. You can serve it with crusty bread or rice. A fresh salad with greens and a light dressing also complements the stew. For a heartier meal, try adding some roasted vegetables or a side of quinoa. Enjoy your delicious meal! For the complete recipe, check out the Full Recipe section. Lentil stew is simple, tasty, and good for your health. You learned about key ingredients, nutritional benefits, and cooking steps. We also discussed storage tips and variations to keep things exciting. It's a dish you can make your own by adding spices or veggies. Enjoy sharing this meal with family or friends. Remember, lentil stew is not only hearty but also flexible for any diet. It’s perfect for meal prep and easy to store. Now, get cooking and savor each delicious bite!

Easy Lentil Stew Hearty and Nourishing Comfort Food

Looking for a cozy meal that warms both your soul and your belly? This Easy Lentil Stew is the perfect

- 1 lb ground beef - 1 cup shredded cheddar cheese - 1/2 cup cream cheese, softened - 1/4 cup grated Parmesan cheese - 1 clove garlic, finely minced - 1 teaspoon onion powder - 1 teaspoon garlic powder - 1 teaspoon dried oregano - 1 packet of refrigerated pizza dough (or crescent roll dough) - Olive oil, for brushing - Fresh parsley, finely chopped (for garnish) - Salt and pepper to taste - Additional cheeses (e.g., mozzarella, pepper jack) - Spices for extra flavor (e.g., smoked paprika, cayenne pepper) When I make Garlic Parmesan Cheeseburger Bombs, I love to keep my ingredients fresh and simple. Ground beef gives these bombs a hearty base, while a mix of cheeses adds rich flavor. Cream cheese makes the filling creamy and smooth. I use garlic and onion powder for a punch of taste. Dried oregano rounds it out nicely. The dough is a key player too. I like using pizza dough, as it bakes up soft and chewy. You can even swap it for crescent roll dough for a flakier bite. If you want to play with flavors, try adding other cheeses like mozzarella or pepper jack. You can kick it up a notch with spices like smoked paprika or cayenne pepper. This way, you can make each batch unique. The key is to have fun and experiment with what you love. Check out the full recipe for all the details and tips! - Preheat the oven to 375°F (190°C) and prepare a baking sheet with parchment paper. - Combine 1 lb ground beef, 1 cup shredded cheddar cheese, 1/2 cup cream cheese, 1/4 cup grated Parmesan cheese, and spices in a mixing bowl. - Roll out pizza dough and cut it into 4x4-inch squares. - Place about 1 tablespoon of filling on each dough square and fold to form bombs. - Arrange the bombs on the baking sheet and brush them with olive oil. - Bake for 15-20 minutes until golden brown. To make your Garlic Parmesan Cheeseburger Bombs shine, roll the dough thin. A thinner dough gives you that nice crispiness. Also, use room temperature cream cheese. It will mix easier with the beef and cheese, making your filling creamy and smooth. Keep a close eye on the internal temperature of your bombs. Ground beef needs to reach 160°F for safety. I also suggest rotating your baking sheet halfway through cooking. This helps them brown evenly, giving you a perfect golden color. These bombs taste great with dipping sauces. I love pairing them with ranch or barbecue sauce. The flavors blend well and make each bite even more enjoyable! Don't forget to serve them warm for the best experience. For the complete recipe, check out the [Full Recipe]. {{image_4}} You can make Garlic Parmesan Cheeseburger Bombs even more exciting. One great way is to add sautéed onions and mushrooms. This gives a heartier taste and a nice texture. You just need to cook the onions and mushrooms until soft before mixing them into the beef filling. It makes every bite richer and more satisfying. Another fun idea is to experiment with different herbs and spices. Try adding smoked paprika for a smoky flavor or a pinch of cayenne pepper for some heat. You can also mix in fresh herbs like basil or thyme for a fresh twist. Each combination can change the taste of your bombs, making them unique every time. If you want a vegetarian version, you can use meat substitutes. Products made from soy or pea protein work well. They provide a similar texture and can absorb the flavors of the spices and cheese. You can also make these bombs vegan by swapping out dairy ingredients. Use vegan cream cheese and cheese alternatives. These changes keep the dish delicious while meeting different dietary needs. Enjoy creating your own variations! Store any leftover Garlic Parmesan Cheeseburger Bombs in an airtight container in the fridge. They will stay fresh for up to 3 days. When you want to enjoy them again, reheat them in the oven. This method keeps the texture crispy and delicious. You can freeze uncooked bombs for up to 2 months. Just place them in a single layer on a baking sheet until firm. Then transfer them to a freezer-safe bag. When you are ready to bake, you can cook them straight from the freezer. No need to thaw! To reheat baked bombs, you can use the oven or microwave. The oven will give you the best results, making them warm and crispy again. If you are short on time, the microwave is a quicker option. Just heat them until they are warmed through. Enjoy the tasty goodness! The oven provides the best texture, while microwaving is quicker. To reheat in the oven, set it to 350°F. Place the bombs on a baking sheet and heat for about 10-15 minutes. This method keeps them crispy. If you’re in a hurry, use the microwave. Heat them for about 30 seconds, but be aware they may lose some crispness. Yes, you can prepare and refrigerate them before baking. Simply follow the steps until you fill the dough. After filling, place the bombs on a baking sheet, cover them, and chill. You can bake them the next day. Just add a few extra minutes to the baking time if they are cold from the fridge. Ranch, barbecue, and garlic aioli are popular choices. Each sauce brings out the flavors in the bombs. You can also try honey mustard or spicy ketchup for a twist. Feel free to mix and match to find your favorite! Use a meat thermometer to check for an internal temperature of 160°F. This ensures the beef is safe to eat. Insert the thermometer into the center of one bomb. If it reads 160°F, you’re good to go! Always check a couple of bombs to be sure. These Garlic Parmesan Cheeseburger Bombs are easy to make and full of flavor. You learned about essential ingredients, step-by-step instructions, and useful tips. Variations can keep your meals exciting, while storage info helps you use leftovers wisely. Remember, these bombs are great for sharing, and you can customize them to suit your taste. I hope you enjoy making and eating them as much as I do. Happy cooking!

Garlic Parmesan Cheeseburger Bombs Tasty and Simple Dish

Are you ready to elevate your snack game? Garlic Parmesan Cheeseburger Bombs are a tasty, easy-to-make dish that everyone will

- 1 can (15 oz) chickpeas, drained and rinsed - 1/4 cup plain Greek yogurt - 1 tablespoon mayonnaise - 1 tablespoon Dijon mustard - 1/4 cup red onion, finely chopped - 1/4 cup cucumber, diced - 1/2 cup cherry tomatoes, halved - 1 tablespoon fresh dill, chopped (or 1 teaspoon dried dill) - Salt and freshly cracked black pepper - 4 slices whole grain bread - 1 cup shredded cheese (mozzarella or cheddar) - Olive oil for drizzling When you make Chickpea Salad Melts, each ingredient plays a key role. I love using chickpeas as the base. They add protein and fiber. They also have a great texture. Rinse them well to remove any canning liquid. This keeps the salad fresh. Next, I add Greek yogurt and mayonnaise. They give the dish creaminess. The yogurt adds a nice tang. I use Dijon mustard for a little kick. It lifts the flavors. For veggies, I chop red onion, cucumber, and cherry tomatoes. The red onion adds sharpness. The cucumber gives crunch. Cherry tomatoes bring sweetness. Fresh dill makes it even better. I often use it to brighten the taste. I choose whole grain bread for a hearty base. It holds up well to the salad. Lastly, I top the melts with shredded cheese. Mozzarella is my go-to for melting. Cheddar is great too. A drizzle of olive oil helps the bread crisp up nicely. All these ingredients come together to create a crunchy and flavorful delight. You can find the full recipe to make these delicious melts. To start making the chickpea salad, you need to mash the chickpeas. I like to use a fork for this. You want them to be slightly chunky. This gives the salad a nice texture. Next, add the Greek yogurt, mayonnaise, and Dijon mustard into the bowl. These ingredients add creaminess and a tangy kick. Then, it's time to mix in the diced veggies. I add red onion for sharpness, cucumber for crunch, and halved cherry tomatoes for sweetness. Finally, season the salad with salt and freshly cracked black pepper. Stir everything together until it is well combined. This step lets the flavors blend perfectly. Now let’s toast the bread. First, preheat your broiler to high. This will help us get that nice golden crust. On a baking sheet, lay out the slices of whole grain bread. Drizzle olive oil on top. This adds flavor and helps the bread crisp up. Place the baking sheet under the broiler. Toast the bread for about 2-3 minutes. Keep an eye on it! You want it golden brown, not burnt. With the bread toasted, it’s time to assemble the melts. Take the chickpea salad mixture and spoon it onto each slice of bread. Make sure to spread it evenly. Next, top each slice with shredded cheese. I recommend using mozzarella or cheddar for the best melt. Now, return the baking sheet to the broiler. Broil the melts for about 2-4 minutes. You want the cheese to be melted and bubbly. Keep watching closely to avoid burning. After that, let the Chickpea Salad Melts cool for a minute before serving. This helps avoid burning your mouth on hot cheese. Enjoy your crunchy and flavorful delight! To make the best chickpea salad, start by mashing the chickpeas. Use a fork and mash them until they are slightly chunky. Leave some whole chickpeas for texture. This mix gives the salad a great feel. Next, focus on flavor. Add Greek yogurt, mayonnaise, and Dijon mustard for creaminess and tang. Then, mix in finely chopped red onion, diced cucumber, and halved cherry tomatoes. Fresh dill adds a herby note. Don't forget to season with salt and cracked black pepper. Taste as you go to balance the flavors. For a perfect melt, choose cheese that melts well, like mozzarella or cheddar. These cheeses give a nice stretch and flavor. Spread the shredded cheese evenly on top of the salad mixture. When broiling, keep an eye on the cheese. It can burn quickly. Broil until the cheese is bubbling and golden brown, which usually takes 2-4 minutes. This step makes the melts truly delicious. Serve the chickpea salad melts on a wooden cutting board for a rustic look. This presentation makes the dish pop. Garnish with a sprinkle of fresh dill to add color. Pair the melts with a side of mixed greens. This adds freshness and crunch to your meal. You can also serve them with veggie sticks or a light soup for a full meal. Enjoy these tasty treats with friends or family! {{image_4}} You can switch up the main beans or legumes in this dish. For example, try black beans or kidney beans instead of chickpeas. This change can give you a new taste and texture. Each bean brings its own flavor, making it fun to experiment. If you want a vegetarian alternative for mayonnaise, consider using avocado or hummus. Both options add creaminess and keep the dish light. You can also use silken tofu blended until smooth for a unique twist. To make your Chickpea Salad Melts even better, add herbs and spices. Fresh parsley, cilantro, or chives can bring bright flavors. A pinch of smoked paprika can add a subtle smokiness. Don't be shy; try adding your favorite herbs! When it comes to cheese, you can choose different types for various tastes. Creamy goat cheese offers a tangy kick. For a stronger flavor, use feta or blue cheese. Each cheese can change the whole vibe of your melts. If you follow a gluten-free diet, use gluten-free bread. Many brands offer tasty options that work well in this recipe. Just check the label to ensure it meets your needs. For vegan variations, swap out the Greek yogurt and cheese. Use a vegan yogurt for creaminess and a plant-based cheese that melts well. Nutritional yeast can also add a cheesy flavor without dairy. These swaps keep your dish delicious while fitting your diet. For the full recipe, check back to gather all these tips into one tasty dish! To keep your Chickpea Salad Melts fresh, follow these steps: - Let the melts cool to room temperature. - Place them in an airtight container. - Store in the fridge for up to three days. Using glass containers works best. They help keep flavors intact. If you have extra chickpea salad left, store it in a separate container. This way, it stays fresh longer. Reheating your Chickpea Salad Melts can be easy while keeping the texture. Here are some methods: - Oven: Preheat your oven to 350°F (175°C). Place the melts on a baking sheet. Heat for about 10 minutes or until warm. - Microwave: If you're in a hurry, use the microwave. Heat for 30 seconds, check, then heat in 15-second bursts until warm. When using the oven, it helps to cover the melts with foil. This keeps them from drying out. For the microwave, make sure to eat them quickly. They can get soggy if left too long. Enjoy your tasty leftovers! Yes, you can prepare the chickpea salad mix a day in advance. Store it in an airtight container in the fridge. Keep the salad and bread separate until you are ready to bake. This keeps the bread from getting soggy. When you are ready to serve, toast the bread and add the salad mix on top. Broil until the cheese melts for a fresh taste. Freezing is not the best option for Chickpea Salad Melts. The bread can become soggy when thawed. If you still want to freeze, do it without the bread. Place the salad mix in a freezer-safe container. Thaw it in the fridge overnight before using. You can make fresh toast when ready to serve. You can get creative with toppings! Here are some great ideas: - Avocado slices for creaminess - Fresh spinach for added crunch - Pickles for a tangy kick - Hot sauce for some heat - Crushed red pepper flakes for extra spice These toppings can change the flavor and make your melts even more delicious! Chickpea Salad Melts combine simple, nutritious ingredients for a tasty meal. You learned how to prepare the salad, toast the bread, and assemble the melts. Along with helpful tips on variations and storage, this recipe fits many diets. You can easily customize it with other ingredients or flavors. Enjoy this nutritious dish with your favorite sides. Try it today, and share it with your loved ones!

Chickpea Salad Melts Crunchy and Flavorful Delight

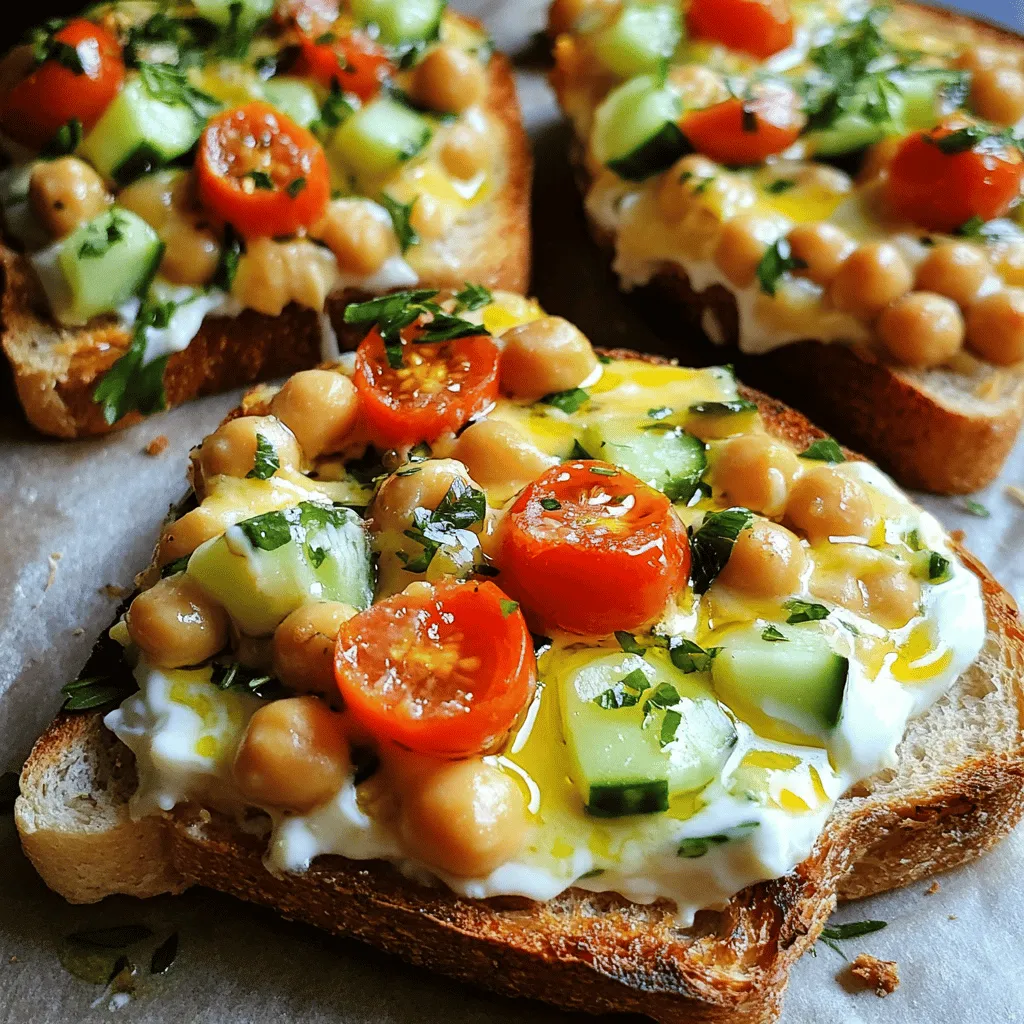
Craving a tasty and wholesome meal? You’ll love my Chickpea Salad Melts! This crunchy and flavorful dish combines simple ingredients

To make a delicious Crockpot Pierogi Casserole, you need simple ingredients. Here’s what you will need: - 1 package (16 oz) frozen pierogi (various fillings) - 1 medium onion, diced - 2 cups shredded potatoes - 1 cup sour cream - 1 cup shredded sharp cheddar cheese - 1 cup chicken or vegetable broth - 2 tablespoons olive oil - 1 teaspoon garlic powder - 1 teaspoon onion powder - Salt and pepper to taste - Fresh chives for garnish These ingredients combine to create a warm and filling dish. The frozen pierogi cut down on prep time. Choose your favorite filling, like potato and cheese or sauerkraut. The onion adds sweetness and flavor. Shredded potatoes give a great texture, while sour cream and cheddar cheese add creaminess. Using broth keeps everything moist while cooking. The olive oil helps the onions cook evenly. Garlic and onion powders boost the flavor, making every bite tasty. Finally, fresh chives add color and a light onion flavor when serving. For more detailed instructions, check out the full recipe. To start, we need to sauté the onions. Heat 2 tablespoons of olive oil in a medium skillet over medium heat. Add 1 diced onion to the pan. Stir it occasionally until it turns soft and clear, about 5-7 minutes. This step brings out the sweet flavor of the onion. Next, we will layer the pierogi and potatoes. Take half of the 16 oz package of frozen pierogi and place them at the bottom of the crockpot. Use your favorite filling, like potato and cheese. Then, sprinkle half of the 2 cups of shredded potatoes over the pierogi. Make sure they cover the pierogi well. Now, add half of the sautéed onions on top of the potatoes. Spoon half of the 1 cup of sour cream over this layer. Finally, sprinkle half of the 1 cup of shredded cheddar cheese on top. Repeat this layering with the rest of the ingredients for a great look and taste. For cooking, start by layering the casserole. After the last layer, carefully pour 1 cup of chicken or vegetable broth over everything. This will keep the casserole moist. Next, add your seasonings. Sprinkle with 1 teaspoon of garlic powder, 1 teaspoon of onion powder, and salt and pepper to taste. This adds nice flavors to the dish. Now, cover the crockpot and set it to cook. If using low heat, cook for 6-8 hours. If you are short on time, high heat works in 3-4 hours. You want the potatoes to be soft and the cheese to be bubbly. Once it's done, serve the casserole warm. A great way to present it is to scoop it into individual bowls directly from the crockpot. For a fresh touch, garnish each bowl with chopped chives. To balance the rich flavors of the casserole, consider pairing it with a side of crisp mixed greens or a light salad. This adds color and crunch to your meal. Enjoy your delicious Crockpot Pierogi Casserole! Choosing the right type of pierogi is key. I like using potato and cheese pierogi for this dish. They add a creamy texture and rich flavor. You can also try sauerkraut or meat-filled pierogi for a twist. When using frozen pierogi, you can cook them straight from the bag. If you use fresh pierogi, reduce the cooking time. Fresh pierogi only need about 4-5 hours on low. This keeps them tender and delicious. For proper cooling, let the casserole sit at room temperature first. Once cool, store it in an airtight container. This helps keep it fresh. You can keep it in the fridge for up to three days. Reheating is easy. I recommend using the microwave for quick meals. Heat in short bursts, stirring in between. This ensures even warming. If you want a crispy top, use the oven. Bake at 350°F for about 15-20 minutes. To boost flavor, try adding more seasonings. A dash of smoked paprika or a pinch of cayenne can add warmth. You can also mix in fresh herbs like dill or parsley for brightness. Feel free to incorporate other veggies or proteins too. Spinach, mushrooms, or bell peppers add color and nutrition. If you like meat, diced ham or cooked sausage can give it depth. {{image_4}} You can swap out the cheese in this dish. For a milder flavor, use mozzarella. For a sharper taste, try gouda or pepper jack. Each cheese brings a unique twist to the dish. If you want to add veggies, consider spinach, mushrooms, or bell peppers. These will not only add color but also boost nutrition. Just sauté any fresh vegetables before layering them into the casserole. It helps to enhance their flavor. For gluten-free options, choose gluten-free pierogi or make your own. Many stores now offer gluten-free varieties. Ensure your broth is also gluten-free, as some brands add gluten. If you prefer vegetarian or vegan adaptations, skip the meat-filled pierogi. Use vegetable broth instead of chicken broth. You can replace sour cream with a dairy-free yogurt. This keeps the creaminess while making it plant-based. To serve a large gathering, simply double the recipe. Use a larger crockpot, and adjust the cooking time if needed. Just make sure all layers are still visible for a nice look. If you want a smaller portion, cut the recipe in half. This works well for a cozy dinner or meal prep. Adjust the cooking time to suit the smaller size. The flavors will stay just as rich and delicious. For the full recipe, check out the detailed steps above. After you make this delicious casserole, let it cool. Place it in an airtight container. Keep it in the fridge. It stays fresh for about 3 to 5 days. - Use glass or plastic containers with tight lids. - Smaller containers are better for easy portions. If you want to save it for later, freezing works well. Cut the casserole into portions. Wrap each piece tightly in plastic wrap. Place them in a freezer bag. You can store it in the freezer for up to 3 months. - Thaw it overnight in the fridge before reheating. - To reheat, use the oven at 350°F for about 20-30 minutes or until heated through. The casserole lasts about 3 to 5 days in the fridge. If stored properly in the freezer, it can last up to 3 months. Always check for any signs of spoilage, like off smells or discoloration, before enjoying your leftovers. To make this dish, you start by sautéing diced onions in olive oil. This brings out their sweet flavor. Next, layer half of the frozen pierogi in your crockpot. Follow this with half of the shredded potatoes, onions, sour cream, and cheese. Repeat the layering with the remaining ingredients. Finally, pour broth over the layers and season. Cover the crockpot and cook on low for 6-8 hours or high for 3-4 hours. The result is a warm, cheesy goodness that fills the kitchen with a delightful aroma. For the full recipe, please refer to the instructions above. Yes, you can use fresh pierogi! They will cook faster than frozen ones. You should reduce the cooking time to about 4-6 hours on low or 2-3 hours on high. Fresh pierogi often have a softer texture, which makes them blend well in the casserole. Just remember to check them occasionally to avoid overcooking. I love to pair this casserole with a light salad or steamed veggies. A crisp green salad adds a fresh contrast. You can also serve it with applesauce or a dollop of sour cream on the side. These sides balance the richness of the casserole and make for a complete meal. You’ll know the casserole is done when the potatoes are tender and the cheese is melted. A good test is to poke a fork into the dish. If it goes in easily, it’s ready! The top should be bubbly and golden brown, which means it has cooked through properly. Enjoy the wonderful mix of flavors! This blog post covered how to make a tasty Crockpot Pierogi Casserole. You learned about the key ingredients, step-by-step instructions, and helpful tips. We explored variations, storage info, and answered common questions. In the end, cooking is fun and creative. Feel free to customize this dish to fit your taste. Enjoy your time in the kitchen, and make this recipe your own!

Crockpot Pierogi Casserole Easy Comfort Food Dish

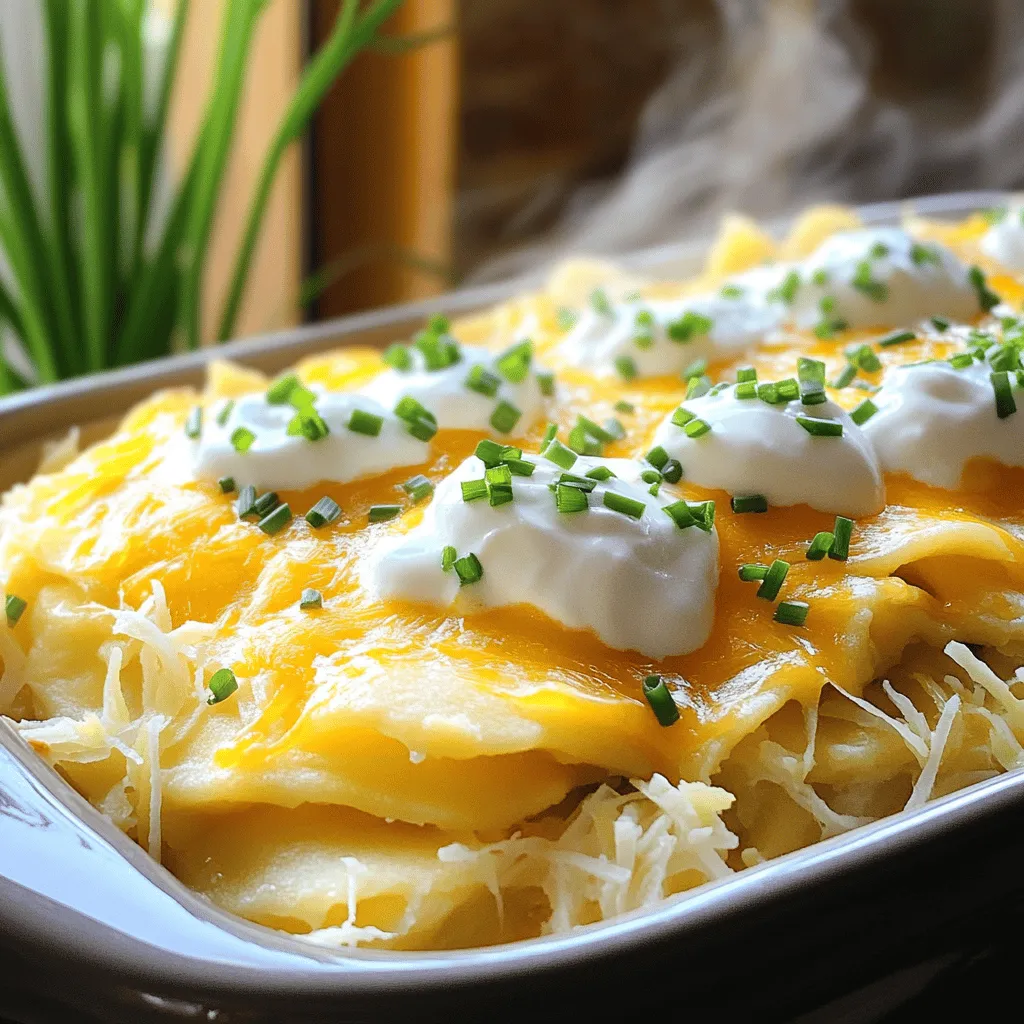
Craving a warm and satisfying meal? Your perfect solution is here with my easy Crockpot Pierogi Casserole. This comfort dish

For a rich Coconut Panna Cotta, you need just a few key items: - 2 cups creamy coconut milk - 1 cup rich heavy cream - 1/2 cup granulated sugar - 2 teaspoons powdered gelatin - 3 tablespoons cold water - 1 teaspoon pure vanilla extract - A pinch of fine salt These ingredients come together to create a smooth and creamy dessert. The coconut milk gives a tropical flavor. The heavy cream adds richness. Sugar sweetens it all perfectly. You can enhance your Coconut Panna Cotta with some fun toppings: - Fresh mango slices - Toasted coconut flakes These garnishes add color and texture. They also bring a burst of flavor. Feel free to mix and match! If you have dietary needs, you can make some easy swaps: - Use almond milk for a nutty taste. - Substitute heavy cream with coconut cream for a dairy-free option. - For a vegan version, try agar-agar instead of gelatin. These substitutions keep your Coconut Panna Cotta tasty while fitting your diet. You can enjoy this dessert no matter your needs! Check the Full Recipe for more details. Start by blooming the gelatin. Take a small bowl and sprinkle the powdered gelatin over the cold water. Let it soak for about 5 minutes. You will see it form a gel-like texture. This step is key for a smooth panna cotta. Next, prepare the coconut mixture. In a medium saucepan, mix together the coconut milk, heavy cream, granulated sugar, pure vanilla extract, and a pinch of fine salt. Heat this over medium heat. Stir gently and often until the sugar dissolves completely. Make sure it is warm but do not let it boil. Once the coconut mixture is warm, add the bloomed gelatin. Stir this mix well for a few minutes. You want it to be smooth and fully combined. After that, take the saucepan off the heat. Let it cool a bit at room temperature. Now, pour the mixture into individual ramekins or cups. Cover them with plastic wrap and refrigerate for at least 4 hours. When ready to serve, run a sharp knife along the edge for easy removal. You can invert them onto plates or serve them in the ramekins. Top each with fresh mango slices and toasted coconut flakes for a lovely touch. For the full recipe, you can refer back to the ingredients listed above. To make the best coconut panna cotta, focus on texture. Use full-fat coconut milk for creaminess. It gives a rich taste and smooth mouthfeel. Heat the mixture gently to avoid boiling. Boiling can make the panna cotta grainy. After adding gelatin, stir until fully dissolved. This ensures a silky finish. Watch for a few common pitfalls. First, don’t skip blooming the gelatin. This step helps it dissolve properly. If you add it directly to the hot mix, it may clump. Second, keep an eye on the temperature. Too much heat will ruin the panna cotta. Lastly, don’t rush the setting time. Let it chill for at least four hours. This helps it firm up nicely. For the best taste, serve panna cotta chilled. The coolness enhances the coconut flavor. If it’s too cold, the taste might dull. Aim for a temperature just above refrigerator cold. Before serving, let it sit for a few minutes at room temperature. This small trick brings out all the lovely flavors. For a full recipe, check out the Dreamy Coconut Panna Cotta section. {{image_4}} You can make a vegan version of coconut panna cotta. Simply swap out the heavy cream with more coconut milk or use a plant-based cream. Look for vegan gelatin or agar-agar as a thickener. This way, you keep the creamy texture without using animal products. It still tastes great and is perfect for everyone! Want to switch up the flavor? You can add coffee, citrus, or even chocolate to the mixture. For coffee, mix in a strong brewed coffee while heating the coconut mixture. If you love citrus, add the zest of an orange or lemon for a burst of freshness. These flavors blend well with coconut and create a unique twist. Layering coconut panna cotta with fruit purees is a fun idea. You can make a mango or raspberry puree by blending the fruit with a bit of sugar. Pour a layer of the puree in the bottom of your serving cups before adding the coconut mixture. This creates a beautiful look and adds a refreshing taste to each bite. For the full recipe, check out the details above! To keep your coconut panna cotta fresh, store it in the fridge. Use airtight containers or cover each ramekin with plastic wrap. This helps prevent any odors from mixing in. Keep the panna cotta away from foods with strong smells. You can keep coconut panna cotta in the fridge for up to five days. After that, the texture may change. It’s best to enjoy it fresh for the best taste. If you plan to serve it later, make it ahead of time and chill. Coconut panna cotta is best served cold. If you need to reheat it, do so gently. Place the ramekin in warm water for a few minutes. Avoid using the microwave, as it can ruin the texture. For the full recipe, check out the dreamy coconut panna cotta! Yes, you can make Coconut Panna Cotta ahead of time. This dessert actually tastes better when it sits in the fridge. You can prepare it a day or two before your event. Just make sure to cover it well with plastic wrap. This helps keep it fresh and prevents any odors from the fridge. If you want a vegan option, use agar-agar instead of gelatin. Agar-agar comes from seaweed and works well in desserts. You can find it in health food stores or online. Use the same amount as gelatin in the recipe. Just remember, agar-agar needs to boil to activate, unlike gelatin. To check if the panna cotta has set, gently shake the ramekin. If it jiggles slightly in the middle and looks firm around the edges, it’s ready. The panna cotta should not be liquid but a soft, smooth texture. After chilling for at least four hours, it should hold its shape when served. Coconut panna cotta is easy and fun to make. We covered the main ingredients, preparation steps, and helpful tips to ensure a smooth texture. You can customize it with flavors or garnishes to match your tastes. Remember, storing it right will keep it fresh. Enjoy making this treat for yourself or others. Use what you learned here to wow your friends and family!

Coconut Panna Cotta Creamy and Simple Dessert Recipe

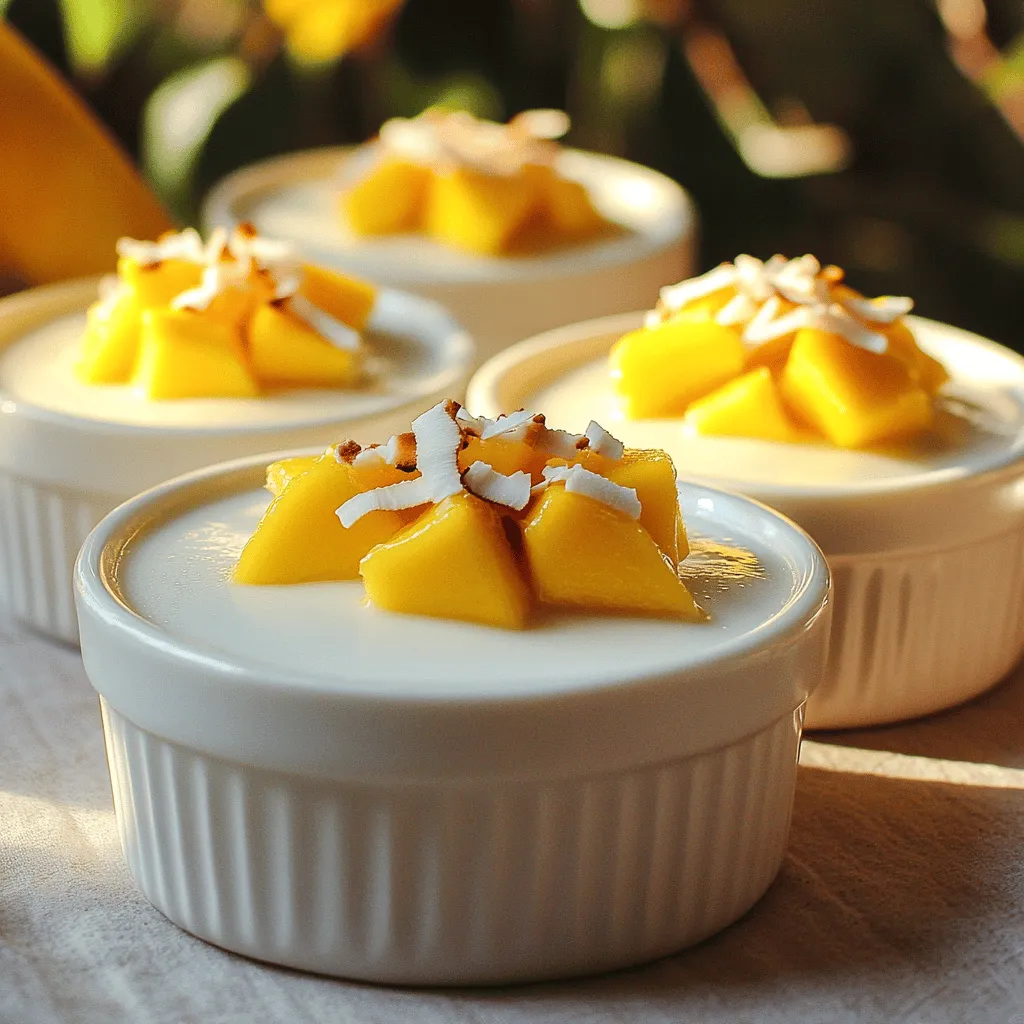
Looking for a simple yet creamy dessert that impresses? You’ll love this Coconut Panna Cotta recipe! With just a few

- 1 pound chicken tenders - 1 cup panko breadcrumbs - 1/2 cup freshly grated Parmesan cheese The main components of this dish are simple yet crucial. Chicken tenders serve as the protein base, providing a tender, juicy bite that pairs perfectly with the crispy coating. I always choose panko breadcrumbs for their light texture and crunch. The freshly grated Parmesan cheese adds a rich, savory layer that enhances the flavor. - 1 teaspoon garlic powder - 1 teaspoon onion powder - 1 teaspoon dried Italian seasoning - Salt and freshly ground black pepper Seasonings transform ordinary chicken into something special. Garlic powder lends a warm, aromatic touch. Onion powder adds sweetness and depth. Dried Italian seasoning gives a hint of herbs that ties everything together. Don’t forget to use salt and freshly ground black pepper to bring out all the flavors. - 2 large eggs - 1 tablespoon Dijon mustard - Cooking spray or olive oil for greasing Binding ingredients are essential for holding the coating onto the chicken. Eggs create a sticky surface that helps the breadcrumbs adhere. Adding Dijon mustard gives a subtle tang that complements the chicken. Finally, using cooking spray or olive oil ensures your tenders bake up nice and crispy. For the complete recipe, check the Full Recipe section. - Preheat the oven to 425°F (220°C). - Line a baking sheet with parchment paper. This makes cleanup easy and keeps the tenders from sticking. - In a shallow dish, combine 1 cup of panko breadcrumbs, 1/2 cup of grated Parmesan cheese, 1 teaspoon of garlic powder, 1 teaspoon of onion powder, 1 teaspoon of dried Italian seasoning, and salt and pepper. Mix it well. - In another shallow bowl, whisk together 2 large eggs and 1 tablespoon of Dijon mustard. This will bind the coating to the chicken. - Take each chicken tender and dip it into the egg mixture. Make sure to let the excess drip off. - After that, coat the tender in the breadcrumb mixture. Press gently to ensure it sticks. Lay the breaded tenders on the prepared baking sheet. - Lightly spray or drizzle olive oil on top of the chicken tenders. This helps them crisp up nicely. - Bake for 15-20 minutes. Check for a golden brown color and an internal temperature of 165°F (74°C). - For an extra crunch, you can broil the tenders for the last 2-3 minutes. Just watch closely so they don’t burn. These steps will give you oven-baked crispy Parmesan chicken tenders that are sure to impress. For the full recipe, please refer to the above section. To get that perfect crunch, use panko breadcrumbs. They are lighter and crispier than regular breadcrumbs. This gives your chicken tenders a delightful texture. Lightly oiling the tenders helps too. A quick spray of cooking oil or a drizzle of olive oil keeps the breading from getting soggy and promotes golden-brown color. Want more flavor? Try adding spices like smoked paprika or cayenne pepper. These can bring a nice kick to your chicken. You can also mix in some herbs, like dried oregano or thyme, for extra taste. Pair your chicken tenders with dipping sauces. Marinara sauce or honey mustard work great. They add a nice touch and complement the flavors well. When serving, arrange the chicken tenders on a nice platter. You can place a small bowl of sauce next to them for dipping. A sprinkle of fresh parsley or basil on top adds color and a fresh aroma. This makes the dish look appealing and inviting. For a fun twist, serve them with crunchy veggies or a side salad for a complete meal. {{image_4}} You can change the texture by using different breadcrumbs. Regular breadcrumbs make a fine coating. Panko breadcrumbs, however, give a crunchier texture. You can also spice up the breading. Adding herbs like oregano or basil brings fresh flavor. You could even try a dash of paprika for a subtle kick. Chicken tenders are great, but you can switch things up! Chicken breasts or thighs work well too. They offer a bit more juiciness. If you want a vegetarian option, try using tofu. Press the tofu to remove moisture, then cut it into strips. This makes for a solid base to soak up all those delicious flavors. Don’t be afraid to play with flavors! Different cheeses can add a unique twist. Try using mozzarella or cheddar for a gooey texture. You can also add zest from a lemon or lime for a bright taste. This simple addition can elevate the dish and brighten up each bite. For the full recipe, check out the detailed instructions above. To keep your leftovers fresh, store them in an airtight container. Place the chicken tenders in the fridge right after they cool down. They will stay tasty for up to three days. Make sure not to leave them out at room temperature for more than two hours. This helps avoid spoilage. Freezing chicken tenders is a great way to save them for later. First, let them cool completely. Then, place them in a freezer-safe bag or container. Try to remove as much air as possible to prevent freezer burn. They can last for up to three months in the freezer. To reheat, bake them in the oven at 375°F (190°C) until heated through. This keeps the outside crispy and the inside juicy. In the refrigerator, chicken tenders last about three days. Signs of spoilage include a sour smell, slimy texture, or discoloration. If you notice any of these, it’s best to toss them out. Always trust your senses when it comes to food safety. Enjoy your Oven-Baked Crispy Parmesan Chicken Tenders with confidence, knowing they are stored properly! For the full recipe, refer to the main article. To make chicken tenders crispy, use panko breadcrumbs. They give a great crunch. Lightly oil the chicken tenders before baking. This helps them brown nicely. Bake at 425°F for 15-20 minutes. For extra crispiness, broil for the last few minutes. Watch closely to avoid burning. Yes, you can prepare chicken tenders ahead of time. Bread the tenders and place them on a baking sheet. Cover them with plastic wrap and store in the fridge. They can stay fresh for up to 24 hours. Just bake them when you're ready to eat. Parmesan chicken tends to pair well with many sauces. Here are some great options: - Marinara sauce - Honey mustard - Barbecue sauce - Ranch dressing You can also make a quick dipping sauce by mixing yogurt with herbs. Explore these flavors to find your favorite! For the full recipe, check out the link. You now have a simple way to make tasty Parmesan chicken tenders. We covered the main ingredients, cooking steps, tips for crispiness, and how to store leftovers. Don’t forget, you can mix up the recipe by using different proteins or spices. Whether for a family meal or a fun snack, these tenders are a hit. Enjoy the process and feel free to get creative as you cook! You will impress everyone with your delicious results.

Oven-Baked Crispy Parmesan Chicken Tenders Delight

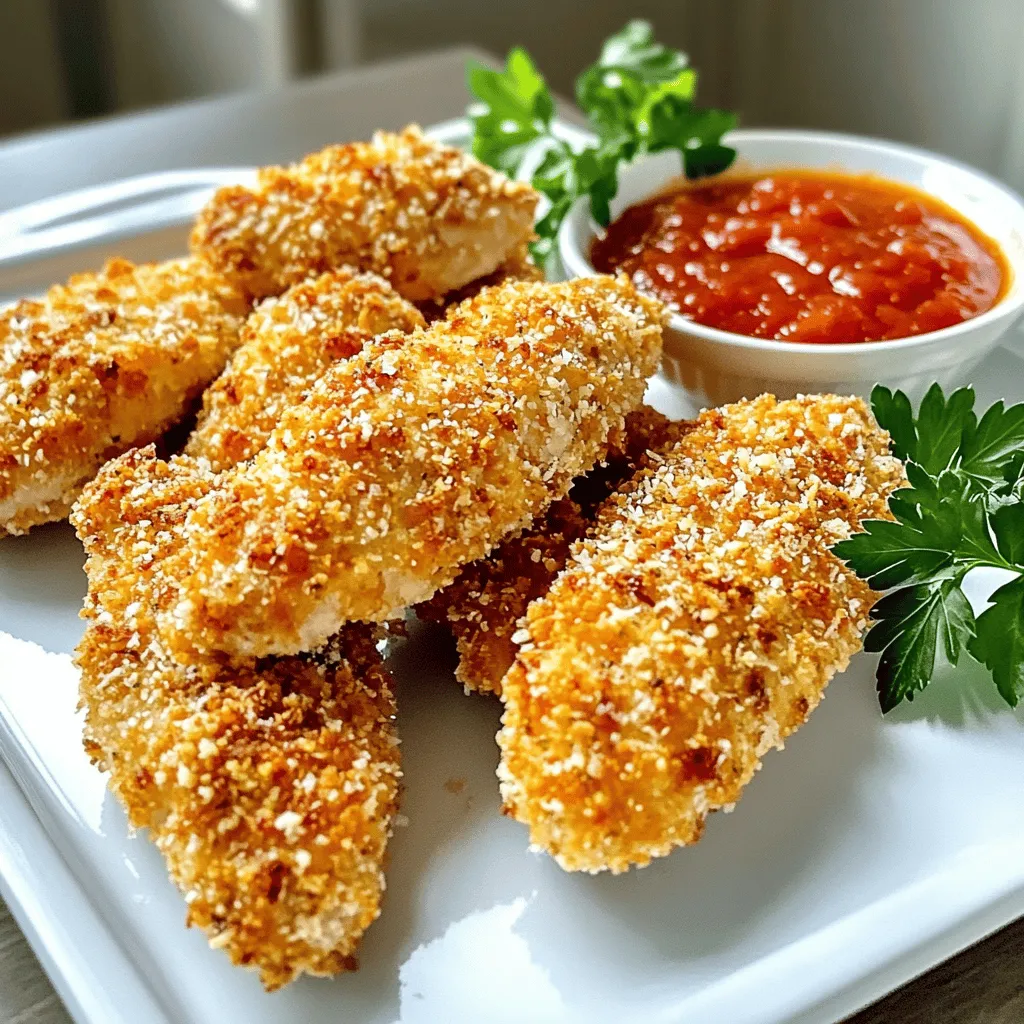
If you’re craving crunchy, cheesy goodness, look no further! My Oven-Baked Crispy Parmesan Chicken Tenders are a must-try. You’ll love

To make these delightful bites, gather these key ingredients: - 1 cup pancake mix - 3/4 cup buttermilk - 1 tablespoon maple syrup - 1 large egg - 1/2 pound breakfast sausage, fully cooked and crumbled - 1/2 cup shredded cheddar cheese - 1 tablespoon butter, for cooking - Additional maple syrup for serving These ingredients work together to create a tasty treat. The pancake mix forms the base, while the buttermilk adds fluffiness. Maple syrup gives sweetness, and the egg binds it all. Breakfast sausage brings a savory touch, and cheddar cheese adds flavor. You can customize your Mini McGriddle Bites with fun add-ins. Here are some ideas: - Bacon bits: Add for extra crunch. - Chopped green onions: For a fresh bite. - Spices: Try a pinch of cayenne for heat. - Fruit: Add mashed bananas or blueberries for sweetness. These options help you make the recipe your own. Mix and match to create your favorite flavors. Mini McGriddle Bites are not only tasty but also a fun snack. Here’s a simple look at their nutrition: - Calories: About 200 per serving - Protein: Approximately 10 grams - Fat: Around 9 grams - Carbohydrates: About 25 grams They give you energy and keep you satisfied. You can enjoy them for breakfast or as a snack. Just remember to enjoy them in moderation, especially with that sweet maple syrup! Check out the Full Recipe for all the details. Start by mixing the pancake mix, buttermilk, maple syrup, and egg in a bowl. Stir until just combined. It’s okay if the batter has a few lumps. Next, fold in the crumbled sausage and cheddar cheese. This adds great flavor and texture. Preheat your skillet over medium heat. Add butter to coat the pan. Once melted, scoop small amounts of batter onto the skillet. Aim for about 2 inches wide. Cook for 2-3 minutes until bubbles form. Then, flip them over and cook for 1-2 more minutes. You want them golden brown. Remove the cooked mini pancakes from the skillet. Repeat with any leftover batter, adding more butter if needed. For serving, stack two mini pancakes with a bit of syrup between them. Enjoy this tasty treat! Prep time is just 15 minutes. Cooking takes about 30 minutes. To save time, prepare the batter ahead of time. You can mix it and store it in the fridge for later. Also, cook in batches. This lets you serve everyone faster. You will need: - Large mixing bowl - Skillet or flat griddle - Spoon for scooping batter - Spatula for flipping pancakes - Measuring cups and spoons These simple tools will help you make perfect Mini McGriddle Bites. Check the [Full Recipe] for all details on how to make this dish. When making Mini McGriddle Bites, it’s easy to make a few mistakes. Here are some common ones to watch out for: - Overmixing the batter: Mixing too much makes tough pancakes. Stir just until combined. - Skipping the butter: Butter keeps the pancakes from sticking. Always add it to the pan. - Not using a hot skillet: If the pan isn’t hot, pancakes won’t cook well. Preheat it properly. - Ignoring the size: Make sure to scoop the batter to the right size. Aim for about 2 inches. To elevate your Mini McGriddle Bites, try these expert tips: - Use fresh ingredients: Fresh buttermilk and eggs make a big difference in flavor. - Add spices: A pinch of cinnamon or nutmeg in the batter adds warmth and depth. - Experiment with cheese: Swap cheddar for pepper jack or feta for a twist. - Check for doneness: Look for golden brown color and bubbles on the surface before flipping. Serving Mini McGriddle Bites well can make them even more special. Here are some fun ideas: - Stack them high: Create a tall stack for a fun presentation. Drizzle with syrup on top. - Add fruit: Fresh berries or banana slices add color and taste. They also balance the sweetness. - Pair with drinks: Serve with coffee, tea, or even a fruit smoothie for a full meal. - Make it a party: Set up a mini McGriddle bar with toppings like whipped cream, nuts, or additional syrup. For more details, check out the Full Recipe for a complete guide on making these tasty snacks. Enjoy your cooking! {{image_4}} You can make Mini McGriddle Bites a bit different. Just change some ingredients! Start by adding spices. A pinch of cinnamon gives them a sweet twist. For those who love heat, try adding a dash of cayenne pepper. This adds a fun kick to your bites! You can also switch up the cheese. Use pepper jack for a spicy flavor or cream cheese for a creamy touch. The options are endless! Want a new flavor? Swap out the sausage for bacon or turkey bacon. This change keeps the bites tasty and fun. You can even add veggies! Chopped spinach or diced bell peppers work well. This makes the bites colorful and nutritious. Change the syrup too! Try flavored syrups like raspberry or blueberry for a fruity kick. Each time you make them, you can have a new treat! If you need gluten-free bites, use gluten-free pancake mix. This keeps the texture light and fluffy. You can also make vegan Mini McGriddle Bites. Replace the egg with a flaxseed meal mixture. Use non-dairy milk instead of buttermilk. For the sausage, try crumbled tempeh or mushrooms. These swaps keep flavor while meeting dietary needs. Everyone can enjoy these bites, no matter their diet! To keep your leftover mini McGriddle bites fresh, place them in an airtight container. This helps to lock in moisture and flavor. Store them in the fridge for up to three days. If you want to keep them longer, freezing is a great option. When you are ready to enjoy your bites again, reheating is simple. You can use a microwave or a skillet. For the microwave, place a few bites on a plate and heat for about 30 seconds. Check if they are warm enough; if not, heat in 15-second intervals. If using a skillet, heat over low heat for a few minutes until warmed through. To freeze your mini McGriddle bites, make sure they are fully cooled first. Then, place them in a single layer on a baking sheet. Freeze them until solid, then transfer to a freezer-safe bag. They can last up to three months in the freezer. When you want to eat them, thaw overnight in the fridge before reheating. This method helps retain their taste and texture. Enjoy your tasty snack any time! Mini McGriddle Bites are made from simple ingredients. You need pancake mix, buttermilk, and maple syrup. Add a large egg for binding. Crumbled breakfast sausage gives them flavor and texture. Shredded cheddar cheese adds a nice touch. You can't find Mini McGriddle Bites at most stores. They are usually homemade. However, some fast-food places might sell similar items. Making them at home is easy and fun. You can use the full recipe to make your own bites. To enhance the flavor, try different spices. A pinch of cinnamon can add warmth. You can use flavored sausage for a twist. Fresh herbs like chives or parsley can brighten the taste. Pair them with unique dips like spicy mustard or fruit preserves. Here’s the full recipe to make Mini McGriddle Bites: - 1 cup pancake mix - 3/4 cup buttermilk - 1 tablespoon maple syrup - 1 large egg - 1/2 pound breakfast sausage, fully cooked and crumbled - 1/2 cup shredded cheddar cheese - 1 tablespoon butter, for cooking - Additional maple syrup for serving 1. In a large mixing bowl, combine the pancake mix, buttermilk, maple syrup, and egg. 2. Gently stir until combined, leaving some lumps. 3. Fold in crumbled sausage and cheese. 4. Preheat a skillet over medium heat and melt the butter. 5. Scoop small amounts of batter onto the skillet, about 2 inches wide. 6. Cook for 2-3 minutes until bubbles form, then flip and cook for 1-2 more minutes. 7. Remove and repeat with the rest of the batter. 8. Stack two mini pancakes with syrup in between and enjoy! In this post, we explored how to make Mini McGriddle Bites. We covered the required ingredients and possible add-ins for flavor. I shared step-by-step instructions for cooking and managing your time. You learned tips to avoid mistakes and serve these bites well. Finally, we discussed how to store and reheat any leftovers. These bites are fun and easy to customize. Enjoy creating your perfect Mini McGriddle Bites!

Mini McGriddle Bites Tasty Snack for Any Occasion

Are you ready to take your snack game to the next level? Mini McGriddle Bites are the perfect treat for

- 1 ½ cups graham cracker crumbs - ½ cup unsalted butter, melted - 2 tablespoons granulated sugar - 16 oz cream cheese, softened at room temperature - 1 cup powdered sugar - 2 teaspoons pure vanilla extract - 3 large eggs, at room temperature - 1 cup sour cream - 1 tablespoon fresh lemon juice - 2 cups fresh strawberries, hulled and sliced - 1 tablespoon granulated sugar - 1 tablespoon fresh lemon juice When making strawberry cheesecake, the right ingredients matter. The crust brings a nice crunch. The filling is rich and creamy. The topping adds fresh flavor. For the crust, I use graham cracker crumbs. They give a sweet and slightly nutty base. The melted butter binds the crumbs. Sugar adds a touch of sweetness. The filling uses cream cheese, which gives it that classic cheesecake taste. I add powdered sugar for sweetness and vanilla for flavor. Eggs help set the filling. Sour cream makes it smooth and rich. A splash of lemon juice brightens the taste. For the topping, I use fresh strawberries. They add color and taste. Sugar and lemon juice help create a syrupy mixture. This makes the strawberries even more delicious. You can find the full recipe for this delightful treat to guide you through the cooking process. - Preheat the oven to 325°F (160°C). - In a bowl, mix graham cracker crumbs, melted butter, and sugar. - Press the mixture into a 9-inch springform pan and bake for 10 minutes. - Beat softened cream cheese in a large bowl until smooth. - Gradually add powdered sugar and mix well until combined. - Carefully incorporate eggs, vanilla extract, sour cream, and lemon juice one at a time. - Pour the filling over the cooled crust and smooth the top. - Bake for 55-60 minutes, leaving the door ajar for cooling. - Refrigerate for at least 4 hours before serving. For the full recipe, check the details above. To make a great cheesecake, start with room temperature ingredients. This helps create a smooth batter. When you mix, don’t overdo it. Overmixing adds air bubbles that can ruin the texture. A beautiful cheesecake deserves a lovely look. Top it with fresh mint leaves for a pop of color. You can also drizzle extra strawberry syrup on top. This adds a nice shine and makes it look even tastier. One common mistake is not letting the cheesecake cool enough. If it's too warm, it won’t set right. Another mistake is skipping the chilling time. Chilling is key for the best texture. Follow these tips for a perfect Strawberry Bliss Cheesecake! {{image_4}} You can add melted chocolate to the filling for a fun twist. Start with your regular cheesecake base. Melt about 4 ounces of dark chocolate and mix it in after you beat the cream cheese. This will give you a rich, chocolatey flavor that pairs well with strawberries. You can also top it with chocolate shavings or a drizzle of chocolate sauce for extra flair. If you want a lighter treat, try a no-bake version. Simply skip the baking step altogether. For the filling, mix cream cheese, powdered sugar, and vanilla until smooth. Then fold in whipped cream instead of eggs and sour cream. Pour this mixture over the crust and chill it for at least 4 hours before serving. It is easy and delicious! To make a vegan version, swap cream cheese for a plant-based alternative. Use coconut cream or soaked cashews blended until smooth. Instead of eggs, add a bit of cornstarch mixed with water for binding. Use maple syrup instead of powdered sugar for sweetness. Follow the same steps for the crust and topping. This way, everyone can enjoy a slice! For all these variations, you can still refer to the Full Recipe for the base cheesecake instructions. To keep your cheesecake fresh, store it in an airtight container in the refrigerator. This helps maintain its creamy texture and taste. Be sure to cover the cheesecake well, as it can absorb odors from other foods. When stored this way, it stays good for about a week. If you want to save some for later, you can freeze slices. Wrap each slice tightly in plastic wrap. It’s best to use a freezer-safe container after wrapping. This way, it stays fresh for up to two months. When you’re ready to enjoy, just remember to thaw it overnight in the refrigerator. When it’s time to serve, take the cheesecake out of the fridge. For the best taste, let it come to room temperature. If you froze it, thaw it overnight in the refrigerator. This will help keep the texture smooth and delicious. Enjoy your slice of strawberry cheesecake at its best! Typically lasts for up to one week when stored properly. I recommend using an airtight container. This keeps the cheesecake fresh and tasty. Always check for any changes in smell or texture before eating. Yes, but fresh strawberries will provide better texture and flavor. Frozen berries can become mushy when thawed. Fresh strawberries look vibrant and add a nice crunch. If you use frozen, let them thaw and drain excess juice. Overbaking and rapid temperature changes can cause cracks. To avoid this, bake at a lower temperature. Also, let the cheesecake cool slowly in the oven. This helps maintain its smooth surface. Yes, options include Oreo or shortbread crusts for variety. Each crust offers a unique flavor. An Oreo crust adds a rich chocolate taste, while shortbread is buttery and sweet. Feel free to experiment! Use gluten-free graham cracker crumbs or almond flour as a substitute. Both options work well and keep the texture nice. Check the labels to ensure they are certified gluten-free to avoid cross-contamination. This blog post breaks down how to make a delicious strawberry cheesecake. We covered the main ingredients for the crust, filling, and topping. I shared step-by-step instructions to guide you through the process. With tips to avoid common mistakes and ideas for variations, you can easily customize your cheesecake. Always remember to let your cheesecake cool properly and chill before serving. Enjoy making this treat that everyone will love!

Strawberry Cheesecake Delight Simple and Tasty Treat

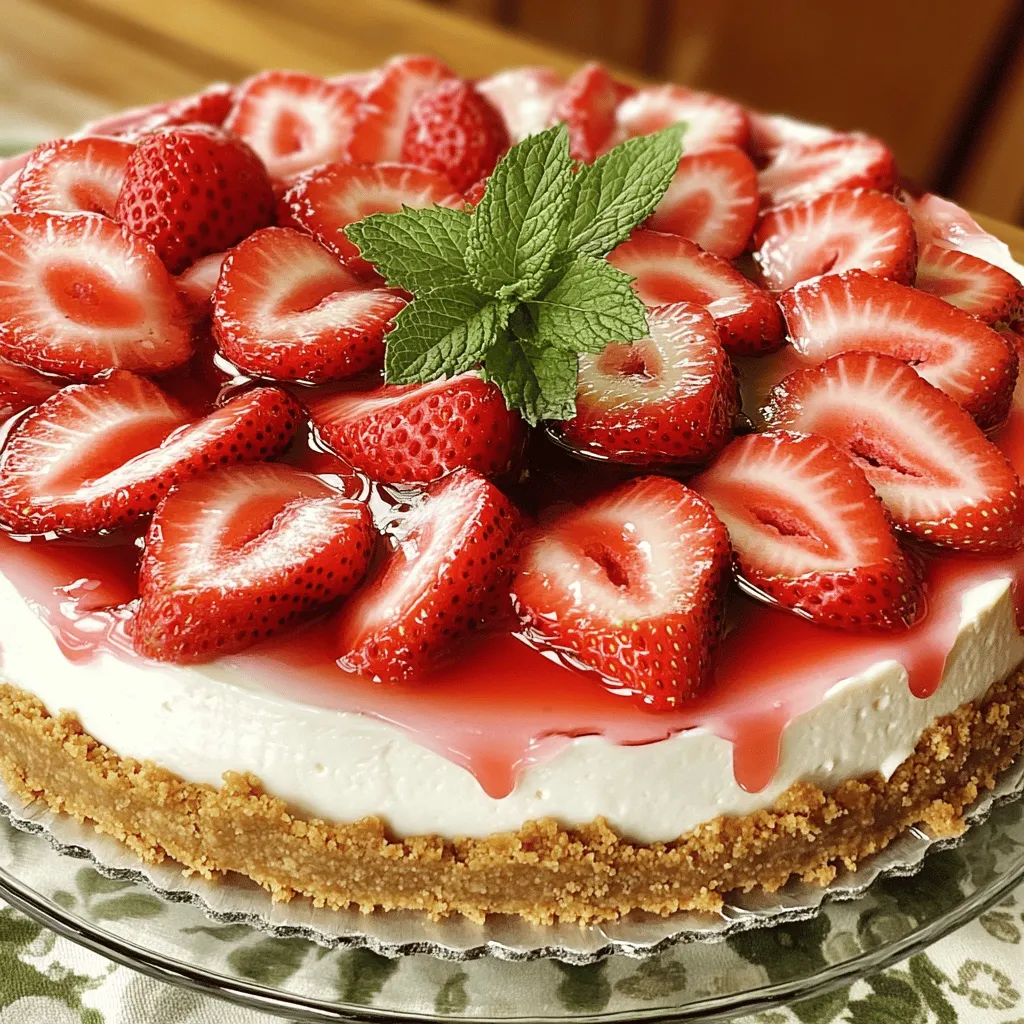
Looking for a dessert that’s both simple and pleasing? Let’s dive into the world of Strawberry Cheesecake! This delightful treat

Older posts
Newer posts
← Previous Page1 … Page11 Page12 Page13 … Page27 Next →

dsad

© 2025 mealinmoments • Built with GeneratePress

Our Policies

  • Copyright Policy
  • Cookie Policy
  • GDPR Policy
  • Privacy Policy
  • Disclaimer
  • Terms Of Use

More Information

  • Home
  • About
  • Contact
  • Appetizers
  • Dessert
  • Dinner
  • Drinks
©2025, mealinmoments About Back To Top