Skip to content
DisclaimerTerms Of UseGDPR PolicyCookie Policy

mealinmoments

  • Home
  • Drinks
  • Appetizers
  • Dinner
  • Dessert
  • About
  • Contact
  • Privacy Policy
DisclaimerTerms Of UseGDPR PolicyCookie Policy

Megan

- Cod fillets: These are the star of the dish. Fresh cod is firm and mild. Choose fillets that are bright in color and smell like the sea. Aim for about 6 ounces each for a filling meal. - Mayonnaise and its role: Mayonnaise adds creaminess and flavor. It keeps the fish moist during baking. The fat in mayo creates a rich topping that enhances the cod’s taste. - Seasonings and additions: - 2 tablespoons Dijon mustard: It adds a tangy kick. - 1 tablespoon freshly squeezed lemon juice: This brightens the dish and balances flavors. - 1 teaspoon garlic powder: It gives a lovely savory taste. - 1 teaspoon smoked paprika: This adds a hint of smokiness. - 1 teaspoon dried thyme: It brings a warm, herbal note. - Salt and freshly ground pepper: These enhance all other flavors. - Fresh parsley (for garnish): It adds color and freshness. - Lemon wedges (for serving): These give a zesty touch. - Converting measurements for different serving sizes: If you want to serve more or fewer people, simply adjust the amount of each ingredient. For example, for six servings, use 6 cod fillets and increase the mayo and seasonings in proportion. - Substitutions for key ingredients: If you don’t have mayonnaise, Greek yogurt is a great alternative. It is creamy and adds a nice tang. For Dijon mustard, yellow mustard also works well, though it is milder. 1. First, preheat your oven to 400°F (200°C). This helps cook the cod evenly. 2. Line a baking sheet with parchment paper. This makes cleanup easy and keeps the fish from sticking. 3. In a medium bowl, mix 1/2 cup mayonnaise, 2 tablespoons Dijon mustard, 1 tablespoon lemon juice, 1 teaspoon garlic powder, 1 teaspoon smoked paprika, and 1 teaspoon dried thyme. 4. Add a pinch of salt and a dash of pepper to the mix. Stir until it is smooth and creamy. 1. Place 4 cod fillets on the prepared baking sheet. Make sure to space them out. 2. Lightly season the fillets with salt and pepper. This brings out their flavor. 3. Take the creamy topping and spread it over each cod fillet. Be generous for the best taste. 4. Put the baking sheet in the oven and bake for 12-15 minutes. The cod should flake easily when done, and the topping should look golden. 1. After baking, take the cod out and let it rest for one minute. 2. Garnish with fresh parsley for a pop of color. 3. Serve with lemon wedges on the side for extra zest. 4. For a nice touch, serve the cod on a bed of sautéed spinach or with roasted veggies. This simple and tasty dish will impress your family and friends! For the full recipe, check out the details above. How do you ensure cod is perfectly flaky? First, use fresh cod. Fresh fish cooks better. When baking, don’t overcook it. Bake until it flakes easily with a fork. This usually takes 12-15 minutes at 400°F. Keep an eye on it, so it doesn’t dry out. Why is seasoning important? Seasoning enhances the cod's natural flavor. A little salt and pepper go a long way. The creamy mayo topping also adds flavor. Use garlic powder and smoked paprika for a tasty twist. These spices make the dish really pop! How do you choose fresh cod? Look for cod with a clean smell. It should smell like the ocean, not fishy. The flesh should be firm and shiny, with no discoloration. If possible, buy from a trusted fishmonger or market. What mayo should you select for flavor? Not all mayo is the same. Choose a high-quality mayo for the best taste. Some mayos are made with olive oil or other natural ingredients. They add depth to your dish. You can even try flavored mayo for extra zest! For the full recipe, check the section above. {{image_4}} You can easily change up the flavor of your baked cod. Here are some ideas: - Adding different herbs or spices: Try using dill, oregano, or basil for a fresh taste. A pinch of cayenne pepper can add a nice kick. You can also switch smoked paprika for sweet paprika if you prefer less heat. - Alternative toppings: For a twist, mix in some grated cheese like parmesan or cheddar. You could also use crushed crackers or breadcrumbs to add texture. Sliced tomatoes on top can add a juicy burst of flavor. Making this dish fit different diets is simple. Here are some options: - Options for gluten-free and low-fat versions: Use gluten-free mayo to keep it gluten-free. For a low-fat version, consider Greek yogurt as a substitute for mayonnaise. It gives a creamy texture with fewer calories. - Vegan alternatives for the creamy topping: Swap the mayo with a vegan mayo or a mix of silken tofu and lemon juice. This keeps the dish creamy and delicious without any animal products. These variations let you create a dish that suits your taste and dietary needs while remaining tasty and satisfying. For the full recipe, check out the detailed instructions above. To keep your baked cod fresh, store it in an airtight container. Place a piece of parchment paper between the fish and the lid to absorb moisture. This helps keep the cod from getting soggy. You can store it in the fridge for up to three days. When reheating, preheat your oven to 350°F (175°C). Place the cod on a baking sheet and cover it with foil. Bake for about 10 minutes, or until heated through. This keeps the fish moist while warming it up. Yes, you can freeze baked cod! It’s best to freeze it right after it cools. Wrap each fillet tightly in plastic wrap, then place them in a freezer bag. Remove as much air as possible to avoid freezer burn. You can store it in the freezer for up to three months. When you’re ready to eat, thaw the cod in the fridge overnight. To reheat, follow the same steps as before for the best taste and texture. If you want to jazz it up, add a little more mayo topping before baking! How long to bake cod at different temperatures? You can bake cod at various temperatures. If you bake it at 350°F (175°C), it takes about 15-20 minutes. At 375°F (190°C), plan for 12-15 minutes. Baking at 400°F (200°C) is ideal, taking just 12-15 minutes for a perfect texture. The key is to look for the cod to be opaque and flaky. Can I use other types of fish instead of cod? Yes, you can use other fish! Options like haddock, tilapia, or pollock work well. These fish have a mild flavor and cook similarly. Just adjust the cooking time if the fillets are thicker or thinner than cod. What is the best way to check if cod is done? The best way to check if cod is done is to use a fork. Gently poke the fish; it should flake easily. If it still looks translucent, it needs more time. You can also use a food thermometer. The internal temperature should be about 145°F (63°C). How can I make my mayo topping more flavorful? To boost the flavor of your mayo topping, try adding herbs like dill or cilantro. You can also mix in some capers or chopped olives for a briny kick. A splash of hot sauce or a pinch of cayenne pepper adds a nice heat. Experiment with different combinations to find your favorite. What side dishes pair well with baked cod? Baked cod pairs nicely with many sides. Try serving it with roasted vegetables like asparagus or carrots. A simple green salad or sautéed spinach adds freshness. For a hearty option, consider rice or quinoa to soak up the flavors. Can I prepare this dish in advance? You can prepare the cod dish in advance. Mix the mayo topping and spread it over the fish. Cover it with plastic wrap and keep it in the fridge for up to 24 hours. When ready, just pop it in the oven. This saves time and lets the flavors meld together. In summary, I covered key ingredients, measurement conversions, and step-by-step instructions for baking cod. I also shared tips on cooking techniques and ingredient quality, plus variations for dietary needs. Remember, selecting fresh ingredients is crucial for flavor. Storing leftovers properly keeps your meal fresh. You can enjoy this tasty dish in many ways. Explore different flavors to make it your own. Happy cooking, and enjoy your delicious baked cod!

Flavorful Baked Cod with Mayo Simple and Tasty Dish

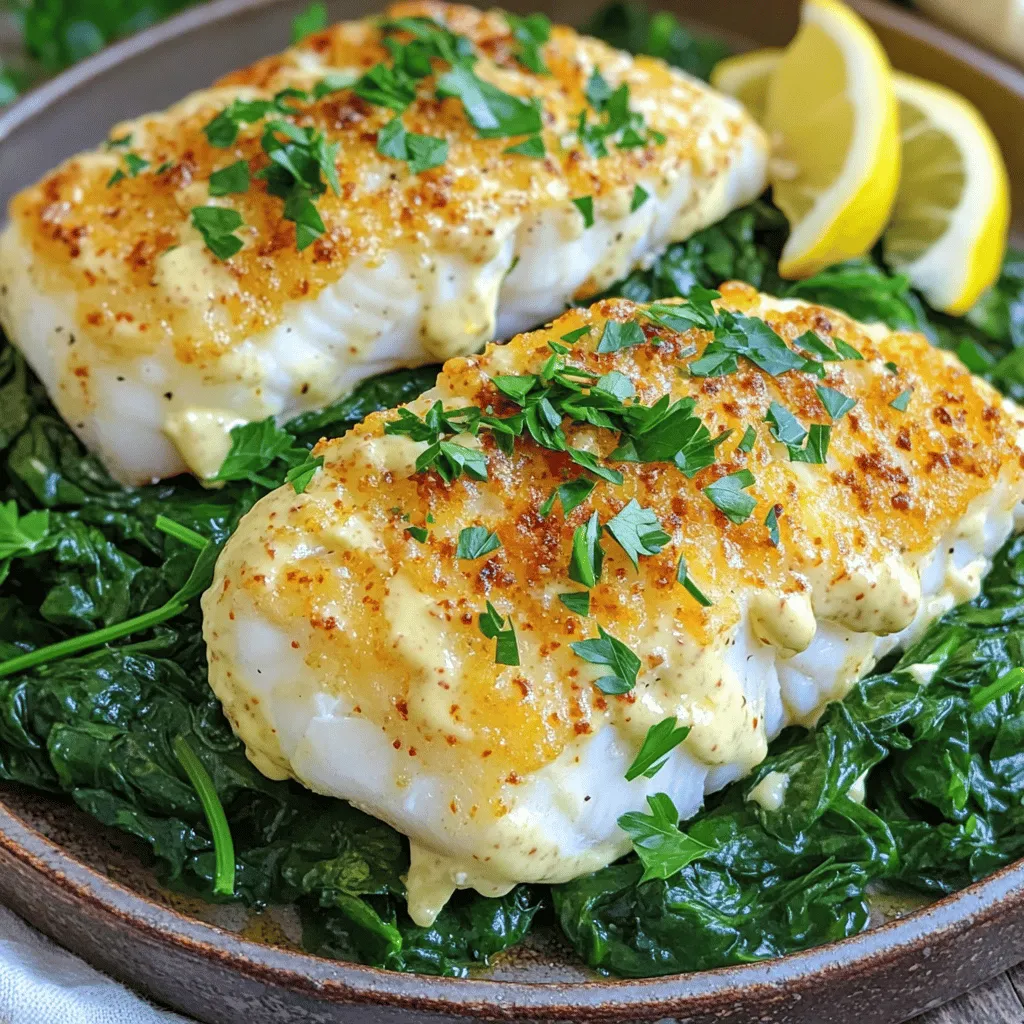
Are you ready to enjoy a simple, tasty dish? This Flavorful Baked Cod with Mayo recipe is a game-changer for

- 1 ½ cups all-purpose flour - 1 cup granulated sugar - ½ cup unsweetened cocoa powder - 1 teaspoon baking soda - ½ teaspoon baking powder - ½ teaspoon salt - 2 large eggs - ½ cup vegetable oil - 1 teaspoon pure vanilla extract - 1 cup buttermilk - 1 cup semi-sweet chocolate chips - ½ cup chopped walnuts (optional) For these chocolate muffins, you need simple ingredients. Each one plays a role. The flour gives structure, while sugar adds sweetness. Unsweetened cocoa powder brings deep chocolate flavor. Baking soda and baking powder make the muffins rise. Salt enhances the flavor. Eggs add richness and moisture. Vegetable oil keeps them soft. Vanilla extract brings warmth. Buttermilk adds tang and moisture. Chocolate chips are a must for gooey bites. Walnuts can add crunch, but they are optional. If you lack an ingredient, don’t worry! Here are some easy swaps. - Flour: You can use whole wheat flour. It gives a nutty taste. - Sugar: Brown sugar adds moisture and a hint of caramel. - Cocoa Powder: Use Dutch-process cocoa for a milder flavor. - Oil: Melted butter can replace oil for a richer flavor. - Buttermilk: Mix 1 tablespoon of lemon juice with milk to make buttermilk. Want to make these muffins a bit healthier? Try these ideas: - Sugar: Use coconut sugar or honey for a lower glycemic index. - Oil: Substitute oil with applesauce for less fat. - Flour: Use almond flour or oat flour for gluten-free muffins. - Chocolate Chips: Use dark chocolate chips for less sugar or add cacao nibs for a crunch. These tips can help you enjoy chocolate muffins while keeping things a little lighter. For the full recipe, follow the steps outlined in the main article. Start by preheating your oven to 350°F (175°C). This temperature will ensure even baking. While the oven heats, prepare your muffin tin. You can line it with paper liners or spray it with cooking oil. This step will help prevent your muffins from sticking. In a big bowl, sift together the dry ingredients. You need 1 ½ cups of all-purpose flour, 1 cup of granulated sugar, ½ cup of unsweetened cocoa powder, 1 teaspoon of baking soda, ½ teaspoon of baking powder, and ½ teaspoon of salt. Whisk these together until they mix well. Look for no lumps in your flour mix. This makes sure your muffins come out soft. In another bowl, crack open 2 large eggs. Add ½ cup of vegetable oil, 1 teaspoon of pure vanilla extract, and 1 cup of buttermilk. If you don’t have buttermilk, you can make some by adding 1 tablespoon of lemon juice to 1 cup of milk. Whisk these wet ingredients until they blend smoothly. Pour the wet mix into the bowl with the dry mix. Use a spatula to gently stir them together. This is the key part! You want to mix just until combined, so the batter stays slightly lumpy. Then, fold in 1 cup of semi-sweet chocolate chips. If you like nuts, add ½ cup of chopped walnuts too. This gives a nice crunch and flavor. Grab a spoon or ice cream scoop to fill each muffin cup. Fill them about ¾ full for the best rise. Place the muffin tin in the oven and bake for 18-20 minutes. To check if they are done, insert a toothpick into the center of a muffin. It should come out clean or with a few moist crumbs. Once baked, take the muffins out of the oven. Let them cool in the tin for about 5 minutes. Then, move them to a wire rack to cool completely. This allows air to circulate around them. When serving, you can dust them lightly with powdered sugar for a fancy touch. Enjoy your delicious chocolate muffins! For the complete recipe, refer to the full recipe section. To get a soft and fluffy texture, avoid overmixing. Stir just until wet and dry ingredients combine. Some lumps in the batter are okay. They help keep the muffins tender. Use room temperature eggs and buttermilk for the best rise. This warmth helps the muffins bake evenly. Store leftover muffins in an airtight container. They will stay fresh for about three days at room temperature. If you want to keep them longer, freeze muffins. Wrap each one in plastic wrap and place them in a freezer bag. They can last up to three months in the freezer. To enjoy, thaw at room temperature or warm them in the oven. To impress your guests, add a touch of flair. Lightly dust cooled muffins with powdered sugar. A fresh mint leaf on top adds color and flavor. Arrange them on a nice plate or stand for a beautiful display. You can also serve them with a scoop of ice cream for a special treat. Check out the Full Recipe for more details on making these delicious chocolate muffins! {{image_4}} To make vegan chocolate muffins, I swap the eggs and buttermilk. Use flaxseed meal instead of eggs. Mix one tablespoon of flaxseed with three tablespoons of water. Let it sit for five minutes to thicken. For buttermilk, mix almond milk with vinegar or lemon juice. This gives a great texture and flavor. For gluten-free muffins, I use almond flour or a gluten-free flour blend. Substitute the all-purpose flour with an equal amount of gluten-free flour. Make sure the cocoa powder is also gluten-free. This way, you can enjoy delicious muffins without gluten. You can customize your muffins with different add-ins. Here are some ideas: - Nuts: Add chopped pecans or hazelnuts. - Fruits: Try adding mashed bananas or applesauce for moisture. - Spices: A pinch of cinnamon or a dash of espresso powder enhances the chocolate flavor. - Other Chocolates: Mix in white chocolate chips or dark chocolate chunks for variety. Experiment with these variations to find your favorite! For a full recipe, check out the Choco Delight Muffins. You can store chocolate muffins at room temperature. Place them in an airtight container. They stay fresh for about 2 to 3 days. If you want to keep them longer, wrap each muffin in plastic wrap. This helps retain moisture and flavor. If you need to store muffins for up to a week, refrigeration is a good choice. Place them in an airtight container to avoid drying out. When you are ready to eat, microwave them for a few seconds to warm them up. This brings back their soft texture. Freezing muffins is a great way to save them for later. To freeze, wrap each muffin tightly in plastic wrap, then place them in a freezer bag. They can last for up to 3 months in the freezer. When you want to enjoy one, let it thaw in the fridge overnight. For a quick option, microwave it for 30 seconds. This makes them taste freshly baked. Enjoy your delicious treats anytime! For the full recipe, check out the ingredients and instructions above. To make chocolate muffins from scratch, start with simple ingredients. You need flour, sugar, cocoa powder, baking soda, baking powder, salt, eggs, vegetable oil, vanilla extract, buttermilk, chocolate chips, and walnuts. Follow the steps in the Full Recipe for a perfect treat. Mix wet and dry ingredients separately, then combine them gently. Bake at 350°F for about 18-20 minutes. The best way to store chocolate muffins is to keep them in an airtight container. This helps keep them fresh for a longer time. You can store them at room temperature for up to three days. If you want to keep them longer, place them in the fridge. Just remember to let them cool completely before storing. Yes, you can use different types of chocolate! Dark, milk, or white chocolate all work well. You can also mix them for unique flavors. Just make sure to adjust the amount of sugar based on your chocolate choice. This way, you can create a chocolate muffin that suits your taste. To ensure your muffins are moist, avoid overmixing the batter. Mix wet and dry ingredients until just combined. Also, using buttermilk adds moisture. If you want extra moisture, add a bit of applesauce or yogurt. These tips will help you bake soft and delicious muffins. If you don't have buttermilk, don't worry! You can make a simple substitute. Add one tablespoon of lemon juice or vinegar to one cup of milk. Let it sit for about five minutes before using. This will give you a great buttermilk alternative for your muffins. These chocolate muffins are a treat you can easily make at home. We covered everything from the ingredients and step-by-step instructions to tips for the perfect texture. You learned about storing and various healthy options too. With simple swaps, anyone can enjoy these delicious muffins. Experiment with flavors and make them your own. Remember, baking is fun and rewarding. Enjoy your fresh-baked muffins!

Chocolate Muffins Easy Recipe for Delicious Treats

Are you ready to whip up some delicious chocolate muffins? This easy recipe requires simple ingredients and just a few

- 8 oz (225g) fettuccine or your choice of pasta - 2 salmon fillets (approximately 6 oz each) - 3 tablespoons extra virgin olive oil - 4 large cloves garlic, finely minced - 1 cup heavy cream - 1/2 cup freshly grated parmesan cheese - 1 cup baby spinach, washed and dried - 1 tablespoon freshly squeezed lemon juice - Salt and freshly ground black pepper to taste - Fresh parsley, chopped, for garnish The ingredients in this creamy garlic salmon pasta dish are simple but full of flavor. You start with pasta, which is the base of the meal. I like fettuccine, but any pasta works. The salmon adds protein and richness. Garlic gives the dish a warm, deep flavor. Heavy cream creates the smooth, creamy sauce that ties it all together. Fresh spinach not only adds color but also nutrients. Lemon juice brings a zesty brightness. Finally, parmesan cheese adds a cheesy finish that boosts the taste. Always season with salt and pepper to suit your liking. You can find the full recipe to guide you through the cooking process. Each ingredient plays a key role in making this dish both comforting and exciting. To start, fill a large pot with water. Add a good pinch of salt and bring it to a rolling boil. Once the water is boiling, add 8 oz of fettuccine. Cook it according to the package's time until it's al dente. Before draining, reserve about 1/2 cup of the starchy pasta water. Then, drain the pasta and set it aside in the pot. Next, take 2 salmon fillets and season them with salt and pepper. In a large non-stick skillet, heat 3 tablespoons of olive oil over medium heat. When the oil is hot, place the salmon fillets in the pan, skin-side down. Cook for about 4 to 5 minutes until the skin is crispy. Gently flip the fillets and cook for another 3 to 4 minutes until the salmon is just cooked through. Once done, transfer the salmon to a plate and set it aside to cool. After it cools, flake the salmon into big chunks. Now, we move on to the sauce. In the same skillet, add one more tablespoon of olive oil. Then, add 4 large cloves of minced garlic. Sauté the garlic for 1 to 2 minutes until it becomes fragrant. Be careful not to let it brown. Gradually pour in 1 cup of heavy cream, stirring well, and bring it to a gentle simmer. Once the sauce is ready, stir in 1/2 cup of freshly grated parmesan cheese. If it seems too thick, slowly add the reserved pasta water, one tablespoon at a time, until you reach the creamy texture you want. Now, toss in the cooked pasta along with 1 cup of baby spinach. Drizzle 1 tablespoon of fresh lemon juice over the mixture and stir gently to combine. Finally, fold the flaked salmon chunks into the pasta. Be gentle to avoid breaking the salmon too much. Serve the creamy garlic salmon pasta on plates and garnish with freshly chopped parsley for a pop of color. If you like, add a sprinkle of extra parmesan on top. Enjoy this delicious dish that combines great flavors in every bite! - Cooking time recommendations: For the best results, cook fettuccine for 8-10 minutes. Check the package for exact times. - How to achieve al dente texture: Al dente means "to the tooth." Taste the pasta a minute before the time ends. It should be firm but not hard. - Best practices for cooking salmon: Use fresh salmon when possible. Pat it dry with a paper towel. Season with salt and pepper for the best flavor. - Avoiding overcooking: Cook salmon for about 4-5 minutes skin-side down. Then flip it for another 3-4 minutes. It should flake easily when done. - How to thin or thicken the sauce: If your sauce is too thick, add reserved pasta water a spoonful at a time. For a thicker sauce, let it simmer longer. - Importance of reserved pasta water: The starchy pasta water helps the sauce cling to the pasta. Always save some before draining your pasta. These tips will help you create a creamy garlic salmon pasta that shines in taste and texture. For the complete recipe, refer to the Full Recipe. {{image_4}} You can mix things up by using shrimp or chicken instead of salmon. Shrimp cooks fast and pairs well with garlic. Just sauté shrimp until pink and add it to the creamy sauce. For chicken, use cooked, shredded pieces. It adds a nice texture and flavor. If you're looking for vegan options, try using chickpeas or tofu. For the sauce, swap heavy cream with coconut cream or a blend of cashews and water. This keeps it creamy while making it plant-based. Different pasta shapes can change the dish's look and feel. You might use penne, spaghetti, or even whole wheat pasta. Each type holds the sauce in its own way, so feel free to choose what you like best. If gluten is a concern, go for gluten-free pasta. Many brands offer great alternatives made from rice or quinoa. They cook similarly and taste just as good. Adding herbs can enhance your creamy garlic salmon pasta. Fresh dill or thyme adds brightness. Just sprinkle them in while cooking for a fresh taste. Want some heat? Red pepper flakes are a great choice. A little can add a spicy kick that balances the creaminess. Adjust the amount to your taste. For the full recipe, check out the details above. To keep your creamy garlic salmon pasta fresh, store it in an airtight container. This helps keep flavors intact. You can use glass or plastic containers. Make sure to let the pasta cool before sealing it up. This will prevent steam from causing sogginess. When you are ready to enjoy leftovers, the best method is to use the stovetop. Place the pasta in a skillet over low heat. Add a splash of heavy cream or reserved pasta water to keep it creamy. Stir gently until heated through. You can also use the microwave, but be careful not to overheat it. If you want to freeze your creamy garlic salmon pasta, it's best to freeze the pasta and sauce separately. This helps maintain texture and flavor. Pour the sauce into a freezer-safe bag. Squeeze out air before sealing. For the pasta, consider freezing it in small portions. When ready to eat, thaw overnight in the fridge. Reheat on the stovetop, adding a bit of cream to restore creaminess. Creamy garlic salmon pasta lasts about three days in the fridge. Store it in an airtight container. This keeps it fresh and tasty for your next meal. Yes, you can make this dish ahead of time. Cook the pasta and salmon separately, then mix them when ready to serve. This helps keep the pasta from getting soggy. You can use Greek yogurt or coconut milk for a lighter version. These alternatives cut calories but keep the dish creamy. Adjust the seasoning to fit the taste of your choice. Yes, this recipe is perfect for meal prep. Portion the pasta and salmon into containers. Just reheat when you are ready to enjoy your meal. Consider serving it with a side salad or garlic bread. These pair well and add a nice touch to your dinner. A glass of white wine can also enhance the meal. For the full recipe, check out the section above. This recipe combines pasta, salmon, and a creamy sauce for a delightful meal. You’ve learned how to cook the pasta, prepare the salmon, and make a rich sauce. With tips for variations, storage, and reheating, you can enjoy this dish multiple times. Whether you choose to add shrimp or use a different pasta, the options are endless. Now, you can impress others—or treat yourself—with a delicious plate of creamy garlic salmon pasta. It’s easy, tasty, and perfect for any occasion.

Creamy Garlic Salmon Pasta Easy Dinner Delight

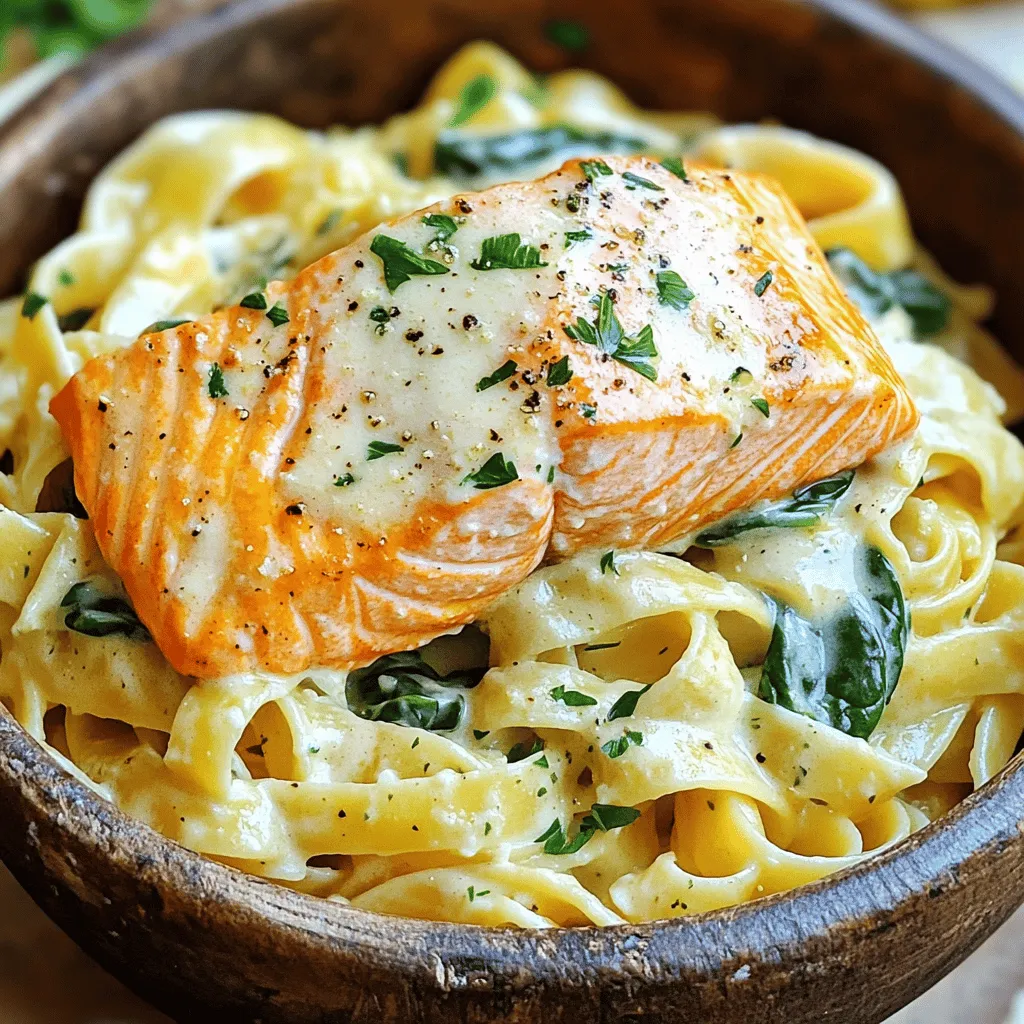
Looking for a quick and tasty dinner? Try my Creamy Garlic Salmon Pasta! This dish combines tender salmon, rich garlic

To make these tasty cookies, you need some key ingredients. Here’s what you will need: - 1 cup cream cheese, at room temperature - 1/2 cup unsalted butter, at room temperature - 1/2 cup granulated sugar - 1/4 cup tightly packed brown sugar - 1 cup fresh blueberries These ingredients create a creamy and sweet base for your cookies. The cream cheese gives a smooth texture. The butter adds richness, while the sugars provide sweetness. You can make your cookies even better by adding a few optional ingredients: - 1/2 cup white chocolate chips - Zest of 1 lemon White chocolate chips add a nice touch of sweetness. Lemon zest brightens the flavor and gives a fresh taste to your cookies. Don’t forget the dry ingredients! Here’s what you will need: - 2 cups all-purpose flour - 1 teaspoon baking powder - 1/2 teaspoon baking soda - 1/4 teaspoon sea salt These dry items help your cookies rise and hold their shape. The flour gives structure, while baking powder and baking soda create those fluffy edges. Sea salt brings out all the flavors in your cookies. For the full recipe, check out the complete details to make these delightful cookies! - Preheat your oven to 350°F (175°C). - Line a baking sheet with parchment paper. First, you need to get your oven ready. Preheating helps the cookies bake evenly. Next, grab a baking sheet and line it with parchment paper. This step stops the cookies from sticking. - Creaming butter and cream cheese - Incorporating sugars and wet ingredients - Combining dry and wet mixtures In a big bowl, mix the cream cheese and butter. Use an electric mixer to make it smooth and creamy. This will take about 2-3 minutes. Then, add the granulated sugar and brown sugar. Mix until everything is light and fluffy. Now, add one egg and some vanilla extract. Mix well until blended. In another bowl, whisk the flour, baking powder, baking soda, and sea salt. Slowly add this dry mix to your wet mix. Stir gently, so you don’t overmix. Overmixing can make your cookies tough. - Adding blueberries and zest - Portioning the dough - Baking time and tips for perfect cookies Now, it’s time to fold in the blueberries and lemon zest. Use a spatula to mix them in gently. This keeps the blueberries whole. Next, use a cookie scoop or tablespoon to drop dough onto the baking sheet. Leave space between each dough ball. Place the baking sheet in the oven. Bake the cookies for 12-15 minutes. The edges should be golden. The centers will look soft, but they will firm up as they cool. After baking, let the cookies cool on the sheet for 5 minutes. Then, move them to a wire rack to cool completely. For the full recipe, check out the details above. Enjoy your delicious blueberry cheesecake cookies! To achieve the best texture for your cookies, avoid overmixing. Mix the dough just until the ingredients blend. Overmixing can lead to tough cookies. Remember, a few lumps are okay. Use room temperature ingredients for the best results. This helps the butter and cream cheese mix well. Cold ingredients can create clumps and affect the dough's texture. Lemon zest brightens the flavor of the cookies. Use a microplane to grate the zest finely. This small step adds a fresh taste that complements the blueberries. For a lovely display, serve the cookies on a decorative plate. Dust them with powdered sugar for elegance. Arrange fresh blueberries around the cookies for a colorful touch. Using cold ingredients can ruin your cookies. Make sure your cream cheese and butter are at room temperature. This allows for a smooth, creamy blend. Avoid overcrowding the baking sheet. Leave at least two inches between cookies. This space helps them spread and bake evenly, so you get that perfect chewy texture. {{image_4}} You can make a few simple swaps to lighten the recipe. First, try using lower-fat cream cheese. This change keeps the creamy texture but cuts some calories. You can also switch granulated sugar for coconut sugar or maple syrup. These options add a nice flavor and are better for blood sugar. Want to mix things up? You can add different berries like raspberries or strawberries. Each berry brings its own flavor and makes the cookies even more fun. If you love chocolate, swap white chocolate with dark chocolate. Dark chocolate adds a rich taste and pairs well with the blueberries. For gluten-free cookies, use gluten-free flour. Almond flour or oat flour works well. These flours give a unique taste and a nice texture. Just be sure to check the package for proper measurements. You can still enjoy these cookies without gluten! Explore the Full Recipe for more details on making these delicious treats. Store your cookies in an airtight container. You can keep them at room temperature for up to three days. If you want them to last longer, put them in the fridge. This will keep them fresh for about a week. Just remember to let them warm up a bit before eating. They taste best when soft. Freezing cookies is a great way to save some for later. First, let the cookies cool completely. Then, place them in a single layer on a baking sheet. Freeze them for about an hour. Once frozen, transfer the cookies to a freezer bag. Remove as much air as you can before sealing. Your cookies can last for up to three months. When you want to eat them, just thaw them at room temperature or warm them in the oven for a few minutes. For the best taste, eat your cookies within a few days. They will stay fresh for about three days at room temperature. If stored in the fridge, enjoy them within a week. If you freeze them, they will last for three months. Always check for any signs of spoilage before eating. Yes, you can use frozen blueberries! Just remember to thaw and drain them first. This keeps the dough from getting too wet. Also, try to fold them in gently. This way, you keep your cookie dough from turning blue. You want those beautiful bursts of blueberry in each bite. To make your cookies chewier, use more brown sugar than white sugar. Brown sugar has more moisture, which helps. You can also bake them for a shorter time. This keeps the centers soft. Lastly, let the cookies cool on the baking sheet. They will firm up but stay chewy. Yes, you can substitute eggs! Use 1/4 cup of unsweetened applesauce for each egg. Mashed bananas work too, but they add a slight banana taste. For a more neutral option, try using 1 tablespoon of ground flaxseed mixed with 2.5 tablespoons of water. Let it sit for a few minutes to thicken before mixing it in. Look for a light golden edge on the cookies. The centers should seem soft but not wet. They will firm up as they cool. If they look too doughy, give them a few more minutes. Trust your nose! If they smell amazing, you are close to done. Making blueberry cheesecake cookies is simple and fun. We covered all the key ingredients and steps. You can mix fresh blueberries with cream cheese, butter, and sugars for a tasty treat. Remember to avoid overmixing and use room-temperature ingredients. Feel free to try variations like different berries or healthier options. Store your cookies well to keep them fresh. With these tips, you’ll bake delicious cookies every time. Enjoy your baking journey!

Easy Blueberry Cheesecake Cookies Delightful and Simple

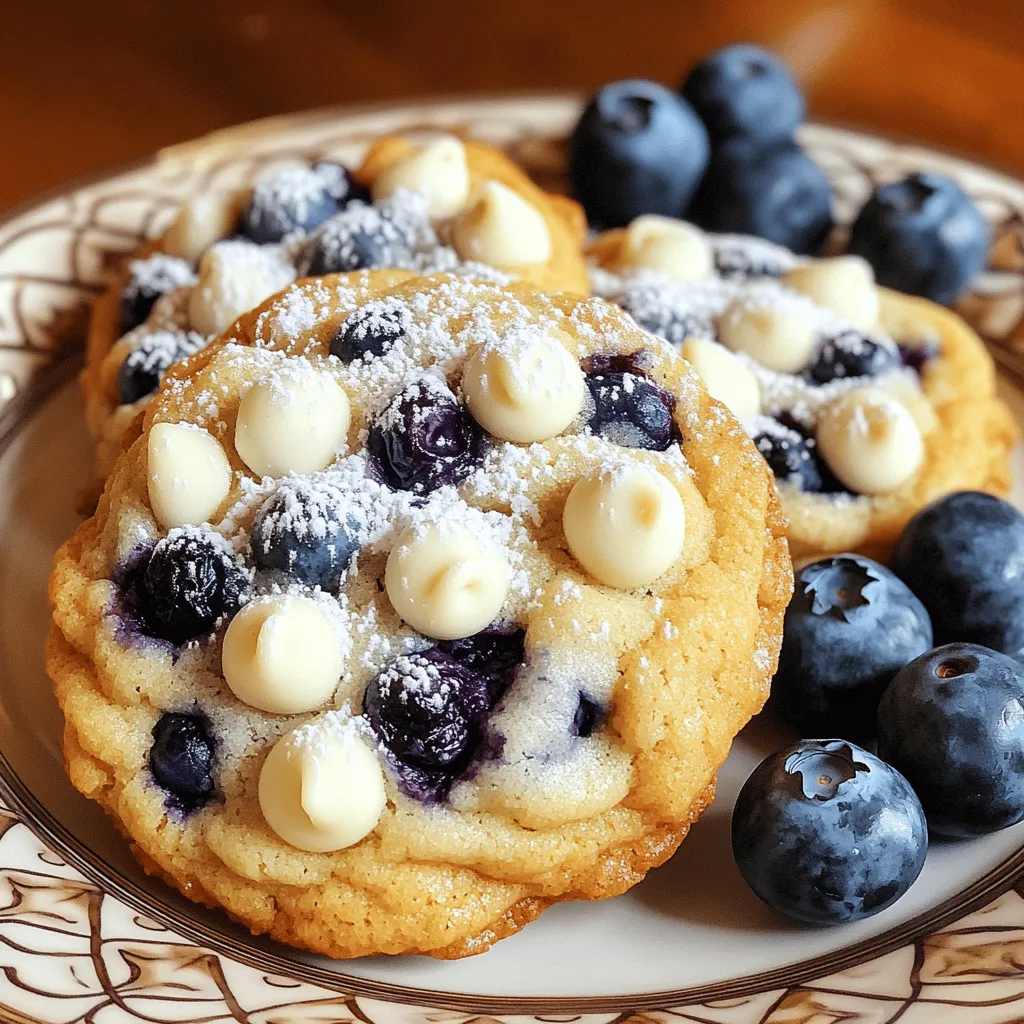
If you love desserts that blend easy prep with delicious flavor, you’ll adore these Easy Blueberry Cheesecake Cookies. Picture soft,

To make your Easy Sausage and Egg Casserole, gather these simple ingredients: - 1 pound breakfast sausage, casings removed - 6 large eggs - 1 cup milk - 1 cup shredded cheddar cheese - 1 medium onion, finely diced - 1 bell pepper (any color), finely diced - 2 cups fresh spinach, roughly chopped - 1 teaspoon garlic powder - 1 teaspoon paprika - Salt and freshly ground black pepper to taste - 1 tablespoon olive oil - 4 slices whole wheat bread, cubed These ingredients create a hearty dish that’s perfect for breakfast or brunch. The breakfast sausage brings great flavor, while the eggs and cheese add creaminess. Fresh veggies like onion and bell pepper give a nice crunch. Spinach adds color and nutrients. The spices, garlic powder and paprika, enhance the taste and make it truly special. You can customize this dish with your favorite ingredients. For example, you can swap the sausage for turkey or a meat-free option. This recipe is flexible, so feel free to experiment! For the full recipe, see below. Set your oven to 350°F (175°C). This step warms up your oven for baking. Grease a 9x13 inch baking dish with non-stick spray or olive oil. In a large skillet, heat 1 tablespoon of olive oil over medium heat. Add 1 medium onion and 1 bell pepper, both finely diced. Cook them for about 5-7 minutes until they soften and smell great. Next, add 1 pound of breakfast sausage to the skillet. Use a spatula to crumble it as you cook. Keep cooking for 8-10 minutes until the sausage is brown and no pink remains. If needed, drain excess grease to keep the dish from getting soggy. In a big bowl, whisk together 6 large eggs, 1 cup of milk, 1 teaspoon of garlic powder, and 1 teaspoon of paprika. Add a pinch of salt and pepper. Mix until it is smooth and frothy. Fold the cooked sausage, sautéed vegetables, and 2 cups of chopped spinach into the egg mixture. Mix well. Gently stir in 1 cup of shredded cheddar cheese until all is evenly coated. Pour the mixture into your prepared baking dish. Spread it out evenly to help it cook well. Place the baking dish in the preheated oven. Bake for 30-35 minutes. The casserole should be set in the middle and lightly golden on top when it is ready. Once baked, let it cool for 5-10 minutes. This helps the dish firm up, making it easy to slice into squares. Serve warm for a delicious breakfast treat. For more details, please check the Full Recipe. You can serve this casserole warm or at room temperature. Pair it with fresh fruit for a sweet touch. A side of crispy hash browns also works well. You might enjoy it with a dollop of sour cream or yogurt for creaminess. Don’t forget to offer hot sauce for those who like a spicy kick! Always preheat your oven to 350°F (175°C) before baking. This step ensures even cooking. When sautéing vegetables, cook them until they are soft. This adds great flavor to the dish. Drain excess grease from the sausage to keep the casserole light. Allow the bake to rest after cooking for better slicing. Garnish your casserole with freshly chopped herbs like parsley or chives. They add color and freshness. For extra flavor, sprinkle a bit of paprika on top before serving. You can also add sliced avocado or cherry tomatoes for a fresh touch. Enjoy getting creative with your garnishes! {{image_4}} You can make this casserole a vegetarian delight. Start by swapping the sausage for a mix of mushrooms and diced zucchini. Sauté them with your onion and bell pepper for a rich flavor. Add in some black beans or chickpeas for extra protein. You can also use a meat substitute like tempeh or lentils. This way, you still enjoy a hearty dish without the meat. To give your casserole more kick, try adding different spices. A dash of cayenne pepper can bring heat. You might also use fresh herbs like thyme or basil for a fragrant touch. Sautéed garlic adds depth to the flavor. You can also toss in some sun-dried tomatoes or olives for a Mediterranean twist. Each addition makes it unique and tasty. Cheese lovers can play around with different types of cheese. Instead of cheddar, try pepper jack for a spicy bite. Feta cheese gives a tangy flavor that pairs well with spinach. You can also use mozzarella for a gooey texture. Mixing different cheeses can create layers of taste that make each bite exciting. To store your leftover casserole, let it cool down first. Then, place it in an airtight container. This keeps it fresh for up to four days in the fridge. You can also cover it tightly with plastic wrap or foil. Just make sure to press out any air to avoid freezer burn. To reheat your sausage and egg casserole, preheat your oven to 350°F (175°C). Place individual portions in a baking dish. Cover them with foil to keep moisture in. Heat for about 15-20 minutes or until warm all the way through. You can also use a microwave. Heat on medium power for about 2-3 minutes, checking often to avoid overcooking. You can freeze this casserole for up to three months. Cut it into squares before freezing for easy portions. Wrap each piece in plastic wrap, then place them in a freezer-safe bag. When you’re ready to eat, thaw it in the fridge overnight. Reheat in the oven or microwave as mentioned above. For the full recipe, check out the details above. Yes, you can make this casserole ahead of time. Prepare it the night before. Just mix all the ingredients and pour them into the baking dish. Cover it with plastic wrap and place it in the fridge. In the morning, bake it directly from the fridge. This saves time and makes breakfast easy. If you want to change the sausage, try turkey sausage or chicken sausage. Both options are leaner and still tasty. For a vegetarian choice, use crumbled tofu or a meat substitute. You can also add more veggies for flavor and texture. To make this dish gluten-free, swap the whole wheat bread for gluten-free bread. There are many good gluten-free options available. Just make sure to check labels for hidden gluten. This keeps your casserole safe for those with gluten sensitivities. To freeze this casserole, let it cool completely after baking. Cut it into squares, and wrap each piece tightly in plastic wrap. Place them in a freezer bag or airtight container. This way, you can enjoy a quick breakfast later. Just reheat in the oven or microwave. This casserole makes a tasty and filling meal. You learned how to layer fresh ingredients like sausage, eggs, and cheese. We also explored storage tips and tasty variations. With these steps, you can create something wonderful for breakfast or brunch. Try it out and enjoy every bite. Cooking is fun, and this dish will please everyone!

Easy Sausage and Egg Casserole Tasty Breakfast Dish

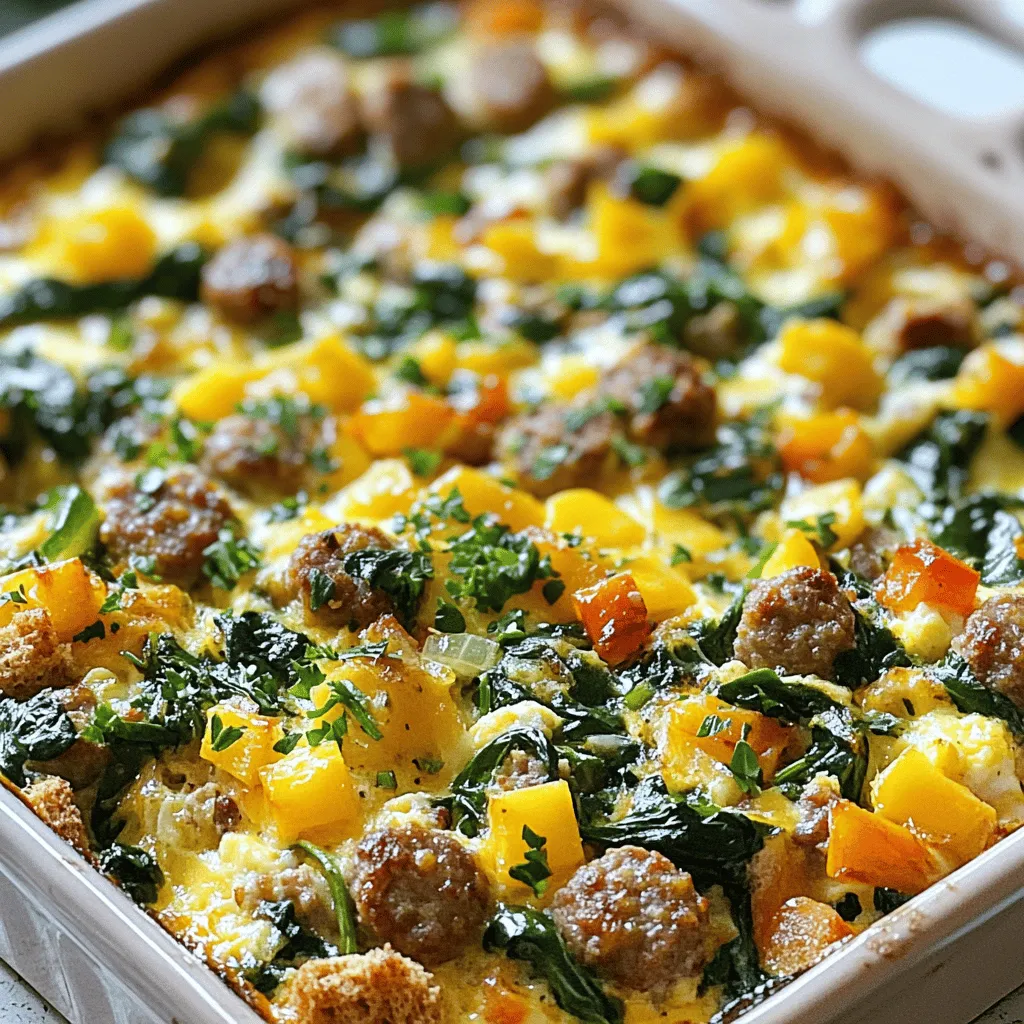
Looking for a quick, tasty breakfast option? This Easy Sausage and Egg Casserole is perfect for busy mornings. Packed with

- 1 pound sea scallops, cleaned and thoroughly patted dry - 4 tablespoons unsalted butter, melted - 4 cloves garlic, minced finely - 2 tablespoons fresh parsley, finely chopped - 1 tablespoon fresh lemon juice - 1 teaspoon paprika - Salt and black pepper to taste - Lemon wedges, for serving These ingredients create a tasty dish. The scallops bring a sweet, ocean flavor. The garlic and butter add richness, while lemon gives a bright touch. - Red pepper flakes for heat - Fresh thyme or dill for herbs - Grated Parmesan for a cheesy crust Adding these can make the dish even better. You can customize it to fit your taste. A bit of heat or cheese can make a big difference. When choosing scallops, look for these signs: - They should smell like the ocean, not fishy. - Their flesh should be firm and slightly glossy. - Avoid scallops that are dry or have brown spots. Fresh scallops make a big difference in taste. They should look and smell fresh. Remember, quality matters for the best results. If you want to make this dish, check the [Full Recipe] for all the steps. First, preheat your oven to 400°F (200°C). This temperature helps the scallops cook evenly. While the oven heats, lightly grease a medium baking dish. You can use butter or a cooking spray. This step prevents sticking and makes serving easier. In a small bowl, melt 4 tablespoons of unsalted butter. Add 4 cloves of finely minced garlic to the butter. Next, mix in 2 tablespoons of finely chopped parsley and 1 tablespoon of fresh lemon juice. For flavor, add 1 teaspoon of paprika and a pinch of salt and black pepper. Whisk everything together until it’s well mixed and colorful. This garlic butter will give your scallops a rich taste. Take 1 pound of cleaned sea scallops and pat them dry. Arrange the scallops in a single layer in your greased baking dish. Make sure not to overcrowd them; this helps them cook well. Drizzle your garlic butter mixture over the scallops. Ensure each scallop gets a nice coating for great flavor. Put the baking dish in the preheated oven and bake for 12-15 minutes. The scallops will look opaque and feel slightly firm when done. For a golden top, switch your oven to broil for the last 2 minutes. Keep an eye on them to avoid burning. Once done, take the dish out and let it cool for a minute. Serve warm with lemon wedges on the side. Enjoy this quick and savory delight! For the full recipe, check out the section above. To get the best texture for your garlic butter baked scallops, start with fresh scallops. They should be moist and firm. Make sure to pat them dry with paper towels. This step helps them brown nicely in the oven. When you bake them, don’t crowd the scallops. Space them out in the dish. This ensures even cooking and lets the heat circulate well. For a crispy top, broil them for a couple of minutes at the end. Keep an eye on them; they can burn quickly. A common mistake is using frozen scallops. If you must, thaw them slowly in the fridge. Another pitfall is overcooking. Scallops cook fast, usually in about 12 to 15 minutes. If they turn too firm, you've cooked them too long. Remember to season generously. A lack of seasoning can dull the flavor. Lastly, don't skip the lemon juice. It brightens the dish and enhances the overall taste. When serving garlic butter baked scallops, pair them with fresh lemon wedges. The zest adds a nice touch. You can also serve them over a bed of creamy risotto or pasta. This adds a filling element to your meal. For a light option, try them on a fresh salad. A green salad with a tangy vinaigrette complements the scallops well. If you want something heartier, serve with crusty bread to soak up the garlic butter. For more tips, check the Full Recipe. {{image_4}} You can change the flavor by adding herbs. Try thyme or dill for a fresh taste. A pinch of chili flakes adds heat. Mix in tarragon for a sweet, anise-like flavor. Each herb gives a unique twist to your garlic butter baked scallops. Scallops are great, but don’t stop there! Shrimp or lobster work well too. Both seafood options bake nicely in garlic butter. They offer a different texture and taste. You can even mix scallops with these seafood types for a delightful medley. To make this dish gluten-free, check labels on your butter. Use a dairy-free butter or olive oil instead. This keeps your dish rich without dairy. You can still enjoy the same great flavor while meeting dietary needs. After you enjoy your Garlic Butter Baked Scallops, store any leftovers right away. Place them in an airtight container. Make sure to cool them to room temperature first. This helps keep them fresh. Store them in the fridge for up to three days. When you’re ready to eat the leftovers, reheat them gently. The best way is to use your oven. Preheat it to 350°F (175°C). Place the scallops in a baking dish and cover it with foil. This keeps them moist while reheating. Heat for about 10 minutes. Check if they are warm enough before serving. If you want to save your scallops for later, freezing is a great option. First, let them cool completely. Then, wrap each scallop in plastic wrap. Place the wrapped scallops in a freezer-safe bag or container. They can stay frozen for up to two months. When you’re ready to enjoy them, thaw them overnight in the fridge before reheating. For a full recipe, check out the details in the main article. For baking, sea scallops are the best choice. They have a sweet, tender texture. Look for fresh, plump scallops that smell clean and ocean-like. Avoid scallops that appear dry or smell fishy. If you can get dry-packed scallops, they are even better. These have no added chemicals and offer a great taste. Yes, you can prepare the garlic butter mixture and clean the scallops in advance. Store the mixture in the fridge for up to 24 hours. Keep the scallops covered in the fridge, too. When you're ready to bake, just combine them and follow the steps from the Full Recipe. This will save you time on busy days. To check if scallops are done, look for a bright white color. They should feel firm and opaque. A simple test is to poke one gently with a fork. If it flakes easily, it is done. Be careful not to overcook them. Overcooked scallops can become tough and rubbery. Garlic butter baked scallops go well with many sides. Here are a few options: - Creamy mashed potatoes - Lemon garlic asparagus - Fresh green salad - Steamed rice or quinoa - Garlic bread for a tasty dip These dishes complement the rich flavor of the scallops and enhance your meal experience. To sum up, we covered key tips for making garlic butter baked scallops. You learned about essential ingredients, cooking steps, and helpful tricks. Remember to choose fresh scallops for the best taste. Explore variations to keep it exciting. Store leftovers properly to enjoy later. With these tips, you can impress friends and family with a delicious meal. Enjoy cooking and taste the difference!

Garlic Butter Baked Scallops Quick and Savory Delight

Are you ready to elevate your dinner game? Garlic Butter Baked Scallops offer a quick and tasty delight that any

- 1 ripe pineapple, peeled and sliced into thick rings - 1/4 cup honey - 1 tablespoon coconut oil, melted - 1 teaspoon ground cinnamon - 1/2 teaspoon vanilla extract - A pinch of sea salt - Fresh mint leaves, for garnish - Lime wedges, for serving - You can swap honey for maple syrup if you want a vegan option. - Use coconut oil for a light flavor, or choose butter for a richer taste. - For a twist, try nutmeg or ginger instead of cinnamon. These ingredient substitutions can help you customize the roasted pineapple to your taste. Each option brings its own unique flavor. So, feel free to mix it up! You can use the full recipe to guide you through the process. First, you need to preheat your oven to 425°F (220°C). This helps the pineapple roast perfectly. Next, line a baking sheet with parchment paper. This will stop the pineapple from sticking and make cleanup fast. To slice the pineapple, start by cutting off the top and bottom. Stand the pineapple upright and slice off the skin in long strips. Then, cut the fruit into thick rings, about 1 inch thick. Make sure to remove the tough core from each ring. In a small bowl, mix together the honey, melted coconut oil, ground cinnamon, vanilla extract, and a pinch of sea salt. Whisk until everything blends well. The glaze should be smooth and easy to spread. If it feels too thick, add a tiny bit of warm water to thin it out. Now, lay the pineapple rings on the prepared baking sheet. Make sure they sit in a single layer without touching. Use a pastry brush to coat each ring with the honey glaze. Cover them well for the best taste. Put the baking sheet in the oven and roast the pineapple for about 20 minutes. Halfway through, flip the rings gently. This will help them caramelize evenly. You want them to turn golden brown with a slight char around the edges. Once they finish roasting, take the baking sheet out of the oven. Let the pineapple cool for a few minutes. For serving, place the warm rings on a platter or individual plates. Garnish with fresh mint leaves for color. Add lime wedges on the side. The lime juice gives a fresh, zesty kick to each bite. For a fun twist, stack the roasted pineapple rings in a pyramid shape. Drizzle any leftover honey glaze on top for extra sweetness. Enjoy your Roasted Pineapple with Honey Glaze Delightful Treat! You can find the Full Recipe above. To get the best roasted pineapple, set your oven to 425°F (220°C). This high heat helps caramelize the sugars in the pineapple. Roast the pineapple for about 20 minutes. Flipping the rings halfway through cooking is key. This step ensures each side cooks evenly and gets that perfect golden brown color. You want to see some char for added flavor! While roasted pineapple is tasty on its own, pairing it with other flavors makes it even better. Try serving it with grilled meats or fish for a delicious meal. It goes well with coconut rice, too! For a special touch, add chopped nuts like almonds or pecans. You can also top with a dollop of yogurt. This adds creaminess and a nice contrast to the sweet pineapple. Roasted pineapple is not just tasty; it's healthy, too! A serving has about 100 calories. It packs vitamins and fiber, making it a great dessert option. If you're gluten-free, this dish is perfect for you. For vegans, simply swap honey for maple syrup in the glaze. This keeps the dish sweet and plant-based. For full details on how to make this dish, check out the Full Recipe. {{image_4}} You can add a fun twist to your roasted pineapple. Try mixing in fresh fruit like mango or kiwi. These fruits add a bright flavor and a colorful look. You can also spice things up by adding chili powder. This adds a warm kick that surprises your taste buds. Seasonal flavors can make your dish even better. Try infusing fresh herbs like rosemary or using seasonal fruits like berries. This will give your roasted pineapple a unique taste. For holiday fun, add warm spices like cinnamon and clove. These spices can bring a cozy feel to your dish. Roasted pineapple is great on its own, but it shines as a dessert topping. You can serve it over ice cream or yogurt for a tasty treat. This combination works well for different occasions, from summer BBQs to winter gatherings. Try drizzling extra honey glaze over the top for more sweetness. This will make your dish even more delightful! For the full recipe, check out the details above. To store leftover roasted pineapple, let it cool first. Place the slices in an airtight container. This keeps the pineapple fresh and juicy. Roasted pineapple will last in the fridge for about 3 to 5 days. Make sure to eat it within this time to enjoy the best flavor. If you want to save roasted pineapple for later, freezing is an option. First, let the pineapple cool completely. Then, arrange the slices in a single layer on a baking sheet. Freeze them for about 2 hours. Once frozen, transfer the slices to a freezer-safe bag. Remove as much air as possible to prevent freezer burn. Frozen pineapple works well in smoothies or as a topping for desserts. Use it within 6 months for the best taste. When reheating roasted pineapple, keep its texture in mind. To do this, use the oven or a microwave. To reheat in the oven, set it to 350°F (175°C). Place the pineapple on a baking sheet and warm it for about 10 minutes. This method keeps it soft yet firm. If you use a microwave, heat it in short bursts of 15 to 20 seconds. Check it often to avoid overheating. Enjoy your roasted pineapple again without losing its yumminess! Look for a golden brown color. The edges should have a slight char. You want the pineapple to feel soft but not mushy. The aroma will be sweet and inviting. These signs show that your pineapple has caramelized well, enhancing its natural sugars. Yes, you can use canned pineapple. It saves time and is easy to find. However, fresh pineapple gives a better texture and flavor. Canned pineapple may be softer and less sweet. If you use canned, drain it well to avoid excess moisture. Fresh fruit generally brings a brighter taste. Roasted pineapple pairs well with many things. Try serving it with grilled meats for a savory contrast. It also goes great with vanilla ice cream for dessert. Add it to yogurt or salads for freshness. You can use it as a topping for pancakes or waffles, too. Explore these options to balance your meal. Roasting pineapple creates a sweet treat that's both easy and fun. You learned about the main ingredients and how to make a tasty honey glaze. We've discussed cooking steps and helpful tips to perfect your dish. Experiment with variations too, like adding fresh fruit or seasonal flavors. Enjoy serving this roasted delight with yogurt, ice cream, or on its own. Don't forget, you can store leftovers for later. Now, gather your ingredients and make this dish shine at your next meal!

Roasted Pineapple with Honey Glaze Delightful Treat

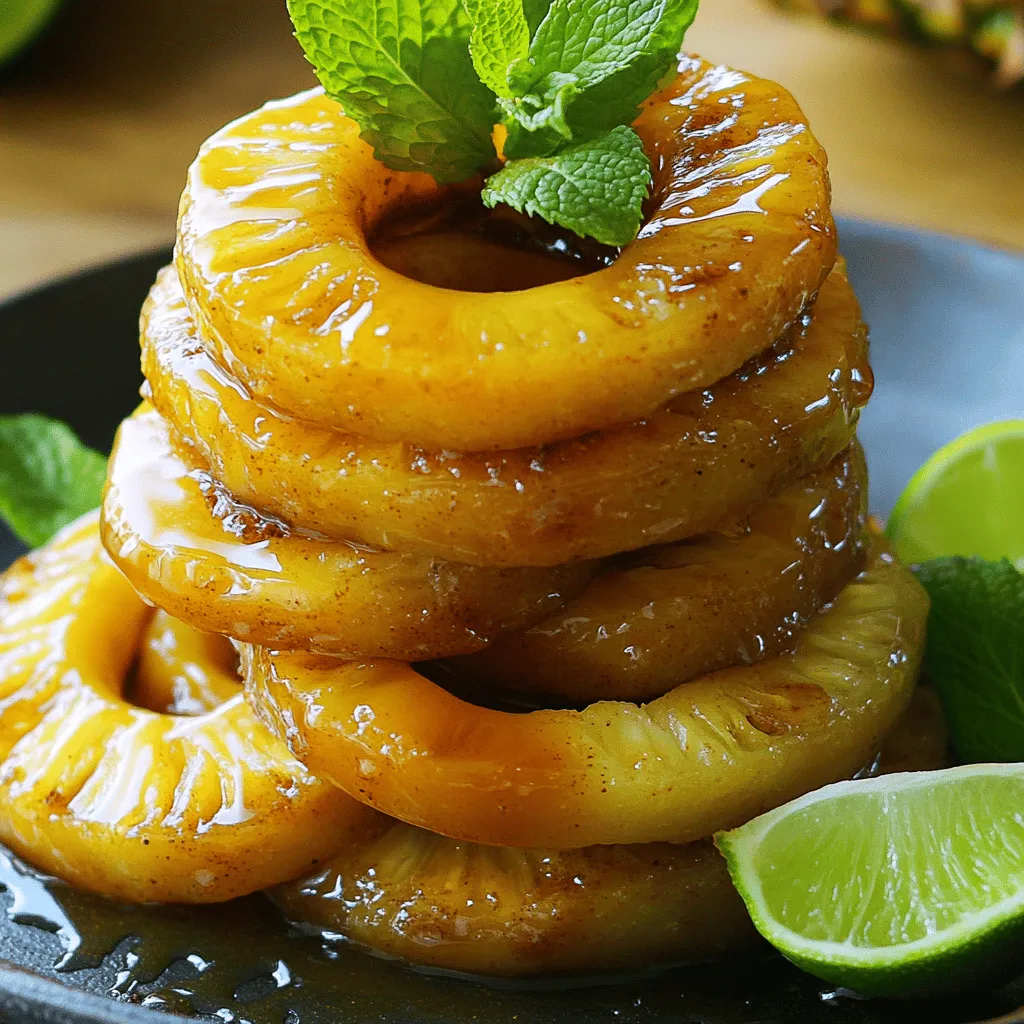
Welcome to a sweet adventure with roasted pineapple drizzled in a warm honey glaze! This delightful treat is not only

- 1 lb boneless, skinless chicken thighs, cut into bite-sized pieces - 1 cup long-grain rice - 1 small onion, finely diced - 1 bell pepper (any color), finely diced - 2 celery stalks, finely diced - 3 cloves garlic, minced - 2 cups low-sodium chicken broth - 1 tablespoon Cajun seasoning - 1 teaspoon smoked paprika - 1/2 teaspoon cayenne pepper (optional, for extra heat) - 1 cup frozen peas - 2 tablespoons olive oil - Salt and pepper to taste - Fresh parsley, chopped (for garnish) - Large pot or Dutch oven - Cutting board - Sharp knife - Wooden spoon or spatula - Measuring cups and spoons - Serving bowls This dish serves about 4 people. Each serving gives you a balance of protein and carbs. Here is a rough estimate of the nutritional values per serving: - Calories: 450 - Protein: 30g - Carbohydrates: 45g - Fat: 15g - Fiber: 3g - Sodium: 600mg This meal is hearty and filling, making it perfect for family dinners. You can enjoy the mix of chicken, rice, and veggies while knowing it’s good for you. For the full recipe, check out the detailed cooking steps. To make this dish, gather all your ingredients first. This makes cooking smooth and easy. You need chicken, rice, and fresh veggies. Make sure to measure everything out. This way, you won’t forget anything. Get your pot ready too. A large pot or Dutch oven works best. - Searing the Chicken Start by heating the olive oil in your pot. Use medium heat to warm it up. Once hot, add the diced chicken thighs. Season them with salt, pepper, and half of the Cajun seasoning. Cook for about 5-7 minutes. Stir occasionally to brown the chicken evenly. When it is golden, remove it from the pot and set it aside. - Sautéing the Vegetables In the same pot, add the diced onion, bell pepper, celery, and minced garlic. This step adds great flavor. Sauté these for about 3-4 minutes. Cook until the onion looks soft and clear. This shows the veggies are ready for the next step. Now add the rest of the Cajun seasoning, smoked paprika, and cayenne pepper if you want more heat. - Adding Ingredients Together Next, stir in the rice. Make sure to coat it well with the veggies and spices. This toasting step will help the rice taste better. After a minute, pour in the chicken broth and turn up the heat. Bring it to a boil. When it boils, lower the heat back down. Add the seared chicken back into the pot. Cover it and let it simmer for about 20 minutes. The rice will soak up the broth. In the last 5 minutes, fold in the frozen peas. They will warm up nicely. Once done, fluff the rice with a fork and check the taste. Adjust the seasoning if needed. Garnish with fresh parsley before serving. This dish is simple and packed with flavor! If you want the complete recipe, check out the Full Recipe. To make your one pot chicken and dirty rice really pop, use fresh herbs. Fresh parsley adds a nice touch. You can also experiment with different Cajun spices. Each blend has a unique flavor. Try adding a squeeze of lime juice before serving. This brightens the dish and adds freshness. Adjust the spice levels based on your taste. If you like it hot, add more cayenne or a dash of hot sauce. For a milder version, reduce the cayenne. You can also swap the chicken for shrimp or sausage. Just adjust the cooking time as needed. Shrimp cooks quickly, while sausage may need longer to brown. One common mistake is overcooking the rice. Keep an eye on it and check a few minutes early. Another mistake is not to season at each step. Always flavor the chicken, veggies, and rice to build layers of taste. Lastly, don't skip the resting time after cooking. Letting the dish sit helps the flavors meld together beautifully. Check out the [Full Recipe] for all the steps and tips! {{image_4}} You can switch the chicken for other meats. Try shrimp, pork, or sausage. Each protein adds a unique flavor. For shrimp, cook them briefly to avoid overcooking. For sausage, slice and brown it before adding other ingredients. These substitutes keep the dish exciting. For a meat-free version, use mushrooms or jackfruit. Mushrooms give depth and a meaty texture. Jackfruit absorbs flavors well and adds bulk. Replace chicken broth with vegetable broth for a richer taste. Add more veggies like zucchini and carrots for color and nutrition. Adjusting spice levels is easy. For mild flavors, reduce the cayenne pepper or skip it. Add sweet bell peppers for a hint of sweetness. If you want more heat, add more cayenne or crushed red pepper flakes. You can also try hot sauce at the end for extra kick. Check out the Full Recipe for a delicious experience! To keep your One Pot Chicken and Dirty Rice fresh, let it cool first. Transfer the dish to an airtight container. Store it in the fridge for up to three days. This way, you’ll enjoy the same great taste later. When you want to reheat, use a microwave or a stovetop. If using the microwave, heat in short bursts. Stir after each burst for even warmth. If using the stovetop, add a splash of chicken broth. This helps keep the rice moist and tasty. You can also freeze leftovers. Place the cooled dish in a freezer-safe container. Make sure to leave some space for expansion. Label the container with the date. It will stay good for up to three months. When ready to eat, thaw overnight in the fridge before reheating. Dirty rice is a flavorful dish from Louisiana. It is made with white rice mixed with ground meat, spices, and vegetables. The name comes from the rice’s color, which gets darker from the meat and seasonings. Traditional ingredients include onions, bell peppers, and spices like Cajun seasoning. The dish is hearty and full of flavor, making it a favorite in many homes. Yes, you can use brown rice for this recipe. However, brown rice takes longer to cook. It usually needs about 40-50 minutes to become tender. You may need to add more broth to keep it moist. Just keep an eye on the cooking time and adjust the liquid as needed. The flavor will still be great! You can prepare the One Pot Chicken and Dirty Rice ahead of time. Cook the chicken and rice as directed, then let it cool. Store it in an airtight container in the fridge for up to three days. When you’re ready to eat, reheat it on the stove or in the microwave. If it seems dry, add a splash of broth to bring it back to life. This dish pairs well with various sides. You can serve it with a simple green salad for a fresh touch. Cornbread also makes a nice, comforting side. For a bit of heat, try a side of pickled jalapeños. The options are endless, so feel free to mix and match! For the full recipe, check out the [Full Recipe]. This blog post covered all you need to know about making One Pot Chicken and Dirty Rice. We looked at essential ingredients, cooking steps, and handy tips for success. You can adapt the recipe to suit your tastes and dietary needs. Remember to store leftovers properly and reheat them safely. Enjoy experimenting with flavors and variations! This dish not only satisfies your hunger but also brings joy to your kitchen. Now, go ahead and get cooking!

Savory One Pot Chicken and Dirty Rice Delight

Get ready to savor the flavors of comfort food with my Savory One Pot Chicken and Dirty Rice Delight! This

- Tomahawk steak (2-3 pounds) - Extra-virgin olive oil - Sea salt and freshly ground black pepper - Large shrimp (deveined and peeled) - Unsalted butter - Fresh lemon juice - Garlic powder - Smoked paprika - Fresh parsley and lemon wedges for garnishing To create a great Surf & Turf Tomahawk Steak, you need a few key items. A tomahawk steak is your main star. It should weigh between 2 to 3 pounds. This cut has a thick bone and is known for its rich flavor. Next, grab some extra-virgin olive oil to help with seasoning. You will also need sea salt and freshly ground black pepper for taste. For the seafood, use large shrimp. Make sure they are deveined and peeled. This saves time and makes cooking easier. Unsalted butter adds a rich taste when cooking the shrimp. Fresh lemon juice gives a nice tang that enhances flavor. To boost the taste of the steak and shrimp, gather some garlic powder and smoked paprika. Both add depth to your dish. Finally, have fresh parsley on hand for garnish. Lemon wedges also add a bright touch when serving. You can find the full recipe for preparing this delightful meal, which includes all these ingredients, and step-by-step cooking instructions. Enjoy creating this savory dish! 1. Letting the steak rest: Take the tomahawk steak from the fridge. Let it sit at room temperature for 30-45 minutes. This helps the steak cook evenly. 2. Drying and seasoning the steak: Pat the steak dry with paper towels. This step removes moisture for a better sear. Drizzle olive oil on both sides. Then, season with sea salt, black pepper, garlic powder, and smoked paprika. Make sure to coat it well for full flavor. 1. Preheating the grill or oven: If using a grill, preheat it to high heat. If you prefer the oven, set it to 400°F (200°C). This ensures a perfect cooking environment. 2. Grilling vs. skillet cooking: For grilling, place your seasoned tomahawk steak directly on the grill. Cook for about 4-6 minutes on each side for medium-rare. If using a skillet, sear the steak for 4-5 minutes on each side, then transfer it to the oven. Cook in the oven for about 15-20 minutes. Use a meat thermometer to check for 130°F for medium-rare. 1. Cooking the shrimp: In a small skillet, melt unsalted butter over medium heat. Add the shrimp and cook for 2-3 minutes on each side until they are pink and opaque. Drizzle with lemon juice and sprinkle parsley on top. 2. Resting the steak: After cooking, remove the steak from heat. Let it rest on a cutting board for at least 10 minutes. This allows the juices to stay inside the meat, making it tender and juicy. Follow these steps to create a stunning Surf & Turf Tomahawk Steak. For the full recipe, check out the details above. Using a meat thermometer helps you know when the steak is ready. Aim for 130°F for medium-rare. Insert the thermometer into the thickest part of the steak without touching the bone. Resting the steak is just as important. After cooking, let it sit for at least 10 minutes. This allows the juices to move back into the meat. Skipping this step can lead to a dry steak. You can boost flavor with different seasonings. Try adding onion powder or fresh herbs like thyme. These can give your steak a unique twist. For plating, arrange the steak and shrimp neatly on your plate. Drizzle some melted butter over the steak. Add a sprinkle of parsley and a few lemon wedges for a pop of color. This makes the dish not only tasty but also beautiful. Cooking times vary based on your method. For grilling, cook the steak for about 4-6 minutes per side for medium-rare. If you use a skillet, sear for 4-5 minutes, then move it to a preheated oven at 400°F. Cook it there for about 15-20 minutes. Oven cooking can be more even, while grilling gives a great char. Choose based on your taste and kitchen setup. For the full recipe, check out the Surf & Turf Tomahawk Steak recipe. {{image_4}} If you want a twist on the classic tomahawk steak, try different cuts. Ribeye is a great option; it’s tender and full of flavor. Porterhouse is another choice, giving you both filet and strip steak in one cut. Flank steak can work well too, especially if you marinate it first. Each cut brings its own taste and texture, making your meal unique. Not a fan of shrimp? No worries! You can swap in lobster for a sweet touch. Grilled scallops also work well; they add a lovely ocean flavor. Even crab cakes can make a tasty pairing. Each seafood choice adds a different flair to your surf and turf dish. Want to lighten up the meal? Choose lean cuts like sirloin or filet mignon. You can also use olive oil instead of butter for the shrimp. To make it gluten-free, check your spices and sauces. Most are naturally gluten-free, but always read labels. These small changes can help you enjoy this dish while staying on track with your diet. For the full recipe, check out the details above. To keep your leftover steak and shrimp fresh, place them in airtight containers. Make sure to let them cool before sealing. This helps prevent steam from building up, which can lead to sogginess. Store the containers in the fridge. Consume them within 3-4 days for the best taste. Reheating your steak and shrimp correctly is key. Avoid the microwave, as it can make the steak tough. Instead, heat a skillet over low heat. Add a bit of oil or butter. Place the steak in the skillet and cover it. Heat for about 3-5 minutes on each side. For the shrimp, use the same skillet and heat for 1-2 minutes. This keeps them juicy and flavorful. Yes, you can freeze leftovers! Wrap the steak tightly in plastic wrap, then put it in a freezer bag. For shrimp, place them in a separate airtight container. Label them with the date. They can last for up to 3 months in the freezer. When ready to eat, thaw them overnight in the fridge before reheating. Enjoy your tasty Surf & Turf Tomahawk Steak again! You can check the doneness of your tomahawk steak by using a meat thermometer. Aim for 130°F for medium-rare. Here are some other signs to look for: - Color: The steak should have a nice brown crust on the outside. - Juices: Juices should run clear when you cut into it. - Touch: Press the steak with your finger. It should feel firm but springy. Yes, you can cook a tomahawk steak indoors. Here are some methods: - Cast-Iron Skillet: Heat it on high. Sear the steak for 4-5 minutes on each side. Then finish in a hot oven at 400°F until done. - Broiler: Place the steak on a pan under the broiler. Cook for a few minutes on each side until it reaches your desired doneness. Great sides will enhance your meal. Here are some tasty options: - Garlic Mashed Potatoes: Creamy and rich, they balance the steak's flavors. - Grilled Asparagus: Adds a nice crunch and bright color. - Caesar Salad: The crisp greens and dressing complement the richness of the steak. - Roasted Corn: Sweet and smoky, it pairs well with both steak and shrimp. Making grilled shrimp flavorful is easy. Try these tips: - Marinate: Soak shrimp in olive oil, garlic, and lemon juice for about 30 minutes. - Season Well: Use salt, pepper, and spices like paprika or cayenne for a kick. - Cook Quickly: Grill shrimp for 2-3 minutes on each side until pink. - Garnish: Finish with fresh parsley and a squeeze of lemon juice to boost flavor. For the full recipe, check out the detailed steps! In this post, we explored how to create a delicious Surf & Turf Tomahawk Steak. We covered the key ingredients, from the tomahawk steak to flavorful shrimp. You learned the step-by-step cooking methods and tips for perfect doneness. We also discussed variations and storage tips to help you enjoy every bite. This dish isn't just a meal; it’s an experience. With the right techniques and ingredients, you can impress anyone at your table. Now, get ready to cook! Enjoy your culinary journey!

Savory Surf & Turf Tomahawk Steak Recipe Delight

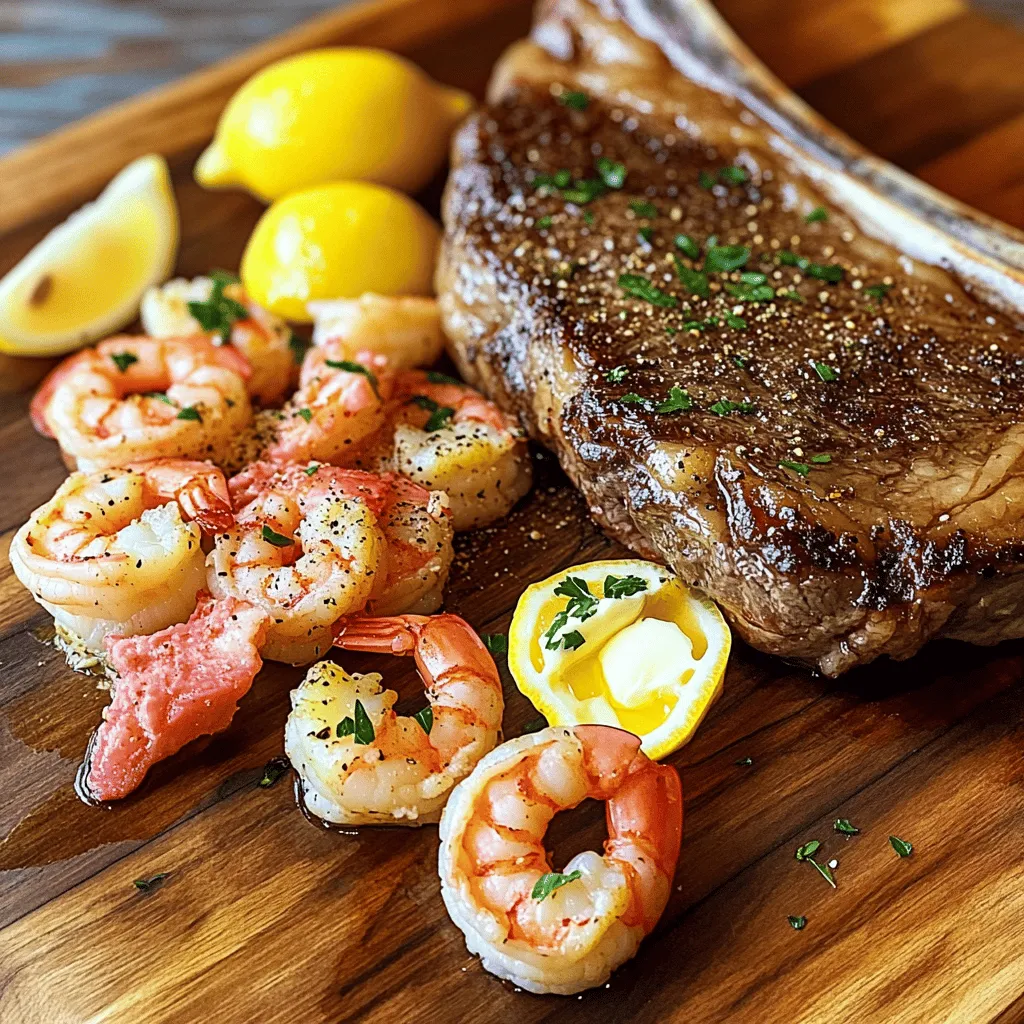
Are you ready to impress at your next dinner gathering? This Savory Surf & Turf Tomahawk Steak Recipe offers a

To make your Creamy Italian Sausage Ditalini Soup, you’ll need: - 1 pound Italian sausage (mild or spicy) - 1 medium onion, diced - 3 cloves garlic, minced - 4 cups low-sodium chicken broth - 1 can (14.5 oz) diced tomatoes, with juice - 1 cup ditalini pasta - 1 cup heavy cream - 2 cups fresh spinach, chopped - 1 teaspoon dried Italian herbs (oregano, basil, thyme) - Salt and black pepper, to taste - Grated Parmesan cheese, for topping - Optional: Fresh herbs for garnish You can mix things up with these options: - Use turkey or chicken sausage for a leaner choice. - Swap ditalini for other small pasta shapes like orzo or elbow macaroni. - Replace heavy cream with coconut milk for a dairy-free option. - Add carrots or celery for extra veggies and flavor. - Try different herbs like parsley or rosemary for a unique taste. Here’s a quick look at the nutrition in key ingredients: - Italian sausage: High in protein and fat. Choose leaner versions for fewer calories. - Heavy cream: Adds richness but is high in calories and fat. Use sparingly. - Spinach: Rich in vitamins A and K. Great for adding nutrients. - Ditalini pasta: A good source of carbohydrates. Helps keep you full. These ingredients come together to create a warm and hearty soup you’ll love! For the full recipe, check the earlier section. To start, heat a large pot over medium-high heat. Add 1 pound of Italian sausage. Use a wooden spoon to break it apart. Cook for about 5-7 minutes until it is brown and fully cooked. This step adds a rich flavor to your soup. Next, add 1 medium onion, diced into small pieces. Sauté for 3-4 minutes until it is soft and translucent. Then, stir in 3 cloves of minced garlic. Cook for 1 more minute until you can smell the garlic. Pour in 4 cups of low-sodium chicken broth and 1 can of diced tomatoes. Scrape the bottom of the pot with your spoon to lift any tasty bits. This is called deglazing. Bring the mixture to a boil. Once the soup is boiling, add 1 cup of ditalini pasta. Cook according to the package instructions, usually about 7-8 minutes. Stir occasionally to keep the pasta from sticking. After the pasta is al dente, reduce the heat to low. Slowly stir in 1 cup of heavy cream, followed by 2 cups of chopped spinach and 1 teaspoon of dried Italian herbs. Cook for another 2-3 minutes until the spinach wilts. Season with salt and pepper to taste. Remove the pot from heat and let the soup rest for a couple of minutes to thicken. For the full recipe, refer to the ingredients and step-by-step details provided above. Enjoy this delightful dish! To cook ditalini pasta just right, follow these tips: - Use a large pot with plenty of water. - Salt the water well; this adds flavor. - Stir the pasta often to prevent sticking. - Check for al dente texture a minute early. - Drain the pasta and add it to the soup right away. Cooking pasta well helps keep your soup from getting too thick. Perfectly cooked ditalini will absorb the soup's flavors but still stay firm. To boost the flavors in your soup, try these ideas: - Use fresh garlic instead of minced. - Add a splash of white wine before broth. - Stir in some red pepper flakes for heat. - Top with fresh herbs like basil or parsley before serving. These steps make your soup more complex and tasty. Each ingredient adds a new layer that makes it special. For a creamier soup, consider these serving tips: - Use more heavy cream for richness. - Drizzle olive oil just before serving. - Add a dollop of ricotta or mascarpone on top. - Garnish with extra grated Parmesan cheese. These touches transform the soup into a luxurious dish. Enjoy a bowl of creamy delight that warms your heart. For the full recipe, check out the details above! {{image_4}} You can switch up ingredients to make this soup your own. Here are some ideas: - Proteins: Instead of Italian sausage, try ground turkey or chicken. You can also use diced ham for a smoky flavor. For a hearty touch, add cooked lentils. - Pasta: While ditalini is great, try small shells, orzo, or even gluten-free pasta. Each type brings a unique bite. - Veggies: Toss in carrots, celery, or bell peppers for extra nutrition. You can also add corn or zucchini for a fresh twist. To make this soup vegan, swap the sausage for plant-based sausage or mushrooms. Use vegetable broth instead of chicken broth. Replace heavy cream with coconut milk or cashew cream for richness. Add more veggies like kale or chickpeas to boost protein and texture. When choosing sausage, you have options. If you like heat, go for spicy Italian sausage. It adds depth to the soup. For a milder taste, stick with sweet Italian sausage. You can also mix both for a balanced flavor. Add red pepper flakes for extra spice if desired. Adjust to your taste for the perfect kick! To keep your soup fresh, store it in an airtight container. Let the soup cool down before sealing it. You can keep it in the fridge for up to three days. If you need to store it longer, freezing is a great option. To freeze the soup, pour it into a freezer-safe container. Leave some space at the top for expansion. You can also use freezer bags for easy stacking. Label the bags with the date. This way, you won't forget how long it's been in the freezer. The soup can last up to three months frozen. When it's time to enjoy your leftovers, reheat the soup on the stove. Use medium heat to warm it slowly. Stir occasionally to prevent sticking. If the soup seems too thick, add a splash of chicken broth or water. You can also microwave it in a microwave-safe bowl. Cover it to avoid splatters. Heat in short bursts, stirring in between, until warm. Enjoy your creamy Italian sausage ditalini soup just like the first day! For the full recipe, check out the instructions above. Yes, you can. Use any small pasta you like. Orzo, macaroni, or even fusilli work well. Just make sure the pasta cooks in a similar time frame as ditalini. This keeps your soup smooth and creamy. To spice things up, add crushed red pepper flakes. Start with a teaspoon and add more to taste. You can also choose spicy Italian sausage instead of mild. This brings heat right into the soup. This soup pairs nicely with crusty bread or a fresh salad. Garlic bread is a great choice too. It soaks up the rich broth and adds a nice crunch. You can also enjoy it with a light, tangy salad for balance. To make this soup gluten-free, simply swap ditalini with a gluten-free pasta. Many brands offer tasty options. Check the cooking time to get it just right. Always read labels to ensure all ingredients are gluten-free. Enjoy your creamy delight without worry! This blog post shared a complete guide for making Creamy Italian Sausage Ditalini Soup. We covered ingredients, step-by-step instructions, and helpful tips. You learned cooking techniques and enjoyed variations to suit your taste. Plus, storage info helps with leftovers, ensuring fresh meals later. In making this soup, you can personalize each step. Experiment and find your perfect balance. Enjoy every spoonful, knowing you created something delicious!

Creamy Italian Sausage Ditalini Soup Delight

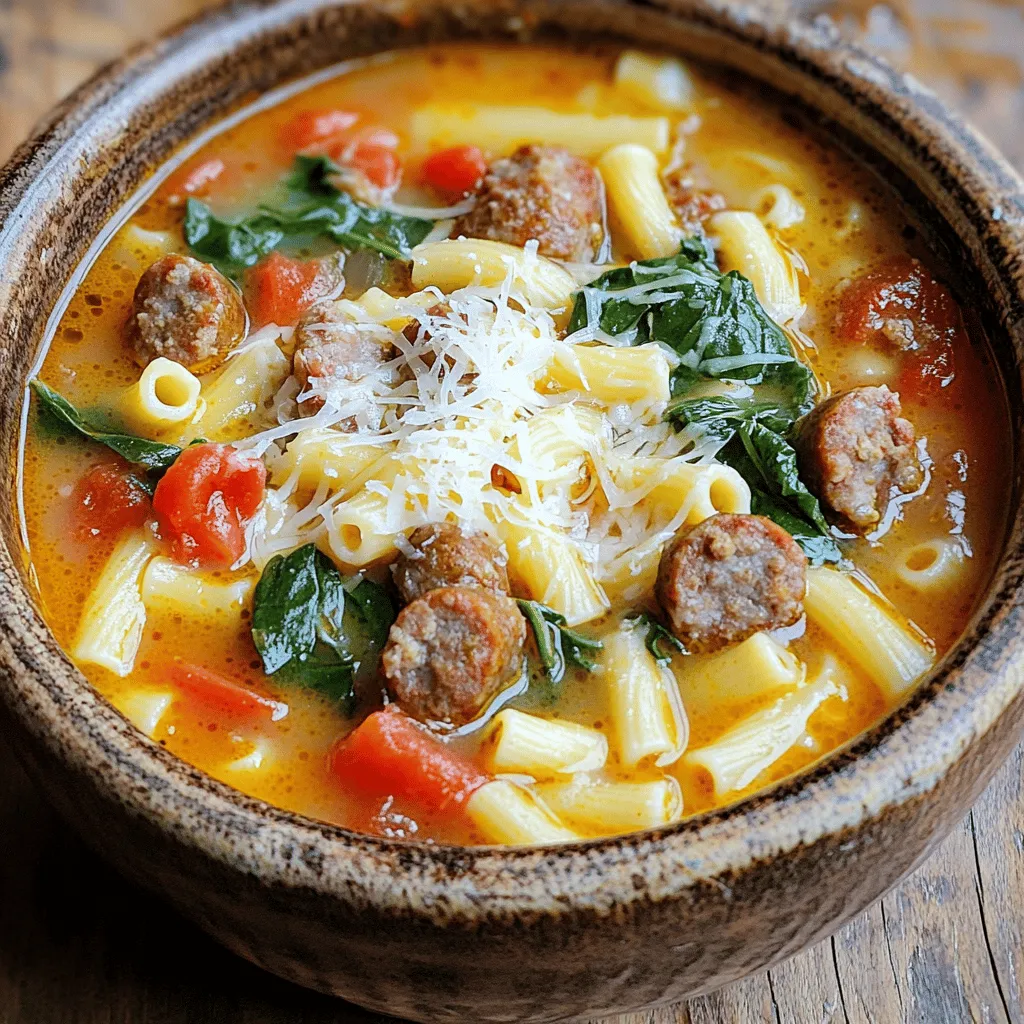
Craving a warm and filling dish? Let me introduce you to Creamy Italian Sausage Ditalini Soup! This comforting bowl combines

Older posts
Newer posts
← Previous Page1 … Page10 Page11 Page12 … Page27 Next →

dsad

© 2025 mealinmoments • Built with GeneratePress

Our Policies

  • Copyright Policy
  • Cookie Policy
  • GDPR Policy
  • Privacy Policy
  • Disclaimer
  • Terms Of Use

More Information

  • Home
  • About
  • Contact
  • Appetizers
  • Dessert
  • Dinner
  • Drinks
©2025, mealinmoments About Back To Top