Chocolate Lava Cake Rich and Indulgent Delight

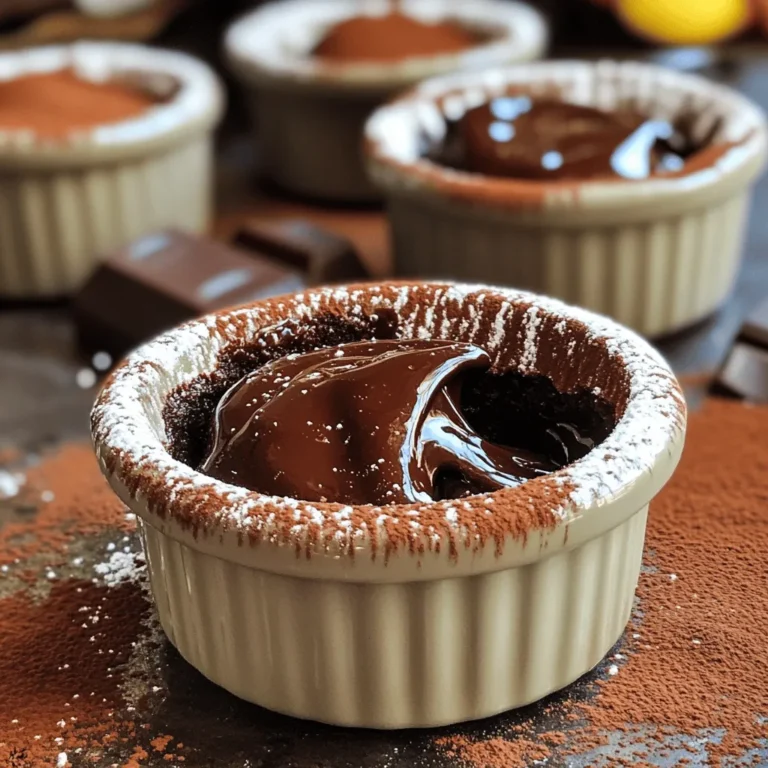
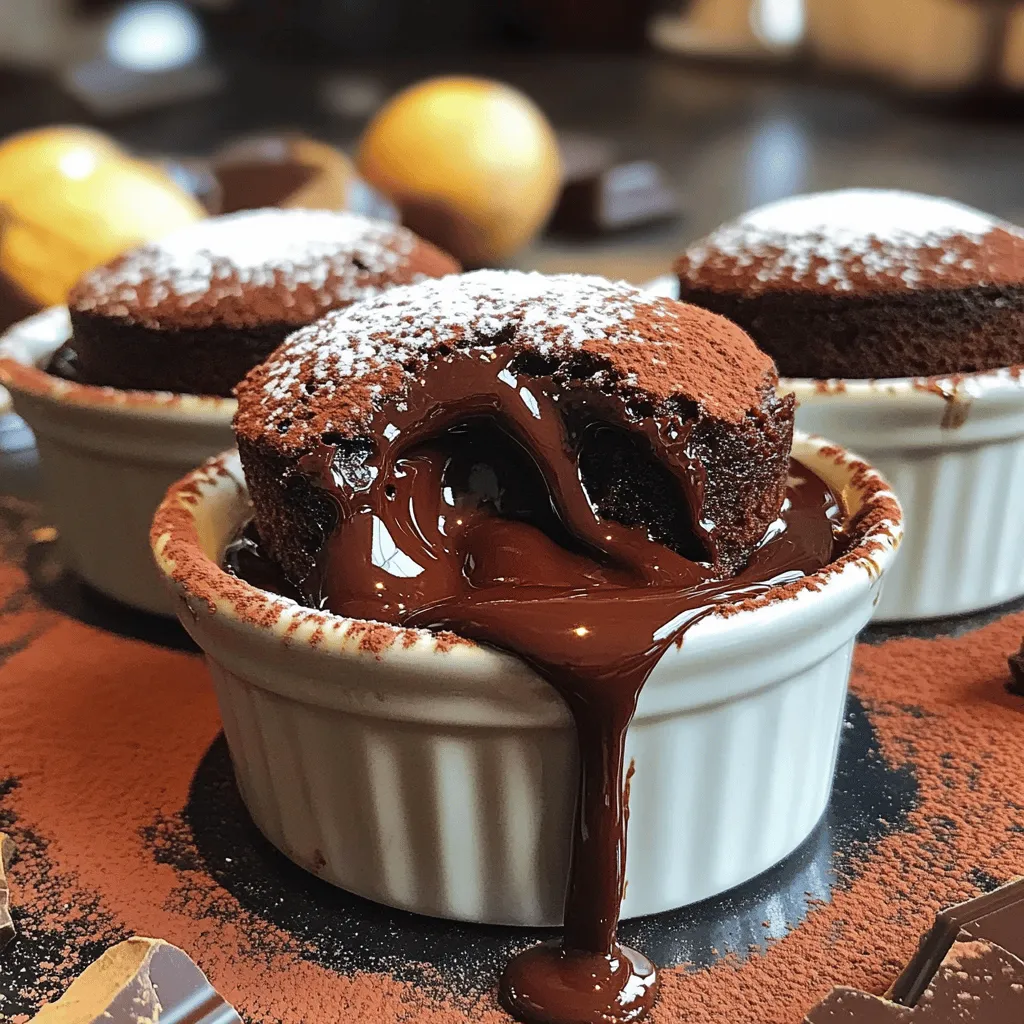
If you’re craving a dessert that’s rich, indulgent, and utterly delicious, you’re in the right place! Chocolate Lava Cake is a true showstopper, with a warm, gooey center that melts in your mouth. In this article, I’ll guide you through easy steps to create this divine treat at home. Get ready to impress your friends and family with the perfect dessert that looks and tastes like magic!

Ingredients

To make a rich chocolate lava cake, you will need the following ingredients:

– 1 cup semi-sweet chocolate chips

– ½ cup unsalted butter

– 1 cup powdered sugar

– 2 large eggs

– 2 large egg yolks

– 1 teaspoon vanilla extract

– ½ cup all-purpose flour

– Pinch of salt

– Butter and cocoa powder (for greasing ramekins)

Each ingredient plays a key role in creating that gooey center we all love. The chocolate chips give it that deep, rich flavor. The butter adds creaminess, while the powdered sugar sweetens the mix. The eggs and egg yolks help the cake rise and keep it moist. Vanilla extract enhances the taste, and flour gives the cake structure. Don’t forget the salt; it balances the sweetness.

When preparing your ramekins, use both butter and cocoa powder. This will help the cakes release easily after baking. This is a crucial step for that perfect presentation.

For the full recipe, refer to the Full Recipe section. Enjoy the process; each step adds to the magic of your chocolate lava cake!

Step-by-Step Instructions

Preheating and Preparing

– Preheat the oven to 425°F (220°C).

– Prepare and grease four ramekins with butter and cocoa powder.

Melting Ingredients

– Melt 1 cup of chocolate chips and ½ cup of butter in the microwave.

– Heat in 30-second bursts, stirring in between.

Combining the Mixture

– Mix in 1 cup of powdered sugar, 2 large eggs, and 1 teaspoon of vanilla.

– Incorporate ½ cup of all-purpose flour and a pinch of salt gently.

Baking Process

– Fill the ramekins about ¾ full with the batter.

– Bake for 12-14 minutes until edges are firm and centers are soft.

– Let the cakes cool for about 1 minute.

– Run a knife around the edges to loosen the cakes.

– Invert each ramekin onto a plate and tap to release.

– Serve warm for the best gooey center experience.

For more detailed steps, check the Full Recipe.

Tips & Tricks

Achieving the Perfect Lava Center

To get that ooey-gooey center, timing is key. Your oven might bake differently than mine. If you have a convection oven, it may cook faster. Always check your cake at 12 minutes. It should look set around the edges but still soft in the middle.

To test doneness, gently shake the ramekin. If the center jiggles slightly, it’s perfect. You can also insert a toothpick; it should come out with a bit of batter clinging to it.

Presentation Enhancements

Garnishing makes your lava cake look fancy. You can add fresh berries on top for color. Mint leaves add a nice touch too. A light dusting of powdered sugar makes it look elegant.

Pair your cake with a scoop of vanilla ice cream. The cold ice cream contrasts well with the warm cake. You can also drizzle chocolate or caramel sauce on the plate for extra flair.

Common Mistakes to Avoid

One big mistake is overmixing the batter. This can make your cake tough instead of soft. Mix just until you don’t see any flour.

Another common issue is the oven temperature. Use an oven thermometer to check if your oven is accurate. If it’s too hot, your cake may bake too fast and won’t have that lava center. Follow the Full Recipe for best results.

Variations

Dietary Modifications

You can easily change this recipe to fit special diets. For a gluten-free option, use almond flour or coconut flour instead of all-purpose flour. Both flours create a rich taste with a slightly different texture. They work great, and you won’t miss the gluten.

If you want a vegan lava cake, substitute eggs and butter. Use flaxseed meal mixed with water as a binder. For butter, try coconut oil or a plant-based spread. This way, you keep the cake moist and delicious without using animal products.

Flavor Variations

Want to spice things up? Add a dash of cinnamon or a bit of brewed coffee to the batter. These flavors deepen the chocolate and make each bite even richer. You can also infuse the batter with orange zest. Just stir in a teaspoon and enjoy that citrus twist!

You can get creative with other flavors too. Think about adding mint extract or even a hint of chili powder for a unique kick. The possibilities are endless with chocolate.

Serving Suggestions

When it’s time to serve, the fun really begins. You can top your lava cake with creamy caramel or a dollop of whipped cream. Both add sweetness and a nice texture contrast.

For a fun twist, create a lava cake sundae. Place a warm lava cake in a bowl, add a scoop of ice cream, and drizzle with chocolate sauce. This treat is sure to impress!

For the full recipe, check out the complete guide that covers all the steps and tips. Enjoy your cooking adventure!

Storage Info

How to Store Leftovers

To keep your chocolate lava cakes fresh, refrigerate them. Place the cooled cakes in an airtight container. This way, they stay moist and tasty. You can store them for up to three days.

Can you freeze chocolate lava cakes? Yes, you can! Wrap each cake tightly in plastic wrap. Then, place them in a freezer bag. They can last for up to three months in the freezer.

Reheating Instructions

To reheat the cakes, use your oven or microwave. For the oven, preheat it to 350°F (175°C). Place the cakes on a baking sheet. Heat them for about 10 minutes. This keeps the gooey center intact.

If you use the microwave, heat each cake for 20-30 seconds. Check the cake to see if it’s warm. Be careful not to overheat, or the center will lose its charm. Enjoy your delicious dessert again!

FAQs

Can I make chocolate lava cake in advance?

Yes, you can prepare the batter ahead of time. Store it in the fridge for up to a day. Just remember to fill the ramekins before baking. Baking straight from the fridge may need a few extra minutes.

How do I know when the lava cake is done?

The edges should feel firm, while the center remains soft. A toothpick inserted in the edge should come out clean, but one from the center should be gooey. This perfect balance gives you that delicious lava effect.

Can I use different types of chocolate?

Absolutely! You can use dark, milk, or even white chocolate. Each type changes the flavor. Dark chocolate gives a rich taste, while milk chocolate is sweeter. Experiment and find your favorite!

Why does my chocolate lava cake not have a gooey center?

This often happens if you bake too long. Each oven is different, so keep an eye on the time. If the center is not gooey, it may need less baking.

What is the best way to serve chocolate lava cake?

Serve it warm for the best experience. A scoop of vanilla ice cream on top adds a lovely creaminess. You can also dust with powdered sugar or add fresh berries for a pop of color. Enjoy every bite!

Full Recipe

Decadent Chocolate Lava Cake Wall

Ingredient List

– 1 cup semi-sweet chocolate chips

– ½ cup unsalted butter

– 1 cup powdered sugar

– 2 large eggs

– 2 large egg yolks

– 1 teaspoon vanilla extract

– ½ cup all-purpose flour

– Pinch of salt

– Butter and cocoa powder (for greasing ramekins)

To make a chocolate lava cake, you start by gathering your ingredients. This cake is a true treat. The gooey center is what makes it special.

Step-by-Step Process Overview

1. Preheat the Oven: Set your oven to 425°F (220°C). This heat gives the cake the perfect bake.

2. Prepare Ramekins: Grease four ramekins with butter. Dust each with cocoa powder. This helps the cakes come out easily.

3. Melt Chocolate & Butter: In a bowl, mix the chocolate chips and butter. Microwave them in short bursts. Stir until smooth.

4. Incorporate Sugar: Add the powdered sugar to the melted mix. Stir until it is lump-free.

5. Add Eggs & Vanilla: Crack the eggs into the bowl. Pour in the vanilla. Whisk the mix until fully combined.

6. Mix the Dry Ingredients: Sift the flour and salt over the chocolate mix. Gently fold it in. Don’t overmix; just combine until no flour shows.

7. Fill Ramekins: Pour the batter into the ramekins. Fill each about ¾ full.

8. Bake: Place the ramekins on a baking sheet. Bake for 12-14 minutes. The edges should be firm, but the center must be soft.

9. Cool Slightly: Remove the ramekins from the oven. Let them cool for 1 minute. Run a knife around the edges.

10. Invert and Serve: Turn each ramekin onto a plate. Tap to release the cake.

11. Enjoy Warm: Serve right away. Pair it with vanilla ice cream or a sprinkle of powdered sugar.

Prep and Cook Time

Prep Time: 15 minutes

Total Time: 25 minutes

Servings: 4

When it’s done, your cake will be rich and warm. Enjoy this dessert with friends or family for a special treat!

You learned how to make a delicious chocolate lava cake with simple steps. Start by gathering the right ingredients and preparing your ramekins. Then, melt and mix everything together carefully. Bake and watch for that gooey center.

Remember to avoid common mistakes like overmixing. Explore fun variations to suit your taste. With proper storage and reheating, you can enjoy this treat anytime. Dive in and impress your friends or family with this sweet dessert!

To make a rich chocolate lava cake, you will need the following ingredients: - 1 cup semi-sweet chocolate chips - ½ cup unsalted butter - 1 cup powdered sugar - 2 large eggs - 2 large egg yolks - 1 teaspoon vanilla extract - ½ cup all-purpose flour - Pinch of salt - Butter and cocoa powder (for greasing ramekins) Each ingredient plays a key role in creating that gooey center we all love. The chocolate chips give it that deep, rich flavor. The butter adds creaminess, while the powdered sugar sweetens the mix. The eggs and egg yolks help the cake rise and keep it moist. Vanilla extract enhances the taste, and flour gives the cake structure. Don’t forget the salt; it balances the sweetness. When preparing your ramekins, use both butter and cocoa powder. This will help the cakes release easily after baking. This is a crucial step for that perfect presentation. For the full recipe, refer to the Full Recipe section. Enjoy the process; each step adds to the magic of your chocolate lava cake! - Preheat the oven to 425°F (220°C). - Prepare and grease four ramekins with butter and cocoa powder. - Melt 1 cup of chocolate chips and ½ cup of butter in the microwave. - Heat in 30-second bursts, stirring in between. - Mix in 1 cup of powdered sugar, 2 large eggs, and 1 teaspoon of vanilla. - Incorporate ½ cup of all-purpose flour and a pinch of salt gently. - Fill the ramekins about ¾ full with the batter. - Bake for 12-14 minutes until edges are firm and centers are soft. - Let the cakes cool for about 1 minute. - Run a knife around the edges to loosen the cakes. - Invert each ramekin onto a plate and tap to release. - Serve warm for the best gooey center experience. For more detailed steps, check the Full Recipe. To get that ooey-gooey center, timing is key. Your oven might bake differently than mine. If you have a convection oven, it may cook faster. Always check your cake at 12 minutes. It should look set around the edges but still soft in the middle. To test doneness, gently shake the ramekin. If the center jiggles slightly, it’s perfect. You can also insert a toothpick; it should come out with a bit of batter clinging to it. Garnishing makes your lava cake look fancy. You can add fresh berries on top for color. Mint leaves add a nice touch too. A light dusting of powdered sugar makes it look elegant. Pair your cake with a scoop of vanilla ice cream. The cold ice cream contrasts well with the warm cake. You can also drizzle chocolate or caramel sauce on the plate for extra flair. One big mistake is overmixing the batter. This can make your cake tough instead of soft. Mix just until you don’t see any flour. Another common issue is the oven temperature. Use an oven thermometer to check if your oven is accurate. If it’s too hot, your cake may bake too fast and won’t have that lava center. Follow the Full Recipe for best results. {{image_4}} You can easily change this recipe to fit special diets. For a gluten-free option, use almond flour or coconut flour instead of all-purpose flour. Both flours create a rich taste with a slightly different texture. They work great, and you won’t miss the gluten. If you want a vegan lava cake, substitute eggs and butter. Use flaxseed meal mixed with water as a binder. For butter, try coconut oil or a plant-based spread. This way, you keep the cake moist and delicious without using animal products. Want to spice things up? Add a dash of cinnamon or a bit of brewed coffee to the batter. These flavors deepen the chocolate and make each bite even richer. You can also infuse the batter with orange zest. Just stir in a teaspoon and enjoy that citrus twist! You can get creative with other flavors too. Think about adding mint extract or even a hint of chili powder for a unique kick. The possibilities are endless with chocolate. When it's time to serve, the fun really begins. You can top your lava cake with creamy caramel or a dollop of whipped cream. Both add sweetness and a nice texture contrast. For a fun twist, create a lava cake sundae. Place a warm lava cake in a bowl, add a scoop of ice cream, and drizzle with chocolate sauce. This treat is sure to impress! For the full recipe, check out the complete guide that covers all the steps and tips. Enjoy your cooking adventure! To keep your chocolate lava cakes fresh, refrigerate them. Place the cooled cakes in an airtight container. This way, they stay moist and tasty. You can store them for up to three days. Can you freeze chocolate lava cakes? Yes, you can! Wrap each cake tightly in plastic wrap. Then, place them in a freezer bag. They can last for up to three months in the freezer. To reheat the cakes, use your oven or microwave. For the oven, preheat it to 350°F (175°C). Place the cakes on a baking sheet. Heat them for about 10 minutes. This keeps the gooey center intact. If you use the microwave, heat each cake for 20-30 seconds. Check the cake to see if it's warm. Be careful not to overheat, or the center will lose its charm. Enjoy your delicious dessert again! Yes, you can prepare the batter ahead of time. Store it in the fridge for up to a day. Just remember to fill the ramekins before baking. Baking straight from the fridge may need a few extra minutes. The edges should feel firm, while the center remains soft. A toothpick inserted in the edge should come out clean, but one from the center should be gooey. This perfect balance gives you that delicious lava effect. Absolutely! You can use dark, milk, or even white chocolate. Each type changes the flavor. Dark chocolate gives a rich taste, while milk chocolate is sweeter. Experiment and find your favorite! This often happens if you bake too long. Each oven is different, so keep an eye on the time. If the center is not gooey, it may need less baking. Serve it warm for the best experience. A scoop of vanilla ice cream on top adds a lovely creaminess. You can also dust with powdered sugar or add fresh berries for a pop of color. Enjoy every bite! - Ingredient List - 1 cup semi-sweet chocolate chips - ½ cup unsalted butter - 1 cup powdered sugar - 2 large eggs - 2 large egg yolks - 1 teaspoon vanilla extract - ½ cup all-purpose flour - Pinch of salt - Butter and cocoa powder (for greasing ramekins) To make a chocolate lava cake, you start by gathering your ingredients. This cake is a true treat. The gooey center is what makes it special. 1. Preheat the Oven: Set your oven to 425°F (220°C). This heat gives the cake the perfect bake. 2. Prepare Ramekins: Grease four ramekins with butter. Dust each with cocoa powder. This helps the cakes come out easily. 3. Melt Chocolate & Butter: In a bowl, mix the chocolate chips and butter. Microwave them in short bursts. Stir until smooth. 4. Incorporate Sugar: Add the powdered sugar to the melted mix. Stir until it is lump-free. 5. Add Eggs & Vanilla: Crack the eggs into the bowl. Pour in the vanilla. Whisk the mix until fully combined. 6. Mix the Dry Ingredients: Sift the flour and salt over the chocolate mix. Gently fold it in. Don’t overmix; just combine until no flour shows. 7. Fill Ramekins: Pour the batter into the ramekins. Fill each about ¾ full. 8. Bake: Place the ramekins on a baking sheet. Bake for 12-14 minutes. The edges should be firm, but the center must be soft. 9. Cool Slightly: Remove the ramekins from the oven. Let them cool for 1 minute. Run a knife around the edges. 10. Invert and Serve: Turn each ramekin onto a plate. Tap to release the cake. 11. Enjoy Warm: Serve right away. Pair it with vanilla ice cream or a sprinkle of powdered sugar. - Prep Time: 15 minutes - Total Time: 25 minutes - Servings: 4 When it's done, your cake will be rich and warm. Enjoy this dessert with friends or family for a special treat! You learned how to make a delicious chocolate lava cake with simple steps. Start by gathering the right ingredients and preparing your ramekins. Then, melt and mix everything together carefully. Bake and watch for that gooey center. Remember to avoid common mistakes like overmixing. Explore fun variations to suit your taste. With proper storage and reheating, you can enjoy this treat anytime. Dive in and impress your friends or family with this sweet dessert!

Chocolate Lava Cake

Indulge in the ultimate dessert experience with Chocolate Lava Cake! This rich and gooey delight features a warm center that melts in your mouth, making it the perfect treat for any occasion. Discover easy steps to create this showstopper at home, impress your loved ones, and elevate your dessert game. Ready to bake? Click through for the full recipe and helpful tips to achieve that perfect lava center everyone will rave about!

Ingredients
  

1 cup semi-sweet chocolate chips

½ cup unsalted butter

1 cup powdered sugar

2 large eggs

2 large egg yolks

1 teaspoon vanilla extract

½ cup all-purpose flour

Pinch of salt

Butter and cocoa powder (for greasing ramekins)

Instructions
 

Preheat the Oven: Set your oven to 425°F (220°C) to prepare for baking.

    Prepare Ramekins: Generously grease four ramekins with butter. Lightly dust each with cocoa powder, tapping out any excess to ensure a smooth release of the cakes.

      Melt Chocolate & Butter: In a microwave-safe bowl, combine the chocolate chips and unsalted butter. Microwave the mixture in 30-second bursts, stirring between intervals, until fully melted and smooth – this should take 1-2 minutes total.

        Incorporate Sugar: Remove the bowl from the microwave. Stir in the powdered sugar, mixing until there are no lumps and the sugar is fully integrated.

          Add Eggs & Vanilla: Crack the two whole eggs and the two egg yolks into the chocolate mixture. Pour in the vanilla extract. Use a whisk to beat all the ingredients together until well combined and smooth.

            Mix the Dry Ingredients: Sift the all-purpose flour and a pinch of salt over the chocolate mixture. Gently fold the flour into the batter using a spatula, taking care not to overmix; mix just until you no longer see any flour.

              Fill Ramekins: Using a ladle, evenly pour the batter into the prepared ramekins, filling each about ¾ full to allow for rising.

                Bake: Place the filled ramekins on a baking sheet for stability, then bake in the preheated oven for 12-14 minutes. The edges should be firm, while the centers remain soft and gooey.

                  Cool Slightly: Once baked, remove the ramekins from the oven and let them cool for about 1 minute. Carefully run a small knife around the edges of each cake to loosen them.

                    Invert and Serve: Gently invert each ramekin onto a plate. Tap the bottom of the ramekin to release the cake.

                      Enjoy Warm: Serve the lava cakes immediately while warm, ideally paired with a scoop of vanilla ice cream or a light dusting of powdered sugar on top for an extra touch of sweetness.

                        Prep Time: 15 minutes | Total Time: 25 minutes | Servings: 4

                          Presentation Tips: Garnish with fresh berries or mint leaves for a pop of color and added freshness.

                            Leave a Comment

                            Recipe Rating